
Oh, get ready for a showstopper, folks! If you are anything like me, you probably can’t resist a good cheesecake and you *definitely* can’t resist the magic of Oreos and the allure of red velvet. So, what happens when you swirl all those glorious flavors together? You get this absolutely divine Red Velvet Oreo Cheesecake. Seriously, it’s like a dream come true for dessert lovers. I remember the first time I whipped this up – it was for my best friend’s birthday, and she’s the pickiest eater I know, but even she was speechless! I’ve been playing around with flavor fusions for years, and this one? This one is a triumph. It’s got that creamy, dreamy cheesecake base, the rich cocoa notes of red velvet, and those irresistible crunches of Oreo cookies all baked into one… pure bliss!
Why You’ll Love This Red Velvet Oreo Cheesecake
Seriously, why *wouldn’t* you love this cheesecake? It’s the best of all worlds, all wrapped up in one swoon-worthy dessert!
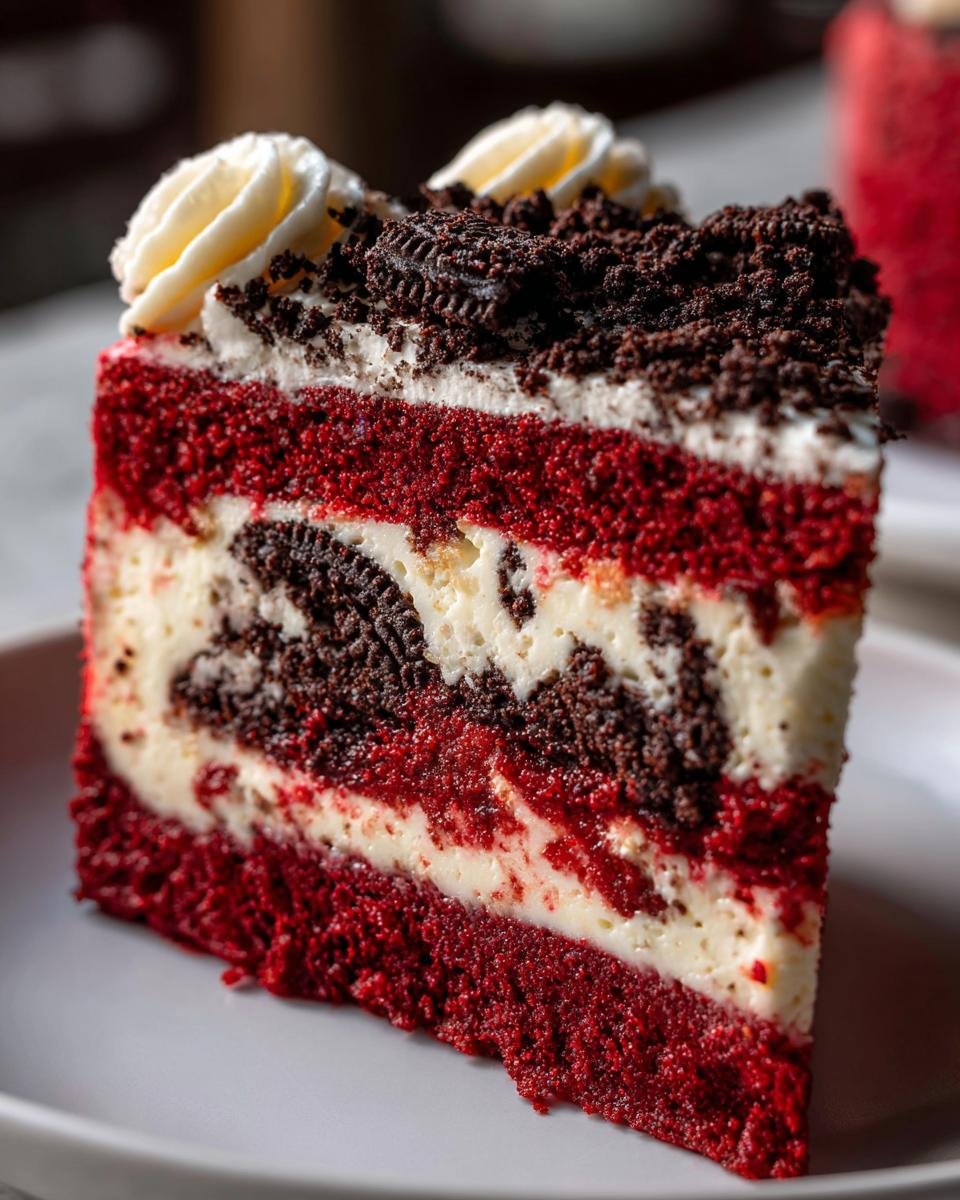
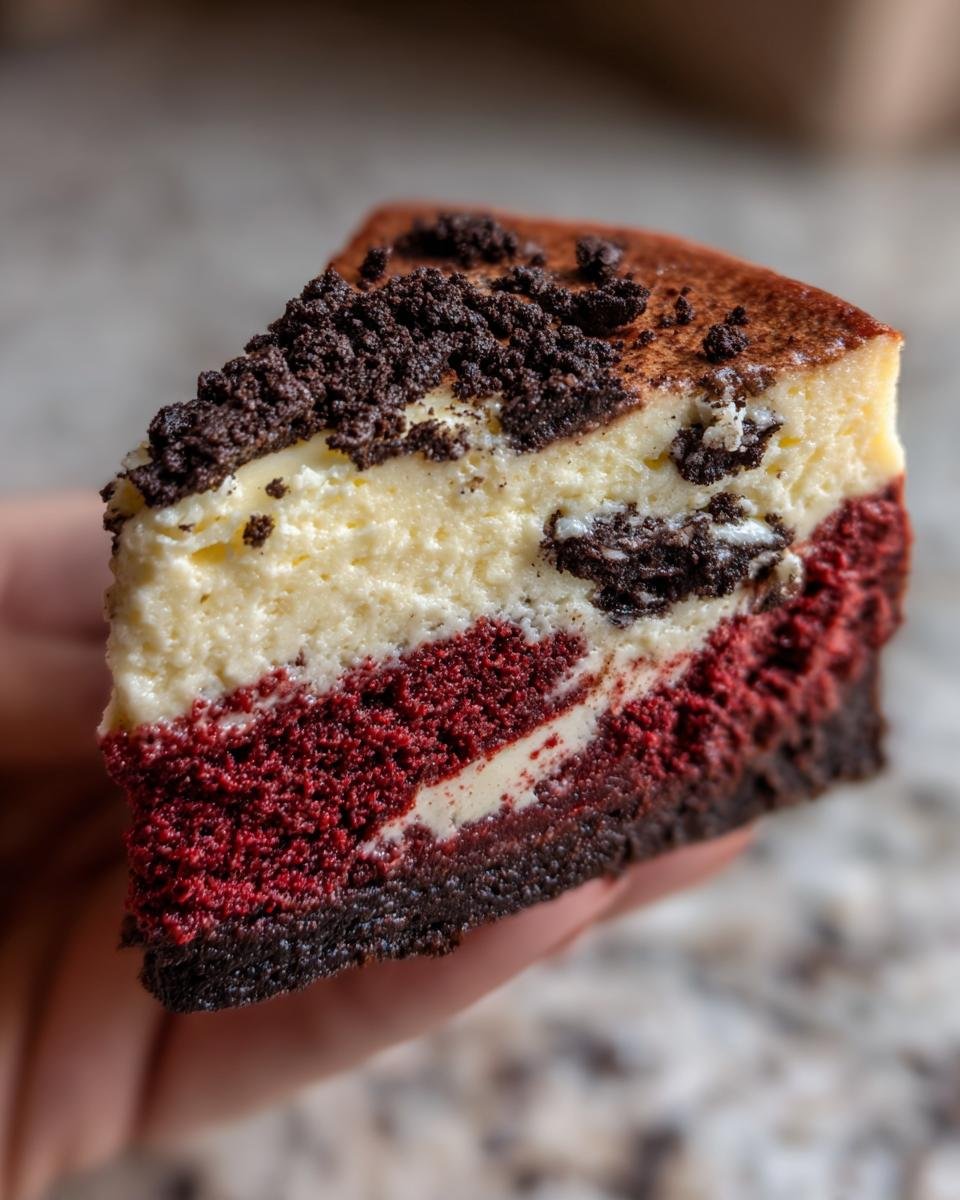
- A Match Made in Dessert Heaven: You get that classic smooth, tangy cheesecake filling, but with the rich, chocolatey undertones of red velvet cake and the satisfying crunch of Oreos. It’s a flavor explosion that just works!
- A Feast for the Eyes: That gorgeous swirl of deep red against the creamy white and dark cookie crumbles? It looks so fancy, but trust me, it’s surprisingly easy to achieve. It’s a total showstopper for any gathering!

- Perfect for Any Celebration (or Tuesday): Birthdays, holidays, or just needing a little pick-me-up – this cheesecake totally fits the bill. It feels special without being overly complicated.
- Easier Than You Think: Honestly, making a showstopper like this doesn’t have to be intimidating. We’ll walk through it step-by-step, and you’ll be so proud of what you create!
Ingredients for Your Red Velvet Oreo Cheesecake
Alright, let’s talk ingredients! This is where the magic begins. Don’t be intimidated by the list; it’s all pretty standard stuff that comes together beautifully for the most amazing Red Velvet Oreo Cheesecake. And trust me, using good quality ingredients really makes a difference here – especially those cream cheese blocks!
Here’s what you’ll need to gather:
- 1 1/2 cups Oreo cookie crumbs (you can buy them pre-crushed or blitz your own Oreos in a food processor, the finer the better for our crust!)
- 1/4 cup Unsalted butter, melted (use the good stuff, it makes the crust nice and crisp)
- 3 (8 ounce) packages Cream cheese, softened (this is super important! Make sure it’s nice and soft so you don’t end up with lumps)
- 1 cup Granulated sugar
- 3 large Eggs (room temperature is best here too, makes for a smoother batter)
- 1 teaspoon Vanilla extract (pure vanilla extract is always my go-to!)
- 1/4 cup Unsweetened cocoa powder (for that rich red velvet touch)
- 1 teaspoon Red food coloring (gel works best for a vibrant color, but liquid is fine too!)
- 1/2 cup all-purpose Flour
- 1/2 cup Buttermilk (if you don’t have any, just mix 1/2 cup milk with 1/2 teaspoon white vinegar or lemon juice and let it sit for 5 minutes!)
- 1 teaspoon White vinegar
- 1/2 teaspoon Baking soda
- 1/2 cup chopped Red velvet cake (you can just bake a small piece of red velvet cake ahead of time or even use cake scraps!)
- 1/2 cup Crushed Oreos (for that lovely layer in the middle!)
Crafting the Perfect Red Velvet Oreo Cheesecake: Step-by-Step
Alright, deep breaths! This is where all the magic comes together to create the most amazing Red Velvet Oreo Cheesecake. Don’t worry, it’s totally doable, and I’ll walk you through every single step, just like I do in my own kitchen. We’re talking gorgeous layers and that irresistible smooth texture. So grab your apron, and let’s get baking! For more tips on creating incredible desserts, check out this fantastic dessert resource.
Preparing the Oreo Crust for Your Red Velvet Oreo Cheesecake
First things first, let’s get that luscious Oreo crust going. It’s the perfect crunchy base for our creamy cheesecake. Just mix those yummy Oreo cookie crumbs with the melted butter until it all holds together like wet sand. Press this mixture firmly and evenly into the bottom of your 9-inch springform pan. Use the bottom of a glass or a measuring cup to get it nice and flat. Pop it in the fridge for a bit while we make the filling!
Making the Creamy Red Velvet Cheesecake Filling
Now for the star: the cheesecake filling! Make absolutely sure your cream cheese is super soft – like, really soft. This is the secret to a lump-free, super smooth batter. Beat it with your sugar until it’s light and fluffy. Then, add those eggs one at a time, mixing just until each one is incorporated. We don’t want to overmix here; it can cause cracks later. Stir in the vanilla extract, that lovely red food coloring, and the cocoa powder. And don’t forget the flour and the buttermilk mixture (remember, milk + vinegar if you don’t have buttermilk!). Gently fold it all together for that signature red velvet goodness!
Incorporating the Red Velvet and Oreo Layers
This is where the fun really begins! We’re going to build beautiful layers. Pour about half of that gorgeous red velvet cream cheese mixture into your prepared Oreo crust. Now, grab those crushed Oreos and sprinkle them evenly over the batter. This is your surprise middle layer! Gently spoon the remaining red velvet cream cheese mixture on top of the Oreos, making sure to cover them completely. Smooth out the top as best you can—it doesn’t have to be perfect; some swirls are charming!
Baking and Cooling Your Red Velvet Oreo Cheesecake
Time to bake this beauty! Preheat your oven to 350°F (175°C). Carefully place your springform pan on a baking sheet (this catches any potential spills!). Bake for about 50 to 60 minutes. You’re looking for the edges to be set, but the center should still have a little jiggle, like Jell-O. Now for the crucial cooling part: turn off the oven, prop the door open slightly with a wooden spoon, and let it chill in there for a whole hour. This slow cooling is key to preventing those dreaded cracks. After that, take it out and let it cool completely on a wire rack before chilling it in the fridge for at least 4 hours, or even better, overnight. Trust me, the chill time makes all the difference for the ultimate Red Velvet Oreo Cheesecake experience!
Tips for the Ultimate Red Velvet Oreo Cheesecake
Okay, let’s chat about making this Red Velvet Oreo Cheesecake absolutely perfect. It’s all about a few little secrets that I’ve picked up over the years of baking and, let’s be honest, a few delicious fails that taught me lessons! Seriously, don’t skip these tips; they’re what take your cheesecake from ‘pretty good’ to ‘OMG, I need another slice right now!’
- Room Temperature is Your Best Friend: I can’t stress this enough! Make sure your cream cheese, eggs, and even your buttermilk are truly at room temperature. I learned the hard way that cold ingredients equal a lumpy batter, and nobody wants a lumpy cheesecake. Give them at least an hour out of the fridge.
- Low and Slow Cooling Prevents Cracking: That step where we turn off the oven and leave the door ajar? It’s not just me being fussy! It lets the cheesecake cool down gradually, which is the number one trick to avoiding those unsightly cracks. I used to pull mine out too fast and end up with a cracked top, but this method solves that problem like a charm.
- Chilling is Non-Negotiable: Patience truly is a virtue when it comes to cheesecake. You *have* to let it chill for at least 4 hours, but honestly, overnight is where the real magic happens. The flavors meld together, and the texture firms up beautifully. Don’t rush this, or yours won’t set up quite right.
- Don’t Fear the Jiggle: When you check the cheesecake during baking, the center should still have a slight wobble. Completely firm means overbaked, and nobody wants a dry cheesecake. It will continue to set as it cools.
Ingredient Notes and Substitutions
Let’s chat about a few things in this recipe that might need a little clarification or a quick fix if you’re missing something. It keeps things totally doable without sacrificing that killer flavor!
That buttermilk? No problem if you don’t have any in the fridge! Just take 1/2 cup of regular milk and stir in 1/2 teaspoon of white vinegar or lemon juice. Let it sit for about 5 minutes, and bam – you’ve got a perfect buttermilk substitute. For the Oreos, you can totally use any flavor you like! Double Stuf would be amazing for an extra decadent crust, or even a mint Oreo if you’re feeling adventurous. The red velvet cake pieces are a fun addition, but if you can’t find any or don’t want to bake a mini one, you can just leave them out. The cheesecake will still be incredible!
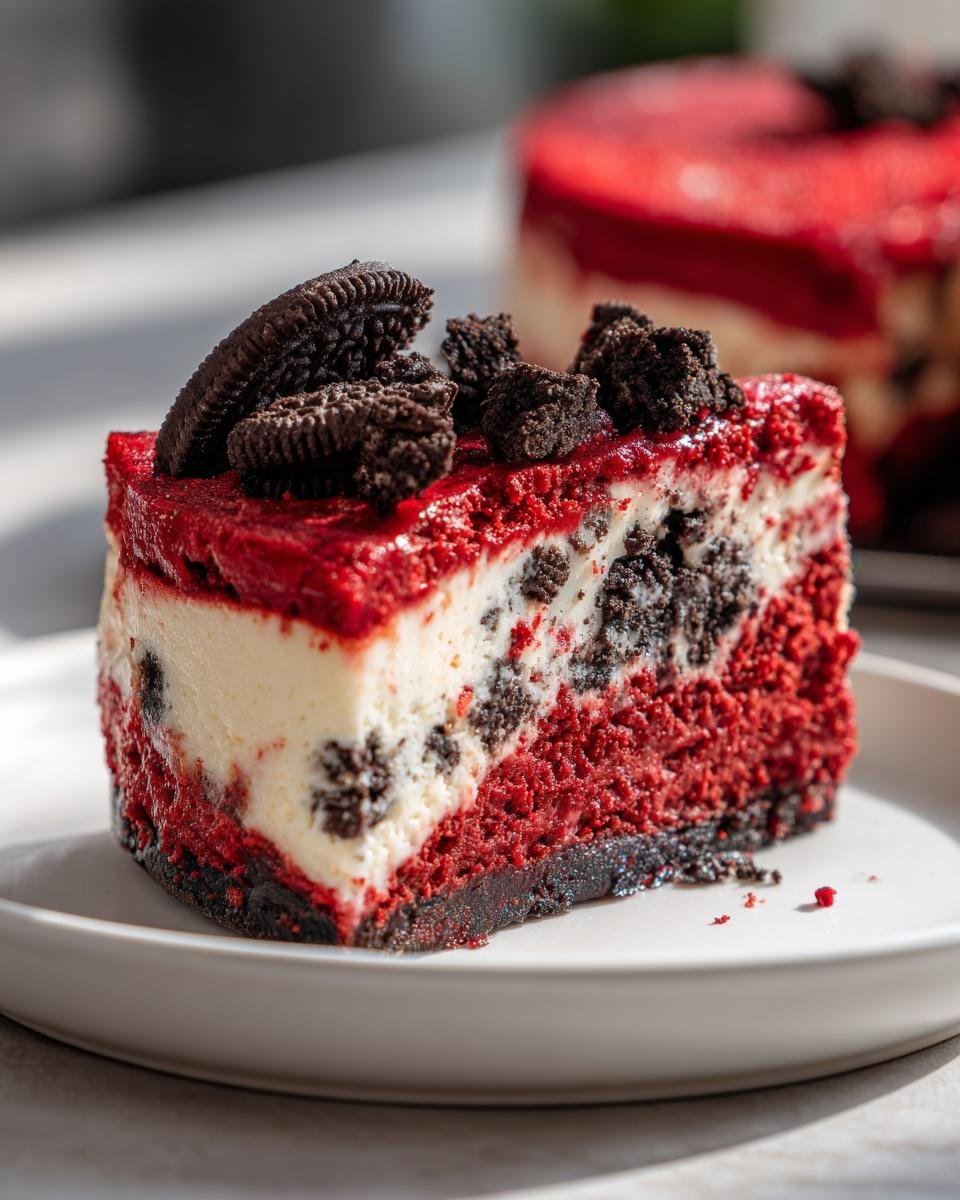
Serving and Storing Your Red Velvet Oreo Cheesecake
Alright, you’ve made it! Your magnificent Red Velvet Oreo Cheesecake is ready to be devoured. For the cleanest slices, warm up your knife under hot water, wipe it dry, and then slice. I like to do this between each cut, it makes such a difference! You can totally serve it just as it is, but a dollop of whipped cream or a few extra crushed Oreos on top wouldn’t hurt, right? If you have any leftovers *shocking, I know!* – just wrap them tightly in plastic wrap or pop them into an airtight container. It’ll stay wonderfully fresh in the fridge for about 3-4 days. And the best part? It’s actually even better the next day!
Frequently Asked Questions about Red Velvet Oreo Cheesecake
Got questions about this dreamy dessert? I’ve got answers! Making a Red Velvet Oreo Cheesecake can seem a little daunting, but a few tips make all the difference.
Why did my cheesecake crack on top?
Oh, the dreaded crack! Usually, it’s from over-mixing the batter after adding the eggs (we want those eggs to stay nice and airy!) or cooling it too quickly. That step where we turn off the oven and let it chill inside with the door ajar is super important for a smooth, crack-free finish. Don’t stress too much, though; a little crack never hurt anyone, and it still tastes amazing!
Can I make this cheesecake without red food coloring?
You absolutely can! It won’t have that signature vibrant red color, but the flavor combination of the cheesecake, cocoa, and Oreos will still be absolutely delicious. It’ll just be a more classic creamy cheesecake with Oreo bits and a hint of chocolatey goodness from the cocoa. Some folks even use a tiny bit of cocoa powder mixed with a little pink food coloring for a softer hue if you’re aiming for less intensity.
How long does the cheesecake need to chill?
Patience is key here! For the best texture and flavor, your Red Velvet Oreo Cheesecake really needs to chill for at least 4 hours, but honestly, overnight is ideal. This allows the cheesecake to fully set and the flavors to meld together beautifully. If you try to cut into it too soon, it might be a bit too soft.
What’s the best way to cut a cheesecake cleanly?
This is my favorite trick! For perfectly clean slices, get a large, sharp knife and run it under hot water for a few seconds. Wipe it dry with a towel, then make your cut. Repeat this for every slice! It helps the knife glide through the cheesecake smoothly without dragging.
Estimated Nutritional Information
Whipping up this decadent Red Velvet Oreo Cheesecake is a labor of love, and naturally, it’s rich! Please keep in mind these are just estimates per slice, as things can change depending on the exact ingredients you use and how generously you slice it. But it gives you a good idea of what a delightful treat you’re enjoying!
Serving Size: 1 slice
Calories: 450
Fat: 28g
Carbohydrates: 45g
Protein: 6g
Print
Red Velvet Oreo Cheesecake
- Total Time: 7 hours 30 min
- Yield: 12 servings 1x
- Diet: Vegetarian
Description
A rich and creamy cheesecake with layers of red velvet cake and crushed Oreos.
Ingredients
- 1 1/2 cups Oreo cookie crumbs
- 1/4 cup melted butter
- 3 (8 ounce) packages cream cheese, softened
- 1 cup granulated sugar
- 3 large eggs
- 1 teaspoon vanilla extract
- 1/4 cup unsweetened cocoa powder
- 1 teaspoon red food coloring
- 1/2 cup all-purpose flour
- 1/2 cup buttermilk
- 1 teaspoon white vinegar
- 1/2 teaspoon baking soda
- 1/2 cup chopped red velvet cake
- 1/2 cup crushed Oreos
Instructions
- Preheat your oven to 350°F (175°C).
- In a bowl, combine Oreo cookie crumbs and melted butter. Press mixture into the bottom of a 9-inch springform pan.
- In a large bowl, beat cream cheese and granulated sugar until smooth.
- Beat in eggs one at a time, then stir in vanilla extract, red food coloring, and cocoa powder.
- In a separate bowl, whisk together flour, buttermilk, vinegar, and baking soda.
- Gently fold the red velvet cake mixture into the cream cheese mixture.
- Pour half of the cream cheese mixture into the prepared pan. Sprinkle with crushed Oreos.
- Pour the remaining cream cheese mixture over the Oreos.
- Bake for 50-60 minutes, or until the center is almost set.
- Turn off the oven and let the cheesecake cool in the oven with the door ajar for 1 hour.
- Remove from oven and let cool completely on a wire rack.
- Chill in the refrigerator for at least 4 hours before serving.
Notes
- For a smoother crust, you can pulse the Oreos in a food processor until finely ground.
- Ensure your cream cheese is at room temperature for the creamiest texture.
- Do not overmix the batter once the eggs are added.
- Chill the cheesecake thoroughly for best results.
- Prep Time: 30 min
- Cook Time: 60 min
- Category: Dessert
- Method: Baking
- Cuisine: American
Nutrition
- Serving Size: 1 slice
- Calories: 450
- Sugar: 35g
- Sodium: 300mg
- Fat: 28g
- Saturated Fat: 17g
- Unsaturated Fat: 11g
- Trans Fat: 0g
- Carbohydrates: 45g
- Fiber: 2g
- Protein: 6g
- Cholesterol: 120mg
Keywords: Red Velvet Oreo Cheesecake, cheesecake recipe, Oreo cheesecake, red velvet cake, chocolate cheesecake, dessert recipe