
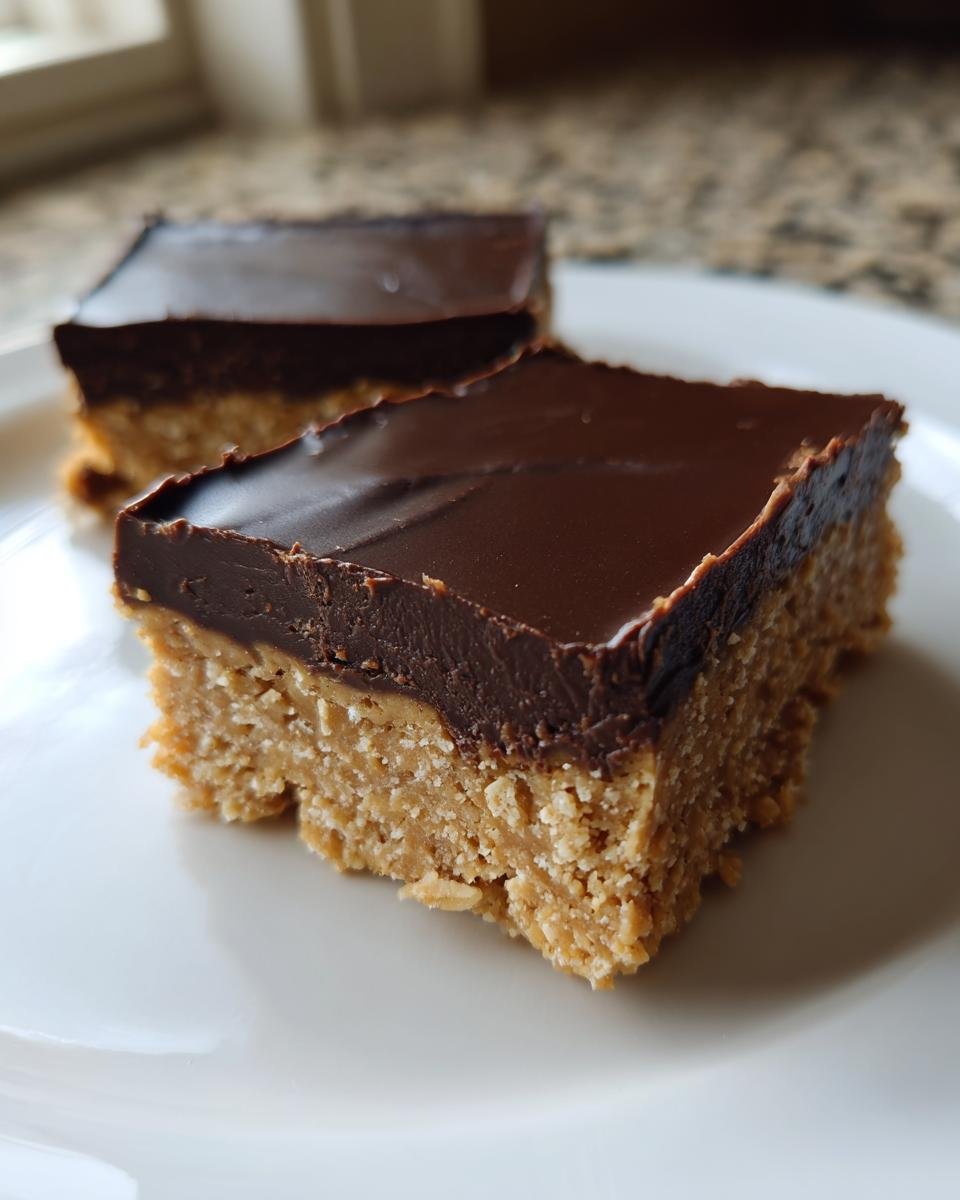
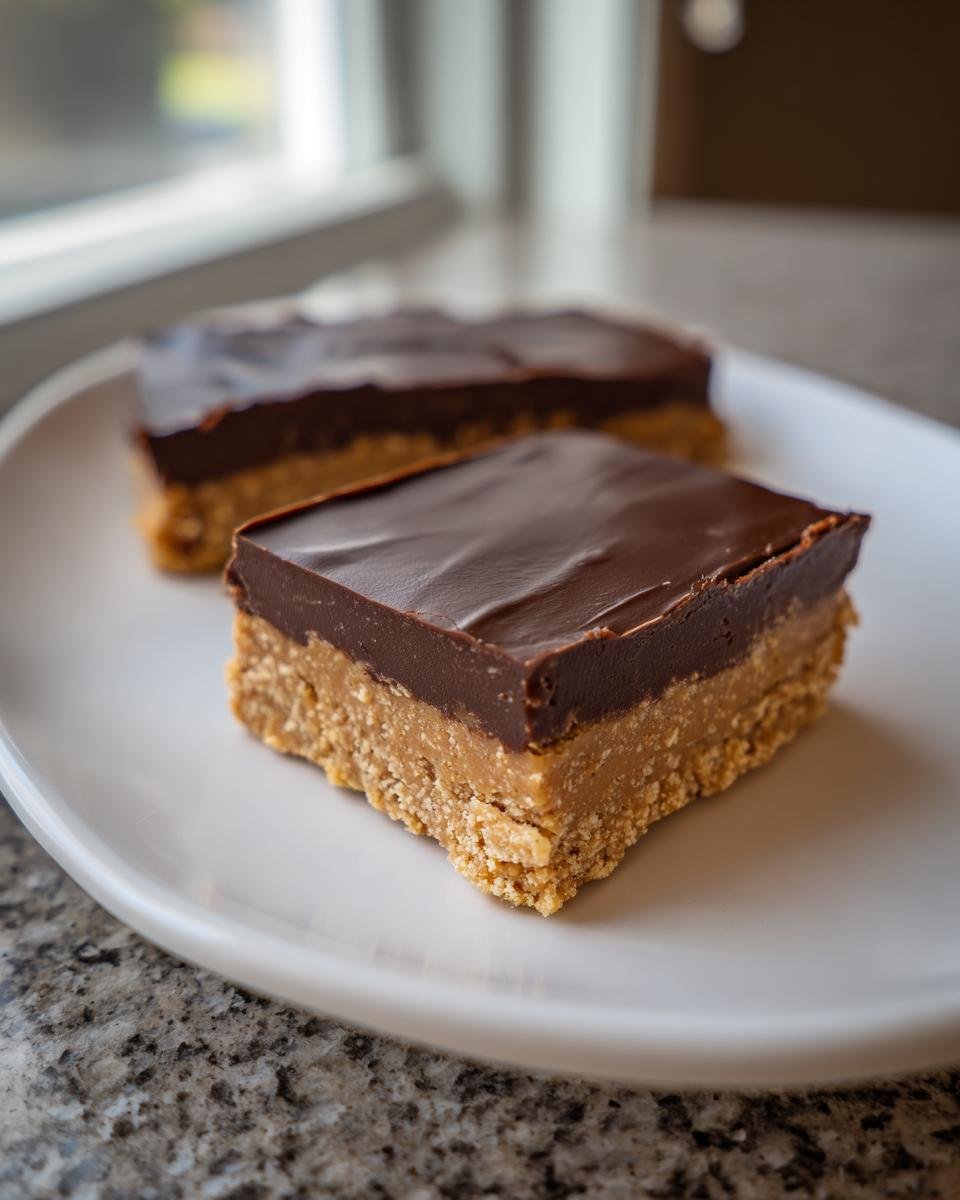
Listen, sometimes you just need that incredible rush of peanut butter and chocolate without turning on the oven, right? I get it. When I first started dabbling in no-bake desserts—mostly because my apartment felt like an oven in the summer—I perfected this exact recipe for the richest **Peanut Butter Chocolate Bars** you could imagine. Seriously, these things are dangerously good! They set up perfectly every time, and honestly, they taste better the next day. It’s the ultimate three-ingredient base, topped with a dreamy chocolate layer. If you’re looking for effortless dessert magic, you’ve found it. Check out how easy this no-bake favorite truly is!
Why You Will Love These Peanut Butter Chocolate Bars
These aren’t just any quick bars; trust me, these simplify dessert week. You need these in your life because they tick every single box a busy cook could have! I always keep a batch ready for unexpected guests.
- They are genuinely no-bake—you’ll only need your microwave for the topping. No oven fuss at all!
- The base layer is intensely creamy, thanks to perfectly softened butter and peanut butter.
- They come together faster than you can decide what movie to watch. Seriously, 15 minutes of hands-on time!
- The contrast between the salty-sweet base and the smooth chocolate shell is just heaven. If you want to up your game generally, check out these baking tips.

Essential Ingredients for Perfect Peanut Butter Chocolate Bars
Okay, the ingredient list is short, which means every single item needs to be the right texture and temperature. Don’t skimp here, because with only a few players on the stage, they all have to perform perfectly for these **Peanut Butter Chocolate Bars** to set right. I always make sure my butter is room temperature soft, which is a lesson I learned the hard way when I tried using cold butter!
For the creamy base, you absolutely need 1 cup of creamy peanut butter. Forget the natural kind that separates; you want that classic, steady texture for the smoothest foundation imaginable. We pair that with 1 cup of powdered sugar and 1/2 cup of butter that is properly softened—not melted, just soft enough to mash easily. If you ever get stuck on texture issues in baking, sometimes checking out some common ingredient swaps, like when figuring out when to use dry milk powder, can help you understand ingredient roles!
The structure comes from 1 1/2 cups of graham cracker crumbs. Make sure they are finely crushed! Then, for the decadent top, grab 1 cup of semi-sweet chocolate chips and an extra 2 tablespoons of butter to make sure that chocolate melts down like silk. That little bit of extra butter makes all the difference in the finish!
Equipment Needed for Your Peanut Butter Chocolate Bars
You don’t need a fancy mixer or anything complicated for this recipe, which is part of the charm! I always make sure I have these basics ready before I even pull out the peanut butter jar. Preparation is half the battle!
You’ll definitely need an 8×8 inch square pan. Make sure you have a big mixing bowl and a smaller one for melting the chocolate. Also, grab a sturdy rubber spatula—this is crucial for pressing that base layer down nice and flat. And please, use parchment paper! Do not skip the parchment paper; it’s your ticket to easily lifting these perfect **Peanut Butter Chocolate Bars** right out of the pan later.
Step-by-Step Instructions to Make No-Bake Peanut Butter Chocolate Bars
Okay, let’s get down to business! This is where the magic happens, and I promise you, it’s smoother than spreading room-temperature cream cheese. We’re moving fast, but we need to be methodical so these **Peanut Butter Chocolate Bars** set up beautifully firm. Remember, no baking means prep work is everything!
Preparing the Pan and Base Mixture for Peanut Butter Chocolate Bars
First things first: grab that 8×8 pan and line it with parchment paper. Make sure you leave plenty of paper hanging over the sides—that overhang is your handle later! Now, in a medium bowl, we mix the base. It’s the peanut butter, the powdered sugar, and that 1/2 cup of lovely softened butter. Mix it until it’s truly smooth. Once it’s creamy, stir in those graham cracker crumbs until everything looks uniformly sandy. When you press this into your lined pan, use the bottom of a measuring cup—seriously! It gives you the flattest, most professional-looking base layer, which is key for pretty squares later.
Melting the Chocolate Topping for Your Peanut Butter Chocolate Bars
Next up is the glorious topping. You need a small, microwave-safe bowl for the chocolate chips and the remaining 2 tablespoons of butter. Here’s the expert tip: never just nuke it for a minute! Pop it in for 30 seconds at a time. Take it out, stir it really well, even if it doesn’t look melted yet, and repeat. If you rush this, you’ll scorch the chocolate, and nobody wants burned chocolate topping on their bars. Stir until it’s completely glossy and smooth. That little extra butter makes it pour beautifully.
Assembly and Chilling of the Peanut Butter Chocolate Bars
Once the chocolate is ready, pour it right over that pressed peanut butter layer. Use an offset spatula or the back of a spoon to gently guide the chocolate evenly right to the edges. You don’t want thick spots or thin spots! After you’ve spread it perfectly, it needs its long rest. Put the pan in the fridge for a minimum of 2 hours. Patience is required here; if you slice them too early, the base layer will crumble apart. For the cleanest cuts, try letting the chilled no-bake dessert sit on the counter for about five minutes before you lift the paper and slice away!
Tips for the Best Peanut Butter Chocolate Bars
I’ve made batches of these **Peanut Butter Chocolate Bars** that were absolute flops, so I learned what truly matters if you want that perfect snap and smooth texture. The biggest tip I can give you revolves around the butter temperature. It needs to be soft enough to blend easily with the peanut butter and sugar, but if it’s oily or melted, your base layer will feel greasy and might not set up firmly enough.
When it comes to the peanut butter itself, creamy is the way to go for a smooth, uniform base. If you use crunchy, you’ll get texture, but it might not compress as tightly into that nice solid bottom layer we want. However, if you love a bit of crunch, maybe reserve half your peanut butter to be crunchy!
For that beautiful chocolate top layer, don’t be tempted to just pour it on piping hot. A slightly cooled, just-melted chocolate layer pours smoother and sets up glossier. If you want a little pop of flavor—and trust me, you do—sprinkle a whisper of flaky sea salt right over the wet chocolate before it goes into the fridge. It cuts through the sweetness perfectly. For general baking confidence, don’t forget to look over these baking tips!
Variations on Classic Peanut Butter Chocolate Bars
While the classic combination of peanut butter, graham crumbs, and chocolate is pure perfection, sometimes you just need to shake things up a little bit, right? These **Peanut Butter Chocolate Bars** are so sturdy and easy that they are basically a canvas for your cravings. You can swap out ingredients without worrying that the whole thing will collapse!
My favorite little trick when I’m making a quick batch is to ditch the plain semi-sweet chocolate topping. You could use milk chocolate if you want it sweeter, or really ramp up the intensity with dark chocolate chips. If you’re feeling really adventurous, try melting down peanut butter chips along with the regular chocolate chips—it doubles down on the peanut flavor and it is just divine.
Another incredibly easy change is to swap out the base nut butter. If you have a peanut allergy in the house or just want to try something different, almond butter works beautifully, and sunflower seed butter is a great option too. You might notice the texture shifts just a tiny bit, but the flavor combinations are fantastic. This is also a great time to explore other great no-bake recipes like my Quick and Easy Peanut Butter Fudge!
Finally, for toppings—oh my gosh, the toppings! I already mentioned the sea salt, which is a must-do for me on the chocolate layer. But you could also fold tiny things into the topping right after you pour it. Mini M&Ms look so cheerful scattered across the top before chilling. Or, if you have leftover crushed pretzels, scattering those on top gives you a wonderful salty crunch that complements the smooth base layer. It’s your bar, make it fun!

Storing and Keeping Your Peanut Butter Chocolate Bars Fresh
Since these wonderful **Peanut Butter Chocolate Bars** are no-bake, they rely on that chill time to set up properly, and they definitely need to stay cool to keep their shape! Honestly, the very best way to store them is in the refrigerator. They just maintain that perfect firm texture when they are kept cold, especially if your kitchen runs warm.
You absolutely must use an airtight container. If you just toss them on a plate uncovered, they’ll start to soak up all the funny smells in your fridge—nobody wants their chocolate tasting like last night’s leftovers! I like to layer them, but you have to be careful. Put a sheet of wax or parchment paper between the layers of bars, like you’re building a delicious, creamy lasagna. This stops the chocolate topping from sticking to the peanut butter base of the next layer.
They usually stay fantastic tasting for about five days in the fridge like this. But here’s my secret weapon for when I make a huge batch: the freezer! Wrap the entire block of bars (before you cut them, if possible) tightly in plastic wrap, and then tuck that into a heavy-duty freezer bag. They freeze like a dream, and I mean a dream!
When a craving hits, just pull out as many squares as you want. You don’t even need to thaw them completely; in fact, I think they are incredible eaten semi-frozen—it makes the chocolate a little snappier! If you do want them fully soft, let them sit on the counter for about 10 or 15 minutes before diving in. Never keep them out at room temperature for too long, though; that beautiful, firm layer will start to get soft and melty really fast.
Frequently Asked Questions About Peanut Butter Chocolate Bars
I know people have questions once they see how simple this recipe is! It’s natural to wonder if you can tinker with something that looks this easy. I’ve gathered the questions I get most often about these irresistible **Peanut Butter Chocolate Bars** so you can bake (or un-bake!) with confidence. If you’ve made a mistake before, don’t worry; we’ve got you covered here.
Can I make these Peanut Butter Chocolate Bars without graham cracker crumbs?
Oh, that’s a tricky one! Those graham cracker crumbs do a lot of heavy lifting in this recipe. They aren’t just there for flavor; they absorb some of that moisture from the peanut butter and butter, giving the base that dense, sliceable structure. If you skip them entirely, you’ll end up with a sticky, soft puddle that won’t really set up into a bar for you.
You *can* substitute them, though! If you need an alternative, try using an equal measure of crushed vanilla wafer cookies—that works really well! You can also use rolled oats, but you’ll need to make sure they are very fine, almost like a coarse flour, so they pack down nicely. Just know that if you swap them out, the final texture of your base layer won’t be exactly the same as this classic recipe, but it will still be super tasty! For more great ideas, check out this other no-bake dessert guide.
How long do these no-bake dessert bars last in the refrigerator?
This is the great thing about them! Because they don’t have eggs or any fresh dairy that sits out, these **Peanut Butter Chocolate Bars** keep really well. Stored properly in an airtight container in the fridge, they stay absolutely delicious for about a week. I find they are actually best around day two or three, once the chocolate has totally set and the flavors have really married together.
If you want them longer, pop them in the freezer! They hold up wonderfully for up to two months, totally sealed up tight. You can eat them straight from the freezer for a super-hard treat, or let them sit on the counter for just ten minutes, and they are perfectly soft enough to bite into. Easy snacking for whenever!
Estimated Nutritional Snapshot for Peanut Butter Chocolate Bars
I always try to keep this in the back of my mind, but honestly, when something tastes this good, I try not to look too closely at the numbers! These **Peanut Butter Chocolate Bars** are definitely an indulgent treat, not an everyday snack. They are rich because of the quality peanut butter and that smooth chocolate topping we use.
Here’s the general breakdown based on my testing and standard ingredient weights for one square:
- Calories: About 250
- Sugar: Around 20g
- Fat: Roughly 16g
- Protein: You get a nice little boost of about 6g!
Now, keep in mind these are just estimates because what brand of peanut butter you use or how thick you pour that chocolate layer makes a difference! But they give you a good idea for enjoying this no-bake dessert guilt-free (mostly, wink).
Print
Simple Peanut Butter Chocolate Bars
- Total Time: 15 min
- Yield: 16 bars 1x
- Diet: Vegetarian
Description
A straightforward recipe for making no-bake peanut butter and chocolate bars.
Ingredients
- 1 cup peanut butter
- 1 cup powdered sugar
- 1/2 cup butter, softened
- 1 1/2 cups graham cracker crumbs
- 1 cup semi-sweet chocolate chips
- 2 tablespoons butter
Instructions
- Line an 8×8 inch pan with parchment paper, leaving an overhang.
- In a medium bowl, mix the peanut butter, powdered sugar, and 1/2 cup softened butter until smooth.
- Stir in the graham cracker crumbs until fully combined.
- Press this mixture evenly into the bottom of the prepared pan.
- In a small, microwave-safe bowl, combine the chocolate chips and 2 tablespoons of butter.
- Microwave in 30-second intervals, stirring between each, until the chocolate is melted and smooth.
- Pour the melted chocolate mixture over the peanut butter layer and spread evenly.
- Refrigerate for at least 2 hours, or until firm.
- Lift the bars out using the parchment paper overhang and cut into squares before serving.
Notes
- Use creamy peanut butter for the smoothest base layer.
- For easier cutting, let the bars sit at room temperature for 5 minutes before slicing.
- Prep Time: 15 min
- Cook Time: 0 min
- Category: Dessert
- Method: No-Bake
- Cuisine: American
Nutrition
- Serving Size: 1 bar
- Calories: 250
- Sugar: 20g
- Sodium: 120mg
- Fat: 16g
- Saturated Fat: 6g
- Unsaturated Fat: 10g
- Trans Fat: 0g
- Carbohydrates: 24g
- Fiber: 1g
- Protein: 6g
- Cholesterol: 10mg
Keywords: peanut butter, chocolate, bars, no-bake, dessert, sweet, easy