
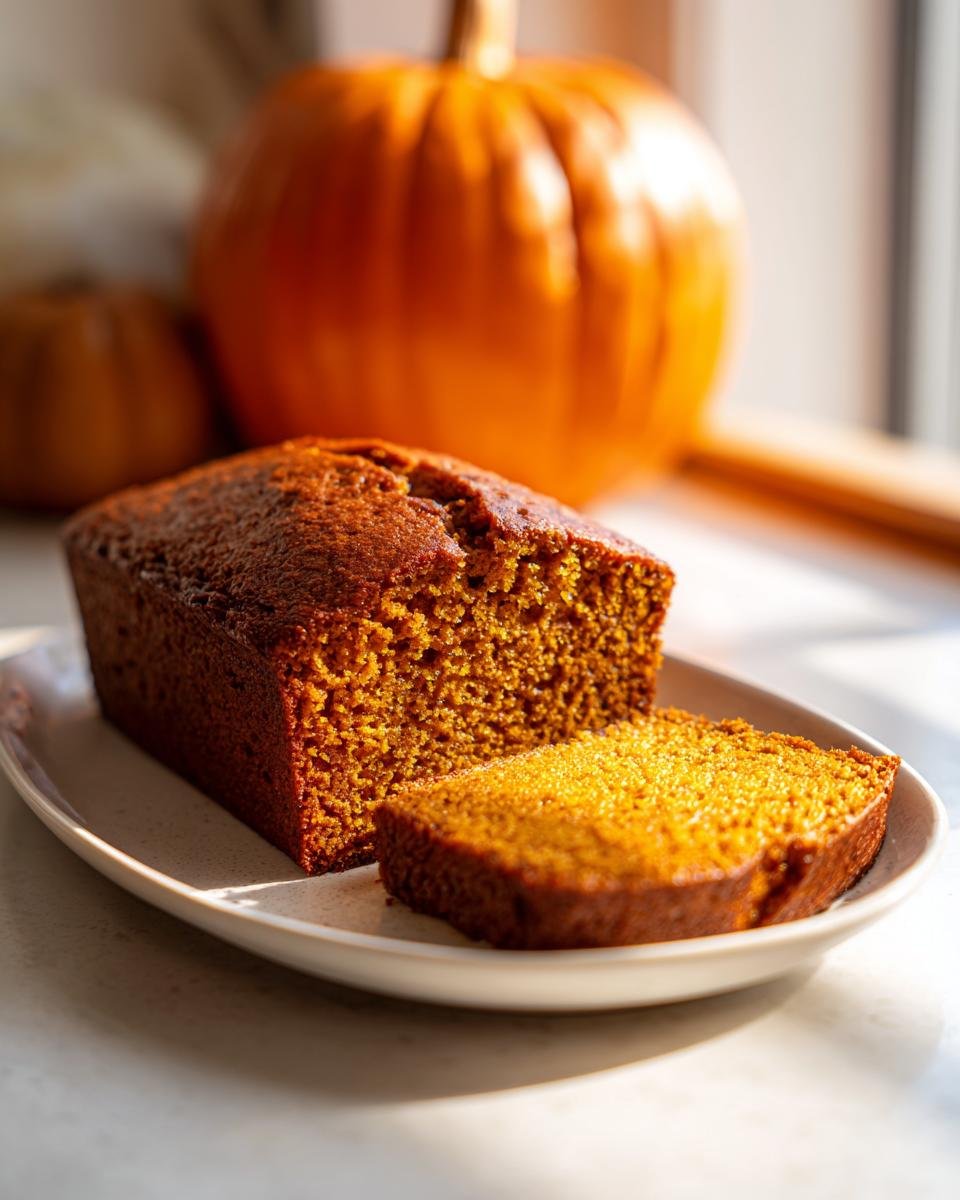
Oh, there is just nothing that smells better than a home filled with baking spices. When the first cool breeze signals fall, my absolute go-to comfort food is always a loaf of fresh, warm bread. If you’re hunting for the fluffiest, richest, can’t-stop-eating-it **Pumpkin Bread**, stop right here! Seriously, this is the simplest recipe out there—no complicated whipping or weird ingredients. This specific version holds a special place in my heart because it came from my neighbor when I first moved into my house years ago, and it’s pure magic. It’s proof that the best quick breads are built on simplicity!
Why This Simple Pumpkin Bread Recipe Works So Well
When I say simple, I mean it. You don’t need an electric mixer for this recipe, unless you just feel lazy today! It’s all about throwing things together the right way without messing with the structure. This is the low-stress fall baking recipe you’ll rely on year after year for the absolute best **Pumpkin Bread**.
Here’s why this method stands head and shoulders above other, fussier quick bread recipes:
- It’s straightforward! Fewer steps mean less chance for error, trust me.
- The spices are perfectly balanced—warm, autumnal, but not overwhelming.
- It uses simple pantry staples you probably already have thanks to that last grocery run.
I’ve compiled some great baking tips if you want to level up your general skills, but they aren’t needed here!
Quick Prep Time for Your Pumpkin Bread
The best part? You’re looking at about fifteen minutes from opening the spice jar to having the batter ready for the oven. Fifteen minutes! That means you can decide you want bread at 5 PM and have it cooling before dinner is even done cooking.
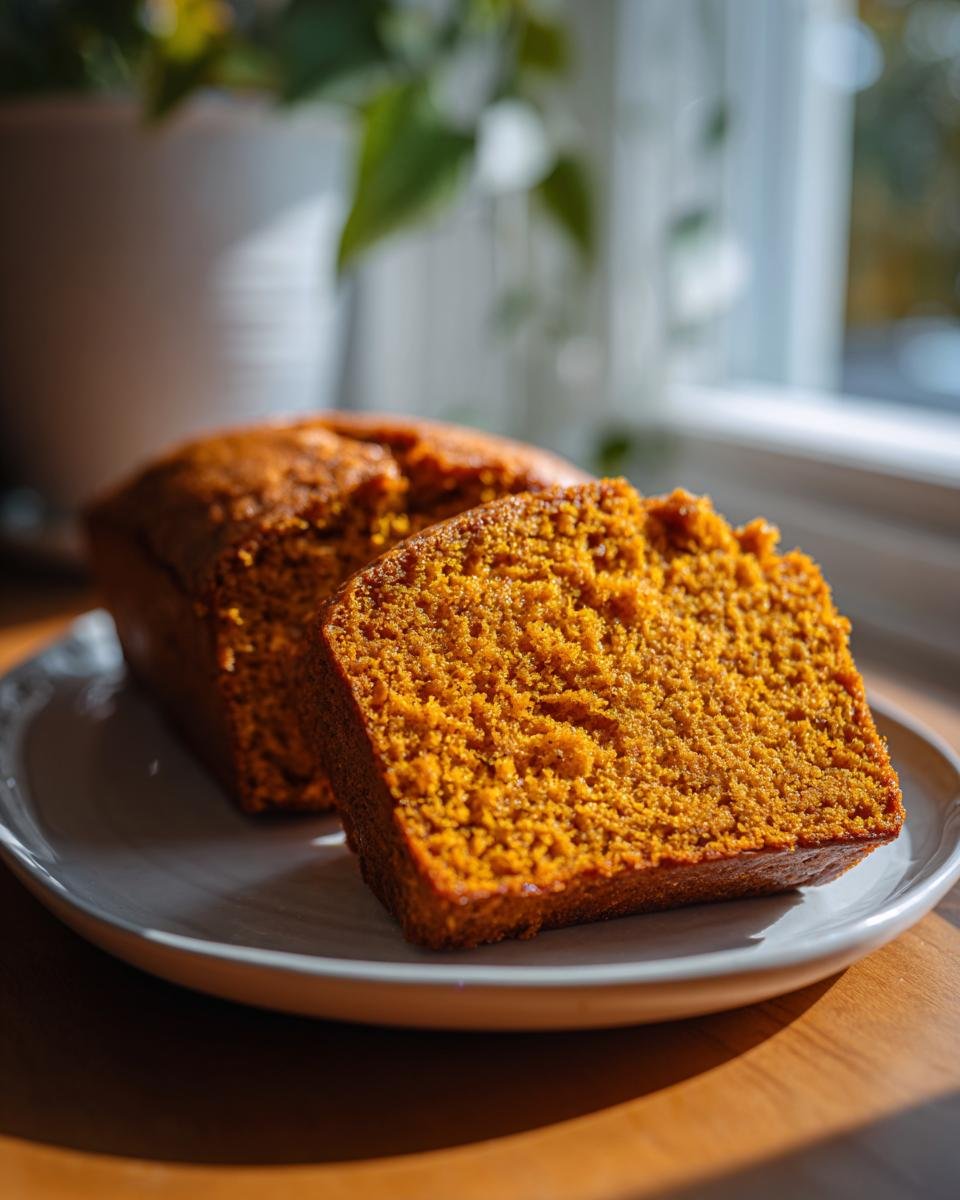
Incredibly Moist Texture in Every Slice of Pumpkin Bread
Moisture is key, right? That’s where we rely on two things that really do the heavy lifting: the pumpkin puree and the vegetable oil. They marry together beautifully while baking, making sure this **Pumpkin Bread** stays tender and doesn’t turn into a crumbly brick a day later. You won’t believe how long this stays fresh!

Gathering Your Ingredients for the Best Pumpkin Bread
Okay, if you want the absolute best **Pumpkin Bread**, you have to start with the right stuff. This part is super crucial because these ingredients aren’t fussy, but they are exact! When you gather everything, double-check that pumpkin can. We need pure pumpkin puree, not that pre-spiced pie filling—that’s a whole different recipe, honey!
Don’t stress too much about substitutions here; the balance is what makes it work, but I did find some interesting tips if you need substitutes for other recipes down the line. For this one, stick to the list!
Dry Ingredients for Perfect Pumpkin Bread Structure
This is the team that gives the bread its lift and its beautiful, warm scent. Get these together in a medium bowl first and give them a good whisk so everything is distributed evenly. You don’t want a clump of baking soda in one bite!
- 1 3/4 cups all-purpose flour (measure this carefully!)
- 1 teaspoon baking soda
- 1 teaspoon ground cinnamon
- 1/2 teaspoon ground nutmeg
- 1/2 teaspoon salt
Wet Ingredients for Flavor and Moisture in Your Pumpkin Bread
These are the heavy hitters—the sugar combo and that gorgeous canned pumpkin. Make sure that brown sugar is nicely packed down when you measure it; that molasses flavor is just non-negotiable for true fall flavor in your **Pumpkin Bread** creation.
- 1 cup granulated sugar
- 1/2 cup packed brown sugar
- 2 large eggs (room temperature is always better, if you remember to pull them out!)
- 1 cup pumpkin puree (Make sure it’s NOT pumpkin pie mix!)
- 1/2 cup vegetable oil
- 1 teaspoon vanilla extract
Step-by-Step Instructions for Making Classic Pumpkin Bread
Alright, deep breath! This is where the magic happens, and I promise, this whole process is easier than wrestling with your kids over putting on shoes. We are going to break this down into three simple phases so your homemade **Pumpkin Bread** comes out perfectly golden every single time. Remember, patience in the mixing stage pays off huge when you slice that first piece!
Preparing the Oven and Pan for Your Pumpkin Bread
First things first: get that oven warm! We need it sitting steady at 350 degrees Fahrenheit. While it’s heating up, grab your 9×5 inch loaf pan. You absolutely must grease it well and then dust it thoroughly with flour. This stops our beautiful loaf from sticking later. I hate wasting good bread because the bottom glued itself to the metal!
Combining the Dry and Wet Mixtures for This Pumpkin Bread
Remember those two bowls we talked about? Take the bowl of dry stuff (flour, spices, soda, salt) and set it near your wet ingredients. In the big bowl, go ahead and whisk your sugars, then beat in those eggs one by one until they look happy. Stir in your oil, vanilla, and that cup of pumpkin until it looks mixed. Now, the most important part: slowly add the dry ingredients to the wet ones—a bit at a time—and stop mixing the second it’s just blended. I mean it, stop! Overmixing these simple ingredients is what makes quick bread dense. If you want to see how I handle mixing other quick breads like zucchini, check out my thoughts on zucchini cake moist recipe basics!
Baking and Cooling Your Fresh Pumpkin Bread
Pour that beautiful spiced batter right into your prepared pan and slide it gently into the hot oven. It usually takes between 55 and 65 minutes. You’ll know it’s done when you thread a wooden skewer right into the middle and it comes out totally clean—no wet batter clinging on! Let it sit in the pan for exactly ten minutes—no more! Then, gently turn the **Pumpkin Bread** out onto a wire rack so it can breathe and cool completely. Don’t slice it too soon, or the steam rushes out and dries it!
Tips for Achieving Perfect Pumpkin Bread Every Time
Even though this recipe for **Pumpkin Bread** is straightforward, there are a couple of little secrets I picked up over the years to make sure every loaf is a total showstopper. You want that perfect crumb, that deep spice flavor, and zero chance of a flop, right? I like to treat even the simplest recipes with respect because the little details make the huge difference!
If you’re looking for more amazing advice on general bread construction and getting those perfect edges, make sure you check out my guide to baking tips to make you a better baker. But for now, focus on mastering this loaf!
Ingredient Adjustments for Richer Pumpkin Bread Flavor
The recipe calls for vegetable oil, and that’s what keeps it super moist and easy, but if you want to amp up that deep, cozy flavor, try swapping out half of that oil for melted butter. You get the tenderness from the oil and that rich, creamy taste from the butter. It’s heavenly!
Also, don’t be shy if you love a little crunch! Toss in about a half cup of chopped walnuts or pecans right when you fold in the dry ingredients. They toast up beautifully in the oven and give you a nice textural surprise when you bite into your **Pumpkin Bread**.
Avoiding Dryness in Your Baked Pumpkin Bread
The number one enemy of any good quick bread? Overmixing! Once you start adding those dry ingredients to the wet ones, you are developing gluten in the flour. Too much gluten, and your loaf gets tough and dry, the opposite of what we want for soft **Pumpkin Bread**.
Mix until you see *just* the wet and dry come together. A few streaks of flour hiding in the batter are perfectly fine—they’ll disappear as it bakes. Also, for your dry ingredients, use the ‘spoon and level’ method to measure your flour instead of scooping it straight from the bag. Scooping packs the flour down, and too much flour means a dry bread!
Variations on Classic Pumpkin Bread
This base recipe is so good, but honestly, sometimes I just crave something a little different, you know? Baking is fun because you can play with textures and flavors without having to start totally from scratch. We don’t want to mess up the moisture—that’s sacred—but a little mix-in action can make things exciting for the weekend!
If you’ve already mastered the plain loaf, try dressing it up. Think about what makes those pumpkin chocolate chip cookies so amazing; we can bring that energy here! I found a fantastic recipe for pumpkin chocolate chip cookies that really embraces the mix-ins, and you can borrow some of those ideas.
For instance, chocolate chips are always a winner. Use about a cup of semi-sweet or dark chocolate chips. Don’t melt them first; just toss them gently into the batter at the very end along with the nuts we talked about earlier. They melt just enough during baking to create those gooey pockets of chocolate heaven.
Spice adjustments are another easy way to get a new treat from the same bowl. If you tend to love gingery flavors, bump that nutmeg up just a tiny bit and add just a whisper of ground cloves—maybe just 1/8th of a teaspoon. Cloves are powerful, so go light! Conversely, if you prefer warm, brighter baking spices, a little extra cinnamon and maybe some ground cardamom work wonderfully.
Another fun twist that looks beautiful is swirling in some plain cream cheese. You’d just take about 4 ounces of softened cream cheese, mix it with a tablespoon of sugar, and plop spoonfuls randomly over the batter once it’s in the pan. Use a knife to swirl it around gently before baking. It creates beautiful white ribbons throughout the orange bread!
Serving Suggestions for Your Homemade Pumpkin Bread
It is so tempting to just grab a knife and eat the whole loaf standing right over the cooling rack, I honestly do it all the time! But when you manage to let your **Pumpkin Bread** cool completely—which is the hardest part, I know—it’s ready for some serious dressing up. Simple serving is often the best, but why not make it look fancy?
The most classic—and my personal favorite—way to enjoy this is when it’s slightly warm, sliced thick, and slathered with real, good quality salted butter. That butter melts right down into the little air pockets and just makes everything taste richer. It’s the perfect easy breakfast or afternoon snack.
If you want something a bit sweeter, a lovely schmear of cream cheese is always a winner. But if you’re taking this to a gathering, something a little more elegant really shines. I recently whipped up a batch of my simple white frosting, and you can thin it out just a bit with a splash of milk to make it drizzle-able.
Once you get a nice glaze on top, you can sprinkle on a tiny pinch of extra cinnamon or maybe some chopped pecans—just for that curb appeal! It looks so professional, even though we both know it took you maybe 20 minutes total to mix up the batter. It’s all about presentation, right? Serve it slightly warm with coffee or cold with milk; either way, it disappears fast!
Storage and Reheating Instructions for Pumpkin Bread
Since this **Pumpkin Bread** is so wonderfully moist thanks to the oil and puree, it actually keeps really well! Nobody wants to eat dry bread a few days in, right? Keeping it fresh is easy, though, especially if you resist slicing into the entire thing right away—which, I know, is hard.
Once the loaf is completely cool—and I mean cold, not even lukewarm—you need to wrap it up tightly. I prefer using plastic wrap first, wrapping that entire loaf snugly, and then putting it inside a large zip-top bag or an airtight container. This traps that nice moisture in and keeps stale air out.
If you keep it sealed up tight on the counter at room temperature, it should stay perfectly delicious for about three to four days. Seriously, if it lasts that long. If your kitchen runs a little warm, or if you used those add-ins like nuts or chocolate chips, you might want to stick it in the fridge after day two. It’ll still be good there for about a full week, though the texture might firm up a tiny bit.
How to Keep Your Slices Soft
So, you’ve got a slice that’s been in the fridge and feels a little stiff? Don’t microwave the whole thing! That just makes it chewy and weird. Take just the slice you want to eat and give it a quick zap. Five to ten seconds is usually plenty, especially if you lay a damp paper towel over it.
The damp towel creates some steam in the microwave, which really brings that soft, fresh-baked texture right back to life. It warms the spices up again too, so it smells amazing. Another trick, if you have a toaster oven, is to warm the slice for just a minute or two until the edges get a tiny bit crisp but the middle is soft and steamy. That’s my preferred method if I’m feeling fancy!
Can I Freeze Extra Pumpkin Bread?
Yes! This bread freezes like a dream, which is great because you usually end up with one perfect loaf and you just can’t eat it all before it gets sad. You need to slice the loaf first—don’t freeze it whole. Once sliced, wrap each individual slice very tightly in plastic wrap, and then put those wrapped slices into one big freezer-safe bag or container.
It keeps beautifully in the freezer for up to three months. When you want one, just pull a slice (or three!) out of the freezer and let it thaw on the counter for about an hour, or use that quick microwave trick mentioned above. Honestly, freezing individually means you always have an emergency slice of fall comfort ready to go!

Frequently Asked Questions About Pumpkin Bread
I get asked so many questions every year right around the time everyone starts pulling out the pumpkin spice! It’s great because it means people are excited about making this **Pumpkin Bread**. Here are the most common things folks ask me about getting this quick bread just right.
Can I substitute the oil in this Pumpkin Bread recipe?
You absolutely can try, but I always tell people to stick with the oil ratio for the best initial results, especially if it’s your first time trying this specific recipe. The oil is what keeps the bread tender and soft when it cools down—it’s a very neutral fat that doesn’t mess with the pumpkin flavor at all.
However, if you want that deeper, buttery taste, go ahead and swap out half the vegetable oil for melted unsalted butter, just like I mentioned in the tips section. It adds richness! Just don’t use applesauce or something watery in place of the full fat quantity, or you’ll end up with a sad, dense brick. If you’re looking for other healthy swaps in quick breads, I’ve seen some interesting takes on zucchini banana bread that might inspire you!
How do I know when my Pumpkin Bread is fully baked?
This is the panic moment for every baker, isn’t it? You don’t want raw batter, but you certainly don’t want dry edges! For this delicious **Pumpkin Bread**, we use the tried-and-true skewer test. Take a thin wooden skewer or even a toothpick and poke it right into the very center of the loaf.
If it comes out covered in wet, gooey batter, it needs more time—maybe another five minutes? If it comes out with just a few moist crumbs clinging to it, you are golden! That means the internal structure is set, but the moisture is still there. If the skewer comes out bone dry, pull it out immediately because it will set up fast.
Visually, you’ll want to see the top of the bread looking set, maybe slightly cracked, and it should have pulled away just a hair from the sides of the loaf pan. Trust your skewer more than your eyes, though!
Estimated Nutritional Breakdown for Pumpkin Bread
So, here’s the thing about listing out the nutrition facts—it’s all just an estimate, you know? My kitchen isn’t a lab, and the size of my eggs or how packed my brown sugar was can change things a little bit. But I did run the numbers based on the standard serving size so you know roughly what you’re diving into with this wonderful quick bread.
This breakdown is helpful, but please remember it’s a guide based on the ingredients listed. If you use extra nuts or decide to top it with a heavy cream cheese glaze, those numbers are going to climb a bit! This is just what the recipe delivers straight out of the pan.
Here is the general breakdown for one slice:
- Serving Size: 1 slice
- Calories: 250
- Sugar: 25 grams
- Sodium: 200 milligrams
- Fat: 12 grams
- Saturated Fat: 2 grams
- Unsaturated Fat: 10 grams
- Trans Fat: 0 grams
- Carbohydrates: 35 grams
- Fiber: 2 grams
- Protein: 4 grams
- Cholesterol: 40 milligrams
It’s pretty amazing how much flavor we packed in there for only 250 calories per slice! It really is a balanced treat. Just be mindful of the sugar; that comes from the combination of granulated and brown sugar doing their job to keep the bread moist and delicious.
Print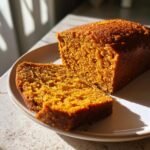
Simple Pumpkin Bread
- Total Time: 75 min
- Yield: 1 loaf 1x
- Diet: Vegetarian
Description
A straightforward recipe for moist pumpkin bread.
Ingredients
- 1 3/4 cups all-purpose flour
- 1 teaspoon baking soda
- 1 teaspoon ground cinnamon
- 1/2 teaspoon ground nutmeg
- 1/2 teaspoon salt
- 1 cup granulated sugar
- 1/2 cup packed brown sugar
- 2 large eggs
- 1 cup pumpkin puree
- 1/2 cup vegetable oil
- 1 teaspoon vanilla extract
Instructions
- Preheat your oven to 350 degrees Fahrenheit. Grease and flour a 9×5 inch loaf pan.
- In a medium bowl, whisk together the flour, baking soda, cinnamon, nutmeg, and salt. Set aside.
- In a large bowl, whisk together the granulated sugar and brown sugar.
- Beat in the eggs one at a time.
- Stir in the pumpkin puree, vegetable oil, and vanilla extract until just combined.
- Gradually add the dry ingredients to the wet ingredients, mixing until just blended. Do not overmix.
- Pour the batter into the prepared loaf pan.
- Bake for 55 to 65 minutes, or until a wooden skewer inserted into the center comes out clean.
- Let the bread cool in the pan for 10 minutes before turning it out onto a wire rack to cool completely.
Notes
- For a richer flavor, substitute half the vegetable oil with melted butter.
- You can add 1/2 cup of chopped walnuts or pecans if desired.
- Prep Time: 15 min
- Cook Time: 60 min
- Category: Dessert
- Method: Baking
- Cuisine: American
Nutrition
- Serving Size: 1 slice
- Calories: 250
- Sugar: 25
- Sodium: 200
- Fat: 12
- Saturated Fat: 2
- Unsaturated Fat: 10
- Trans Fat: 0
- Carbohydrates: 35
- Fiber: 2
- Protein: 4
- Cholesterol: 40
Keywords: pumpkin bread, quick bread, fall baking, spice bread, easy pumpkin