
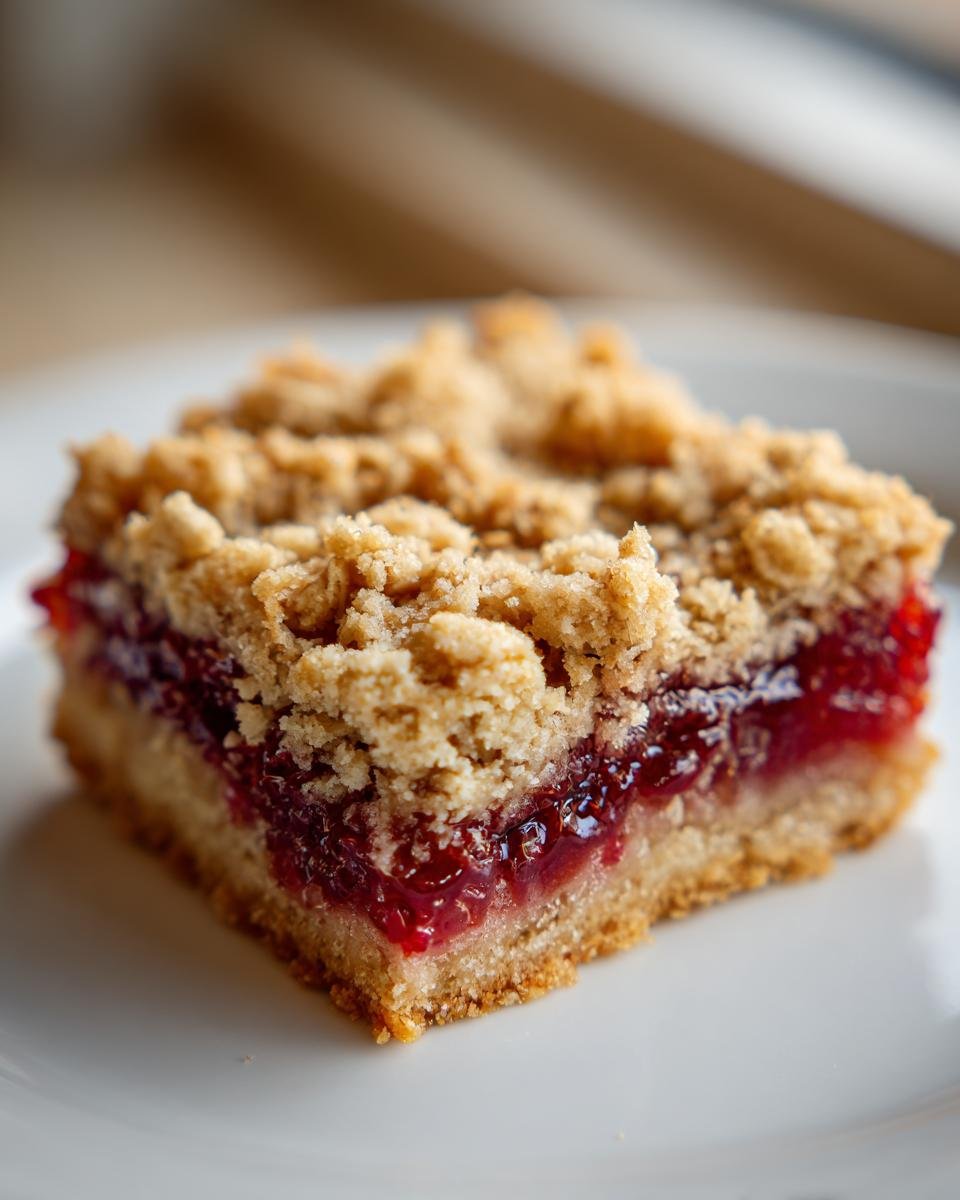
Oh my gosh, you know those days when you just *need* something sweet, but you don’t want a fussy layer cake? I totally get it. That’s when I reach for my tried-and-true recipe for the absolute best **Raspberry Crumble Bars** you will ever make. Seriously, these are my go-to comfort bake. They hit that perfect spot: that base is buttery, almost like shortbread, and the fruit filling is just the right mix of sweet tanginess that wakes up your taste buds.

I must have tinkered with this specific combination of oats and butter ratios for weeks until I got the topping just right—crumbly enough to sprinkle but perfect for pressing down. Trust me, about 15 minutes of prep and you’ve got a bakery-quality treat ready for the oven. It’s pure magic, and I’m so excited to share my secrets with you!
Why You Will Love These Raspberry Crumble Bars
I know what you’re thinking—another crumble bar recipe? But trust me, these are different. They hit every single note you want when that craving strikes you for something homemade, buttery, and perfectly balanced between sweet indulgence and that bright, tart fruit flavor. You’ve got to make these!
- They are lightning fast to put together! Seriously, from zero to pouring the fruit in takes maybe 15 minutes if your butter is cold. No stand mixer fuss needed here, folks, just your hands or a pastry cutter.
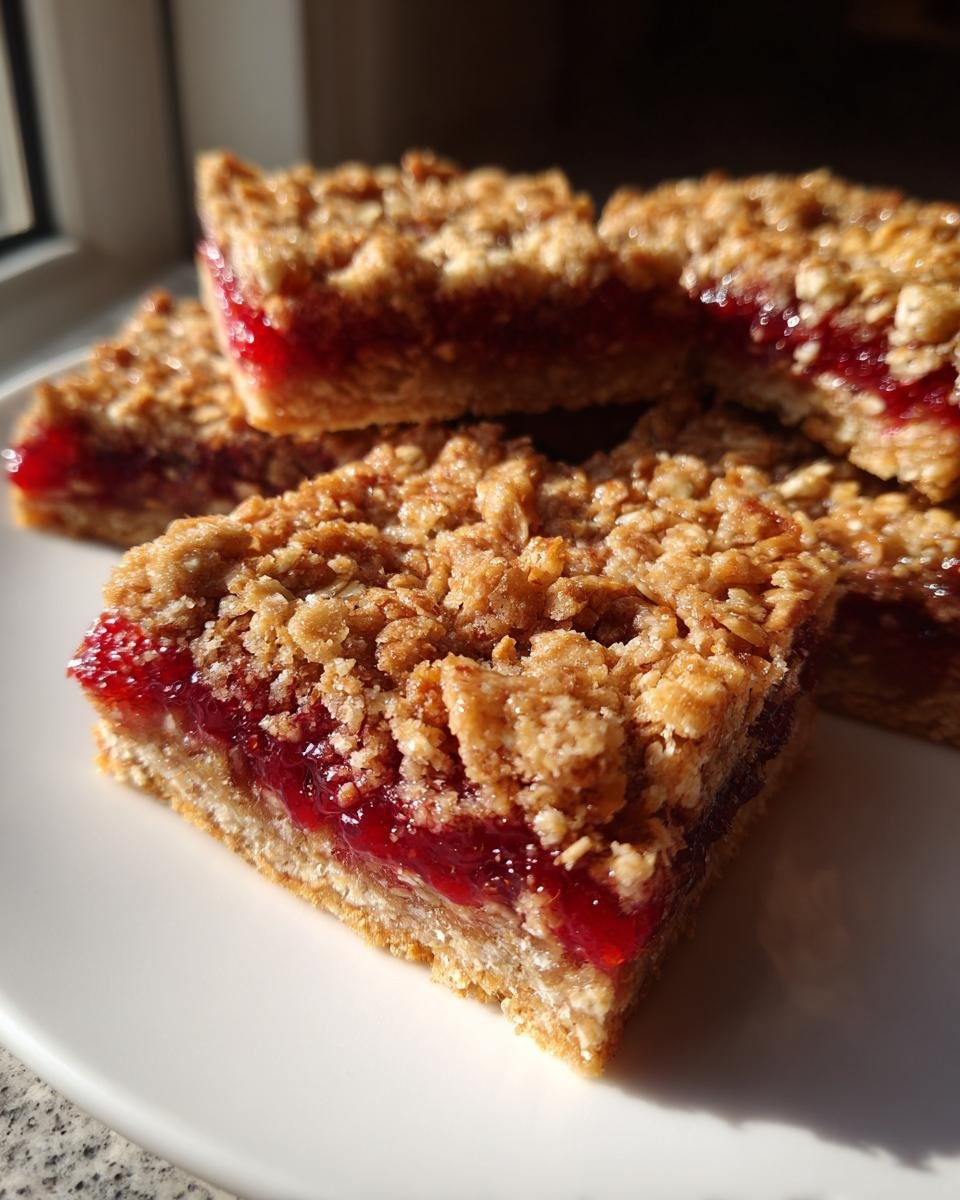
- That texture combination is just addictive. You get the firm, rich, buttery shortbread base that holds everything together, topped with the perfectly textured oat crumble. And if you want to dive deeper into general baking tips, check out my general baking resource page!
- The flavor balance is spot on. Fresh or frozen raspberries give you that beautiful tartness that cuts perfectly through the sweetness of the brown sugar and butter. It’s not cloyingly sweet, I promise.
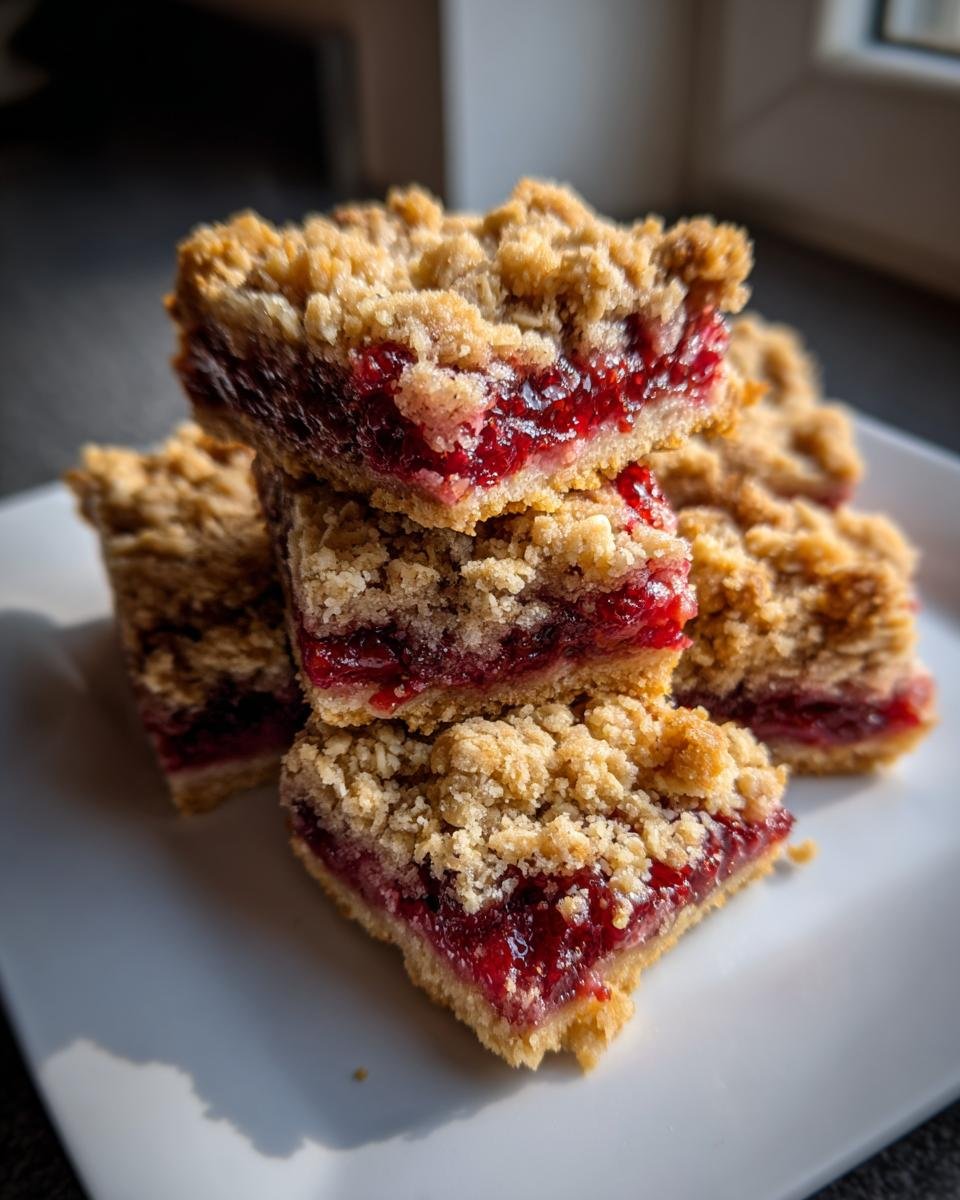
- They travel well and cut cleanly (once you chill them, shhh!). They’re perfect for potlucks or packing up for lunch boxes because they hold their shape so much better than a gooey pie.
Honestly, these easy raspberry crumble bars are my secret weapon when I need a crowd-pleaser that doesn’t take all afternoon!
Essential Ingredients for Perfect Raspberry Crumble Bars
Okay, the beauty of these raspberry crumble bars is that they use super simple pantry staples. You probably have most of this stuff already! But listen closely, because *how* you prep these items is everything. Remember, baking is science, but we’re making it taste like magic!
The dry base ingredients are just your standard flour, rolled oats—don’t use instant, please, we need structure!—and packed light brown sugar. That brown sugar is crucial because it brings richness and that slight molasses flavor that white sugar just can’t touch.
Now for the real MVP: the butter. It must be cold, and I mean *ice cold*, cut right into little cubes. When you mix in that cold butter, it creates little pockets that turn into flaky layers when they hit the oven heat. This is the key to keeping your shortbread base from getting greasy instead of crumbly!
For the filling, we keep it bright. Fresh or frozen raspberries—no thawing needed if they are frozen, just go straight from the freezer to the bowl! A tiny bit of granulated sugar and a splash of lemon juice really make those raspberries sing. If you ever need ideas on how to swap out liquids in baking generally, I have a great guide on buttermilk substitutes that might inspire you for future bakes!
Step-by-Step Instructions for Making Raspberry Crumble Bars
Okay, let’s get baking! These raspberry crumble bars come together so fast, but taking a second to do each step right ensures you get that perfect, decadent texture. Don’t rush the cooling though, or you’ll end up with raspberry mush instead of clean squares!
First things first, get your oven cranked up to 375 degrees F. I always line my 8×8 inch pan with parchment paper, but here’s my tip: make sure you leave a good overhang on two opposite sides! This creates little handles so you can just lift the whole pan of deliciousness out later. That little bit of planning saves so much heartache!
In a separate bowl, we’re mixing up the fruit filling—just toss those raspberries with a small amount of sugar and lemon juice. It sounds simple, but that acid really brightens up the flavor. Meanwhile, you’ll get the other ingredients together for the base/topping. If you struggle with crusts sometimes, I reference my big baking guide which has some hands-on tips!
Preparing the Crust and Crumb Topping for Raspberry Crumble Bars
In one bowl, whisk together your flour, oats, brown sugar, and salt. Now, take that cold butter—cubed, remember!—and start cutting it in. I prefer using my fingertips for this part because you can really feel what’s happening. You’re done when the mixture looks like coarse, uneven crumbs, with some pea-sized butter chunks still visible. This is exactly what you want for that perfect shortbread and crumb topping on your raspberry crumble bars.
Assembling and Baking Your Raspberry Crumble Bars
Take about two-thirds of that crumb mixture and press it firmly and evenly into the bottom of your prepared pan for the base. Then, spread those beautiful, sugared raspberries right over the top. Finally, sprinkle the remaining one-third of the crumb mixture evenly over the berries. Bake this dream creation for about 30 to 35 minutes. You’re looking for that topping to be deep golden brown and seeing the raspberry filling bubbling happily underneath. Seriously, the smell alone is worth the wait!
Expert Tips for Perfect Raspberry Crumble Bars Every Time
You know I love seeing your beautiful bakes, but the one question I always get about these **Raspberry Crumble Bars** is, “Why is my bottom crust getting totally soggy?” It’s frustrating, right? A great crumble bar needs that distinct, buttery shortbread base.
Here are my tried-and-true secrets to keep everything perfect from top to bottom. First, if you are using frozen raspberries (which is totally fine, by the way!), please do not thaw them first. They go straight from the freezer into the bowl with the sugar and lemon! That keeps them from weeping too much liquid before they ever hit the oven.
My big tip for the crust protection? After you press in that initial two-thirds of the crumb mixture, I like to give that base layer a *super* quick, light press with the bottom of a measuring cup, just to really compact it. This creates a barrier against the tart fruit topping. If you want more foundational baking help, I really recommend reading through my guide on general baking!
And finally, that slicing thing. Don’t even try to cut them when they are warm, I’m warning you now! They need time! Chilling them for an hour after they cool on the rack makes slicing these raspberry bars impossibly neat. You’ll thank me later when you have perfect squares!
Variations on Classic Raspberry Crumble Bars
Even though I think my original recipe for these **Raspberry Crumble Bars** is absolutely perfect—I mean, it has the oats and the buttery crust, what’s not to love?—I totally encourage you to play around! Baking should be fun, not strict.
If you’re low on oats or just want a different kind of texture, try swapping out half of the oats for finely chopped pecans or slivered almonds. It adds a lovely crunch! If you want to lean into the warm flavors, a half-teaspoon of cinnamon or a pinch of cardamom blended right into the dry crumble mix really complements the tartness of the raspberries beautifully.
For another fun spin, you can mix in white chocolate chips into the topping along with the remaining crumble mixture before baking. It makes them super decadent! If you’re curious about experimenting with other oat-based flavor profiles, I had a blast developing my chocolate chip pumpkin oatmeal cookies, and those flavor combinations might inspire you here, too!
Storage and Make-Ahead Tips for Raspberry Crumble Bars
Good news! These fantastic **Raspberry Crumble Bars** are the perfect make-ahead dessert because they actually taste *better* the next day. Once they are completely cool—and I mean totally cooled down after chilling—pop them into an airtight container.
At room temperature, they’ll stay great for about two days, though they usually disappear faster than that in my house! If you want them to last longer, pop them in the fridge; they keep happily for up to five days. For long-term storage, you can absolutely freeze them. Wrap the cooled squares tightly in plastic wrap, then pop them into a freezer-safe bag. They keep well for about three months in the freezer. Just thaw them on the counter for a few hours before you’re ready to eat!
Serving Suggestions for Your Raspberry Crumble Bars
You’ve put in the work, now it’s time to eat these amazing **Raspberry Crumble Bars**! While they are perfectly divine all on their own, sometimes you just need that little extra something to make them fancy.
When I serve these up warm—and yes, reheating them slightly makes the crust even more buttery—I absolutely have to have a scoop of really good vanilla bean ice cream melting right next to it. The cold cream against the warm, tart fruit is heaven.
If you’re not into ice cream, a simple dollop of freshly whipped cream works wonders. Or, if you want a little drizzle effect, you could lightly dust them with powdered sugar, maybe even mixing up a quick glaze using my basic white frosting recipe but thinning it out a bit with a little milk! These bars are beautiful just as they are, but who doesn’t love a fancy finish, right?
Frequently Asked Questions About Raspberry Crumble Bars
You’ve made the dough, you’ve baked the fruit, and now you have questions! Don’t worry, that’s totally normal when you’re learning a new recipe. I get questions all the time about these wonderful **Raspberry Crumble Bars**, so let’s clear up the common snags right now so your next batch is absolutely flawless.
For instance, sometimes folks ask if they can use melted butter instead of cold, cubed butter. Please, resist the urge! Melted butter will soak right into the flour and oats, resulting in a dense, greasy base instead of that beautiful shortbread texture we are aiming for. Keep that butter cold!
Can I substitute fresh raspberries with other fruit in these Raspberry Crumble Bars?
Oh yes, absolutely! This buttery shortbread structure works with almost any moderately firm fruit filling. Blueberries and chopped apples are fantastic substitutes, though I always recommend adding just a little extra granulated sugar if you use a fruit that is naturally much more tart than the raspberries. For softer fruits like peaches, just make sure you cook them down slightly first so they don’t turn everything into soup when they bake!
What is the best way to cut these bars cleanly?
This is where patience pays off. Remember what I said? The secret to getting those perfect, neat squares for your **Raspberry Crumble Bars** is cooling, cooling, and then chilling! Let the bars cool completely on the counter first—this takes ages, I know!—but then, here’s the real trick: wrap the whole cooled thing tightly in plastic wrap and pop it in the refrigerator for at least an hour. Cold fat cuts cleanly, warm fat smears everywhere. Once it’s chilled, the knife slides right through that buttery base like a charm!
Estimated Nutritional Information for Raspberry Crumble Bars
You’re going to love how satisfying these **Raspberry Crumble Bars** are, but as with any tasty treat made with butter and sugar, we should probably peek at the numbers! Based on my measurements, one bar clocks in around 200 calories, with about 11g of fat and 15g of sugar because, well, butter and fruit love sugar!
Remember, this information is just an estimate, folks. If you use low-fat butter or skip the oats, those numbers might shift a bit. This is just a helpful guideline while you enjoy your homemade, buttery goodness!
Print
Raspberry Crumble Bars
- Total Time: 50 min
- Yield: 16 bars 1x
- Diet: Vegetarian
Description
Simple recipe for sweet and tart raspberry crumble bars with a buttery shortbread base and topping.
Ingredients
- 1 cup all-purpose flour
- 1/2 cup rolled oats
- 1/2 cup packed light brown sugar
- 1/4 teaspoon salt
- 1/2 cup (1 stick) cold unsalted butter, cut into cubes
- 1 1/2 cups fresh or frozen raspberries
- 1 tablespoon granulated sugar
- 1 teaspoon lemon juice
Instructions
- Preheat your oven to 375 degrees F (190 degrees C). Line an 8×8 inch baking pan with parchment paper, leaving an overhang on two sides for easy removal.
- In a medium bowl, combine the flour, rolled oats, brown sugar, and salt.
- Cut in the cold butter using a pastry blender or your fingers until the mixture resembles coarse crumbs.
- Press about two-thirds of the crumb mixture evenly into the bottom of the prepared pan to form the crust.
- In a small bowl, gently toss the raspberries with the granulated sugar and lemon juice. Spread the raspberry mixture evenly over the crust.
- Sprinkle the remaining one-third of the crumb mixture over the raspberries.
- Bake for 30 to 35 minutes, or until the topping is golden brown and the filling is bubbly.
- Let the bars cool completely in the pan on a wire rack before lifting them out using the parchment paper overhang.
- Cut into squares.
Notes
- If using frozen raspberries, do not thaw them before using.
- For cleaner cuts, chill the cooled bars for at least one hour before slicing.
- Prep Time: 15 min
- Cook Time: 35 min
- Category: Dessert
- Method: Baking
- Cuisine: American
Nutrition
- Serving Size: 1 bar
- Calories: 200
- Sugar: 15
- Sodium: 80
- Fat: 11
- Saturated Fat: 7
- Unsaturated Fat: 4
- Trans Fat: 0
- Carbohydrates: 24
- Fiber: 2
- Protein: 3
- Cholesterol: 30
Keywords: raspberry, crumble bars, shortbread, dessert, oats, baked fruit