
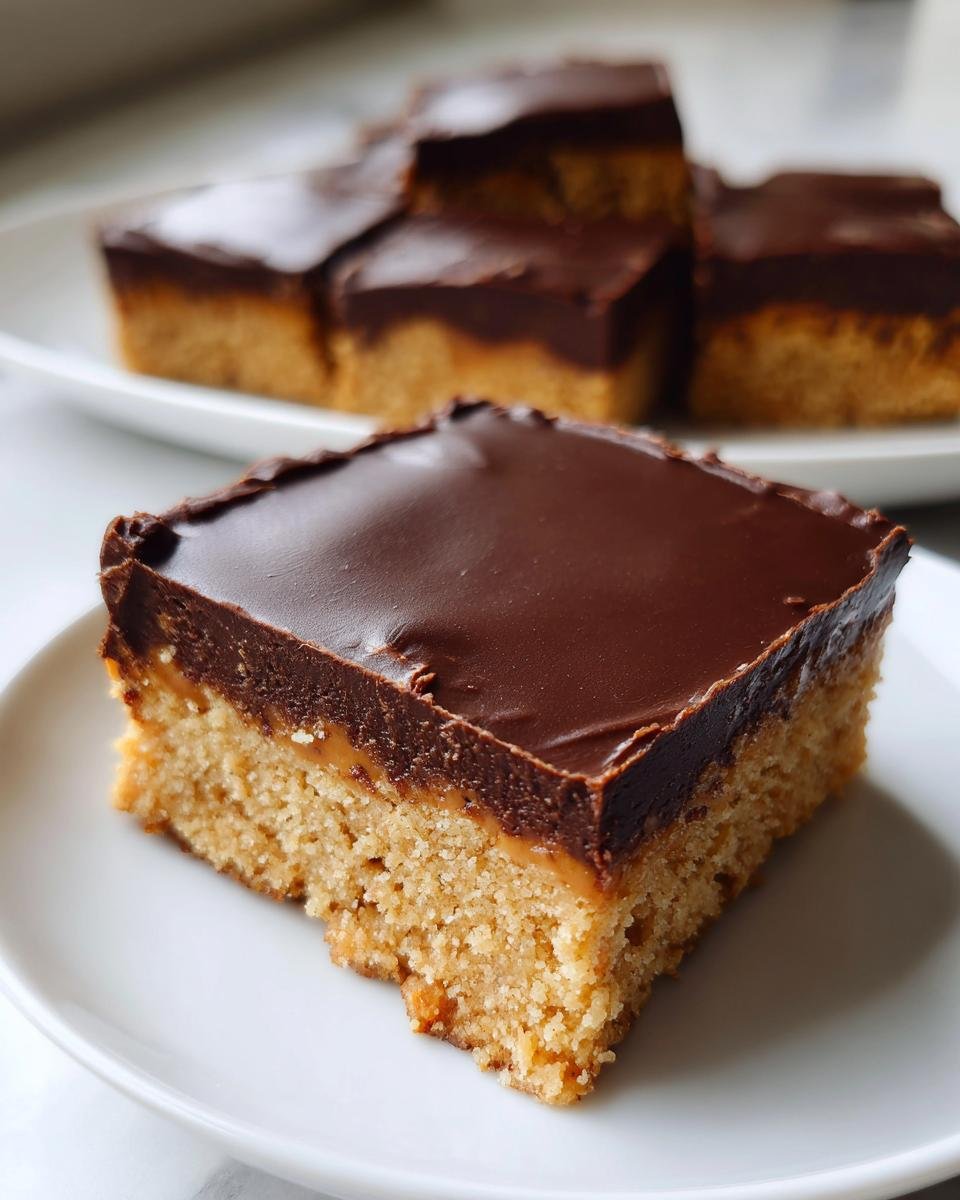
Oh, my favorite kind of baking! When you need something sweet, something that hits that craving for salty peanut butter mixed with rich chocolate, but you absolutely cannot turn on the oven? I have you covered. These Simple Peanut Butter Bars are the best thing to happen to my weeknight dessert routine. They are ridiculously easy, no messy baking required, and honestly, they taste like childhood magic. I grew up making these alongside my big brother during the summer when it was just too hot to handle the stove. Trust me, if you make these just once, they’ll become your go-to easy sweet, too!
Why You Will Love These Simple Peanut Butter Bars
Honestly, what’s not to love? These bars fly off the plate every time I make them. They are my secret weapon when company drops by unexpectedly!
- No oven means less heat in the kitchen—perfect for summer cravings!
- The whole thing comes together in about fifteen minutes of actual work.
- They have that perfect sweet-and-salty punch that keeps you coming back for one more square.
- They are sturdy enough to pack for potlucks but rich enough for dessert. Check out how I made a similar no-bake favorite here!

Essential Ingredients for Perfect Peanut Butter Bars
Okay, the beauty of these bars is realizing how truly few things you need! You probably have most of this stuff hiding out in your pantry already. The real trick here is the butter. It has to be softened perfectly—not melted, not hard straight from the fridge. When it’s right, you can gently press your finger into it and leave a dimple.
We need the good stuff for the base:
- One full cup of butter, and remember, softened is key!
- One cup of creamy peanut butter—I skip the natural kind here; we need that stability.
- Just a teaspoon of vanilla extract to round out the flavor.
- Four whole cups of powdered sugar. Yes, you read that right; this is what gives it that dense structure.
For the shiny top layer, we just need 1 1/2 cups of semi-sweet chocolate chips paired with one tablespoon of shortening. Trust me on the shortening; it keeps that chocolate topping smooth and sliceable, unlike just using chips alone. If you want a sneak peek at some other easy peanut butter treats, check out my secrets for 3-ingredient peanut butter balls!
Tips for Making the Best Peanut Butter Bars Base
This base layer is where the magic happens, and honestly, it’s what separates a good peanut butter bar from the absolute best. The most common boo-boo people make right at the start is using butter that’s too cold. If your butter is cold, you’ll end up with lumpy peanut butter patches in your base, and nobody wants that! Remember, we’re aiming for smooth, creamy, and fully incorporated before we even think about adding the sugar.
When you start beating that butter, peanut butter, and vanilla together, it’s going to look great. But once you dump in those four cups of powdered sugar, things get serious—the mixture gets really thick, almost like cookie dough. Don’t panic! Just keep mixing. It takes a little elbow grease, or maybe you should grab an electric mixer. If you want to see some general advice that helps with every kind of baking, I always recommend reading through my general baking tips to make you a better baker page!
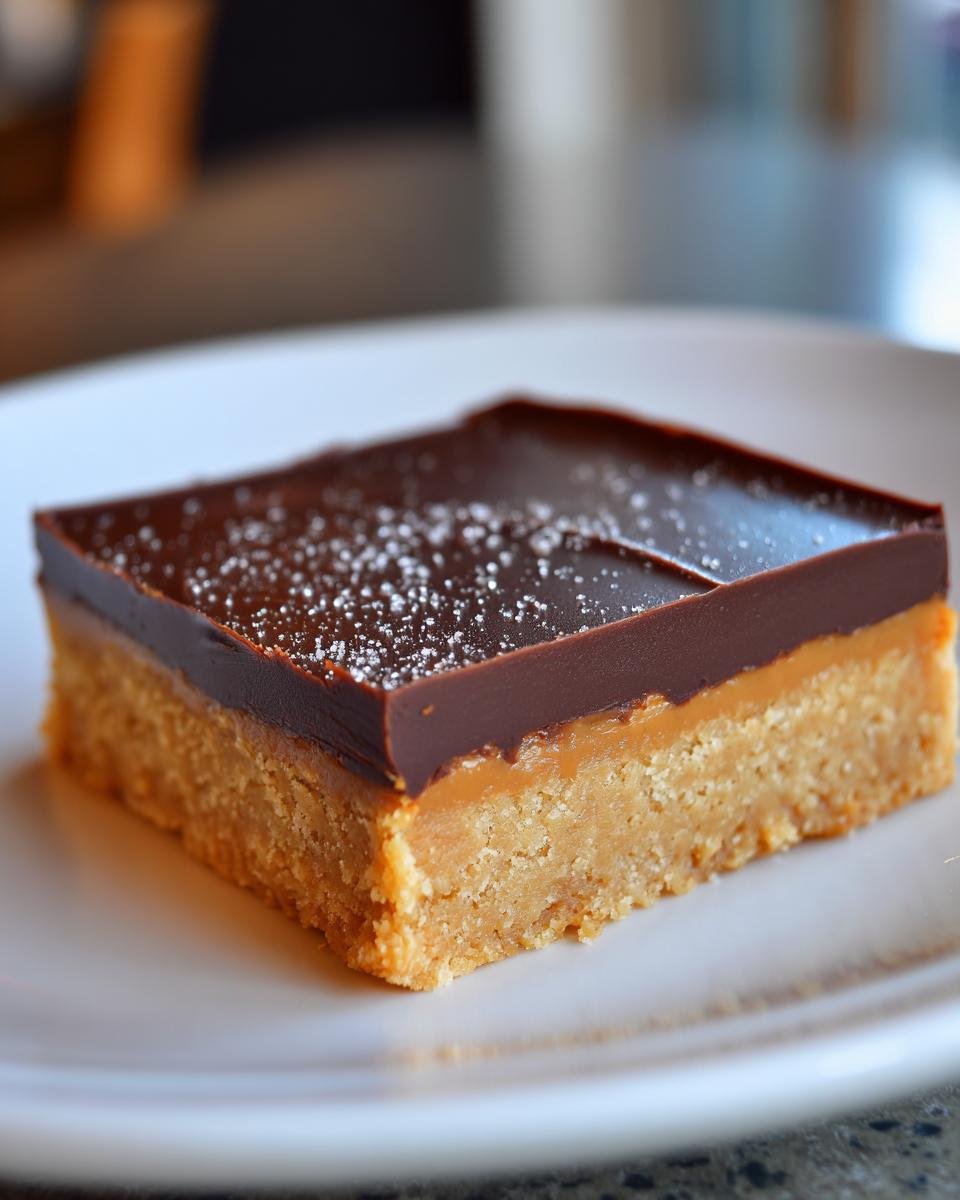
Achieving the Right Peanut Butter Bar Consistency
When the sugar is all mixed in, that dough is going to be stiff. That’s exactly what we want! This means you won’t end up with a runny mess once you spread it. Use a spatula or even the back of a sturdy measuring cup to press that thick layer evenly into your prepared pan. Push it out right to the corners. You want a consistent thickness across the whole 9×13 inch pan so that the chocolate topping doesn’t end up thicker in one spot than another. Press it down firmly—we don’t want any air pockets puffing up later!
Step-by-Step Instructions for No-Bake Peanut Butter Bars
Okay, let’s get mixing! Since these are no-bake, the whole process moves really fast, which is why having everything ready beforehand is a lifesaver. Don’t worry too much about the chocolate topping while you’re making the base; we just need that peanut butter layer set first. It’s all very simple, but timing is key for that perfect, crisp chocolate shell on top. Once it’s all done, patience is your final virtue before you can dive in!
Preparing the Pan and Mixing the Peanut Butter Layer
First things first, grab your 9×13 inch pan. I always line mine with parchment paper, but make sure you leave a big overhang on two sides—these flaps are your handles later when it’s time to lift the whole thing out. So much easier than trying to pry them out, right? Once the paper is nestled in there, you can start mixing. Beat that softened butter, creamy peanut butter, and vanilla until it looks like a light, fluffy cloud in your bowl. Then, slowly introduce the powdered sugar a cup at a time. You need to mix until it’s just combined; don’t overdo it, or the texture gets weird!
Melting the Chocolate Topping for Your Peanut Butter Bars
Now for the gooey topping layer. You need your chocolate chips and that tablespoon of shortening—or if you’re stuck, that tablespoon of coconut oil works great too! Put them in a microwave-safe bowl. Here’s my crucial warning: microwave chocolate burns faster than anything! Use short bursts—like 30 seconds at a time. After each 30 seconds, pull it out and stir really well. Keep doing that until it’s mostly melted, then just stir until the residual heat smooths out the last lumps. It steams easily, so be careful when you pull it out. Then, pour that gorgeous melted chocolate right over the top of your peanut butter layer and use an offset spatula to spread it to cover every corner. You can see a few other no-bake chocolate ideas I’ve played with over at my no-bake chocolate posts!
Chilling and Cutting the Final Peanut Butter Bars
This is the hardest part, I know, but you absolutely must let these chill. Don’t even think about cutting them right away! Pop the whole pan into the refrigerator for a minimum of two hours. This time lets the base firm up beautifully and, more importantly, it sets that chocolate topping so it’s snappy and won’t smear everywhere when you slice into it. Once you’re sure the chocolate is totally firm, use those parchment paper handles to lift the whole block out onto a cutting board. Then slice them into squares. If you want super clean edges, sometimes running a warm knife under hot water and wiping it dry between cuts helps!

Ingredient Notes and Substitutions for Peanut Butter Bars
I get asked all the time about swapping ingredients, especially when it comes to baking! Luckily, these simple peanut butter bars are pretty forgiving, but there are two spots where you might need a little direction. The first is the butter you use for the base. Make absolutely sure it’s room temperature soft, not melted! If it’s melted, the base will be greasy and never set right.
For the chocolate topping, we call for shortening because it helps keep the chocolate layer nice and soft to slice through, even when chilled. But if you just don’t keep shortening around, you can totally substitute it with one tablespoon of coconut oil. It melts the same way and gives you a great finish! For other baking swaps you might run into, sometimes it helps to review my notes on how to make buttermilk substitutions, just to get your head game on swaps!
Storage and Make-Ahead Tips for Peanut Butter Bars
The best part about these sweet treats is that they actually taste better the next day once everything has really settled in the fridge. You absolutely want to keep these goodies chilled because of the butter content in the base and the chocolate on top. Store them in an airtight container in the refrigerator. They honestly stay perfectly fresh for up to a week that way! If you’re feeling ambitious and want to bake ahead for a holiday party, good news: they freeze beautifully!
Just slice the entire pan before freezing. Place sheets of wax paper between layers of bars, wrap the whole stack snugly in plastic wrap, and pop it in the freezer for up to three months. They thaw on the counter in about an hour. If you love making treats ahead like this, you might want to check out my recipe for Caramel Crumb Bars too—they freeze just as well!
Frequently Asked Questions About Peanut Butter Bars
I get so many questions about these easy sweets, which just tells me everyone loves a good chocolate and peanut butter combo! Since these Peanut Butter Bars are no-bake, people often wonder about texture and setup, which is totally normal. Here are the answers to the things I hear most often!
Can I use crunchy peanut butter in these Peanut Butter Bars?
You absolutely can, but you need to know what you’re signing up for! Using crunchy peanut butter means your base layer won’t be perfectly smooth. You’ll get little peanut chunks in every bite, which some people actually prefer! If you like texture, go for it. But if you want that classic, uniform, melt-in-your-mouth base, stick with creamy. These bars are flexible, but the base texture changes once you add the nuts!
What is the best way to get clean cuts on the bars?
This is a huge one, especially when you’re trying to serve them neatly! The most important thing is chilling them long enough—don’t rush the two hours minimum. If you’re still struggling with messy edges, try waiting until they are extra cold. Before cutting, pull the whole thing out using the parchment paper overhang. If you have a big chef’s knife, try dipping it in hot water, wiping it totally dry, and then making a clean slice. Wipe the knife clean between every cut, and you’ll have perfect squares! You can find all sorts of helpful kitchen tricks on my page about other peanut butter cookie treats!
If you’re looking for more guidance on making this recipe your own, let me know in the comments below!
Estimated Nutrition Facts for Peanut Butter Bars
Now, I’m not a nutritionist—my expertise is definitely in the mixing bowl! But I know a lot of you are curious about what’s in these glorious treats. Based on the ingredients list, here’s what you’re generally looking at per bar. Keep in mind these numbers are just my best guess, as the exact brand of peanut butter or chocolate chips you use can shift things around a little bit. But wow, for something this delicious, those numbers look pretty good for a homemade dessert!
- Calories: Around 250
- Fat: About 16g
- Sugar: Roughly 25g (most of this comes from the powdered sugar and chocolate!)
- Protein: About 5g
If you want to see how these stack up against another famous no-bake treat, you should check out my recipe for quick and easy peanut butter fudge! Enjoy these knowing they are homemade and worth every single bite.
Share Your Delicious Peanut Butter Bars
Now that you’ve made a batch of these amazing, fudgy, no-bake Peanut Butter Bars, I really want to hear about it! Did you make them for a party? Did you manage to save any for yourself the next day? Tell me your experience!
Please take a moment to jump down and leave a star rating for the recipe right below here. Those ratings help other folks know that this recipe is worth making tomorrow. And if you snapped a picture of your glossy chocolate tops—I *need* to see them! Drop a comment below and let me know how you liked them, and if you tried serving them cold or letting them sit out a little bit first. Happy sharing!
Print
Simple Peanut Butter Bars
- Total Time: 2 hr 15 min
- Yield: 24 bars 1x
- Diet: Vegetarian
Description
A straightforward recipe for making classic, no-bake peanut butter bars.
Ingredients
- 1 cup butter, softened
- 1 cup creamy peanut butter
- 1 teaspoon vanilla extract
- 4 cups powdered sugar
- 1 1/2 cups semi-sweet chocolate chips
- 1 tablespoon shortening
Instructions
- Line a 9×13 inch pan with parchment paper, leaving an overhang for easy removal.
- In a large bowl, beat the softened butter, peanut butter, and vanilla extract until smooth.
- Gradually add the powdered sugar, mixing until fully combined. The mixture will be thick.
- Press the peanut butter mixture evenly into the prepared pan.
- In a microwave-safe bowl, combine the chocolate chips and shortening. Microwave in 30-second intervals, stirring between each, until completely melted and smooth.
- Pour the melted chocolate mixture over the peanut butter layer and spread evenly.
- Refrigerate for at least 2 hours, or until the chocolate is firm.
- Lift the bars out of the pan using the parchment paper overhang. Cut into squares before serving.
Notes
- Use room temperature butter for easier mixing.
- If you do not have shortening, you can substitute with 1 tablespoon of coconut oil for the chocolate topping.
- Prep Time: 15 min
- Cook Time: 0 min
- Category: Dessert
- Method: No-Bake
- Cuisine: American
Nutrition
- Serving Size: 1 bar
- Calories: 250
- Sugar: 25g
- Sodium: 120mg
- Fat: 16g
- Saturated Fat: 6g
- Unsaturated Fat: 10g
- Trans Fat: 0g
- Carbohydrates: 26g
- Fiber: 1g
- Protein: 5g
- Cholesterol: 20mg
Keywords: peanut butter bars, no bake, dessert, chocolate topping, easy sweets