
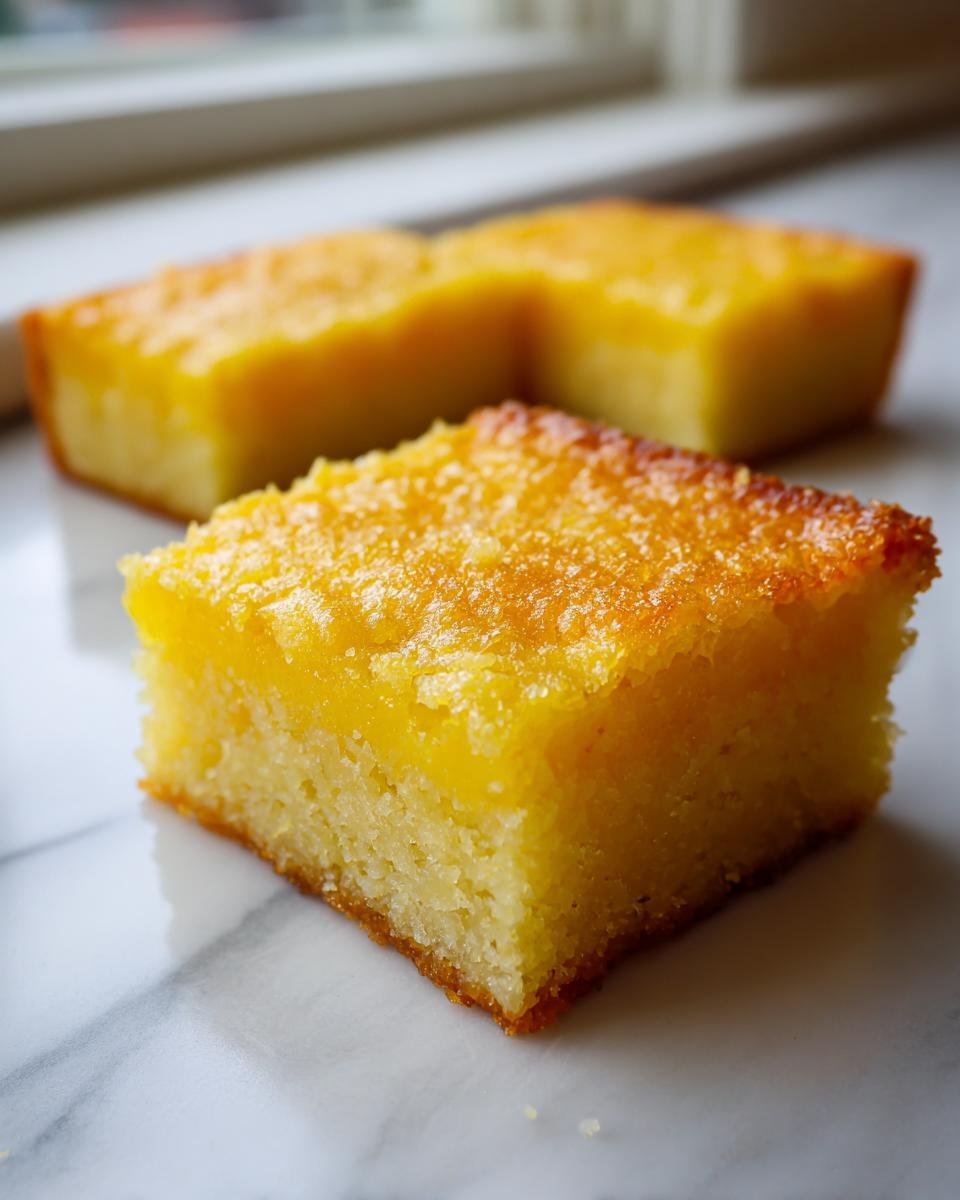
Oh, you know that feeling, right? That intense craving for something bright, something tart, but you’re standing there staring at your pantry knowing most desserts are off-limits because of gluten or, well, sugar? I’ve been there hundreds of times! It took me ages to crack the code on citrusy bakes that actually taste creamy and indulgent while staying strictly paleo. But I finally nailed it, friends! These are truly the best Healthy Lemon Bars Gluten Free Paleo treats you will ever make. I mean it! After years of testing different almond flour ratios and sweeteners, I found the happy medium where the crust is crisp, and the filling sets up perfectly without any weird grainy texture. Trust me when I say this recipe delivers that perfect sweet-and-sour punch every single time.
Why You Will Love These Healthy Lemon Bars Gluten Free Paleo
Seriously, these bars check every single box, which is why I make them constantly when I need a real pick-me-up for a weekend brunch or just a Tuesday afternoon. You won’t miss the flour or refined sugar, I promise!
- Perfectly Tart & Sweet Balance: We hit that magical spot where the citrus is bright and zesty, but the maple syrup keeps it from being too sour. It’s flavor perfection!
- Truly Compliant Baking: These are totally free from gluten, grains, and refined white sugar, making them a dream for anyone following a strict paleo or low-grain diet.
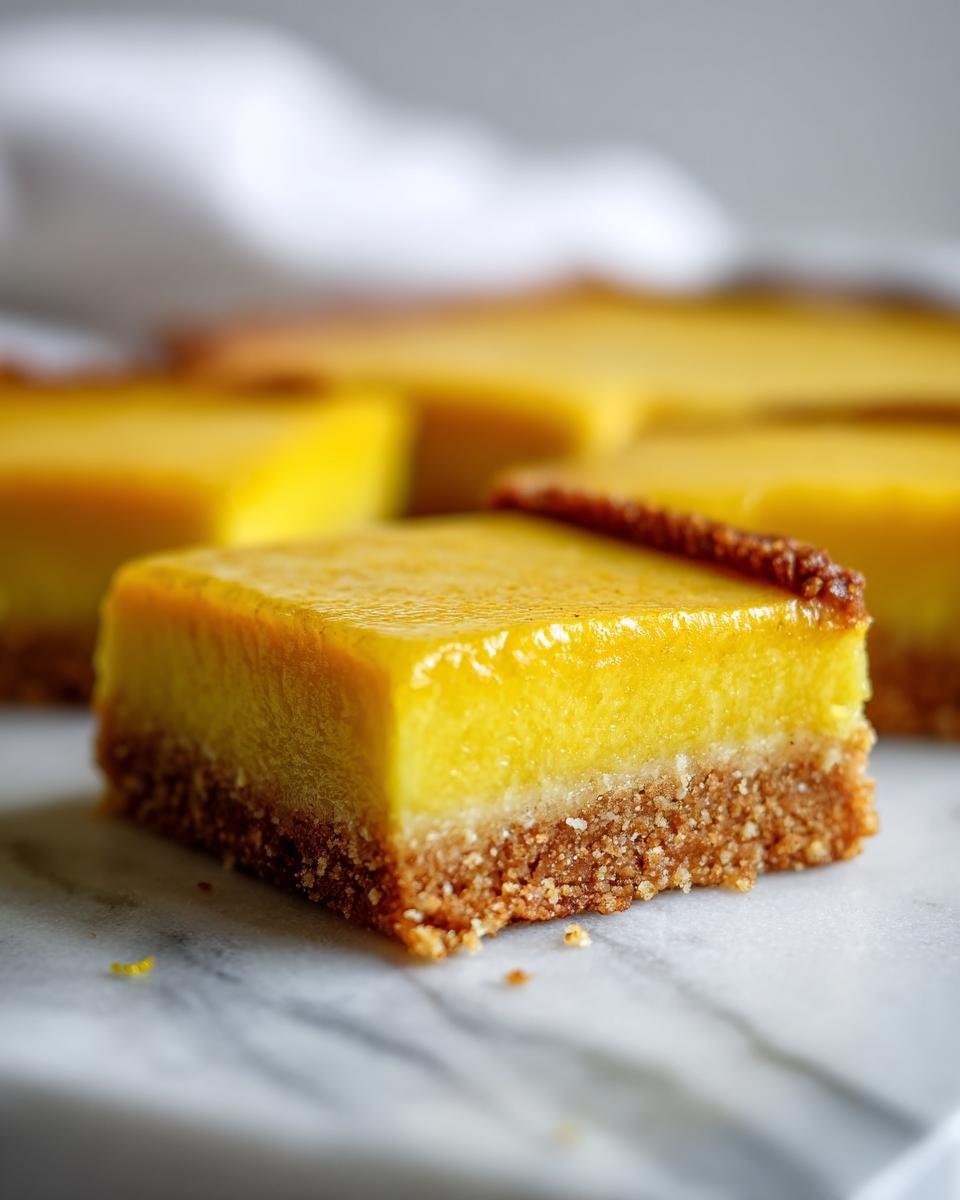
- Almond Flour Crust Magic: Forget weird gummy crusts—this base uses simple almond flour and melts right into the pan, giving you that buttery crumble without any of the dairy or gluten drama.
- Simple Ingredient List: You don’t need twenty specialty items to make these work. Everything is straightforward, and you probably have most of it if you do any paleo baking at all.
- They Set Up Like a Dream: Unlike some paleo custards that stay runny, the combination of eggs and arrowroot starch ensures these set up firm enough to slice cleanly.
Essential Ingredients for Healthy Lemon Bars Gluten Free Paleo
Okay, this is where we build the trust, right? We need to make sure we get the texture and that beautiful, bright lemon flavor absolutely spot-on, which means paying attention to what goes where. I divide this into two main teams: the crust foundation and the zesty filling! You absolutely want to use blanched almond flour here, not almond meal, if you can swing it—it keeps the bottom texture much finer and less gritty. Don’t skip the zest; it holds so much essential oil flavor!
For the Almond Flour Crust
This is the simplest, most delightfully crumbly crust you’ll ever make. You just mix this up, press it in, and bake it blind really quick. For the coconut oil, make sure it’s fully melted, but don’t let it get hot—just liquidy and smooth!
- 1 1/2 cups almond flour (blanched is best!)
- 1/4 cup coconut oil, fully melted
- 1/4 cup maple syrup
- 1/4 teaspoon salt
For the Bright Lemon Filling
This filling is the star! The key here is using freshly squeezed lemon juice; bottled stuff just tastes flat next to fresh. Also, make sure the eggs are at room temperature if you have the time, as they whisk up smoother that way and incorporate better into the syrup. We’re using maple syrup so we stay totally paleo!
- 3 large eggs
- 1/2 cup fresh lemon juice (this is non-negotiable!)
- Zest of 1 whole lemon
- 1/2 cup maple syrup
- 1 tablespoon arrowroot starch or tapioca flour (this is our magic thickener!)
Step-by-Step Instructions for Healthy Lemon Bars Gluten Free Paleo
Don’t let the paleo aspect trick you; these are super quick to put together! The entire baking process takes less than an hour, but the crucial part is definitely the chilling time afterward. We need everything to set properly so you get those gorgeous squares and not a sunny puddle on your plate. If you want more general tips for better baking overall, I have a whole guide you might want to peek at! Baking is all about technique, after all.
Baking the Crust for Healthy Lemon Bars Gluten Free Paleo
First things first, get your oven humming at 350 degrees Fahrenheit. Grab an 8×8 inch pan and make sure you line it with parchment paper, leaving a nice overhang on the sides—that’s our ticket to easy removal later! For the crust, just dump the almond flour, melted coconut oil, that first 1/4 cup of maple syrup, and salt into a bowl. Stir it until it looks like wet sand. Press that crumbly dough firmly and evenly into the bottom of your pan. Bake this crust layer for about 10 to 12 minutes until you see the edges just barely kissing gold. Pull it out; we’re moving right along!

Creating and Baking the Lemon Filling
Now for the sunshine! In a clean bowl, you’re going to whisk together everything for the filling: those three eggs, all your fresh lemon juice and zest, the remaining 1/2 cup of maple syrup, and your arrowroot starch. Whisk it—and I mean whisk it—until it’s totally smooth, like silk. You don’t want any lumps of starch when you pour this over that warm crust. Pour the lovely yellow mixture right over the hot base. Back into the oven it goes for another 20 to 25 minutes. You’ll know it’s done when the center isn’t liquid anymore when you gently jiggle the pan.
Cooling and Slicing Your Healthy Lemon Bars Gluten Free Paleo
This is the hardest part: waiting! Let the bars cool completely on the counter first—don’t rush them into the fridge hot. Once they are room temperature, cover them and move them to the refrigerator for a minimum of two hours. That extra chilling time is essential for that clean cut. Here is my big trick for amazing presentation: grab the parchment overhang we left earlier and lift the entire slab of chilled lemon bars right out of the pan. Place it on a cutting board, and then use a sharp knife to slice them cleanly. No sticky mess, just perfect edges!
Ingredient Notes and Substitutions for Healthy Lemon Bars Gluten Free Paleo
I get asked about ingredients all the time, so let’s clear a few things up before you start! Remember how I mentioned blanched almond flour? That’s really important. If you use standard almond meal, your crust will be a little heavier and maybe slightly rougher, but hey, it’ll still taste amazing. Also, don’t panic about the thickener; if you don’t have arrowroot starch, tapioca flour works perfectly interchangeably here—they both help that gorgeous filling set up just right for slicing into perfect Healthy Lemon Bars Gluten Free Paleo squares.
Tips for Perfect Healthy Lemon Bars Gluten Free Paleo Results
Even with a great recipe, little techniques make the difference between good and *incredible*, especially when you’re baking without gluten. I learned these tricks the hard way, usually involving a sticky mess or a runny center, so please learn from my trials!
You absolutely must not overmix that almond flour crust once you add the wet stuff. Seriously, stop mixing the second it comes together into a crumbly dough. When you mix paleo flours too much, they can get tough or dense, and we want that base light and melt-in-your-mouth! If you’re looking for a general deep dive into improving your whole baking game, I always point people towards my general baking advice page where I share loads of extra wisdom.
Two other minor things that make a huge difference: first, make sure that parchment paper overhang is generous—we talked about this before, but it’s worth repeating because using it to lift the bars out is the secret to beautiful squares. Second, room temperature eggs for the filling! They blend so much better with the lemon juice and syrup, creating a homogenous mixture that bakes evenly. Cold eggs can sometimes cause the filling to cure unevenly, leading to little pockets of solidified egg white, and nobody wants that surprise in their tart treat!
Storage and Reheating for Your Healthy Lemon Bars Gluten Free Paleo
The best thing about these bars, besides tasting amazing, is that they store beautifully! Since they have a nice custard-like filling, they actually get better after they’ve hung out in the cold for a while. They firm up a bit more, which makes slicing even easier the next day!

You absolutely must keep these chilled. Don’t even think about leaving them on the counter once they’re set. Put them in an airtight container—I usually layer them between sheets of parchment paper so the top layer doesn’t stick to the filling of the layer below it. Stored this way in the refrigerator, they keep perfectly well for nearly a week. Seriously, they are still bright and delicious on Day 5!
As for reheating? Honestly, you shouldn’t! These are meant to be enjoyed cold, straight from the fridge. Heating them up would compromise that perfect, firm set we worked so hard to achieve when chilling them down. Enjoy them cool and zingy; that’s when the contrast between the crumbly crust and the creamy lemon is at its absolute peak.
Variations on Healthy Lemon Bars Gluten Free Paleo
I love how adaptable this base recipe is! While the classic lemon flavor is unbeatable, sometimes you just want to play around a little bit, right? The great news is that because we are using simple whole-food ingredients like almond flour and maple syrup, you can easily tweak the filling without messing up the bake time or structure one bit. It’s so much fun to shake things up!
My favorite minor addition, especially if I’m serving these to guests, is adding just a tiny splash of high-quality vanilla extract right into the filling mixture when I whisk in the eggs. It deepens the overall flavor profile and adds such a warm background note that plays beautifully against the sharp lemon. It’s such a small step, but wow, does it make a difference!
If you are feeling adventurous and maybe have some gorgeous limes sitting around, you can swap out half or even all of the lemon juice and zest for lime! A Key Lime Bar is practically begging to happen here. Just make sure you use fresh lime juice, obviously. For an extra decadent, bright pairing, you might even want to check out my recipe for lemon raspberry cupcakes sometime, where I incorporate fruit right into the batter—it gives you an idea of how different citrus flavors pop!
Serving Suggestions for These Paleo Lemon Bars
Since these bars are already so flavorful and bright, you really don’t need much fancy dressing up to serve them, which is perfect for those busy weeknights! I always find that a little textural contrast makes the experience even better. Since they are eaten chilled, the coldness really highlights those tangy lemon notes.
My number one favorite pairing is serving them alongside fresh, ripe berries. You can’t go wrong with a handful of sweet blueberries or maybe some sliced strawberries scattered around the plate. The soft, slightly bursting fruit flavor is the perfect natural companion to our tart, gluten-free crust. It just feels elegant without any extra effort!
If you want something a little richer to cut through the tartness, you absolutely must make a simple dollop of coconut whip. It’s creamy, naturally sweet, and totally dairy-free. I have a super easy guide on how to make coconut whipped cream that takes five minutes, and honestly, it transforms these bars into a dessert worthy of any fancy dinner party. Just a small cloud of it right on top, and you are golden!
For a slightly more complex sweetness that keeps things paleo, you can also dust them lightly with a mixture of cinnamon and powdered coconut sugar right before serving. It gives a little visual appeal and a tiny warming spice note that works surprisingly well with the citrus!
Frequently Asked Questions About Healthy Lemon Bars Gluten Free Paleo
I know when you start baking paleo, you have a million questions bubbling up! It’s totally normal. Baking without gluten or refined sugar is different, and these lemon bars are no exception. Let’s tackle the stuff I hear the most so you can bake with total confidence!
Can I use a different sweetener instead of maple syrup?
That’s a classic question, especially if you’re trying to avoid maple syrup for some reason. Because we are keeping this recipe Healthy Lemon Bars Gluten Free Paleo, maple syrup is ideal because it’s liquid, which helps the crust mix correctly and blends nicely into the custard filling. If you absolutely must swap, you could try using honey—but beware, honey has a much stronger flavor that will compete with the lemon, and you might need to slightly reduce the amount because it’s sweeter!
Why is my almond flour crust so crumbly?
If your base is falling apart when you try to press it in, chances are your coconut oil was too cold, or you might have added a touch too much! Almond flour doesn’t absorb liquid like regular wheat flour does. You want the oil to be melted so it coats everything well. If it’s too crumbly, try adding just one *tiny* teaspoon more of melted coconut oil to see if it helps it hold together when pressed firmly into the pan. Remember, you’re pressing it pretty hard, so press with purpose!
How do I make sure the filling doesn’t weep or get watery?
Weeping, or having that watery layer form beneath the filling while chilling, usually happens for two reasons: either the eggs weren’t fully whisked in with the starch, or you didn’t chill them long enough! Make absolutely certain that arrowroot starch is totally dissolved into the liquid filling ingredients before it hits the oven. Also, don’t skimp on the chilling time—two hours is the minimum for these paleo lemon bars to set properly. If you’re worried, chill them for three! Coldness helps stabilize that egg-based custard.
Can I make a half batch or use a different sized pan?
You definitely can halve the recipe, but I’d honestly just suggest scaling it up! Baking paleo goods in tiny quantities can sometimes mess with how the ingredients behave. If you use a smaller pan, you’ll definitely need to reduce your baking time for the crust and filling—always check often! If you end up with leftover buttermilk, I have a guide on making quick buttermilk substitutes just in case you need it for another recipe!
Print
Gluten-Free Paleo Lemon Bars
- Total Time: 50 min
- Yield: 12 bars 1x
- Diet: Gluten Free
Description
A simple recipe for tart and sweet lemon bars made with almond flour, suitable for gluten-free and paleo diets.
Ingredients
- 1 1/2 cups almond flour
- 1/4 cup coconut oil, melted
- 1/4 cup maple syrup
- 1/4 teaspoon salt
- 3 large eggs
- 1/2 cup fresh lemon juice
- Zest of 1 lemon
- 1/2 cup maple syrup
- 1 tablespoon arrowroot starch or tapioca flour
Instructions
- Preheat your oven to 350 degrees Fahrenheit. Line an 8×8 inch baking pan with parchment paper, leaving an overhang on the sides.
- Prepare the crust: In a medium bowl, combine the almond flour, melted coconut oil, 1/4 cup maple syrup, and salt. Mix until a crumbly dough forms.
- Press the dough evenly into the bottom of the prepared pan. Bake the crust for 10 to 12 minutes, until lightly golden. Remove from the oven.
- Prepare the filling: In a separate bowl, whisk together the eggs, lemon juice, lemon zest, 1/2 cup maple syrup, and arrowroot starch until smooth.
- Pour the lemon filling evenly over the warm crust.
- Return the pan to the oven and bake for 20 to 25 minutes, or until the filling is set and no longer liquid in the center.
- Let the bars cool completely at room temperature, then chill in the refrigerator for at least 2 hours before slicing.
Notes
- For easier removal, lift the bars out of the pan using the parchment paper overhang.
- Store leftovers in an airtight container in the refrigerator.
- Prep Time: 15 min
- Cook Time: 35 min
- Category: Dessert
- Method: Baking
- Cuisine: American
Nutrition
- Serving Size: 1 bar
- Calories: 180
- Sugar: 14
- Sodium: 45
- Fat: 12
- Saturated Fat: 3
- Unsaturated Fat: 9
- Trans Fat: 0
- Carbohydrates: 16
- Fiber: 2
- Protein: 4
- Cholesterol: 40
Keywords: lemon bars, gluten free, paleo, almond flour, healthy dessert, paleo baking