
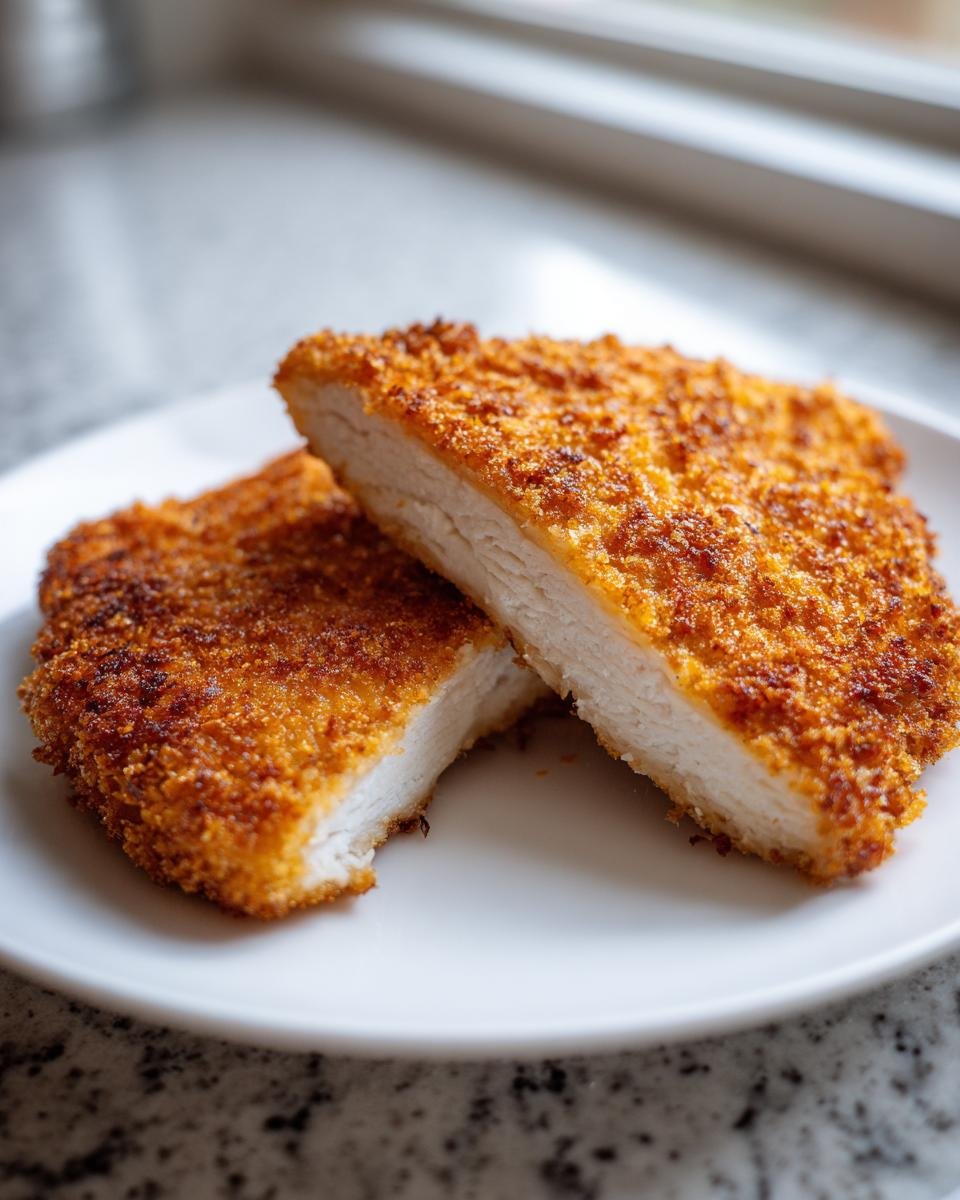
Listen, I have chased the perfect crunch my entire life! You know how sometimes you make breaded chicken and it’s just… sad and soggy two minutes after it leaves the pan? Well, worry no more. I finally cracked the code for achieving the ultimate Crispy Breaded Chicken Cutlets Irresistible Crunchy Delight. This isn’t just another fried chicken recipe; this is *the* technique that guarantees that audible crackle with every single bite. It all comes down to a few simple secrets in how we handle the breading station. Trust me, once you nail this easy setup, you won’t go back!
Why You Will Love These Crispy Breaded Chicken Cutlets Irresistible Crunchy Delight
I swear, this recipe is my new weeknight hero because it delivers maximum satisfaction with minimum fuss. You get that incredible, restaurant-quality texture without spending half the day in the kitchen. It’s all about that shatteringly crisp exterior! Here’s what makes these cutlets my go-to:
- The Crunch Factor: That Panko breading holds up beautifully—it stays crunchy even if they sit out for a few minutes.
- Speedy Dinner: Seriously, the total active time is under 30 minutes. Perfect for those frantic evenings.
- Pure Versatility: Slice them for salads, serve them over pasta, or stack them on a bun. They just work!
If you want to dive deeper into making your baked goods and coatings better in general, check out my tips on baking improvement techniques. It really helps with breading too!
Ingredients for Crispy Breaded Chicken Cutlets Irresistible Crunchy Delight
Okay, the ingredient list is simple, but listen closely: Panko is non-negotiable here! It’s what gives us that amazing, airy crunch. You’ll need two chicken breasts, pounded thin—like 1/4 inch thin. Then, we set up our dredging station: flour seasoned perfectly with salt, pepper, and garlic powder, your beaten eggs, and that glorious Panko breadcrumb pile. And yes, we need enough vegetable oil to get that beautiful fry going. For tips on making substitutes if you’re missing something, swing by this link about buttermilk swaps—sometimes things just happen in the kitchen!
Expert Tips for Achieving Crispy Breaded Chicken Cutlets
Look, knowing the right ingredients isn’t enough; the *technique* is what turns a good cutlet into that Irresistible Crunchy Delight. I’ve learned a few things the hard way, so let me save you some soggy frustration! My biggest game-changer was getting serious about chilling the breaded pieces. Seriously, if you have even five extra minutes, pop those breaded cutlets onto a rack in the fridge. It helps everything cement together, making them less likely to shed crumbs in the hot oil. And speaking of hot oil, temperature management is everything here.
The Secret to Maximum Adherence in Your Crispy Breaded Chicken Cutlets
This is where most people mess up! You need a three-stage journey: flour, egg, Panko, in that order. After you coat the chicken in the first layer of flour, you have to shake off every single speck of excess. If you don’t, that loose flour clumps up in the egg wash and burns! Then, give the chicken a good shake after the egg dip. Finally, when you press it into the Panko, you really need to apply gentle but firm pressure. Think of it like you are tucking the breadcrumbs in snugly, making sure every part kisses the Panko.
Oil Temperature Control for Perfect Frying
Listen to me: temperature is the king of crunch. If your oil is too cool, the chicken soaks up grease like a sponge, and you get limp, pale cutlets. If it’s scorching hot, the outside burns before the inside is safe to eat. You are aiming for a solid 350 degrees F (175°C). I use an instant-read thermometer because I trust it more than guessing! Also, never, ever overcrowd your pan. If you pile them in, the oil temperature immediately plummets, and you end up steaming your chicken instead of frying it. Cook in manageable batches, pull them out, and let them drain. You can read more about mastering cooking temperatures in my general baking guide, even though this is savory!
How to Prepare Crispy Breaded Chicken Cutlets Irresistible Crunchy Delight
Getting these to the finish line is almost as fun as eating them! We’ve prepped our chicken and set up that perfect breading station, so now it’s time to make some magic happen. The key here is staying organized so you don’t have raw chicken hands touching your seasoned flour!
First things first, get your oil heating up. You need about a half-inch in a big skillet, and you want that thermometer reading 350°F (175°C) before anything touches the pan. While that’s coming up to temp, start dredging. Take one of those lovely thin cutlets and press it into the seasoned flour mix. Don’t be shy, but remember to shake off the excess—we talked about that!
Next, dip it fully into the egg bath and let the drips fall away naturally. Then, straight into the Panko! Press that breading firmly on all sides; this is what guarantees the crunch we are after. Once your oil is ready, gently lay the cutlets in the pan. Be careful not to overcrowd, seriously! Cook them for about three to four minutes on the first side until they are gorgeous and golden brown. Flip them gently and cook the second side for another three to four minutes until they hit that safe 165°F inside. When they come out, they need to drain on a wire rack, not paper towels, so the bottom stays crispy. You can find my thoughts on getting that ultimate texture in my crispy chicken snack wrap tutorial!

Variations for Your Crispy Breaded Chicken Cutlets
Okay, while I truly believe the fried version gives you that maximum Irresistible Crunchy Delight, I know not everyone wants to deal with a skillet full of oil, or maybe you’re trying to keep things a little leaner for dinner. No problem at all! That recipe note mentioned baking, and that’s a fantastic alternative when frying isn’t convenient.
If you’re skipping the oil bath, you simply set your oven to 400 degrees F, arrange those breaded cutlets on a wire rack set over a baking sheet (this lets air circulate underneath so they crisp up better), and bake them for about 15 to 20 minutes. You’ll still get super tasty chicken, just not *quite* the deep-fried texture—but hey, it’s quicker cleanup!
Now, let’s talk about jazzing up the flavor! The basic salt, pepper, and garlic powder in the flour is classic, but you can totally personalize it. If you love a little smokiness, try whisking in a teaspoon of smoked paprika into your flour mixture. A little dried parsley or Italian seasoning mixed right into the Panko breadcrumbs gives it a nice herbal lift. If you’re feeling spicy, cayenne pepper is your best friend!
For those of you who own an air fryer—and if you don’t yet, you should seriously look into one—you can adapt this breading method for that appliance too! It gets surprisingly close to fried texture. You can see exactly how I manage that over in my recipe for Air Fryer Chicken Tenders; I use the exact same breading sequence for those!
Serving Suggestions for Crispy Breaded Chicken Cutlets
Now that you’ve created this masterpiece of crunch—that amazing Irresistible Crunchy Delight—you need the perfect crew to serve it with! Think about what complements a crispy fried texture. You want something cooling, bright, or creamy to cut through the richness, right?
My top, can’t-miss suggestion is always a big squeeze of fresh lemon juice right over the hot cutlet when it hits your plate. That bright acidity wakes up every flavor in the chicken and the breading. It’s simple, but wow, does it make a difference!
For a full dinner, you absolutely can’t go wrong with classic creamy mashed potatoes. The soft, smooth texture against the sharp crunch of the chicken is just heaven. Or, if you’re trying to keep it lighter, pair it with something tangy and fresh. I always make a big batch of my easy herb tomato salad when I make these cutlets. The juicy tomatoes and fresh basil are the perfect counterpart to the fried flavor.
If you’re making these into little chicken sandwiches, you still need that brightness! A thin smear of garlic aioli or—if you’re feeling bold—a little sprinkle of thinly sliced pickled red onions on the bun really makes the whole thing sing. Honestly, though, even just serving it alongside some creamy coleslaw is perfection. Keep the sides simple so that incredible crispy texture remains the star of the show!
Storage and Reheating Instructions for Crispy Breaded Chicken Cutlets
So, you have leftovers of that perfect Irresistible Crunchy Delight? Lucky you! But we have to treat these cutlets gently if we want them to survive the night and keep some of that glorious crunch. The enemy here is moisture trapped against the crust, which turns delicious Panko into sad, soggy blankets.
The absolute first rule of storage is cooling. Do not, under any circumstances, seal up warm chicken cutlets! Let them cool completely on a wire rack—yes, the same rack you used for draining oil—until they are room temperature. This lets any residual steam escape. Once they are totally cool, transfer them to an airtight container, but here’s my little trick: I actually put a paper towel between the layers of cutlets. It helps wick away any lingering moisture trying to get trapped down there.
Now, let’s talk about reheating because the microwave is your sworn enemy if you want crunch reinstated. That appliance steams everything, and your crispy chicken will turn rubbery instantly. We need dry, concentrated heat to bring that Panko back to life!
The best way to rescue your cutlets is in the oven or, even better, the air fryer. If you’re using the oven, preheat it to about 375°F (190°C). Place the cutlets directly on a wire rack set over a baking sheet. This allows the heat to hit the bottom crust, which is usually where sogginess starts. Give them about 8 to 10 minutes. You want them hot all the way through, and you’ll notice that coating starting to firm up and crisp again.
If you have an air fryer, you’re in luck! Set it to about 360°F (180°C) and cook for maybe 4 to 6 minutes, flipping halfway through. The air circulation is fantastic for restoring that original crunch. It works like magic, bringing that golden texture right back to life so you can enjoy the crunch all over again!
Frequently Asked Questions About Crispy Breaded Chicken Cutlets
I know you might still have a couple of lingering questions about getting that perfect, shatteringly crisp coating on your cutlets. That’s totally fair! Making genuinely crispy chicken means paying attention to the little details. Here are a few things I get asked all the time about this recipe, including some pointers that I use when I’m tackling tougher baking projects, which you can check out more about here: my general baking guide.
Can I use chicken thighs instead of breasts for this recipe?
Oh, absolutely you can! Chicken thighs are actually super forgiving because they have more natural fat in them, meaning they stay juicier and it’s much harder to dry them out. You still need to pound them thin, just like the breasts, so they cook evenly. The main adjustment you’ll need to make is the cooking time. Because dark meat takes a little longer to reach that safe 165°F internal temperature, I’d add an extra minute or so per side when frying. Don’t rush it; that rich flavor of the thigh meat pairs beautifully with the Panko!
How do I keep my Crispy Breaded Chicken Cutlets from getting soggy?
This is the million-dollar question for all things fried! The biggest mistake people make is draining the hot cutlets on a stack of paper towels. I know it seems logical, but as the cutlet cools, the steam gets trapped underneath the crust, and guess what? Soggy bottom! My non-negotiable rule is draining them on a proper wire rack set over a baking sheet. This lets the air circulate 360 degrees around the chicken, allowing the steam to escape freely. That little bit of elevation makes a huge difference in maintaining that Irresistible Crunchy Delight long after they leave the oil.
What oil is best for frying to get the best crunch?
You need an oil that can handle the heat without breaking down or smoking too much, which is called having a high smoke point. For this recipe, I lean heavily on neutral oils that don’t impart too much flavor. Simple vegetable oil works perfectly because it’s cheap and has a high smoke point. Canola oil is another fantastic, neutral choice. My personal favorite, if I’m feeling fancy, is peanut oil—it gives a really nice, clean fry. Just avoid olive oil; it burns way too fast for this kind of moderate, medium-high frying temperature. Always hit that 350°F mark for the best results!
Nutritional Estimate for Crispy Breaded Chicken Cutlets
Okay, so while we are absolutely here for the flavor and that stunning, Irresistible Crunchy Delight, I know some of you are tracking macros or watching your intake. I pulled the estimated numbers from the general recipe guidelines, but I always want to remind everyone that these are just starting points!
When you’re frying chicken, the amount of oil that actually soaks into the Panko crust can change things significantly, so treat these values as a decent baseline, not gospel truth. If you bake them instead of frying, you’ll see those fat numbers drop considerably, which is great!
For one estimated serving (one cutlet), here’s what we’re generally looking at:
- Serving Size: 1 cutlet
- Calories: 350
- Protein: 35g (That’s why chicken is awesome!)
- Fat: 15g (This is the variable part!)
- Saturated Fat: 3g
- Carbohydrates: 20g (Mostly from the flour and Panko)
- Sugar: 1g (Nice and low!)
- Sodium: 450mg
Remember, these estimates are based on the specific amounts in the recipe details provided. If you use thinner chicken or soak up less oil—or maybe you use a lighter dusting of seasoning—those numbers will shift! It’s all about how you make it your own, but knowing the baseline helps when planning meals around these crispy beauties.
Print
Crispy Breaded Chicken Cutlets
- Total Time: 25 min
- Yield: 4 servings 1x
- Diet: Low Fat
Description
Simple recipe for making crunchy breaded chicken cutlets.
Ingredients
- 2 boneless, skinless chicken breasts, halved horizontally
- 1 cup all-purpose flour
- 2 large eggs, beaten
- 1 1/2 cups panko breadcrumbs
- 1/2 teaspoon salt
- 1/4 teaspoon black pepper
- 1/4 teaspoon garlic powder
- Vegetable oil for frying
Instructions
- Pound the chicken halves between two sheets of plastic wrap until about 1/4 inch thick.
- Set up a breading station with three shallow dishes. Place flour in the first dish. Mix salt, pepper, and garlic powder into the flour.
- Place beaten eggs in the second dish.
- Place panko breadcrumbs in the third dish.
- Dredge each chicken cutlet first in the flour mixture, shaking off excess.
- Dip the floured cutlet into the egg, letting excess drip off.
- Coat the cutlet thoroughly in the panko breadcrumbs, pressing lightly to adhere.
- Heat about 1/2 inch of vegetable oil in a large skillet over medium-high heat until it reaches 350 degrees F (175 degrees C).
- Carefully place cutlets in the hot oil, ensuring not to overcrowd the pan.
- Fry for 3 to 4 minutes per side, until golden brown and cooked through (internal temperature reaches 165 degrees F or 74 degrees C).
- Remove cutlets from the oil and place them on a wire rack set over a baking sheet to drain excess oil.
Notes
- For extra crispiness, chill the breaded cutlets for 15 minutes before frying.
- You can bake these cutlets at 400 degrees F (200 degrees C) for 15-20 minutes if you prefer not to fry.
- Prep Time: 15 min
- Cook Time: 10 min
- Category: Main Course
- Method: Frying
- Cuisine: American
Nutrition
- Serving Size: 1 cutlet
- Calories: 350
- Sugar: 1
- Sodium: 450
- Fat: 15
- Saturated Fat: 3
- Unsaturated Fat: 12
- Trans Fat: 0
- Carbohydrates: 20
- Fiber: 1
- Protein: 35
- Cholesterol: 120
Keywords: crispy chicken, breaded cutlets, fried chicken, panko, crunchy chicken