
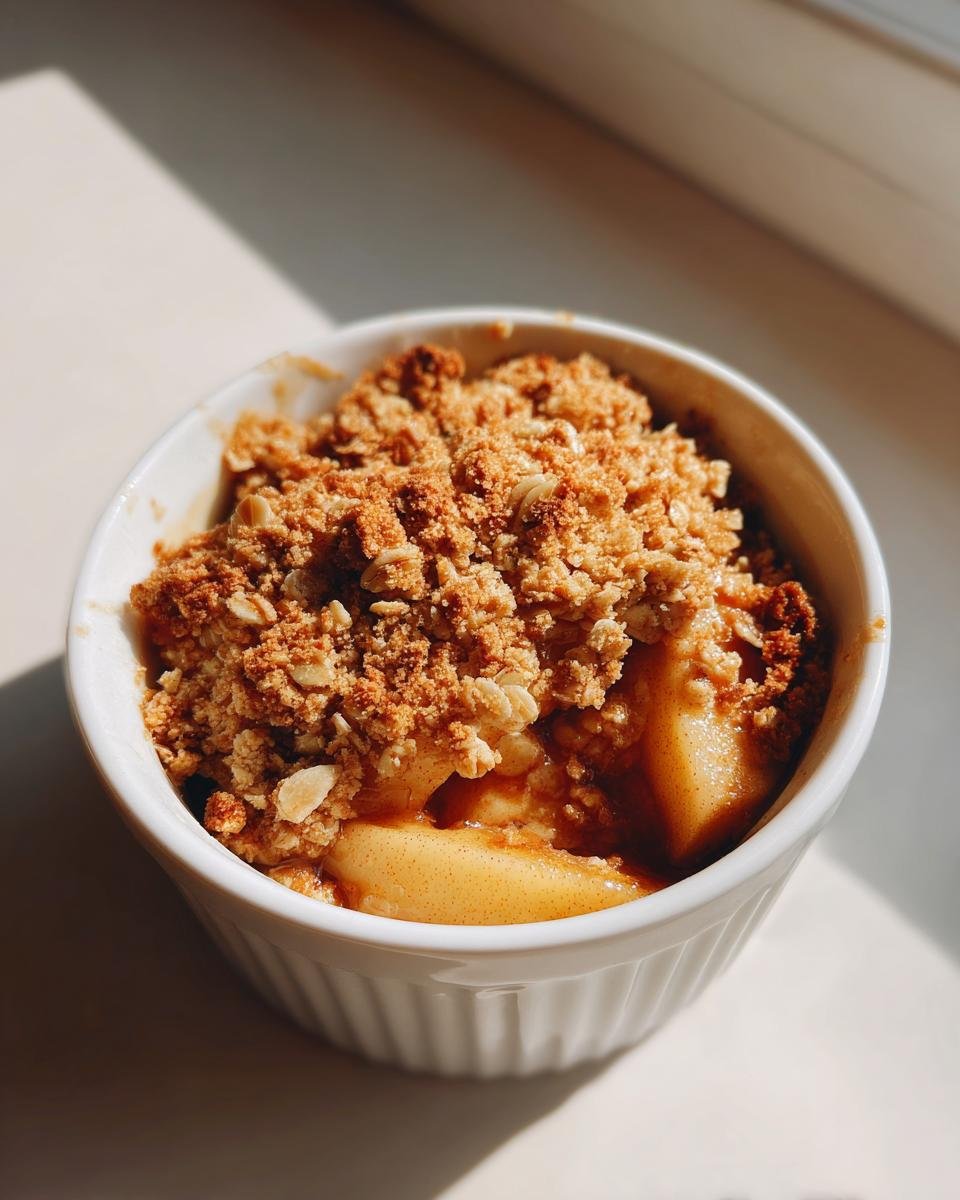
Oh, friends, there’s nothing quite like the smell of cinnamon and warm baked fruit filling your kitchen, right? Forget fancy tarts; sometimes you just need pure, unadulterated comfort. That’s exactly what this Baked Apple Crisp is! I spent a whole autumn chasing the perfect ratio of tart apple to crunchy topping, and trust me, I finally cracked the code.
This isn’t just *any* crisp; it’s the version where the apples are meltingly tender but the oat topping stays ridiculously crisp—we don’t do soggy bottoms here, nope! I perfected this exact recipe when I needed a quick dessert for a church potluck after a terrible week. It came out golden and everyone asked for the recipe immediately. You are going to love this simple Baked Apple Crisp.
Why This Baked Apple Crisp Recipe Works So Well
When you open your oven door to check on this dessert, you’ll instantly know why I stand by this recipe. It’s all about hitting those perfect textures that other crisps sometimes miss. I used to struggle with toppings that dissolved or apples that turned into mush. Not anymore!
Here are the three main reasons this Baked Apple Crisp is my go-to, year after year:
- The Topping Never Quits: We use cold butter cut into small pieces, and that’s key. When the cold butter hits the hot oven, it creates those glorious little pockets that bake into a crunchy, irresistible layer. I’ve even got some great tips on how to keep it crunchy later, which you can read about right here if you’re interested in general baking tricks.
- Tart Meets Sweet Perfection: Using a firm, slightly tart apple—like Granny Smith which I always keep on hand—means the apple softens without turning to soup. The small amount of granulated sugar on the apples cooks down just enough to balance the tartness perfectly.
- It’s So Fast, You Can Make It Spontaneously: Seriously, from the time I decide I want dessert to the time it hits the oven, it’s usually under 15 minutes of prep. This means even a busy Tuesday night calls for homemade Baked Apple Crisp!
It’s just straightforward, honest baking that always delivers a showstopper. You really can’t mess this one up.
Essential Ingredients for the Perfect Baked Apple Crisp
Okay, listen up, because the magic of this Baked Apple Crisp lives and dies by what you put in the bowl. The beauty of this recipe is that everything you need is likely already sitting in your pantry or fruit bowl. We need to keep the filling simple so the apples shine, and we need our topping ingredients to be *cold*—trust me on the temperature thing!
When I look at this ingredient list, I see pure potential for comfort. You don’t need any tricky extracts or specialty flours here; just good, honest stuff. Here’s exactly what you’ll need to gather before you start making a mess (the best part of cooking!):
For the Apple Filling in Your Baked Apple Crisp
This is the heart of the dessert, so use apples you actually like eating raw! I always reach for Granny Smith because they hold their shape beautifully and give that necessary little kick of tartness.
- 6 medium apples (I highly recommend grabbing Granny Smith or Honeycrisp)
- 1/4 cup granulated sugar
- 1 tablespoon all-purpose flour
- 1 teaspoon ground cinnamon
Remember, those apples need to be peeled, cored, and sliced consistently about 1/4 inch thick. If they’re too thick, they stay hard; too thin, and you get applesauce!
For the Crunchy Topping of Your Baked Apple Crisp
This is where we create the contrast to those soft, warm apples. The oats have to be the right kind—we want rolled oats, not the quick-cooking instant ones, or you’ll lose that wonderful chewiness and structure!
- 1/2 cup all-purpose flour
- 1/2 cup rolled oats
- 1/2 cup packed brown sugar (use the dark brown if you have it; it adds a richer flavor!)
- 1/4 teaspoon ground nutmeg
- 1/2 cup cold unsalted butter, cut into small pieces
The secret here is that butter. It must be cold, straight from the fridge, and cut into little cubes. If it’s warm, it melts into the flour mixture instead of creating those fantastic crumbs we are aiming for.
Step-by-Step Instructions for Making Baked Apple Crisp
Alright, now that you’ve got your beautiful ingredients organized, let’s get this into the oven! The steps for a successful Baked Apple Crisp are broken into two distinct jobs: the soft, sweet apple core and the crunchy, buttery crown. Pay attention to the temperature settings; baking is chemistry, but this recipe is forgiving, I promise!
First things first: always get your oven preheated! I set mine to 375 degrees F (190 degrees C) right away. While that’s warming up, grab your 8×8 inch baking dish and give it a quick coat of butter or whatever non-stick spray you use. This little step prevents sticking later, which is always a headache!
Preparing the Apple Layer for Your Baked Apple Crisp
Time to suit up your apples! Peel, core, and slice all six of those beauties into about 1/4 inch pieces. Try to keep them uniform so they cook evenly—no one wants a half-raw apple in their dessert! Once they are all sliced up, pop them into the prepared dish.
In a separate little bowl, quickly whisk together the granulated sugar, the single tablespoon of flour (this helps thicken the juices), and your cinnamon. Now, sprinkle this over the apples and get in there with your hands or a spoon and toss everything gently. We want every single slice coated lightly, making sure the juices start forming at the bottom.
Creating the Crumb Topping for Your Baked Apple Crisp
Switch bowls now! We need a clean space for the topping. Combine the remaining flour, your rolled oats, the packed brown sugar, and that pinch of nutmeg. Give those dry ingredients a quick stir to marry the spices.
This is the fun part! Take those cold butter pieces—and I mean cold—and use a pastry blender or even just your fingertips to ‘cut’ the butter into the dry mix. You are looking for coarse crumbs, basically little pebbles of buttery oat goodness. Don’t overwork it until it looks like paste; stop as soon as it resembles a coarse meal. Then, sprinkle this crumb mixture evenly across the apples. Don’t press it down!

Baking and Resting Your Delicious Baked Apple Crisp
Into the preheated 375°F oven it goes! You’re looking at 35 to 45 minutes total. How do you know when it’s done? The topping should be a gorgeous golden brown, but more importantly, you need to do the fork test. Pierce the apples near the center with a fork; if it slides in easily, they are tender and ready!
Resist the urge to dive in immediately! You absolutely must let this Baked Apple Crisp cool for at least 10 minutes on the counter. This small rest lets those juices settle down and thickens the sauce slightly. If you skip this step, all those beautiful juices will run all over your plate. For more tips on perfect crisp results, check out this handy guide here!
Expert Tips for the Best Baked Apple Crisp
So, you’ve got the basic recipe down, but you want the *best* Baked Apple Crisp of your life? I hear you! I’ve made this recipe enough times now that I’ve learned a few tricks to upgrade it from good to absolutely legendary. These bits of wisdom are what separate a weeknight dessert from something you actually brag about later!
Preventing that Pesky Soggy Bottom
This is the number one complaint I hear about crisps, and it drives me bananas! You want a crispy lid, sure, but you don’t want to dig through a damp, wet bottom layer to get to the good stuff. My trick involves a slight adjustment to the apple coating step.
Instead of just tossing the apples in the sugar/cinnamon mix, I always add a tiny bit of cornstarch—maybe just a teaspoon—along with the flour and sugar. The cornstarch loves to grab onto the moisture the apples release as they bake. It creates a lovely, thick glaze underneath the fruit layer, stopping the juices from seeping into and soaking your topping. It’s a simple addition, but wow, does it make a difference!
My Secret to Super Crunchy Crumble Texture
We already stressed using cold butter, but let’s talk about getting that perfect granular texture in the topping. When you’re cutting in the butter, stop mixing the second you see flakes and crumbs that are about the size of little peas or flattened oatmeal flakes. If you mix too much and it starts turning into a paste, you’re warming the butter, and that’s bad news for crispness.
Also, after you sprinkle the topping over the apples, here’s something I sometimes do, especially if I notice my topping looks a little sparse: I take just a tiny bit more cold butter, slice it really thinly, and dot a few extra little pieces right on top of the crumb layer before it goes into the oven. Those extra cold spots melt into golden pools of crispness on the surface. It’s my little secret!
Boosting the Flavor Profile
Cinnamon and nutmeg are winners, but we can push the flavor harder without messing up the classic profile. If you have fresh orange zest lingering from a baking project, grab about half a teaspoon and mix it right in with the apples and the sugar coating. That bright citrus note really wakes up the sweetness of the apples.
And for the oats? If you have time, try toasting your rolled oats lightly in a dry skillet for about five minutes before mixing them into the topping. Toasting them brings out a wonderful nutty depth that you just don’t get when they go straight out of the canister. For more general tips on transforming your baking game, check out some of my favorite universal tips here!
Ingredient Notes and Substitutions for Baked Apple Crisp
I get so many questions about ingredient swaps, and honestly, while I like to keep things classic in my kitchen, I totally understand needing to use what you have on hand! This Baked Apple Crisp is pretty flexible, but you have to be smart about what you swap out, especially when it comes to the fruit and the fat.
Let’s talk about those glorious apples first. The recipe calls for firm baking apples like Granny Smith or Honeycrisp, and that’s because they keep their shape when they steam under that delicious topping. But feel free to mix and match, just don’t use something super soft like McIntosh, or you’ll end up with apple sauce!
The Best Apples to Use (And Which Ones to Avoid)
When I make this, I usually go for a 50/50 mix of tart and sweet. If I only use Granny Smith, sometimes it’s a little too sharp for the kids, so I’ll blend them with a Honeycrisp or a Fuji. Just ensure your chosen apples are firm enough to resist turning mushy during that 40-minute bake time. If you’re using apples picked fresh from the orchard, give them a good squeeze to check firmness first!
Butter Substitution for Dietary Needs
Butter provides the flavor and the structure for that crumbly top, and frankly, it’s hard to beat. But if you need to make this Baked Apple Crisp dairy-free, you certainly can! You’ll want to use a high-quality, solid vegan butter substitute. Make sure it’s the block style, not the soft spreadable tubs, because the water content is too high in the tubs.
Another common question is about coconut oil. Yes, you can substitute coconut oil for the butter, but you need to use it *cold* and cut it into small pieces, just like the butter. Coconut oil is softer than butter at room temperature, so keep it chilling in the freezer for about 15 minutes before you cut it up for the topping. It will give the topping a slightly different texture, often a little lighter, but it still delivers that wonderful crunch!
Oats and Sugar Adjustments
Please don’t try to use instant oats here; they break down way too fast and will give you more of a paste than a crisp topping. Stick to old-fashioned rolled oats—that’s the only way to get that proper chew! As for sugar, I really do encourage the dark brown sugar for the topping because that molasses flavor really complements the baked cinnamon. If you only have light brown sugar, you can use it, but maybe add just a tiny extra dash of cinnamon to compensate for the missing rich flavor note.
Serving Suggestions for Your Warm Baked Apple Crisp
Look, I’m going to be totally honest: any Baked Apple Crisp that isn’t served warm is missing out on half the experience. That heat melts the toppings and brings out the intense aroma of the cinnamon and baked apples. But what you serve *with* it can elevate this simple dessert into something truly memorable.
My original notes mentioned the classics—vanilla ice cream or whipped cream—and those are non-negotiables, in my opinion! A big scoop of high-quality vanilla bean ice cream melting slowly over the hot crumble? Perfection. That contrast between hot and cold is just divine. If you’re making a huge batch, maybe try my caramel sauce over the top instead of plain ice cream one night; it’s decadent, but oh!).

The Classic Duo: Ice Cream and Whipped Cream
When serving up a classic Baked Apple Crisp, you need something cold to cut through the richness of the oat topping. Vanilla ice cream is the undisputed champion here. It just seems to soak up the cinnamon-spiced apple juices beautifully as it melts.
If you’re feeling a bit lighter, homemade whipped cream is lovely. You whip heavy cream with just a touch of powdered sugar and a tiny splash of vanilla extract until soft peaks form. Don’t over-whip it into stiff peaks, though; you want that billowy softness that drapes nicely over the scoop of crisp!
My Favorite Unexpected Pairing: Sharp Cheddar
Now, this one might make some people raise an eyebrow, but hear me out because this is East Coast comfort food served up right! A thin slice of very sharp, aged cheddar cheese melted right over a warm piece of apple crisp is incredible. Seriously!
The saltiness and the intense, slightly sour tang of a sharp cheddar cut through the sweetness of the brown sugar and baked apples. It works the same way a salted caramel works—it balances everything out. I only ever serve it this way for cozy nights in, and I promise, once you try it, you’ll be craving that savory hit!

Other Ways to Dress Up Your Baked Apple Crisp
If dairy isn’t your thing or you just want to change it up, a drizzle of maple syrup, especially a high-quality Grade A Dark Robust maple syrup, is always a winner. It enhances the caramel notes from the brown sugar in the topping.
Also, consider a light dusting of powdered sugar mixed with a pinch of extra nutmeg right before serving, just to make it look extra pretty when you bring it to the table. You can never have too much spice, I always say!
Storage and Reheating Instructions for Leftover Baked Apple Crisp
Oh, the joys of having leftovers! Honestly, sometimes I think I bake the Baked Apple Crisp just just so I can have an excuse to eat it for breakfast the next day. But because we worked so hard to get that topping crispy, we have to handle leftovers with a little bit of care so we don’t end up with a soggy mess later on.
If you manage to have any left after dessert wraps up, the storage is super simple. Just make sure it has cooled down completely before you put it away. Warm food creates steam, and steam equals soggy fruit and topping. Nobody wants that tragedy!
The Best Way to Store Your Baked Apple Crisp
Once completely cool, grab an airtight container. You can use the original baking dish if it has a tight lid, or you can transfer the whole thing, or just the portions you want to save, into a standard food storage container. Keep it covered in the refrigerator. Because of all that lovely moisture from the apples, it will last quite well for about four days.
I find that if I leave it too long—say past day five—the topping starts to get a little too soft, even when refrigerated. It’s still perfectly edible, of course! But for peak enjoyment of that crunch, aim to finish it within four days. If you’re only saving a single serving, sticking it in a small, separate container is best!
Reheating Tactics: Saving the Crunch
This is the most important part of the whole storage process! You absolutely *cannot* reheat Baked Apple Crisp in the microwave if you want any crispness left. The microwave heats the water molecules, and that just turns your beautiful oat topping into warm mush instantly. It’s a flavor disaster zone, trust me.
The oven is your best friend here. Take out the portion you want to eat—I usually just reheat whatever is left in the pan, or scoop out a serving onto a small oven-safe ramekin if I’m only having one portion. Pop it into a preheated oven at about 350 degrees F (175 degrees C) for about 10 to 15 minutes. This allows the heat to warm the apples through and, more importantly, it dries out the topping again, bringing back that lovely golden crunch!
Serving Leftovers Extra Special
Since you took the extra time to reheat it properly in the oven, you should treat yourself! When you pull that warmed-up Baked Apple Crisp out, it’s the perfect time to add a fresh topping that slightly melts.
If you’re reheating a large dish, add a light sprinkle of extra brown sugar and a few tiny dots of cold butter right on top before you put it back in the oven for the last five minutes. That will give you a fresh, caramelized layer. Then, serve it up warm with a brand-new scoop of ice cream. It will taste like you just baked it this minute, I swear!
Frequently Asked Questions About Baked Apple Crisp
I know, I know, sometimes you just have a quick question that pops up while you’re standing in the kitchen, staring at a bag of apples. I’ve tried every variation of this Baked Apple Crisp under the sun, so I’ve gathered the most common things people ask me when they’re whipping up a batch. Hopefully, this clears up any last-minute doubts!
Can I use frozen apples instead of fresh ones for this Baked Apple Crisp?
This is one I get asked a lot, especially when the fresh apple season is over! If you absolutely must use frozen apples, you can, but you have to be careful about the sogginess factor. Frozen apples release way more water than fresh apples do when they heat up, and that’s a recipe for a soupy bottom layer.
If you go the frozen route, you absolutely must toss the apples with a little extra flour—maybe two tablespoons total instead of just one—when you’re coating them in sugar and spice. And please, for the love of crispness, don’t thaw them first! Put them directly from the freezer into the baking dish. You might also need to add about 5 to 10 extra minutes to the baking time since the frozen fruit chills the dish significantly.
My crisp topping isn’t actually crisping up; it’s just getting dark. What am I doing wrong?
Ugh, that’s the worst! A dark, soft topping is such a letdown after all that work. Usually, this means one of two things: either your apples released too much moisture and basically steamed the topping, or the topping wasn’t cold enough to begin with. If it’s already browning too much but the apples underneath aren’t tender yet, here’s my quick fix!
Carefully take the dish out of the oven, and while it’s still hot, quickly lay a large piece of aluminum foil loosely over the top, just tenting it. This will block the direct heat to the topping and let the steam escape without turning the apples mushy. Give it another 10 minutes, check the apples, and if they are tender, you’re good to go! Next time, remember to use that cold butter trick religiously!
Can I assemble the entire Baked Apple Crisp ahead of time and bake it later?
Yes, you totally can assemble this ahead of time, which is great for holiday meal prep! You need to keep the two components separate until the very last minute, though. If you mix the apples and the topping too early, the sugar draws moisture out of the apples and makes the topping soggy before it even sees the oven.
So, here’s how I do it: Prepare the apples and put them in the dish, ready to go. Prepare the crumb topping and store it in a separate sealed container in the fridge. When you are ready to bake, preheat that oven, sprinkle the topping over the cool apples, and bake as directed. If the topping comes straight from the fridge, it might need an extra 5 minutes of baking time to get perfectly golden. For more general baking strategy talk, you might find some interesting tidbits here!
Share Your Baked Apple Crisp Success
Honestly, finishing a batch of Baked Apple Crisp and having that perfect aroma fill your home is such a rewarding moment. It proves that simple, traditional cooking always wins out over anything complicated!
I truly hope this recipe becomes your go-to comfort dessert. Once you conquer this one, I want to hear all about it! Did you use Honeycrisp or Granny Smith? Did you try the sharp cheddar serving suggestion? Don’t keep your baking triumphs to yourself!
Please leave a star rating right below this section if you loved the recipe—it really helps other home cooks find the best tried-and-true desserts. Snap a picture of your beautiful golden topping and tag me! Happy baking, friends!
Print
Baked Apple Crisp
- Total Time: 55 min
- Yield: 6 servings 1x
- Diet: Vegetarian
Description
A simple recipe for a warm baked apple crisp with a crunchy topping.
Ingredients
- 6 medium apples (such as Granny Smith or Honeycrisp)
- 1/4 cup granulated sugar
- 1 tablespoon all-purpose flour
- 1 teaspoon ground cinnamon
- 1/2 cup all-purpose flour
- 1/2 cup rolled oats
- 1/2 cup packed brown sugar
- 1/4 teaspoon ground nutmeg
- 1/2 cup cold unsalted butter, cut into small pieces
Instructions
- Preheat your oven to 375 degrees F (190 degrees C). Grease an 8×8 inch baking dish.
- Peel, core, and slice the apples into 1/4 inch thick pieces. Place the apple slices in the prepared baking dish.
- In a small bowl, mix the 1/4 cup granulated sugar, 1 tablespoon flour, and cinnamon. Sprinkle this mixture over the apples and toss gently to coat.
- In a separate medium bowl, combine the 1/2 cup flour, rolled oats, brown sugar, and nutmeg.
- Cut in the cold butter using a pastry blender or your fingers until the mixture resembles coarse crumbs.
- Sprinkle the crumb mixture evenly over the apples.
- Bake for 35 to 45 minutes, or until the topping is golden brown and the apples are tender when pierced with a fork.
- Let the crisp cool for at least 10 minutes before serving.
Notes
- Serve warm with vanilla ice cream or whipped cream.
- You can substitute other firm baking apples for the suggested varieties.
- Prep Time: 15 min
- Cook Time: 40 min
- Category: Dessert
- Method: Baking
- Cuisine: American
Nutrition
- Serving Size: 1 serving
- Calories: 320
- Sugar: 35
- Sodium: 5
- Fat: 16
- Saturated Fat: 10
- Unsaturated Fat: 6
- Trans Fat: 0
- Carbohydrates: 45
- Fiber: 4
- Protein: 3
- Cholesterol: 40
Keywords: apple crisp, baked apples, oat topping, cinnamon dessert, fall dessert