
Oh, there’s just nothing that lifts my spirits like a truly classic, creamy dessert, you know? Forget the fussy no-bakes; I’m talking about the real deal—the kind that bakes up perfectly golden and sinks just a tiny bit in the middle as it cools. That’s why I’m sharing my absolute favorite recipe today: a straightforward, no-fail baked Cherry Cheesecake. I remember my Aunt Carol always made this for every summer BBQ. The smell of the warm graham cracker crust mixing with that tangy, sweet cream cheese filling just took me right back to childhood picnics. It’s everything you want in a baked cheesecake, but I promise you, it’s so much easier than you think!
Why This Cherry Cheesecake Recipe Works So Well
I’ve tested a million cheesecake recipes, but this one is the gold standard because it focuses on getting the basics right without any weird steps. Honestly, sticking to the plan here guarantees you won’t end up with cracked edges or a sloppy center. It’s all about that balance between a sturdy base and a ridiculously smooth interior. For more tips on getting your baking right, check out my general guide on baking confidence! You can read more about boosting your baking here.
- It’s truly straightforward, even for a beginner baker.
- The texture is exactly what you expect: dense, creamy heaven.
- The classic pairing of buttery graham cracker and tangy cherry is just perfect.
Perfect Graham Cracker Crust for Your Cherry Cheesecake
We aren’t messing around with fancy cookie bases here! This is the classic graham cracker crust, and it’s what holds everything together. You need to really press that crumb mixture down firmly into the pan. I use the bottom of a measuring cup to really compact it before it goes into the oven for those ten minutes. That pre-bake step is non-negotiable because it sets the crust so it doesn’t get soggy under all that creamy filling!
Achieving the Creamiest Filling for Your Cherry Cheesecake
The secret to that melt-in-your-mouth texture? Temperature! Seriously, your cream cheese must be fully softened—room temperature soft. When you start mixing, beat that cheese until it’s velvety smooth before even looking at the sugar. When you add the eggs, you must introduce them one by one and stop mixing the second they disappear. Overmixing those eggs throws air into the batter, and air is the enemy of a smooth top!
Ingredients Needed for Simple Cherry Cheesecake
Okay, you can’t make a great Cherry Cheesecake without the right components, and I want you set up for success right from the start. I’ve laid out exactly what you need, separated into the three main parts: the crust, the filling, and that sweet, vibrant topping. Don’t even think about using cold cream cheese for this—it needs to be fully softened, or you’ll end up with frustrating little lumps instead of that glorious smooth texture.
For the crust, it’s super basic, just graham crumbs, a bit of sugar to help it brown, and melted butter to bind it all together. You need about a cup and a half of crumbs total. Remember, the butter has to be melted before you mix it in!
Now for the star of the show, the filling! We are using three full 8-ounce packages of cream cheese; don’t skimp on the cheese! You’ll also need a touch of vanilla extract—a full teaspoon—and a fair amount of sugar to balance the tang. The most important part of the filling mix is making sure you have exactly 4 large eggs. Make sure no partial eggs sneak into that batter!
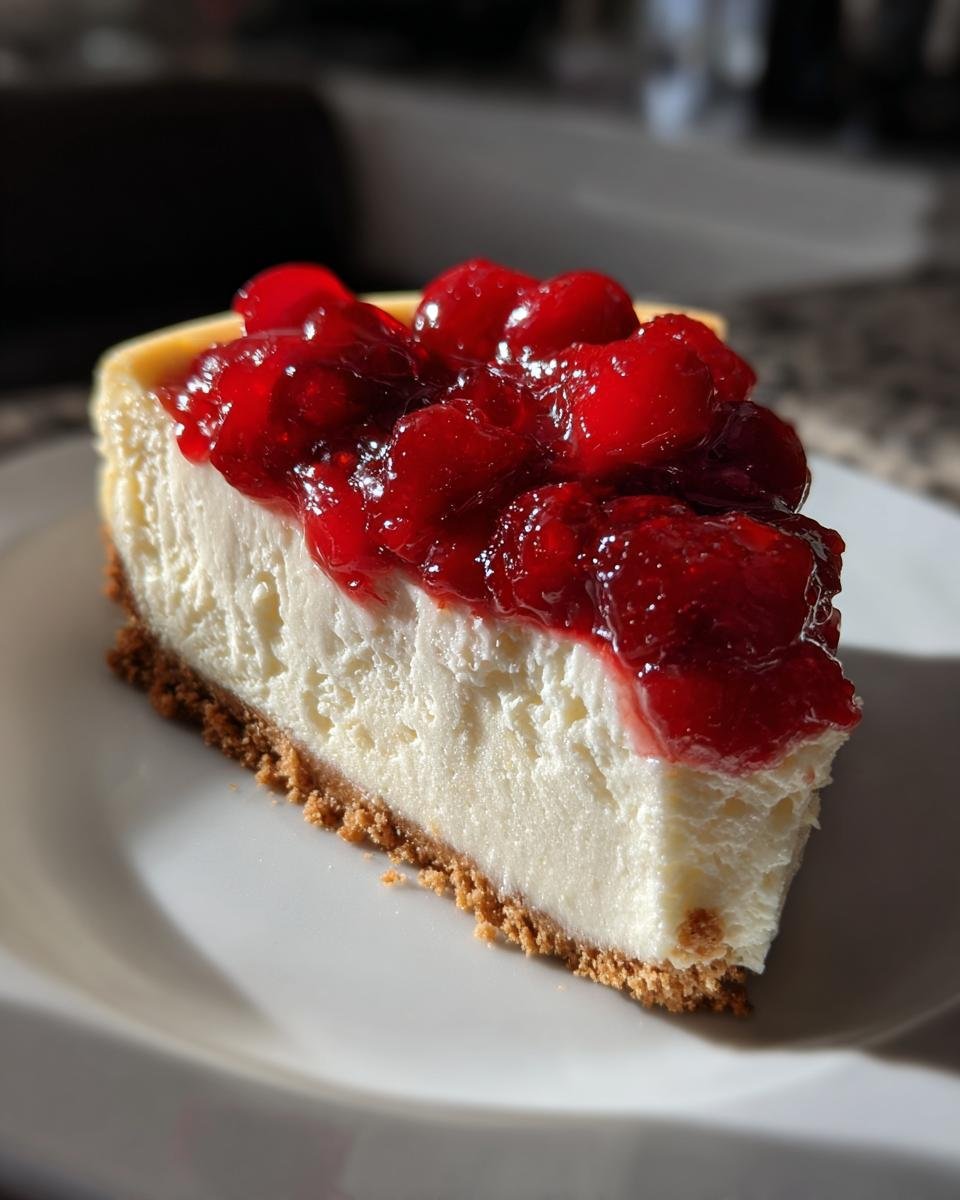
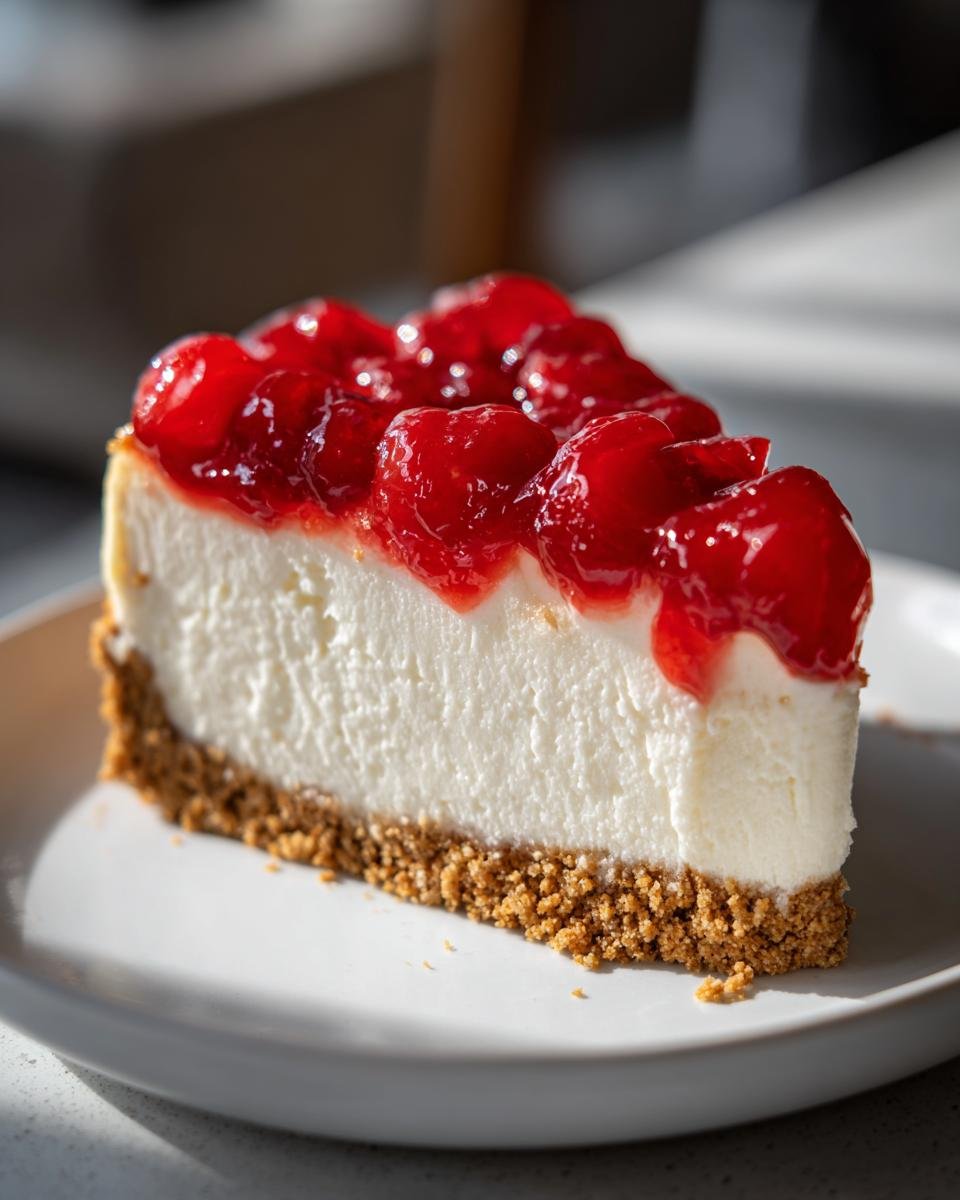
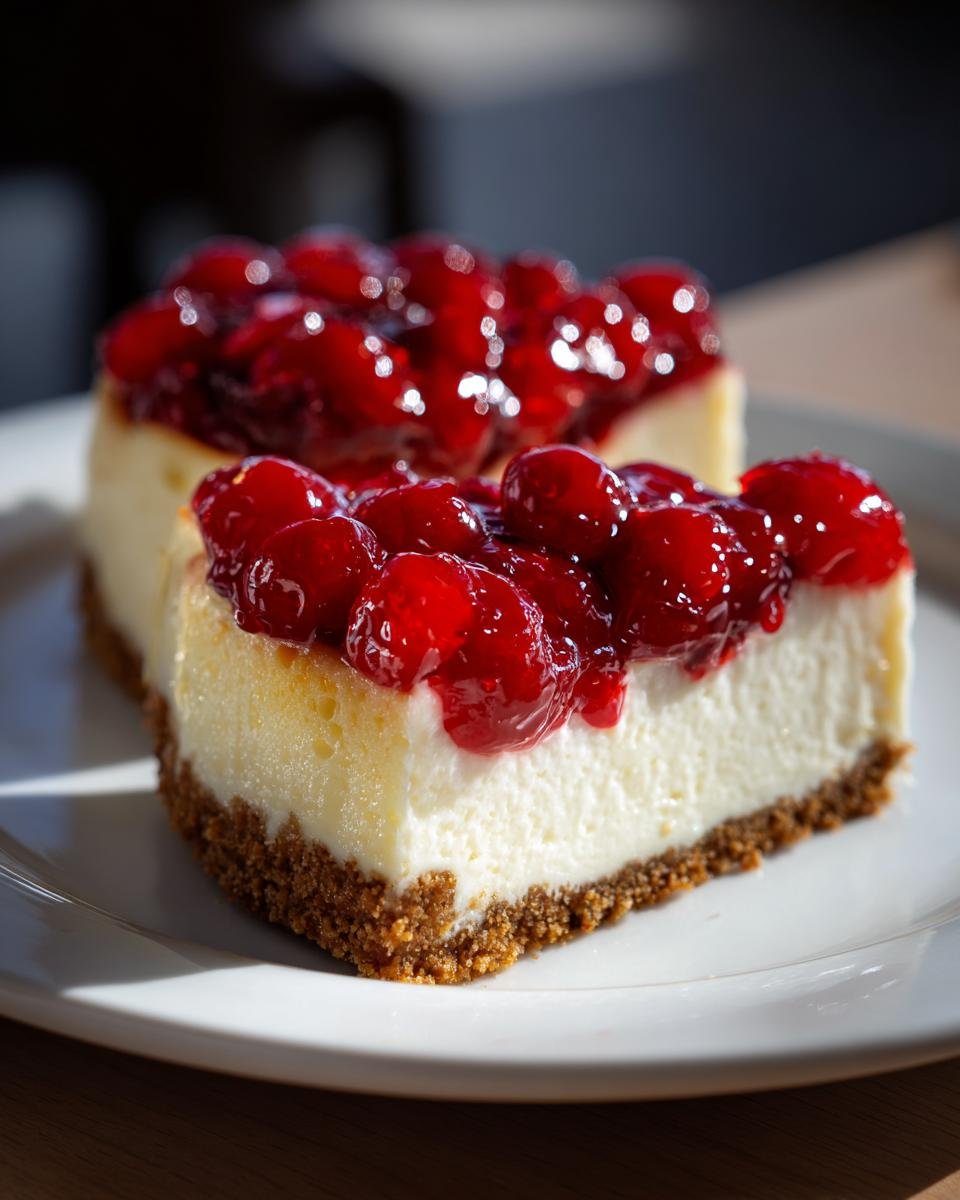
Finally, the topping is simple: just one standard 21-ounce can of cherry pie filling. You don’t have to make a fruit reduction or anything complex; sometimes, the canned stuff just works perfectly as a traditional bright red layer over the chilled cake. I haven’t added any special buttermilk substitutions here, but if you ever need to replace sour cream or buttermilk in another recipe, check out this handy guide!
Step-by-Step Instructions for Baking Your Cherry Cheesecake
Alright, let’s get baking! The actual process is super satisfying because you start seeing that beautiful cheesecake structure come together layer by layer. Before you even touch the ingredients, get that oven preheated to 350 degrees F (175 degrees C). And here’s a big thing: you need to wrap the outside bottom of your 9-inch springform pan really well with heavy-duty aluminum foil. This is just standard prep, but it’s essential in case you decide later you want to use a water bath.
Preparing the Crust and Initial Bake
First things first, smash those graham cracker crumbs together with the crust sugar, then stream in that melted butter. Mix it up until it looks like wet sand. Now, press it down—and I mean really press it—into the bottom of your foil-wrapped pan. Give it a quick 10-minute bake just to set everything nicely, then pull it out to cool a little bit before we pour in the good stuff.
Mixing the Smooth Filling for the Cherry Cheesecake
This is where our earlier prep pays off! Grab your big bowl and beat that softened cream cheese until it’s utterly lump-free. It should look like smooth silk! Then, slowly beat in the remaining sugar and the vanilla. Once that duo is perfectly combined, you add those eggs, and this is critical: add them one at a time, mixing only until the yolk disappears. Stop immediately, trust me. You aren’t whipping air into this batter; you are building a dense, creamy foundation!
Baking and Cooling the Cherry Cheesecake Properly
Pour that magnificent filling over your cooled crust. It should bake for about 50 to 60 minutes. You’re looking for the edges to be set, but you want to see that center still have just a little wobble, like Jell-O. When it seems done, turn the oven OFF, prop that door open slightly, and leave it in there for a full hour. This slow cooling trick prevents those awful dramatic temperature shifts that cause cracking. You can explore some advanced heat management tips right here if you’re curious!

Expert Tips for the Best Baked Cherry Cheesecake
Everyone talks about baking time, but I think the real secret to a professional-looking Cherry Cheesecake is controlling that environment while it bakes. Look, cracks happen when the outside cooks way faster than the inside, causing everything to shrink unevenly as it cools. To fight that, we have to talk about the water bath, even though this is a simple recipe!
If you want that impossibly smooth, crack-free top—and who doesn’t?—you should try baking it in a water bath. Remember I told you to wrap that springform pan really well? That’s so water doesn’t seep in! You place that foil-wrapped pan inside a larger roasting pan and pour hot water halfway up the sides of your cheesecake pan before it goes into the oven. That steamy, gentle heat is magic!
Also, let’s revisit ingredient temperature, because this is crucial. Your cream cheese absolutely needs to be perfectly soft—leave it out for at least an hour before you start. If you try to rush it by microwaving it, you risk melting the edges, and that throws off the structure before you even turn the mixer on. Cold spots or melted spots equal an uneven bake, so take your time on that step. For even more ways to avoid baking pitfalls like this, you can check out my favorite general tips right here!
Storing and Serving Your Homemade Cherry Cheesecake
This is the hardest part, I know—waiting! But resist the urge to just poke at it right away. A baked cheesecake needs time to firm up properly, so you absolutely must chill it in the refrigerator for a minimum of four hours. Honestly though, if you can wait until the next day, the flavor and texture just deepen beautifully overnight. It becomes perfectly sliceable!
When it comes to serving this spectacular Cherry Cheesecake, timing is everything with that bright cherry topping. You take that beautiful, chilled cake out of the pan, and only then do you spread that can of cherry pie filling evenly across the top. Adding the fruit too early means it soaks in and makes everything messy. Don’t forget to run a thin, warm knife around the edges before releasing the springform ring!
Storing leftovers is a breeze, really. Just cover that cut cake tightly with plastic wrap or pop it into an airtight container. It keeps great in the fridge for four or five days. If you have a huge banner crowd and need to save some for later, cheesecakes freeze beautifully too. Wrap it super tight—foil then plastic wrap—and it’s good for about a month. I actually found this little tip about storing leftovers for my caramel bars that works for cheesecake too: always keep the topping separate if you plan to freeze leftovers!
Variations on the Classic Cherry Cheesecake
While my heart belongs to the classic cherry topping, sometimes you just need to switch things up a little bit! This recipe is such a solid base that it begs for a little experimentation once you nail the basics. Don’t worry, these variations are simple—nothing that requires another grocery run.
If you’re like me and love warm spices, try adding about half a teaspoon of ground cinnamon directly into your graham cracker crust mixture before you bake it. It elevates the crunch beautifully! Or, if you’re tired of cherries (which I really can’t imagine!), you could swap that can out entirely for a fruit topping you prefer. Think about making a homemade blueberry sauce or even a spiced apple topping. For inspiration on different flavor combos, look at how they mixed pumpkin and chocolate in this crazy good cheesecake recipe!
Another fun twist is adding a little almond extract along with the vanilla extract in the filling—just a tiny splash! Almond pairs wonderfully with cherry. If you’re looking for something completely different but still cheesecake-based, you absolutely must check out how they handled apple crisp cheesecake for fall. It’s amazing how adaptable cheesecake can be!
Frequently Asked Questions About Cherry Cheesecake
I get so many questions about cheesecakes once people try one of my recipes, and that’s great! It means you’re baking! Here are the ones I hear most often about this simple baked Cherry Cheesecake because knowing the answers makes the process much smoother.
Why did my Cherry Cheesecake crack on top?
Oh, cracks! They happen to everyone, I promise. Nine times out of ten, it’s caused by a drastic temperature change. That’s why putting the cake inside the turned-off oven to slowly cool down for an hour is my biggest non-negotiable step. If you take it straight from the oven to the counter, it shrinks too fast. Also, if you overbeat those eggs, you introduce too much air, which expands and then collapses, leaving you with a giant crack. If you are desperate to avoid them, you must use that water bath!
Can I use a different crust for this Cherry Cheesecake?
Sure, you absolutely can swap it out! The graham cracker crust is classic, but I love experimenting too. If you want a slightly richer flavor, use vanilla wafer cookies instead of graham crackers—just crush them up finely. You’ll use the same amount of crust ingredients. Just remember that whatever base you choose, you must press it firmly and pre-bake it for those 10 minutes so it holds up when the filling goes in.
Can this baked cheesecake be frozen?
Yes, it freezes really well, which is handy for holidays! But here’s the rule: you must chill it completely in the fridge first—wait until it’s rock solid after that overnight chill. Then, you need to wrap it extremely well. I wrap mine first in plastic wrap, making sure to press the plastic right against the surface of the cake to prevent ice crystals. Then, wrap it again tightly in aluminum foil. When thawing, let it defrost slowly in the fridge for a full day. Never put the cherry topping on before freezing, though!
When should I add the cherry topping?
This is a simple one! You spread the cherry pie filling over the top *only* after the cheesecake is fully chilled—at least four hours, but ideally overnight. If you put the topping on before chilling or baking, the moisture will ruin the beautiful, smooth surface of your cream cheese filling. You want that bright red layer to sit perfectly on top of that cold, solid cheesecake!
For some really creative topping ideas that aren’t cherry, you can check out how other bakers managed toppings on this fun Red Velvet Oreo Cheesecake recipe for inspiration.
Estimated Nutritional Information for This Cherry Cheesecake
Now, listen up, because nobody is making cheesecake for their health benefits, right? But just so you have an idea of what you’re digging into, I’ve pulled together the basic numbers based on the recipe. Remember, since we are using full-fat cream cheese and a buttery crust, these numbers reflect an indulgent slice! This information is an estimate per serving, based on 10 slices, so keep that in mind when you’re enjoying your wonderful Cherry Cheesecake.
- Calories: Roughly 450 per slice
- Fat: Around 28g
- Carbohydrates: About 48g
- Sugar: That hits around 45g (that’s the good stuff!)
- Protein: Just about 8g
Share Your Perfect Cherry Cheesecake Experience
That’s it, my friends! You now have everything you need to whip up what I truly believe is the simplest, most satisfying baked Cherry Cheesecake out there. I’ve given you all my little tricks—the slow cooling, the softened cheese, the firm crust—so now it’s your turn to make some magic happen in your kitchen!
I absolutely live for seeing your results! When you tackle this recipe, please come back and drop a star rating below so I know how it turned out for you. Did the crust stay crisp? Was the filling perfectly smooth? Don’t be shy!
If you snapped a photo of that gorgeous, glossy cherry topping, share it with me! You can tag me on social media or just send me an email through the contact page—I love getting those little glimpses into what you’re baking. Reach out to me here anytime you have a question or just want to tell me how much your family loved this dessert. Happy baking, and enjoy every single creamy bite!
Print
Simple Cherry Cheesecake
- Total Time: 120 min
- Yield: 10 servings 1x
- Diet: Vegetarian
Description
A straightforward recipe for a classic baked cherry cheesecake with a graham cracker crust.
Ingredients
- 1 1/2 cups graham cracker crumbs
- 1/4 cup granulated sugar (for crust)
- 6 tablespoons unsalted butter, melted
- 3 (8 ounce) packages cream cheese, softened
- 1 1/2 cups granulated sugar (for filling)
- 1 teaspoon vanilla extract
- 4 large eggs
- 1 (21 ounce) can cherry pie filling
Instructions
- Preheat your oven to 350 degrees F (175 degrees C). Wrap the outside bottom of a 9-inch springform pan with heavy-duty aluminum foil.
- Mix graham cracker crumbs and 1/4 cup sugar. Add melted butter and press the mixture firmly into the bottom of the prepared springform pan.
- Bake the crust for 10 minutes. Remove from oven and let cool slightly.
- Beat the softened cream cheese in a large bowl until smooth. Gradually beat in 1 1/2 cups sugar and vanilla extract until combined.
- Beat in the eggs one at a time, mixing just until blended after each addition. Do not overmix.
- Pour the cream cheese mixture over the cooled crust.
- Bake for 50 to 60 minutes, or until the edges are set but the center still jiggles slightly.
- Turn off the oven, prop the door open slightly, and let the cheesecake cool in the oven for 1 hour.
- Remove the cheesecake from the oven and cool completely on a wire rack.
- Chill the cheesecake in the refrigerator for at least 4 hours, or preferably overnight.
- Before serving, spread the cherry pie filling evenly over the top of the chilled cheesecake.
Notes
- For a water bath, place the foil-wrapped springform pan inside a larger roasting pan and fill the larger pan with hot water halfway up the sides of the springform pan before baking.
- Softened cream cheese mixes best; leave it out at room temperature for about an hour before starting.
- Prep Time: 20 min
- Cook Time: 60 min
- Category: Dessert
- Method: Baking
- Cuisine: American
Nutrition
- Serving Size: 1 slice
- Calories: 450
- Sugar: 45g
- Sodium: 300mg
- Fat: 28g
- Saturated Fat: 17g
- Unsaturated Fat: 11g
- Trans Fat: 0.5g
- Carbohydrates: 48g
- Fiber: 1g
- Protein: 8g
- Cholesterol: 95mg
Keywords: cherry cheesecake, baked cheesecake, graham cracker crust, cream cheese dessert