
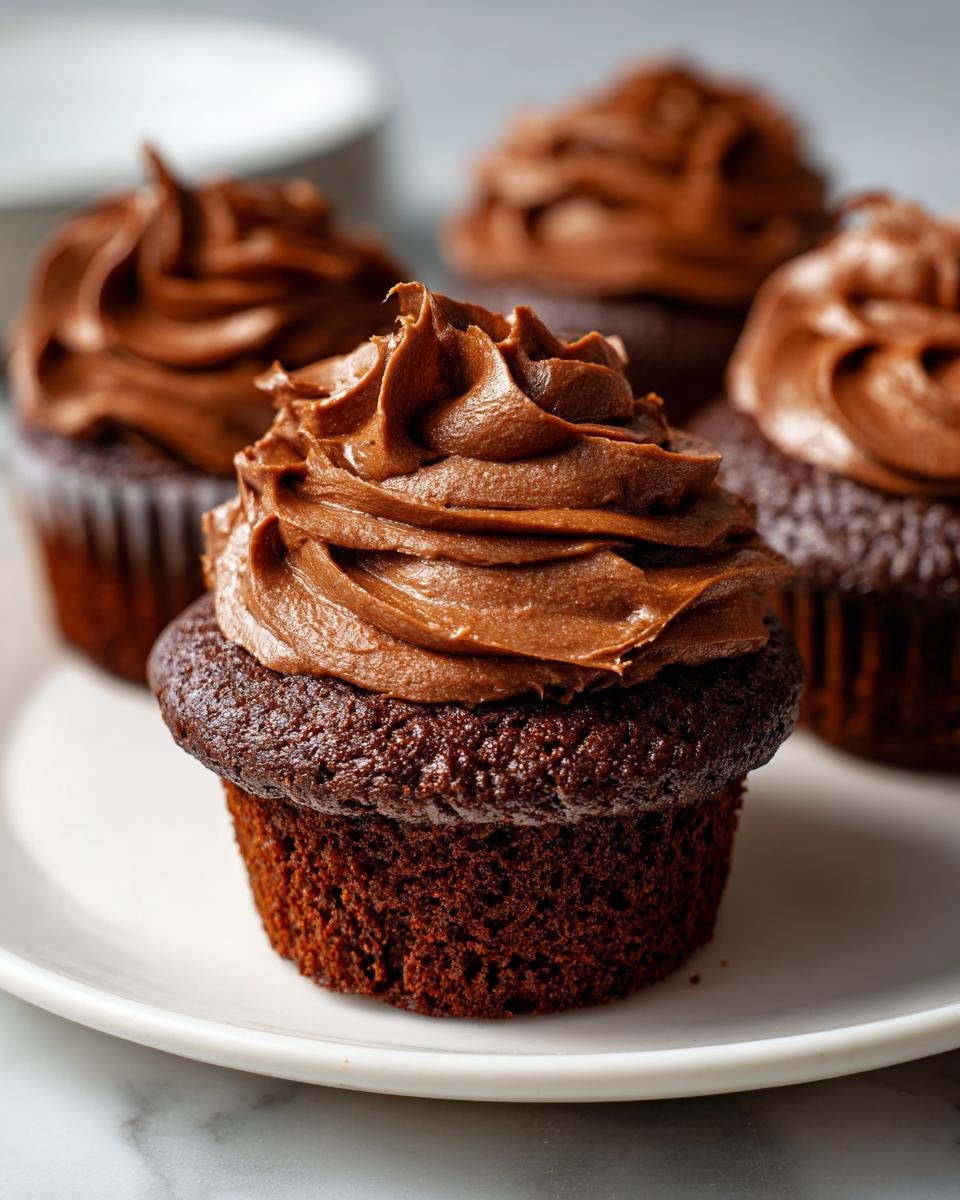
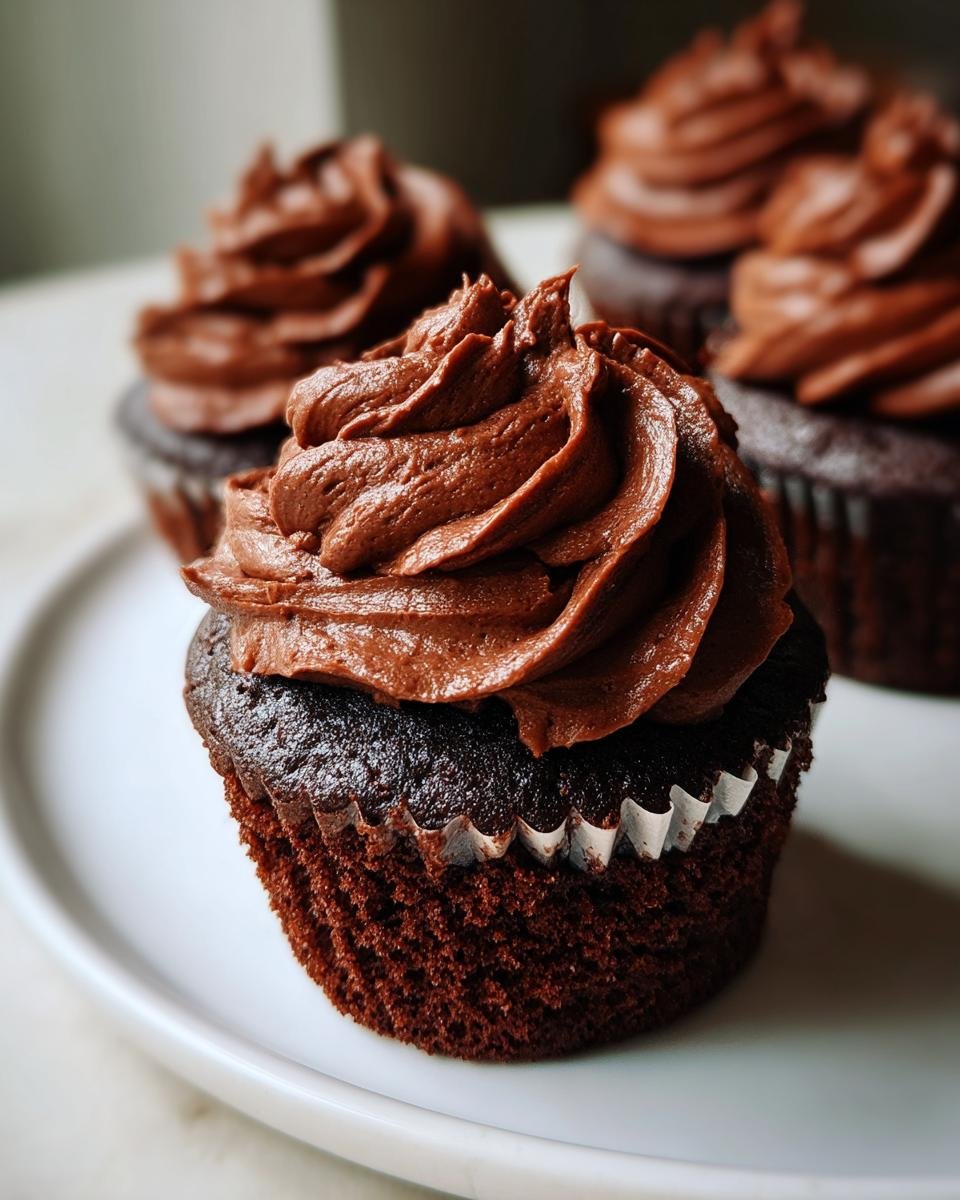
Oh my goodness, is there any better combination in the entire world than rich, dark chocolate paired with creamy, sweet hazelnut? I don’t think so! When these two flavors meet, magic happens, and that’s exactly what we’re doing today with what I truly believe are the best, absolute ultimate Nutella Cupcakes you will ever make. Seriously, they are that good—moist little chocolate sponges topped with a frosting so decadent it should probably be illegal.

I remember the first time I made these; it was for my nephew’s fifth birthday, and I was absolutely panicked because I was short on time. But these came together in a flash, and the look on everyone’s faces when they took that first bite was priceless. Forget complicated layers; these are simple, straightforward, and absolutely packed with that perfect chocolate-hazelnut punch!
Why You Will Love These Nutella Cupcakes
It’s one thing to have a good cupcake, but it’s another thing entirely to have a *sensation*! These little guys check every box you could ever want in a home-baked treat. If you need dessert for a potluck or just have a sudden, crucial chocolate craving, these are your answer. Trust me on this one.
- They are unbelievably fast! From start to finish, you’re looking at about 40 minutes total. That means you can satisfy that chocolate craving before you even finish cleaning up the mixing bowls when you make these Nutella Cupcakes.
- The flavor is complex, not just sweet cardboard. We use both granulated and brown sugar, plus the hot water method, which makes the chocolate taste incredibly deep and rich—it’s not shy on flavor!
- They are the ultimate crowd-pleaser. Seriously, who doesn’t love Nutella? Every single person asks me for this recipe when I bring these out. If you want to be the hero of your next gathering, look no further.
Quick Preparation for Perfect Nutella Cupcakes
When I say quick, I mean it. Prep time is only about 20 minutes, and then 20 minutes in the oven and you are done baking. That speed is why these became my go-to when I had company unexpectedly. We just whisk the dry stuff, mix the wet stuff, combine, pour, and bake. It’s practically foolproof, which you need in your baking arsenal!
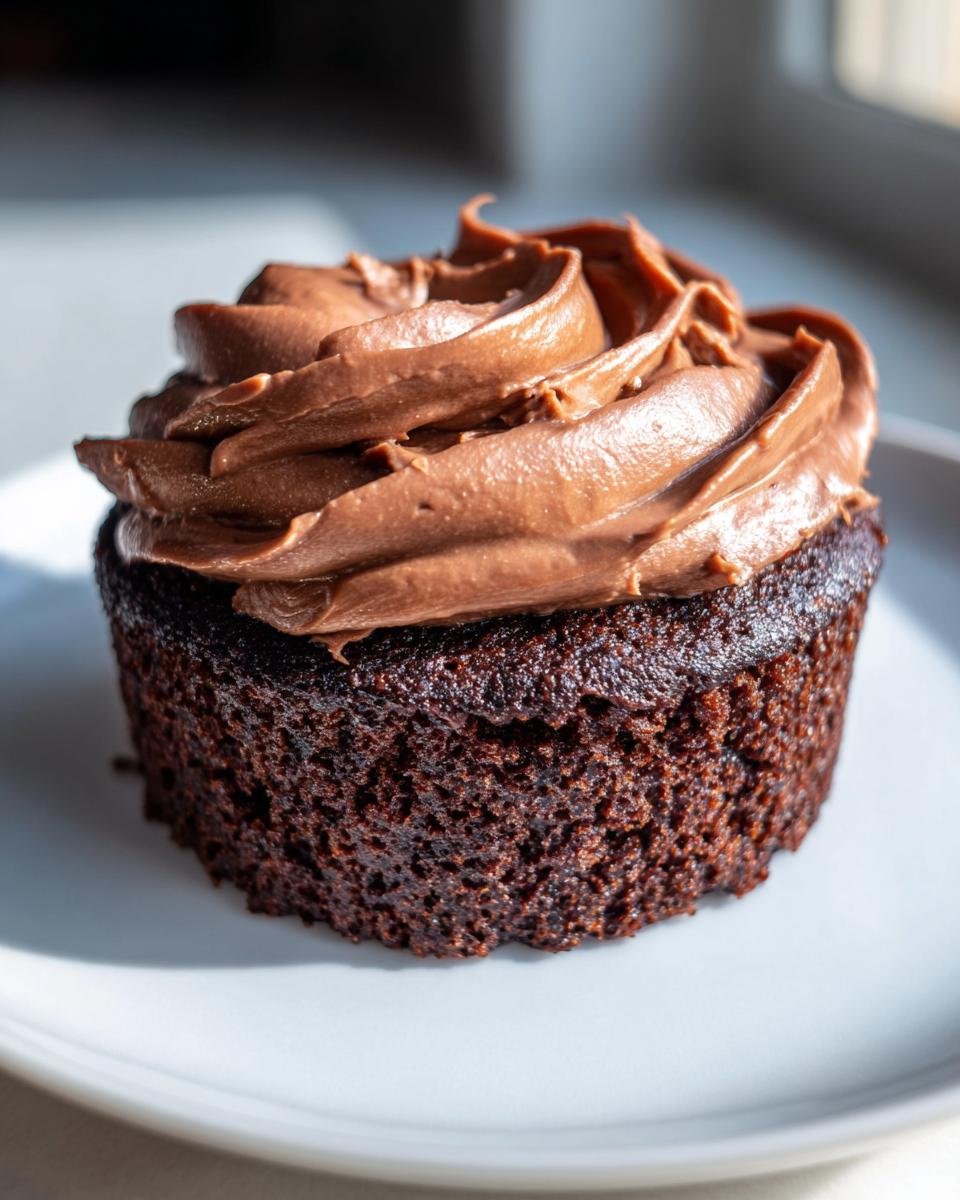
Rich, Creamy Nutella Frosting
Okay, let’s talk about the real reason we’re all here: the topping! This frosting is not just some plain buttercream dyed brown; it’s loaded with actual Nutella mixed into a classic, fluffy base. The secret is making sure your butter is perfectly soft for creaming, so you get that light, pipe-able texture that just melts in your mouth. It puts any store-bought frosting to shame, hands down.
Essential Ingredients for Your Nutella Cupcakes
You know how I always say that great baking starts with great ingredients? It’s especially true here because we are dealing with chocolate and hazelnut—flavors that demand respect! We need to make sure we have the right powders for that deep color and the perfect fats for that incredible texture in the cake. Don’t worry, everything is easy to find, so no exotic trips to specialty stores needed for these goodies.
Keep everything organized before you start mixing! Getting your ingredients measured out—what we bakers call ‘mise en place’—is half the battle won, especially for these swift Nutella Cupcakes.
For the Chocolate Cupcake Base
We need a good structural base to hold up that amazing frosting, so pay attention to the flours and leaveners here!
- 1 3/4 cups all-purpose flour
- 3/4 cup unsweetened cocoa powder (Make sure it’s unsweetened for the best depth!)
- 1 1/2 teaspoons baking soda
- 1 teaspoon baking powder
- 1 teaspoon salt
- 1 cup granulated sugar
- 1 cup packed brown sugar (Packing it in there helps keep things moist!)
- 1/2 cup vegetable oil
- 2 large eggs
- 1 cup buttermilk (See my notes later if you don’t have this on hand!)
- 1 teaspoon vanilla extract
- 1 cup hot water (Yes, hot! This blooms the cocoa powder and makes the chocolate taste so intense.)
For the Decadent Nutella Frosting
This is where the stardom happens! You want real butter here, friends, not margarine. And, of course, the good stuff: Nutella!
- 1 cup unsalted butter, softened (It needs to be soft enough to easily dent, but not melting on your counter!)
- 3 cups powdered sugar (Sifted is always better, but I forgive you if you skip this step!)
- 1/2 cup Nutella (This is the minimum amount I use; feel free to sneak in a little extra if you’re feeling truly decadent.)
- 1/4 cup milk (Just enough to get the right spreadable consistency.)
Step-by-Step Instructions for Amazing Nutella Cupcakes
You don’t need to be a pastry chef to nail these, I promise! I broke down the process into simple stages so you can follow along without any stress. The key here is patience during the mixing and cooling phases. Trust me; if you rush the cooling, that beautiful frosting will slide right off!
Preparing the Cupcake Batter
This is where we build that rich chocolate flavor right from the start. Get your oven ready so everything moves smoothly once the batter is mixed.
- First things first: crank your oven up to 350 degrees F (175 degrees C). Grab your standard 12-cup muffin tin and pop in those paper liners. Lining them prevents sticking and makes cleanup a breeze later!
- In a big bowl, take your whisk and combine all the dry dusty stuff: the flour, the cocoa powder, baking soda, baking powder, and salt. Whisk them together well so there are no weird clumps of baking powder hiding later.
- Next, add in your granulated sugar and that wonderfully rich brown sugar right on top of the dry mix. Give it a good mixing with a spoon or paddle attachment until everything looks evenly distributed.
- Now for the wet ingredients! Pour in the vegetable oil, your two large eggs, the buttermilk, and the vanilla extract. Mix this up on medium speed, but only until it just comes together. Don’t go crazy mixing it yet!
- Here’s the slightly weird but totally crucial step: carefully mix in the cup of hot water until the batter looks smooth. Don’t panic! The batter *will be thin*—almost watery—and that’s exactly what we want for that moist crumb structure we’re aiming for.
Baking and Cooling the Nutella Cupcakes
The baking itself is fast, but the cooling time is non-negotiable if you want that perfect application of frosting later.
- Fill up each little paper cup about two-thirds full with that thin batter. Don’t overfill, or you’ll get mushroom tops, and those are hard to frost nicely!
- Pop them into the hot oven for about 18 to 20 minutes. You’ll know they are done when a toothpick stuck right in the center comes out clean, or maybe just with a few moist crumbs clinging to it. Let them cool entirely on a wire rack before you even think about touching the frosting. They must be bone cold!
Making and Applying the Nutella Frosting
This frosting comes together almost as fast as the batter did, provided you remembered to let your butter soften properly. If the butter is too cold, your frosting will be lumpy, and that’s no good for beautiful Nutella Cupcakes!
- Start by beating that softened butter in a clean bowl until it looks creamy and smooth—like it has some life in it.
- Now, add the powdered sugar slowly, alternating it with the milk. You want to add a bit of sugar, beat until smooth, add a splash of milk, beat again. Keep doing this until it’s all in there and looks relatively smooth.
- This is the best part: beat in that beautiful half-cup of Nutella! Keep beating until the whole batch turns into a light, fluffy cloud of chocolate-hazelnut goodness. Stop when it’s perfectly combined and holds a nice peak.
- Grab your cooled cupcakes and either use a piping bag, which is fancy, or just a simple butter knife, and spread or swirl that amazing frosting right on top! You earned this!
Expert Tips for Perfect Nutella Cupcakes Every Time
I’ve made these Nutella Cupcakes so many times, whether for my family or just a Tuesday afternoon emergency, that I’ve picked up a few non-negotiable tricks that take them from “good” to “I need the recipe!” Honestly, a few little tweaks can make a huge difference between a slightly dense cupcake and one that is perfectly light and chocolatey.
The secret to making baking less of a chore and more of a joy is understanding these small moments where ingredients react. Don’t skip these warnings; this is the insider knowledge I wish someone had shared with me when I first started baking!
Buttermilk Substitution for Your Nutella Cupcakes
If you’ve ever gone to bake and realized you’re out of buttermilk, you know the panic! It’s frustrating, but don’t worry, you don’t have to run to the store. The recipe calls for buttermilk because that tiny bit of acid reacts beautifully with the baking soda, giving us a better lift and tenderness in that chocolate crumb.
If you’re in a pinch, you can easily make your own substitute! Just take one cup of regular milk—whole milk works best for richness—and mix in one tablespoon of white vinegar or fresh lemon juice. Seriously, that’s it. Let it sit on the counter for about five minutes until it looks slightly curdled. Then, bam! You’ve got buttermilk for your Nutella Cupcakes. Easy peasy!
Finishing Touches for Your Nutella Cupcakes
While these are absolutely stellar with just a swirl of that creamy frosting, sometimes I feel like they need just one more textural element. If you want to elevate them just a tiny bit—especially if you’re serving them to guests—I have a super simple suggestion.
After you pipe or spread the frosting on, grab some chopped hazelnuts! They toast up beautifully, so if you happen to have some toasted ones, even better. A sprinkle of nuts right on top of the Nutella frosting adds the perfect crunch that contrasts wonderfully with the soft cake underneath. It brings out that delicious hazelnut flavor even more!
Variations on Classic Nutella Cupcakes
Listen, once you master the core recipe for these fantastic Nutella Cupcakes, you have a license to play around a little! Baking should be fun, and sometimes you want to give a classic recipe a little jolt of something new. I’ve experimented quite a bit since that initial batch, and I have a couple of easy adjustments that take these chocolate hazelnut delights to the next level without adding any real stress to your baking schedule.
These aren’t huge departures—we aren’t turning them into lemon-lavender bombs or anything—but small tweaks that really enhance that signature chocolate and Nutella flavor profile. Try one of these next time!
Add Espresso Powder for Deeper Chocolate
If you want your chocolate flavor to taste deeper and richer, almost like it came from a fancy European chocolatier, you have to try adding instant espresso powder. Don’t worry, they won’t taste like coffee! You just dissolve about one teaspoon of espresso powder right into that cup of hot water before you add it to the batter. It really just amplifies the cocoa notes, making the whole cupcake taste intensely chocolaty. It’s my favorite trick, and nobody ever guesses the secret ingredient!
Swap Extracts for a Twist
The base recipe uses vanilla extract, which is classic for a reason. But if you want to lean into that nutty profile, try swapping out some of that vanilla for almond extract. Just use half a teaspoon of almond extract instead of the full teaspoon of vanilla, or maybe half and half. That little hint of almond plays so beautifully with the hazelnut in the Nutella frosting. It makes people scratch their heads wondering what that extra little something is!
Mix-Ins Right Into the Batter
Since these cupcakes are already so moist thanks to the oil and buttermilk, they handle a few extra mix-ins surprisingly well. If you’re feeling extra enthusiastic, try stirring in about a half-cup of mini chocolate chips or finely chopped nuts (hazelnuts are the obvious winner here!) right at the end. Just fold them in gently with the last of the dry ingredients. Make sure they are folded in gently so you don’t deflate all that air you worked hard to create. If you add mix-ins, remember to make sure your frosting is slightly thicker so those goodies don’t all sink to the bottom!
Storing and Serving Your Nutella Cupcakes
So, you’ve successfully conquered the baking and frosting process, and now you have a dozen perfect towers of chocolate and hazelnut goodness! Congratulations! The next crucial step is making sure they still taste amazing tomorrow, or the day after that. Proper storage is important, especially with a creamy topping like this Nutella frosting.
Here’s the deal: because this frosting is based on butter and contains a good amount of sugar, it’s actually pretty hardy. You absolutely do not want to stick these in the refrigerator unless your kitchen is boiling hot. Why? Because the cold air is the enemy of fluffy frosting! Refrigeration will make that gorgeous Nutella swirl turn hard and waxy. Yuck!
Room Temperature Storage is Your Friend
For the best experience, you want these stored snugly at cool room temperature. Find an airtight container—a big plastic container with a lid or a cake carrier works perfectly. Keep them away from direct sunlight or any heat source, obviously. If you keep them sealed up nicely, these little treasures will stay fresh and delicious for about three to four days.
If you’re making them for an event the next day, you can totally frost them ahead of time! Just make sure the cupcakes themselves are completely cool before you even look at the frosting bowl. Nobody wants melted Nutella sliding down the sides of the liner!
Serving Suggestion: Bring Them to Life
While they are fine straight from the container, I always recommend bringing them out about 30 minutes before you plan to eat them, especially if the air conditioning is cranked up high. Letting the butter in the frosting warm up slightly—just a little—brings back that gorgeous, creamy mouthfeel. When the frosting is perfectly soft, it just meshes with the moist chocolate cake in the most wonderful way. Seriously, the slightly room-temperature bite is unmatched!
And if you are just saving the plain baked cupcakes (without frosting), they can actually be wrapped tightly in plastic wrap and kept on the counter for up to two days, or frozen for longer storage. If you freeze them, wrap them super tight in plastic wrap, then foil, and thaw them overnight on the counter before whipping up a fresh batch of that incredible Nutella frosting!
Frequently Asked Questions About Nutella Cupcakes
I always get so many questions after people bake my recipes, which tells me you all are getting busy in the kitchen! That’s fantastic! Baking is all about experimenting, so it’s natural to wonder about swaps or make-ahead times. I’ve gathered up the most common things people ask me about these dreamy Nutella Cupcakes right here so you don’t even have to ask!
If you have a question that isn’t answered below, please feel free to reach out! But usually, these cover everything you need to know about moisture, storage, and making life easier.
Can I make the Nutella Cupcakes batter ahead of time?
This is a tricky one, and my absolute advice is: no, you really shouldn’t. Remember how we talked about that hot water blooming the cocoa? That reaction starts immediately, and we want all that wonderful lift from the baking soda and powder working when it hits the heat of the oven. If the batter sits around for too long, the leavening agents start to fizzle out, and your beautiful chocolate cake will end up dense and tough.
The best way to get a head start is to measure out all your dry ingredients and keep them safely in one container, and measure your wet ingredients (minus the hot water) in another. Then, right before you’re ready to bake, preheat your oven, mix what you need to mix, and bake immediately while that batter is fresh. It really only takes 15 minutes to mix up before popping them in the oven!
How long do these Nutella Cupcakes stay fresh?
That’s the beauty of these chocolate cakes—they stay surprisingly fresh because of the oil and the buttermilk! If you frost them and keep them in an airtight container on the counter (remember, no fridge unless it’s tropical in your house!), they are fantastic for about three full days. Day four is usually when I notice the cake part firming up just a little bit.
Now, if you’ve got leftover plain baked cupcakes without the frosting, you can actually wrap those very tightly in plastic wrap and pop them in the freezer for up to three months! When you’re ready for a treat, just thaw them on the counter and whip up a quick batch of that rich Nutella Cupcakes frosting!
Can I use oil other than vegetable oil?
Since vegetable oil is pretty neutral in flavor, it’s my standard pick here. But if you prefer, you can substitute it with canola oil because it behaves almost exactly the same way in baking. You could even try melted coconut oil, but be warned—if you use coconut oil, you might get the tiniest hint of coconut flavor creeping in, which I actually think pairs wonderfully with the hazelnut, so that’s a fun little experimental swap!
Why is the batter so thin? I’m worried they won’t bake right!
I hear you! When you pour in that full cup of hot water in Step 5, the batter suddenly goes from thick sludge to something that looks almost like a thin pancake mix. This is 100% normal and exactly what we need! That hot liquid helps “bloom” the cocoa powder, releasing its deepest chocolate flavors, and it keeps the final product unbelievably moist. If your batter was thick, your cupcakes would be dry and dense. Trust the process; thin batter equals moist, delicious Nutella Cupcakes!
Estimated Nutritional Value for Nutella Cupcakes
Okay, let’s get down to brass tacks. When you’re eating something this delicious, you probably aren’t thinking about macros, but I know some of you are curious! I always like to share the estimated breakdown of what’s in one of these gorgeous treats. Since these are rich, indulgent desserts featuring butter and that lovely sugar-packed Nutella, they definitely fall into the Nutella Cupcakes treat category, not a light snack!
I’ve used the standard serving size listed in my test notes, but remember, you are the baker, and you can always make them bigger or smaller! These numbers are a great guideline, but they are just estimates based on the ingredients I listed earlier.
Here is what you can generally expect from one perfectly frosted cupcake:
- Serving Size: 1 cupcake
- Calories: Around 450 (Yep, worth every single calorie in that frosting!)
- Sugar: About 55g (That’s where the joy lives!)
- Fat: Roughly 25g (Remember, that’s mostly from the butter and oil needed for that supreme moistness.)
- Protein: About 5g
- Carbohydrates: Around 58g
One important thing to keep in mind: these values change if you decide to swap out the vegetable oil for something else, or if you skip the frosting entirely! Also, if you’re adding those optional chopped hazelnuts, make sure to factor in a little extra fat and fiber. But honestly, I rarely stress about these numbers when I’m serving up a batch of homemade Nutella Cupcakes!
Share Your Homemade Nutella Cupcakes
I mean it when I say that sharing food is like sharing a piece of your heart! Now that you have the tried-and-true steps for the best Nutella Cupcakes this side of the internet, I absolutely insist that you get baking. Don’t let those jars of Nutella just sit there gathering dust!
When you take your first bite of that rich chocolate cake topped with that silky, chocolate-hazelnut swirl, I want to know about it! Were they an instant hit at your dinner table? Did you try the suggested sprinkle of chopped hazelnuts on top?
Tell Me What You Think!
The best part of this whole process is hearing from you wonderful bakers. Please, take a minute once you’ve tried these out to leave a rating below. Stars are great, but honestly, it’s the comments that really mean the world to me. Tell me how they turned out, what little changes you might have made (if any!), or who you shared these amazing treats with.
If you snapped a picture of your gorgeous batch of homemade Nutella Cupcakes—maybe you used a fancy piping tip, or perhaps you made a double batch for a party—please share it! You can tag me on social media, or if you prefer, use the contact form right here on the site to send it along. I absolutely love seeing my recipes come to life in your kitchens.
Your feedback truly helps other readers feel confident that they can tackle this recipe too. Happy baking, and I can’t wait to see your creations!
Print
Nutella Cupcakes
- Total Time: 40 min
- Yield: 12 servings 1x
- Diet: Vegetarian
Description
Simple recipe for chocolate cupcakes topped with a rich Nutella frosting.
Ingredients
- 1 3/4 cups all-purpose flour
- 3/4 cup unsweetened cocoa powder
- 1 1/2 teaspoons baking soda
- 1 teaspoon baking powder
- 1 teaspoon salt
- 1 cup granulated sugar
- 1 cup packed brown sugar
- 1/2 cup vegetable oil
- 2 large eggs
- 1 cup buttermilk
- 1 teaspoon vanilla extract
- 1 cup hot water
- 1 cup unsalted butter, softened (for frosting)
- 3 cups powdered sugar (for frosting)
- 1/2 cup Nutella (for frosting)
- 1/4 cup milk (for frosting)
Instructions
- Preheat your oven to 350 degrees F (175 degrees C). Line a standard 12-cup muffin tin with paper liners.
- In a large bowl, whisk together the flour, cocoa powder, baking soda, baking powder, and salt.
- Add the granulated sugar and brown sugar to the dry ingredients and mix well.
- Pour in the vegetable oil, eggs, buttermilk, and vanilla extract. Mix on medium speed until just combined.
- Carefully mix in the hot water until the batter is smooth. The batter will be thin.
- Fill each cupcake liner about two-thirds full.
- Bake for 18 to 20 minutes, or until a toothpick inserted into the center comes out clean. Let the cupcakes cool completely on a wire rack.
- To make the frosting, beat the softened butter in a large bowl until creamy.
- Gradually add the powdered sugar, alternating with the milk, beating until smooth.
- Beat in the Nutella until the frosting is light and fluffy.
- Pipe or spread the frosting onto the cooled cupcakes.
Notes
- You can substitute the buttermilk with 1 cup of regular milk mixed with 1 tablespoon of white vinegar or lemon juice; let it sit for 5 minutes before using.
- For extra flavor, sprinkle chopped hazelnuts on top of the frosting.
- Prep Time: 20 min
- Cook Time: 20 min
- Category: Dessert
- Method: Baking
- Cuisine: American
Nutrition
- Serving Size: 1 cupcake
- Calories: 450
- Sugar: 55g
- Sodium: 250mg
- Fat: 25g
- Saturated Fat: 10g
- Unsaturated Fat: 15g
- Trans Fat: 0g
- Carbohydrates: 58g
- Fiber: 2g
- Protein: 5g
- Cholesterol: 50mg
Keywords: Nutella, cupcakes, chocolate, hazelnut spread, frosting, dessert, baked goods