
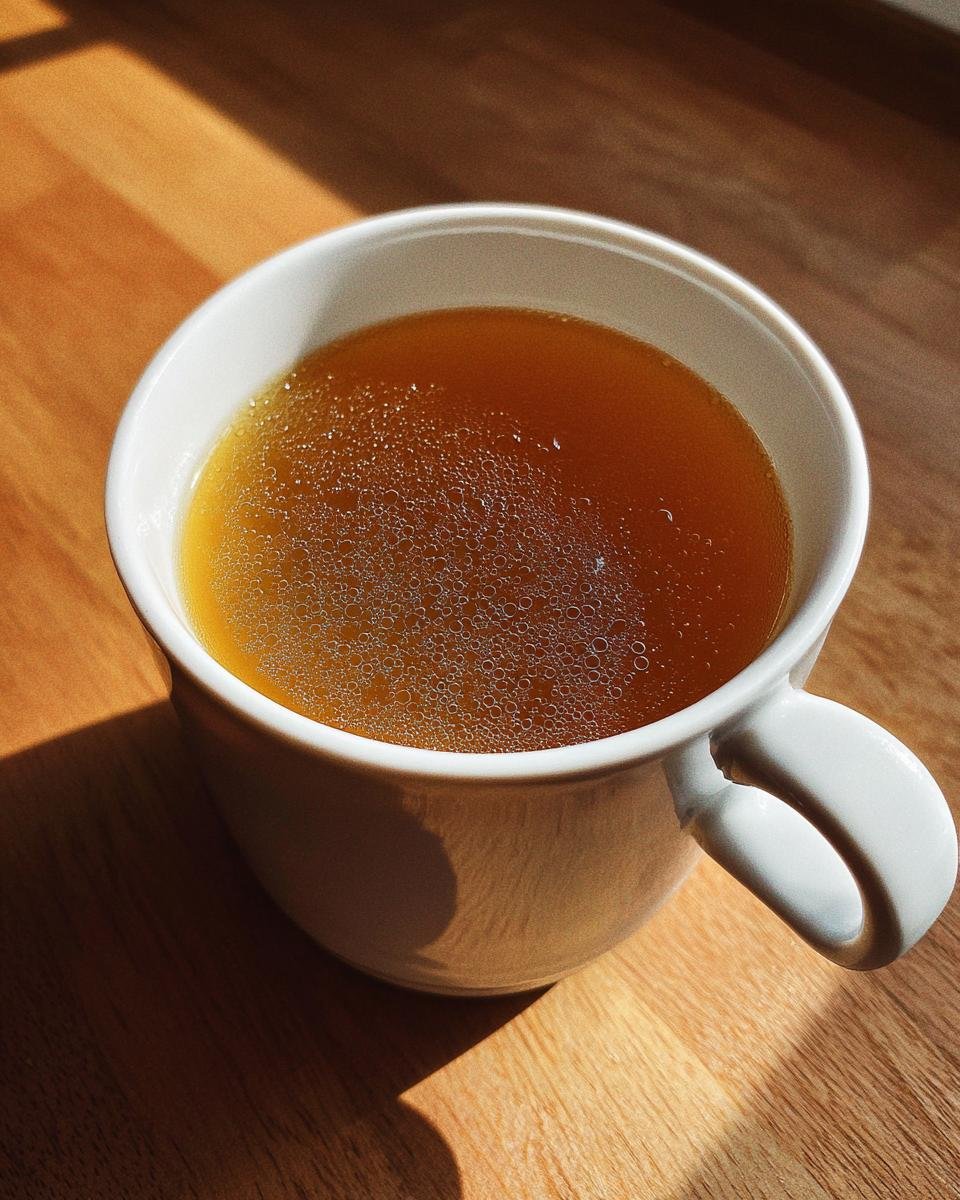
Oh my goodness, you have to stop buying that stuff in the cartons! I know, I know, people say it’s too much work, but trust me when I tell you that nothing—and I mean *nothing*—compares to the stuff you make right on your own stove. For years now, I’ve been dedicated only to making **Homemade Bone Broth**, and it’s changed how I cook entirely. Forget those fancy spice blends or complicated vegetable additions our grandparents used; this recipe is the absolute simplest, most straightforward way to get that rich, gelatinous goodness poured right into your mug.
When you let these beef bones simmer slowly, you pull out minerals and collagen that those quick grocery store versions just skip over. It just tastes… cleaner. Warmer. Better. My **Homemade Bone Broth** has been the quiet secret ingredient in everything from my morning coffee replacement to helping my kids bounce back faster when they catch a cold. You’ll see how incredibly easy it is to make a gallon of liquid gold without any fuss!

Why This Homemade Bone Broth Recipe Works So Well
This recipe succeeds because it doesn’t try to do too much, which is exactly what a great base needs! A lot of people get tangled up trying to add every vegetable under the sun, but we are focusing purely on extraction—getting every bit of goodness out of those bones. The magic behind this **Homemade Bone Broth** is the combination of two simple things: acid and time. You’ll notice I insist on apple cider vinegar, and that little bit of acid is crucial because it gently softens the bones and helps pull out all those amazing minerals that you can’t get otherwise.
Then comes the slow simmer. We aren’t making a fast stock here; we are making a true broth that needs a minimum of 12 hours—sometimes 24! That extended, gentle heat is what dissolves the collagen into liquid gold. If you want amazing results, you’ve got to give it the time it asks for. It’s worth linking to general baking tips sometimes, because kitchen science is kitchen science, even outside the oven! Like learning how to properly manipulate ingredients for the best texture, the long simmer is non-negotiable here.
The Importance of Quality Bones for Homemade Bone Broth
You can’t rush the start, so pay attention to your source material! Don’t just grab any old scraps. For this **Homemade Bone Broth**, you really want those big, hearty marrow or knuckle bones. These are packed with the connective tissue that breaks down into that beautiful gelatin we are aiming for. If your bones are weak, your broth will be weak, it’s just that simple!
Ingredients Needed for Perfect Homemade Bone Broth
Okay, so getting the right stuff gathered is half the battle, right? Luckily, this ingredient list is blissfully short, which again proves that simple is king when it comes to fantastic **Homemade Bone Broth**. I learned a lot about substitutions when baking, and I’ll tell you, for broth, you really don’t want to stray too far from the basics here. If you can’t find exactly what I list, you might just have to put it off until you can!
For the full glorious gallon batch, here’s what you need to round up. Don’t forget, the quality of the bones dictates the final result. If you’re interested in learning how sometimes you can swap things out successfully in other recipes, like making your own buttermilk, that technique rarely applies here—use the right bones!
- You’ll need about 4 lbs of beef bones—specifically, I look for a mix of those dense marrow bones and knuckle bones. That’s where all the good collagen hides!
- One full gallon of really good filtered water. Don’t skimp here; since water is 90% of the finished product, if your water tastes funny, your broth will too.
- Two tablespoons of apple cider vinegar. Yes, seriously. This acidic nudge is completely necessary to pull those minerals out of the bones while they simmer.
- One teaspoon of sea salt is completely optional. I usually leave it out until the very end when I’m tasting it, because I often use my broth in recipes that are already salty.
Step-by-Step Instructions for Making Homemade Bone Broth
Alright, this is where we move from gathering supplies to actual cooking! Don’t be intimidated by the long cooking time; the actual hands-on work is maybe fifteen minutes total. If you followed the ingredient list, you’re ready to turn those bones into liquid gold. I always get so excited during this part because you can practically smell the good stuff happening already. If you’ve ever made your own bouillon cubes, you know that satisfying transformation, but this is even better, honestly. You can check out how I make homemade bouillon cubes separately, but for broth, we keep it simple and slow.
Initial Setup and Bringing to a Simmer for Homemade Bone Broth
Grab your biggest stockpot—or if you’re using your slow cooker for this, get that out now. First, gently toss all four pounds of those beef bones right into the vessel. Next, pour that entire gallon of filtered water over them until they are completely submerged. Now for the important catalyst: pour in those two tablespoons of apple cider vinegar right on top. The very next thing you do is turn the heat up until it hits a full, rolling boil. But here’s the crucial bit: as soon as you see those big bubbles, you must immediately turn the heat down to the lowest setting your stove allows for a very gentle simmer.
Simmering and Skimming Impurities in Your Homemade Bone Broth
Once you have that super low, gentle bubble—just a slight movement on the surface—it is time for patience. During the first hour, you’ll see some foam and greyish scum rise to the top. Just take a big spoon and carefully skim all that off and toss it out. It’s just impurities that you don’t want lingering in your nice **Homemade Bone Broth**. After that initial cleanup, just let it simmer away, partially covered! I usually let mine go for a solid 12 hours, but on a weekend, I’ll push it toward 24 hours. If you notice the liquid dropping below the bones during that marathon simmer, just top it up with a bit more filtered water so everything stays submerged.
Straining and Storing Your Finished Homemade Bone Broth
When the time is up—and your kitchen smells heavenly—turn the heat off and let it cool down just enough so you can handle it safely. Now, grab a large bowl and a fine-mesh sieve. Set the sieve over the bowl and carefully pour your entire pot through it. You want to discard all those tired-out solids left behind in the sieve; they’ve given you all they’ve got! If you are adding salt, stir it in now while the broth is still warm. The final step is letting it cool completely on the counter before you jar it up. You’ll know you did it right because when it chills in the fridge, it will turn into a solid, jiggly block. That lovely gelatin means your **Homemade Bone Broth** is ready!

Tips for the Best Homemade Bone Broth Results
Look, I’ve been making **Homemade Bone Broth** for so long that I have a couple of little tweaks I swear by to bring it up from “good” to “absolutely essential liquid gold.” You don’t have to follow these, but why wouldn’t you want the best possible flavor you can coax out of those bones? These little extras take almost no extra effort but really boost the final product’s richness.
It goes against the super-simple base recipe, but sometimes you just need more flavor! It’s the same principle as why we check our oven temperature just one more time before putting the cake in—a few extra minutes upfront saves disappointment later with the final result.
Roasting Bones for Deeper Flavor in Homemade Bone Broth
If you want your **Homemade Bone Broth** to have that dark, savory color and a really deep, meaty flavor, you’ve got to roast the bones first. Don’t skip this if you want a richer taste! After cleaning them up, just spread those bones out on a baking sheet. Pop them into a 400°F oven for about 30 minutes. You want them nicely browned, almost caramelized on the edges. When you add them to the pot, they’ll release all that roasted flavor goodness right into your water. It makes the simmering time even more worthwhile!
Storage and Reheating Homemade Bone Broth
So you made a giant pot of this incredible **Homemade Bone Broth**, and now you have gallons of it! First off, good job—you are set for the winter! The best way to store this is definitely in the fridge first, but only for about five days, tops. Remember how I mentioned it should turn into that solid, jiggly block? That thick gelatin mass means it’s perfectly preserved in the cold.
For the long haul, you absolutely must freeze what you aren’t using right away. I try to freeze mine in one-cup or two-cup increments. Having individual portions ready is such a lifesaver when you want to make a quick soup base or just need a warm mug on a chilly morning. If you have ice cube trays, that’s a fun way to freeze little flavor bombs you can toss into sauces or rice cooking later on! When you’re ready to use the frozen stock, just thaw a container overnight in the fridge or gently heat it on the stovetop over low to medium heat. Never microwave a big batch, honestly; the slow heat keeps the texture nice and smooth as it liquefies again.
Common Questions About Making Homemade Bone Broth (FAQ)
I get so many great questions once people try making their first batch of **Homemade Bone Broth**! It’s really an intuitive process, but it’s easy to get hung up on details when you’re working with something that cooks for an entire day. Don’t you worry though; we’ll clear up the main mysteries right here so you can feel totally confident about your next batch of beautiful **beef broth**.
How do I know if my homemade bone broth has enough gelatin?
This is the easiest thing to check, honestly, and it’s the most satisfying moment! You don’t need a thermometer or any fancy tools here. After your broth has finished simmering and you’ve strained it into its containers, you have to let it cool down completely and chill it in the refrigerator for several hours, ideally overnight. If you did everything right and managed a good extraction time, your **Homemade Bone Broth** will solidify into a thick, wobbly block. It won’t be runny; it should basically look like a savory Jell-O. That jiggly texture? That is pure, wonderful **gelatin**, and it means you have done a fantastic job!
Can I use chicken bones instead of beef bones for this homemade bone broth recipe?
Absolutely, you can! Chicken bones are fantastic, especially if you are looking for something lighter in flavor or perhaps for a lighter soup base rather than a rich, long-simmered **beef broth**. The main difference is that chicken bones tend to set up faster and the resulting broth is usually much lighter in color and taste. Beef bones give you that deep, dark, mineral-heavy flavor that is so robust. If you use chicken, you might find you need slightly less simmering time, maybe sticking closer to the 12-hour mark instead of pushing all the way to 24. Either way, you are making something amazing!
Nutritional Estimates for Homemade Bone Broth
Now, I have to give you a little disclaimer right up front, because I’m a cook, not a food scientist! When you’re making something this naturally derived like **Homemade Bone Broth**, the exact numbers are always going to shift depending on how much fat renders out and exactly what kind of bones you used. These figures are just a general guide, so take them as such!
But it’s still amazing to see what you’re actually taking in when you sip a mug of this goodness. Whether you’re using it in place of water when cooking rice or just drinking it straight, knowing those macros floating around in there is helpful. Here are the rough estimates based on the full gallon yield for a single one-cup serving size:
- Serving Size: 1 cup
- Calories: About 50, which is wonderful for something this satisfying!
- Protein: Around 6 grams—that’s your collagen working hard!
- Fat: Roughly 2 grams total fat.
- Saturated Fat: About 1 gram.
- Carbohydrates, Fiber, and Sugar: Zero across the board, which is exactly what we educated cooks want to see!
- Sodium: About 150mg, but remember, I leave the salt optional in my recipe, so this totally depends on how much you add in later.
See? You’re getting pure nourishment without loads of unnecessary junk. That’s the beauty of keeping your **Homemade Bone Broth** recipe this pure and simple!
What to Do After You Make Your Homemade Bone Broth
Phew! You’ve done the waiting, you’ve strained the liquid, and now you have that beautiful, savory **Homemade Bone Broth** chilling away in the fridge. Honestly, you deserve a huge pat on the back! But the experience isn’t over yet. When you nail a recipe like this—one that takes so much patience—I just love hearing about it!
Please, once you’ve tasted how incredible this is compared to anything else, come back and tell me how it went. Did you push yours to a full 24 hours of simmering? Did you roast your bones first, and did you notice that deeper color I mentioned?
Drop a comment below! I love reading about everyone’s adventures, especially when they involve a giant pot of something so restorative. If you managed to get a picture of that perfect gelatinous block right before you chilled it down, I’d love to see it! You can always reach out directly through my contact page if you have any private questions that you don’t want to air publicly.
Go make yourself a warm mug right now—you earned it!
Print
Simple Homemade Bone Broth
- Total Time: 18 hours 10 min
- Yield: About 3 quarts 1x
- Diet: Gluten Free
Description
A basic recipe for making nutritious bone broth using beef bones and water.
Ingredients
- 4 lbs beef bones (marrow or knuckle bones)
- 1 gallon filtered water
- 2 tablespoons apple cider vinegar
- 1 teaspoon sea salt (optional)
Instructions
- Place the beef bones in a large stockpot or slow cooker.
- Cover the bones completely with filtered water.
- Add the apple cider vinegar to the water.
- Bring the water to a boil, then immediately reduce the heat to the lowest setting to maintain a gentle simmer.
- Skim off any foam or impurities that rise to the surface during the first hour of simmering.
- Simmer the broth, partially covered, for 12 to 24 hours. Add more water if the liquid level drops significantly.
- Remove from heat and let it cool slightly.
- Strain the broth through a fine-mesh sieve into clean containers, discarding the solids.
- Stir in salt if using.
- Cool completely before refrigerating or freezing.
Notes
- Using apple cider vinegar helps draw minerals from the bones into the broth.
- For a richer flavor, you can roast the bones at 400°F for 30 minutes before simmering.
- Refrigerated broth will set into a gelatinous block if made correctly.
- Prep Time: 10 min
- Cook Time: 18 hours
- Category: Soup Base
- Method: Simmering
- Cuisine: General
Nutrition
- Serving Size: 1 cup
- Calories: 50
- Sugar: 0
- Sodium: 150
- Fat: 2
- Saturated Fat: 1
- Unsaturated Fat: 1
- Trans Fat: 0
- Carbohydrates: 0
- Fiber: 0
- Protein: 6
- Cholesterol: 15
Keywords: bone broth, beef broth, homemade broth, gelatin, stock, slow simmer