
Oh, the sheer joy of a dessert that manages to be both brilliantly tart and deeply satisfyingly sweet at the very same moment! That’s what you get with these incredible, straightforward Lemon Bars. Seriously, this is the recipe I always return to when I need a guaranteed crowd-pleaser without spending half my day fussing in the kitchen.
Forget fussy layers or complicated folding techniques. We’re focusing on two perfect things here: a buttery, tender shortbread crust that melts in your mouth, and a bright, zesty lemon filling that sets up beautifully firm. If you’ve been intimidated by making homemade lemon squares, trust me—these simple Lemon Bars are your new signature bake.
Why You Will Love These Simple Lemon Bars
Seriously, if you avoid baking because you think it takes hours, this recipe is going to change your mind completely. These Lemon Bars are pure sunshine, and they come together so fast!
- They require minimal fuss—we’re talking about using one bowl for the filling!
- That incredible texture contrast: crumbly crust meets smooth, tangy topping.
- You can have them cooling in under an hour. That’s nearly instant gratification!
Quick Prep and Bake Time for Perfect Lemon Bars
When I say simple, I mean it. The total time from start to finish is right around 50 minutes, which is amazing for a dessert that tastes like you spent all afternoon on it. Anyone can conquer these, even if you’ve never made a shortbread crust before. Don’t let fancy recipes scare you away from delicious homemade Lemon Bars!

The Ideal Balance of Tart and Sweet Lemon Bars
This is where the magic truly happens. The richness of that buttery shortbread base cuts through the sharp citrus flavor of the filling perfectly. It’s not overwhelmingly sour, and it’s certainly not too sweet—it hits that wonderful spot right in the middle. The crust supports the bright lemon filling without ever getting soggy, which is my personal marker for a truly successful batch of Lemon Bars.
Gathering Ingredients for Your Lemon Bars
Okay, let’s talk ingredients because even simple recipes sing when you use the right stuff! With these Lemon Bars, fresh quality really matters, especially when it comes to the citrus. Seriously, skip that bottled stuff for the filling—you absolutely must use fresh lemon juice. The bright, vibrant flavor you get from a real lemon makes all the difference between an okay bar and the best Lemon Bars you’ve ever had!
We break this down into the crust and the filling. Don’t worry, you probably have nearly everything you need sitting in your pantry right now. For liquids that might require substitutions, if you ever run into a pinch needing homemade buttermilk, you should check out my guide over how to whip up buttermilk substitutes.
Ingredients for the Shortbread Crust of Your Lemon Bars
The crust is built on butter, so make sure that butter is properly softened—not melted, but soft enough that you can gently press your finger into it and leave a dent. That softness is what helps you get that perfect, crumbly, almost sandy texture when you mix it up for these Lemon Bars.
- 1 cup all-purpose flour
- 1/2 cup unsalted butter, softened
- 1/4 cup granulated sugar (just for the crust, nice and sweet!)
Ingredients for the Bright Lemon Filling of Your Lemon Bars
This filling comes together in a whisk, but pay close attention to how you measure that little bit of flour! You only need one tablespoon, and if you dump it in without leveling the spoon first, you risk getting a slightly gummy layer on top of your beautiful shortbread. We want set, tart perfection for these Lemon Bars.
- 2 large eggs
- 1 cup granulated sugar (for the filling)
- 1/4 cup fresh lemon juice (I promise, this is key!)
- 1 tablespoon lemon zest
- 1 tablespoon all-purpose flour
Step-by-Step Instructions for Perfect Lemon Bars
Alright, now we get to the fun part where everything comes together! Don’t let the steps intimidate you; they are super clear because we want your Lemon Bars to turn out flawless. If you want to start practicing some general kitchen skills that will help with this recipe and many others, I’ve put together some handy baking tips that really boost your confidence.
Preparing and Baking the Shortbread Crust for Lemon Bars
First things first: get that oven preheated to 350°F (175°C). Next, you need to line that 8×8 inch pan very carefully with parchment paper, ensuring you leave an overhang on two sides. These parchment ‘slings’ are your best friends later for lifting these delicate Lemon Bars out! Now, for the crust, just mix up the flour, softened butter, and the crust sugar until it looks crumbly—you can use your hands for this, it’s therapeutic!
Press that mixture firmly and evenly into the bottom of your prepared pan. We’re baking this crust blind first for about 15 minutes. You’re looking for it to be just lightly golden around the edges. Not brown, just taking on a tiny bit of color—that means it’s sturdy enough to hold our gorgeous filling!
Mixing and Pouring the Filling Over Baked Lemon Bars
While that crust is getting happy in the oven, it’s time for the lemon star of the show! In a separate bowl, gently whisk together those two eggs, the filling sugar, the fresh lemon juice, the zest, and that single tablespoon of flour. Keep whisking until it looks completely smooth. If you see any streaks, keep going! We don’t want any lumps getting trapped under that powdered sugar dusting on our final Lemon Bars.
When the crust is done, pull it out and immediately—and I mean *immediately*—pour that beautiful liquid filling right over the hot shortbread base. It’s going right back in the oven, so don’t worry about the temperature shock!
Final Bake and Cooling of Your Lemon Bars
Bake this beauty for another 20 to 25 minutes. You’ll know it’s done when the filling is set. It shouldn’t be liquid anymore, but it might still have a tiny bit of jiggle right in the absolute center when you gently shake the pan. That’s perfect!
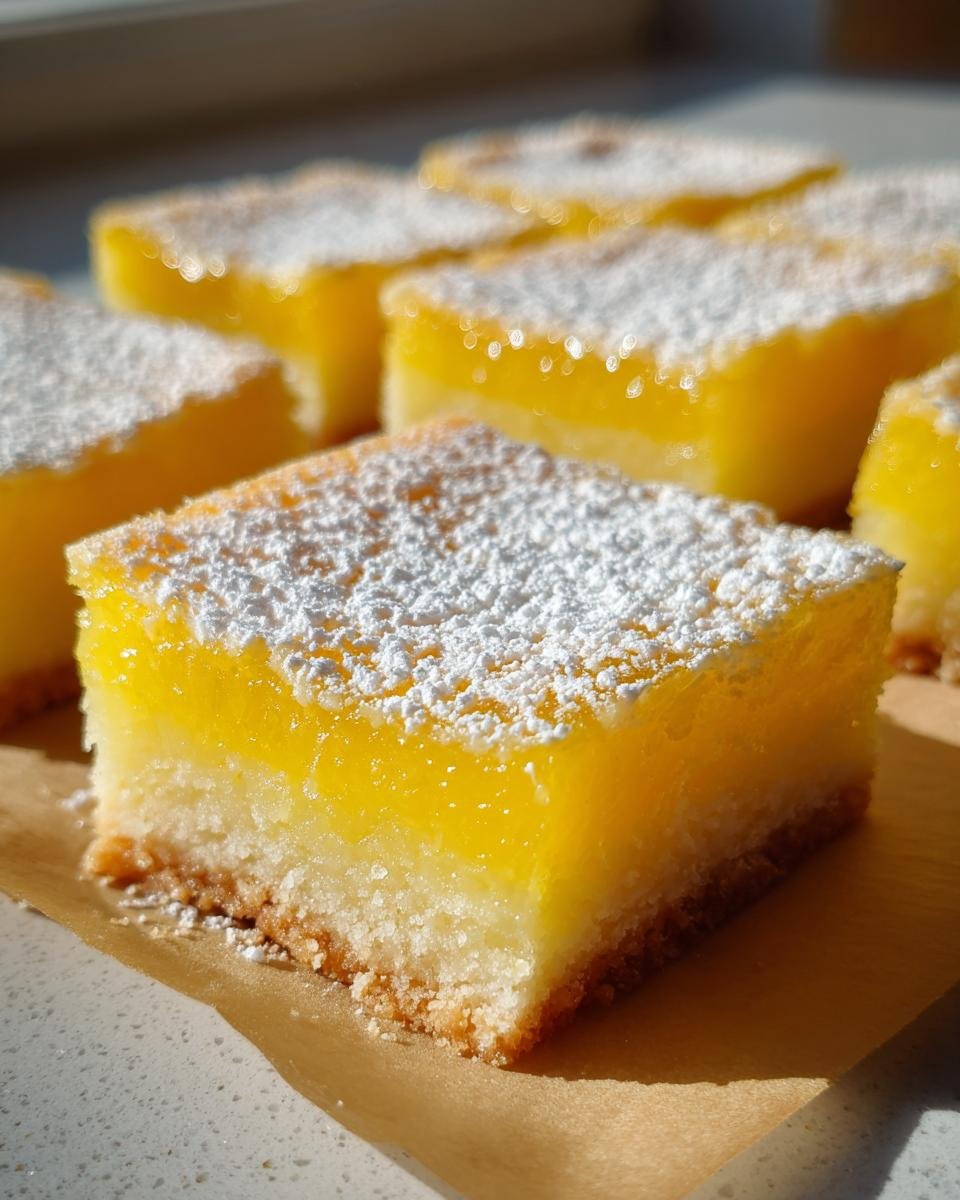
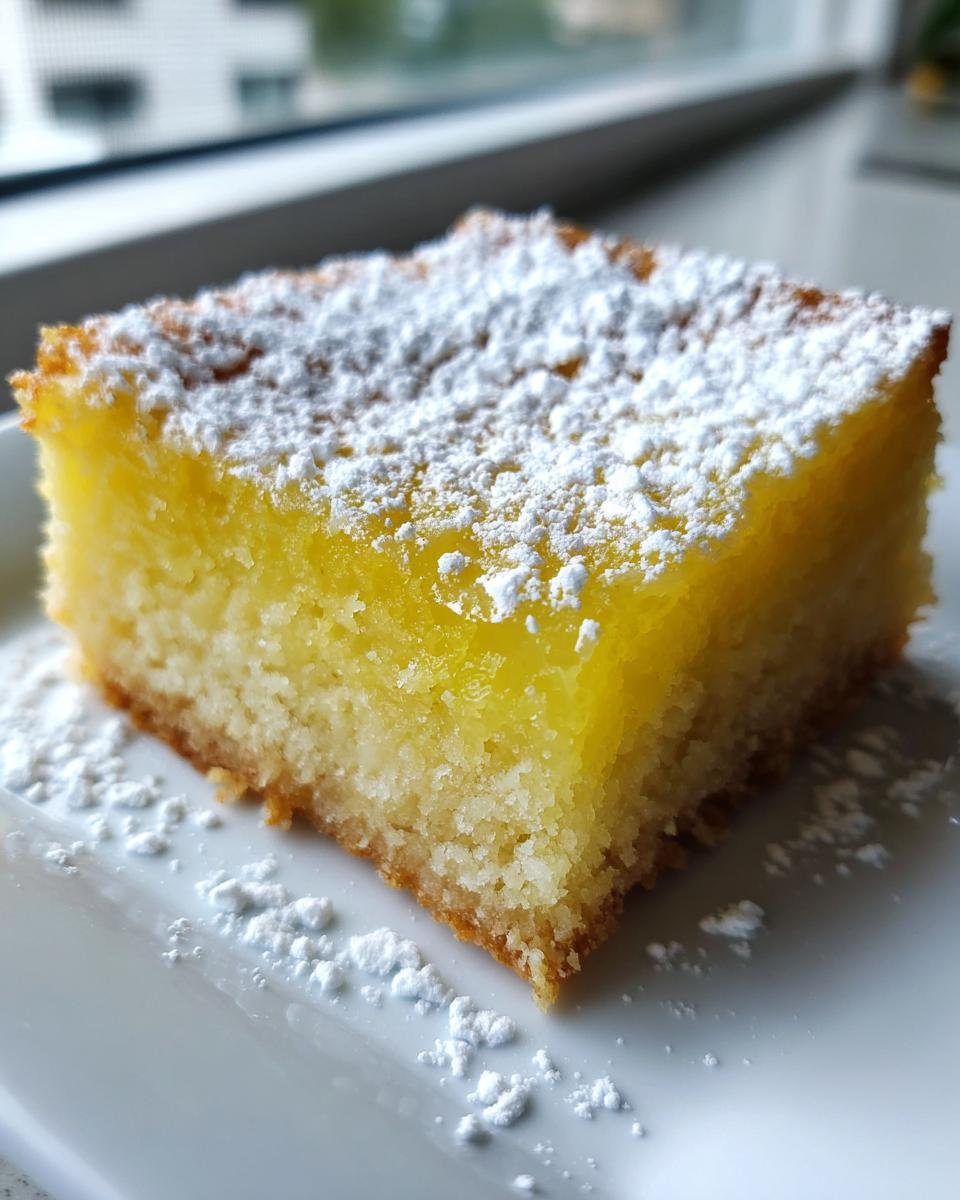
This next part is the hardest: you must let them cool completely on a wire rack. I mean it! If you try to cut warm Lemon Bars, they will absolutely fall apart, and you’ll end up with lemon soup instead of squares. Once they are totally cool, use those parchment paper handles to lift them out high and proud before slicing them up. Finish them off with a generous, snow-drift dusting of powdered sugar!
Tips for Achieving the Best Lemon Bars Every Time
Even though this recipe is simple, there are a couple of little secrets I cling to that make the difference between a good batch of Lemon Bars and an absolutely mind-blowing batch. These aren’t complex moves, but they definitely build up my confidence knowing I’ve done everything right before I even pull them out of the oven.
The Importance of Chilling Lemon Bars Before Slicing
Listen, I know you’re excited. The smell is intoxicating, and you want to cut into these amazing Lemon Bars immediately. But trust me on this, this is the step that separates the pros from the panicky mess-makers. You need to chill these things for at least two hours, or honestly, even better if you can wait longer!
If you try to slice them while they are even slightly warm, the filling is still too soft. You end up pushing the filling around instead of cutting through it cleanly. When they are thoroughly chilled, the filling is firm, and you get those gorgeous, sharp, perfect squares that look like they came straight from a fancy bakery case. It’s the difference between a sloppy afternoon snack and a beautifully presented dessert!
Ingredient Quality for Superior Lemon Bars Flavor
I preach this all the time, but it bears repeating for Lemon Bars: fresh lemon juice is non-negotiable. Bottled juice has a strange, cooked flavor that just doesn’t sing the way fresh juice does. I find that Meyer lemons make the absolute best ones if you can find them—they have a slightly sweeter, more floral note while still having that fantastic tartness. If you can’t find those, good old standard Eureka lemons will work wonderfully, just make sure you zest right before you squeeze them!
Also, make sure your butter is cold for the crust, even though we bake it right away. And remember that little bit of flour in the filling? Make sure it’s leveled out when you scoop it. These little details really help build the best flavor and texture foundation for your final Lemon Bars.
Storage and Keeping Your Lemon Bars Fresh
You baked them, you chilled them—now you need to know how to keep these amazing Lemon Bars tasting just as bright and tart next week as they do today! Luckily, these hold up really well, which makes them perfect for make-ahead baking. That high sugar content in the filling acts like a natural little preservative, which I love.
The main rule here is preventing them from drying out or absorbing any weird fridge smells. You want them tucked away safely in an airtight container. I find that layering them can sometimes cause smearing of that gorgeous powdered sugar, so if you are storing them for more than a day, maybe keep the powdered sugar dusting aside until you serve them.
For the best flavor and texture, I always recommend eating them within three to four days. If you need to stretch that time, pop the airtight container into the refrigerator right away. They actually firm up a little more when chilled, which makes the shortbread crust even more stable!
If you’ve managed to resist eating them all right away, you can totally keep them on the counter for a day or so if your kitchen isn’t too warm. But honestly, I grab mine from the fridge when I’m craving that cool, tangy bite. They are just fantastic!
Serving Suggestions for Your Tart Lemon Bars
Now that you have perfected these gorgeous, tangy Lemon Bars, the important question is: how do you serve them? While they are absolutely divine all by themselves, maybe with just that snowy cloud of powdered sugar, sometimes it’s fun to dress them up a little for company. I love pairings that either lean into the citrus or give a creamy counterpoint to that sharp tartness.
If you’re serving them after a heavy meal, keeping it simple is best. Maybe just a small swirl of good quality whipped cream on the side. If you wanted to go huge on the lemon flavor, or if you wanted to check out something a little fluffier, I actually have a stellar recipe for a bright lemon cake with coconut frosting that hits a very different, but equally sunny, note. But back to our delicious bars!

Here are a few ways I love presenting these simple Lemon Bars:
- With Berries: A scatter of fresh, barely sweet raspberries or blueberries on the plate balances the high tartness of the lemon perfectly. The color contrast against the pale yellow filling is stunning, too.
- A Dollop of Cream: Don’t use that heavy, overly sweet canned stuff. Use real heavy cream, whip it slightly until it just holds soft peaks—no sugar needed if the bars are sweet enough—and place a tiny spoonful next to the bar.
- Alongside Vanilla Ice Cream: This is my go-to if I pull these out as an afternoon treat. The coldness and creamy vanilla flavor contrast sharply with the room-temperature, tangy bar. It’s heaven.
- Dusting Refreshed: If your Lemon Bars have been chilling overnight, the powdered sugar sometimes dissolves a bit. Don’t be afraid to give them one final, light dusting right before you put them on the platter! Freshly dusted always looks better.
Honestly, though, the best way to serve them is straight from the fridge when that crust is super firm and you get that satisfying clean snap when you bite in. Enjoy every single tart, buttery bite!
Frequently Asked Questions About Lemon Bars
It’s totally normal to have questions when you are trying a new recipe, especially one as important as perfect Lemon Bars! Over the years, I’ve answered a lot of concerns, mostly about texture, because getting that perfect set is what makes or breaks the bar. Here are the things people ask me most often when they make this recipe for the very first time.
Can I make these Lemon Bars ahead of time?
Oh, please do! If anything, these are better when made ahead. I find that they taste their very best on day two once the crust fully settles against that tangy filling. You can certainly make them a day or two in advance. Just make sure they are completely cooled, then store them tightly covered in the refrigerator. Remember what I said about slicing? Chilling them overnight makes cutting those clean squares so much easier when you are ready to serve them. Don’t dust with powdered sugar until you are ready to pull them out to serve, though!
My Lemon Bars filling is jiggly, did I underbake them?
This is the number one panic call I get! Don’t freak out if the center looks a little jiggly when you pull them out of the oven. I mean truly *liquid* is bad, but a gentle wiggle is okay! That filling firm-up happens mostly during the cooling process. When you think they are done, the filling needs to look mostly opaque and solid around the edges, but that slight wobble in the very middle is totally expected at 35 minutes because it will continue to set as it slowly cools down to room temperature and then chills in the fridge. If you overbake them trying to get rid of all the wobble, you risk the filling becoming dry or even rubbery, and nobody wants that in their Lemon Bars.
What is the best way to zest lemons for these Lemon Bars?
You want the bright yellow part—the zest—but you absolutely must avoid the white part underneath, which is the pith. The pith is bitter and will totally ruin the clean, bright flavor we are aiming for in these Lemon Bars! I use a microplane grater, or sometimes just the fine side of a box grater if the microplane is dirty (oops!). You just run the side of the lemon lightly over the grater, only going until you see the yellow color. You’ll be shocked how much flavor you can get without ever hitting that bitter white layer. It makes a world of difference in the filling!
Estimated Nutritional Snapshot for Lemon Bars
Okay, let’s have a quick chat about what’s inside these delicious Lemon Bars, because while they taste like pure sunshine, they definitely count as a treat! I always make sure to mention that these numbers are just estimates based on my precise measurements, so your count might wiggle just a tiny bit depending on how heavy-handed you are with that final dusting of powdered sugar—which, let’s be honest, I tend to be!
These are rich because of that buttery shortbread base, so they do carry a good bit of fat, but that’s what makes them so satisfying! If you are counting macros or just watching your intake generally, here’s a quick rundown for one bar based on the recipe yielding 16 squares:
- Serving Size: 1 bar
- Calories: About 180 per bar
- Sugar Content: Roughly 18g (Remember, this is where a lot of the wonderful flavor comes from!)
- Total Fat: Around 10g, with 6g being saturated fat from the lovely butter.
- Carbohydrates: You’re looking at about 22g of carbs.
- Protein: A small boost of 3g.
See? Not bad for a dessert that tastes this decadent! They are a perfect little indulgence after a nice dinner, especially when you pair them with that fresh cup of coffee. Just remember that the shortbread crust and the sweet filling mean these are best enjoyed as an occasional treat, not an everyday snack, but they are certainly worth every single bit of that 180 calories!
Share Your Simple Lemon Bars Creations
Well, that’s it! You’ve conquered the world of beautiful, tangy, buttery Lemon Bars. Now, I want to hear all about them! Baking is always better when you can share the results, and I genuinely love seeing how you all interpret my family’s favorite recipes.
Did you try the chilling trick? Did you dust them extra thick? Head down to the comment section below and please, please let me know how they turned out. Giving this recipe a star rating really helps other bakers know they are in good hands when they decide to tackle these squares. If you ended up tweaking the recipe slightly, I want the details!
And definitely take a photo! Tag me on social media so I can share the sunshine your baking brought to my day. I’m always rounding up great citrus combinations, so if you’ve got a killer pairing for these bars—maybe a spicy ginger tea or something similar—let me know about that too. Speaking of sometimes going wrong, I actually wrote about a terrible mistake I made with crumb bars once, so if you want to read about how even I mess up sometimes, you can check out that cautionary tale about my fatal one-cup baking mistake.
So tell me honestly, now that you’ve made these flawless Lemon Bars, what’s your absolute favorite citrus dessert? Are you sticking with bars, or are you moving onto pies or maybe a bright cake? I can’t wait to read what you have to say!
Print
Simple Lemon Bars
- Total Time: 50 min
- Yield: 16 bars 1x
- Diet: Vegetarian
Description
A straightforward recipe for tart and sweet lemon bars with a shortbread crust.
Ingredients
- 1 cup all-purpose flour
- 1/2 cup unsalted butter, softened
- 1/4 cup granulated sugar (for crust)
- 2 large eggs
- 1 cup granulated sugar (for filling)
- 1/4 cup fresh lemon juice
- 1 tablespoon lemon zest
- 1 tablespoon all-purpose flour (for filling)
- Powdered sugar for dusting
Instructions
- Preheat your oven to 350°F (175°C). Line an 8×8 inch baking pan with parchment paper, leaving an overhang on two sides.
- Prepare the crust: In a medium bowl, mix 1 cup flour, 1/2 cup softened butter, and 1/4 cup sugar until crumbly. Press this mixture evenly into the bottom of the prepared pan.
- Bake the crust for 15 minutes, or until lightly golden.
- Prepare the filling: While the crust bakes, whisk together the 2 eggs, 1 cup sugar, 1/4 cup lemon juice, lemon zest, and 1 tablespoon flour in a separate bowl until smooth.
- Pour the filling mixture over the hot, baked crust.
- Return the pan to the oven and bake for an additional 20 to 25 minutes, or until the filling is set and no longer liquid in the center.
- Let the bars cool completely in the pan on a wire rack.
- Once cool, lift the bars out using the parchment overhang. Cut into squares.
- Dust generously with powdered sugar before serving.
Notes
- Chill the bars for at least 2 hours before cutting for cleaner slices.
- Use fresh lemon juice for the best flavor.
- Store cooled lemon bars in an airtight container.
- Prep Time: 15 min
- Cook Time: 35 min
- Category: Dessert
- Method: Baking
- Cuisine: American
Nutrition
- Serving Size: 1 bar
- Calories: 180
- Sugar: 18
- Sodium: 30
- Fat: 10
- Saturated Fat: 6
- Unsaturated Fat: 4
- Trans Fat: 0
- Carbohydrates: 22
- Fiber: 1
- Protein: 3
- Cholesterol: 45
Keywords: lemon bars, shortbread crust, lemon dessert, sweet and tart, baked dessert