
You know what I love? When a classic dessert seems completely intimidating—like baking something creamy and fancy—but it turns out to be dead simple to make at home. That’s exactly what happened when I finally cracked the code on the perfect **White Chocolate Cheesecake**. Honestly, I used to fear the water bath. My very first attempt looked like a cracked, sunken volcano! But once I mastered that little trick to keep the heat gentle, everything changed. This recipe is straightforward, uses ingredients you probably already have, and delivers that unbelievably rich, velvety texture that only a baked cheesecake can offer. Trust me, this is the foolproof guide to making the creamiest, dreamiest baked cheesecake you’ve ever tasted.
Why This Simple White Chocolate Cheesecake Recipe Works
I know what you’re thinking: cheesecake is hard work. But this recipe sheds all the unnecessary fuss! It’s designed for home bakers who want maximum flavor without all the stress. My goal here was to get that gorgeous, dense, creamy texture without needing a whole day dedicated to baking.
- We keep the steps logical and clean, so you never wonder what comes next.
- It delivers that unmistakable, luxurious mouthfeel you expect from a perfect dessert.
- It’s shockingly fast to put together before it heads off to chill! If you want a few more general tips for success in the kitchen, you can check out my general baking secrets right here.
Perfect Creamy Texture Every Time
The secret to texture, truly, is the cream cheese. You absolutely must make sure it’s totally, perfectly softened—not slightly cool, but soft. When you beat it until it’s smooth *before* adding the sugar and eggs, you are incorporating the air smoothly. Then, when we gently fold in that melted white chocolate, we avoid over-mixing. That’s how you get a flawless **White Chocolate Cheesecake** without any grainy spots or deflated centers.
Foolproof Graham Cracker Crust
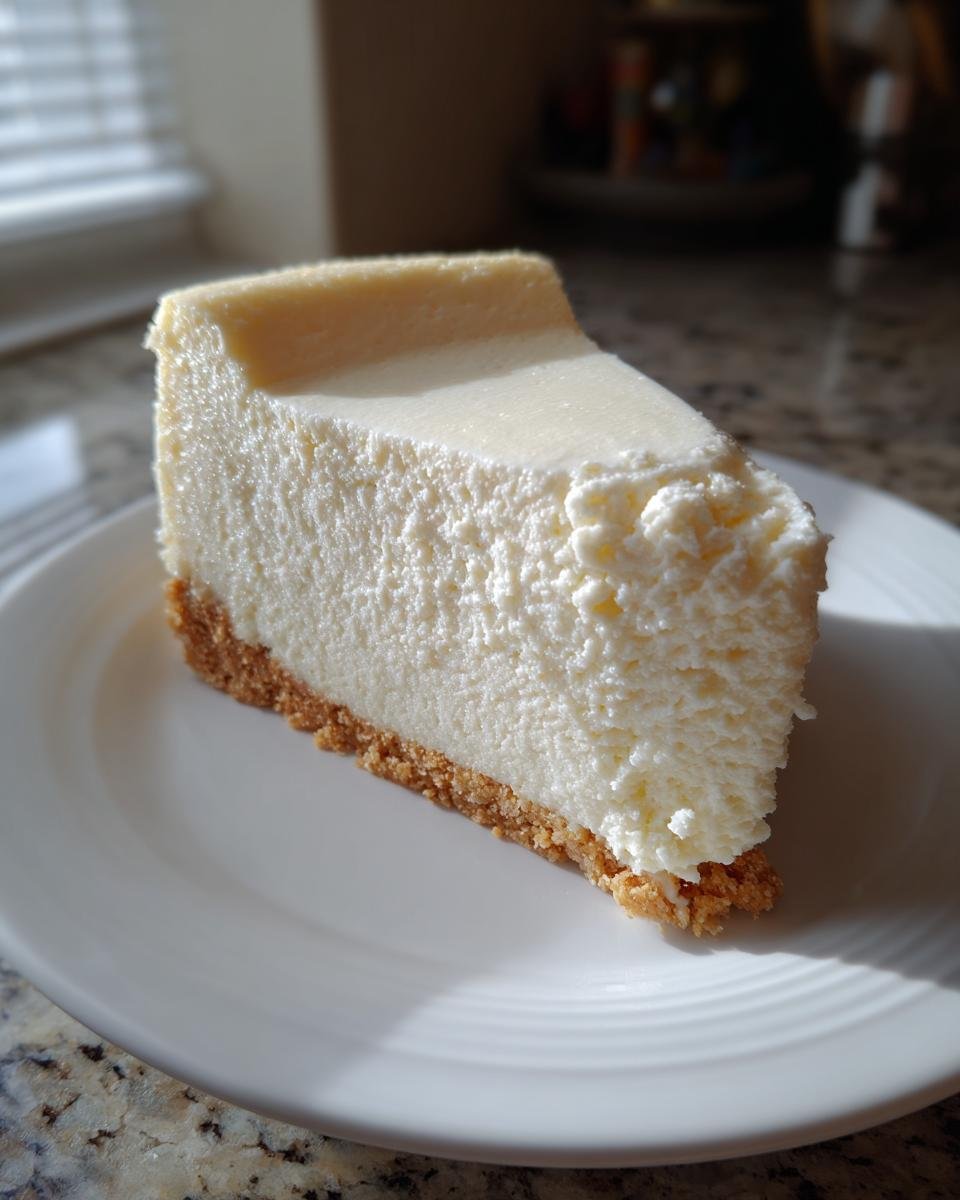
Honestly, I hate fiddling with crusts that need blind baking! This one is so easy. You just mix the crumbs, sugar, and melted butter, press it in, and you’re done. No pre-baking required! It sets up beautifully in the oven while the filling bakes. It saves time and ensures that when you slice into your **White Chocolate Cheesecake**, the crust stays perfectly crunchy under that rich white chocolate layer.
Essential Ingredients for Your White Chocolate Cheesecake
Okay, let’s talk about what you need to gather because having everything ready makes the mixing process fly by. Since we aren’t doing any tricky substitutions here (though I have tips for making buttermilk if you ever need them, you can check out my guide on that here!), stick to these measurements. Remember, for cheesecake, temperature and quality matter more than almost any other dessert!
Crust Components for the White Chocolate Cheesecake
For the base layer, we keep it classic and simple. You need one and a half cups of graham cracker crumbs. Make sure they are finely crushed—I usually pulse mine in a food processor just for a second to get a nice, consistent sand-like texture. Then, mix those crumbs with a quarter cup of granulated sugar. Finally, the glue holding it all together: six tablespoons of unsalted butter, melted down gently. That’s the entire list for the bottom layer!
Filling Ingredients for the White Chocolate Cheesecake
This is where the magic happens! The richness definitely comes from the cream cheese; you’ll need three full 8-ounce packages, and please, please, please make absolutely certain they are softened completely. I usually leave mine out on the counter for at least two hours before I even think about turning on the mixer. For sweetness, we use one and a half cups of granulated sugar mixed into the cheese base, plus one tiny teaspoon of vanilla extract for depth. Next up are the binders: four large eggs, which you add one at a time. The star, of course, is the flavor: twelve ounces of good quality white chocolate. Melt it slowly—I mean snail-slow—to keep it silky smooth! If the chocolate scorches, your beautiful **White Chocolate Cheesecake** will taste bitter, so take your time when melting that down until it’s liquid gold.
Step-by-Step Instructions for Perfect White Chocolate Cheesecake
This is where we put all the prep work to use! Cheesecake requires patience, but honestly, the actual mixing is quick. You’re looking for smooth, uniformed mixtures at every stage. Remember, we are baking this low and slow to keep everything silky, so make sure your oven is preheated to 350 degrees F (175 degrees C) before you start combining things.
Preparing the Pan and Crust
First things first: protect that creamy filling from any rogue water! Take your 9-inch springform pan and wrap the outside bottom really well with a couple of layers of heavy-duty aluminum foil. I mean wrap it tight like a little present. While the oven heats up, mix up those graham cracker crumbs, that quarter cup of sugar we saved for the crust, and the six tablespoons of melted butter in a small bowl. You just mix until it looks like wet sand. Then, press that mixture firmly and evenly into the very bottom of your foil-wrapped pan. Don’t overthink it; just press it down hard!
Mixing the Creamy White Chocolate Cheesecake Batter
Get that electric mixer ready! In a large bowl, beat your room-temperature cream cheese until it looks absolutely smooth—no lumps allowed around here, please! Once that’s perfect, we slowly add the one and a half cups of sugar and the vanilla extract. Beat until everything is just combined and creamy. Now, here comes the eggs. Add them one at a time. This is a major step: only beat until you see each egg disappear into the mixture before adding the next one. Don’t go whipping it up! Overmixing the eggs traps too much air, and that’s how cracks start forming later. Once the eggs are in, gently stir in that lovingly melted and slightly cooled white chocolate until you just can’t see any streaks of white anymore. Stop right there!
Baking the White Chocolate Cheesecake with a Water Bath
Time for the water bath, or bain-marie, which is our ticket to a smooth bake. Pour your beautiful batter right over that crust in the springform pan. Now, take a larger baking pan—one that your springform pan fits inside with a little room to spare. Carefully place the cheesecake pan inside the larger pan. Here’s the trick: you need hot water—fresh from the tap or kettle—and you fill that outer pan about halfway up the side of the springform pan. It should look like a cozy little hot tub for your cheesecake! Bake this setup for between 50 and 60 minutes. You know it’s ready when the edges look set, but if you gently tap the side, the very center has a slight, beautiful jiggle to it. It’s not liquid, but it’s definitely not firm yet.

Cooling and Chilling Your White Chocolate Cheesecake
Listen, this cooling process is as important as the baking! When the time is up, just turn the oven OFF. Don’t open the door yet! Leave the cheesecake sitting inside that hot water bath with the oven door slightly ajar for a full hour. This slow, gradual temperature drop is critical; it prevents the cheesecake from shrinking too fast and cracking. After that hour, gently take it out of the water bath, remove the foil, and let it cool completely on a wire rack on the counter. Only once it’s fully cooled down can you move it to the refrigerator. You must chill this **White Chocolate Cheesecake** for a minimum of six hours, but honestly, overnight is when it sets up perfectly and achieves that ideal sliceable, velvety texture!
Expert Tips for the Ultimate White Chocolate Cheesecake
Even though this recipe is designed to be super easy, I picked up a few tricks over the years in the kitchen, mainly by making a few mistakes myself! Getting that textbook, smooth result takes just a tiny bit of extra attention during the mixing and cooling phases. If you’ve ever had trouble with lumps or cracks, these focused tips should solve everything for you on your next **White Chocolate Cheesecake** adventure. If you want my general philosophy on what makes a great baker, check out my tips on becoming a better baker!
Preventing Lumps in Your White Chocolate Cheesecake Batter
Let’s tackle those frustrating lumps first. The cream cheese needs to be at room temperature—and I mean truly soft. If you try to beat cold cream cheese, it just won’t incorporate properly, and you’ll end up with little rogue chunks, even with a good mixer. You have to beat the cream cheese until it is perfectly smooth *before* you introduce the sugar. Once that sugar is in, you beat it until it’s creamy, but here’s the key: when the eggs go in, add them slowly and don’t speed up the mixer. The goal is just to combine, not whip air into the structure. The less you mix after the eggs and chocolate are added, the creamier your **White Chocolate Cheesecake** will be!
Avoiding Cracks in Your White Chocolate Cheesecake
Cracks are the nemesis of the cheesecake baker, but they usually happen when the temperature changes too fast. The water bath is your first line of defense, so don’t skip it! It surrounds the cake in gentle, steamy heat, cooking it evenly from the sides and bottom. But the second crucial defense is the slow cool-down period. When that hour is up in the turned-off oven, you have to leave the door cracked slightly. I usually wedge a wooden spoon into the door opening. This lets the temperature drop gently, easing the cheesecake out of its heat shock. If you pull it out cold right away, the filling contracts too fast and *boom*—crack city. A slow, patient cooling process ensures a beautifully smooth, unblemished top on your **White Chocolate Cheesecake**.
White Chocolate Cheesecake Variations and Serving Suggestions
Once you master the basic, beautiful **White Chocolate Cheesecake**, you start to get ideas, right? I love knowing I can tweak this recipe depending on what I have on hand or what mood I’m in. It’s rich enough on its own, but sometimes it just needs a little something extra to make it sing for a big party. I’ve found that white chocolate plays so nicely with tart flavors, which helps cut through that richness!
Flavor Twists for Your White Chocolate Cheesecake
Before you pour that glorious batter into the pan, you have room to get creative! If you want a sunny brightness, try zesting one whole fresh lemon right into the batter when you add the vanilla. It just wakes everything up. Or, if you want something a little more rustic and fruity, try blending up some fresh or thawed raspberries—just a tiny bit of puree—and swirl it gently through the top of the batter with a butter knife. It gives you these gorgeous pink veins throughout the cheesecake, which looks amazing when you slice it. If you ever want to try white chocolate in a different baked good, I have a killer recipe for white chocolate raspberry cookies!
Serving Ideas for White Chocolate Cheesecake
While that plain, smooth top is gorgeous, sometimes you need a little contrast in texture. Serving this **White Chocolate Cheesecake** with fresh, barely sweetened berries is my absolute favorite choice. Think tart raspberries or sliced strawberries piled right on top before serving. Another fun, easy thing I do is take a little bit of chocolate—milk or dark, doesn’t matter—melt it down, and use a fork to drizzle thin lines all over the top just before it goes into the fridge for its final chill. If you’re feeling extra decadent, a drizzle of warm dulce de leche or even a homemade caramel fudge sauce makes this feel like a fancy restaurant dessert!
Storage Instructions for Leftover White Chocolate Cheesecake
Oh boy, if you somehow manage to have leftovers—which I frankly doubt, because this stuff disappears fast—you need to treat it right. Cheesecake is delicate, and you don’t want it smelling like whatever else you crammed into the fridge! The freshness is all about keeping the surface protected.
Once your **White Chocolate Cheesecake** is fully chilled and you’ve cut a few slices, you need to cover the main cake tightly. I always use plastic wrap, but make sure the plastic wrap doesn’t actually touch the top surface of the cheesecake itself, especially if you haven’t glazed it heavily. Pressing plastic directly onto the exposed filling can sometimes leave a weird sheen or pull particles off when you remove it later. If you can, I cut a square of parchment paper slightly larger than the top and lay *that* right on the surface first, then wrap the whole springform pan (or just the leftover section) snugly with plastic wrap or foil.
It keeps beautifully in the refrigerator for a good four to five days. Honestly, some people say cheesecake tastes even better on day two because all those flavors have really settled in! Don’t leave it out on the counter for more than an hour before serving because that cream cheese needs to stay cold to maintain that perfect texture we worked so hard for. If you need to keep it longer than five days, freezing is an option, but you must wrap it extremely well first—think an outer layer of foil over the plastic wrap!
Frequently Asked Questions About White Chocolate Cheesecake
I’m gathering all the common questions I hear about this recipe here because making a perfect cheesecake sometimes just requires a little extra peace of mind. Don’t worry if you didn’t line up your ingredients perfectly; there are usually ways around small hiccups! If you’re ever curious about making smaller batches or variations like mini cheesecakes, I have a whole guide on [how to make 12 mini cheesecakes]!
Can I skip the water bath when making this White Chocolate Cheesecake?
Oh, I wish I could tell you yes, but I really, really can’t! If you skip the water bath, you are guaranteeing either an unevenly baked center that stays gooey or a huge crack right across the top because the edges cook way too fast compared to the middle. That slow, steamy environment created by surrounding the pan in hot water is what gives us that textbook, creamy texture without drying out the delicate baked custard. It’s the insurance policy for your perfect **White Chocolate Cheesecake** top!
What is the best way to melt white chocolate for the cheesecake?
White chocolate is so fussy, isn’t it? It scorches if you look at it wrong! My absolute favorite, safest way to melt it is over a double boiler—just a heatproof bowl set over a pot of barely simmering water, making sure the bottom of the bowl doesn’t touch the water. If you must use the microwave, you have to be super cautious. Use low power, maybe 30 or 40 percent, and heat it in 15-second bursts, stirring really well between each one. It takes longer, but it prevents those hard, burnt clumps from forming in your beautiful, smooth white chocolate.
Estimated Nutritional Data for White Chocolate Cheesecake
Now, let’s be real: This is cheesecake. It’s rich, it’s decadent, and it is absolutely worth every single calorie! But since I promised you all the details, I pull together the best estimates for what you are looking at per slice, assuming you get ten servings out of the whole thing. I always tell people that when you’re making something this delicious, you shouldn’t worry too much about counting macros, but it’s good to have an idea!
Please keep in mind these numbers are just an estimation. They are based on standard ingredient brands and perfectly measured portions. Things like the exact brand of white chocolate or how much butter soaked into the crumbs can change things slightly, but this gives you a solid baseline for your amazing **White Chocolate Cheesecake**.
- Serving Size: 1 slice
- Calories: Around 450 per slice – see? Totally worth it!
- Fat: We are looking at about 30 grams of total fat here, with 18 grams of that being saturated fat from all that wonderful cream cheese and butter.
- Carbohydrates: You’ll get about 40 grams of carbs, with 35 grams of that coming from sugar—that’s the joy of cheesecake!
- Protein: You get a decent little boost of about 7 grams of protein per slice from the dairy.
- Cholesterol: Roughly 100mg.
So yes, it’s a treat, but it’s a homemade treat made with love and high-quality ingredients. That makes it taste so much better than anything store-bought, in my opinion!
Share Your Thoughts on This White Chocolate Cheesecake
Well friends, we made it! We tackled the water bath, we mastered the smooth batter, and now you have a spectacular **White Chocolate Cheesecake** chilling happily in your fridge. But the story doesn’t end here for me—it’s just the beginning! I truly want to hear all about how this recipe worked for you in your own kitchen.
Did you add any fun twists? Maybe you went for the raspberry swirl, or maybe you just served it plain because the purity of the white chocolate flavor was just too good to mess with! Drop a comment down below and tell me your experience. Were your serving sizes as modest as mine (hint: they weren’t)?
If you loved this recipe and want to share photos of your perfectly creamy, un-cracked cheesecake tops, please feel free! Tag me on social media—I absolutely adore seeing your bakes. And if you have any super specific questions or need a little troubleshooting after you’ve tried it, don’t hesitate to reach out to me directly through my contact page. Happy baking, and I hope this rich, simple **White Chocolate Cheesecake** becomes a loved classic in your family just like it is in mine!
Print
Simple White Chocolate Cheesecake
- Total Time: 7 hours 25 min
- Yield: 10 servings 1x
- Diet: Vegetarian
Description
A straightforward recipe for a rich white chocolate cheesecake with a graham cracker crust.
Ingredients
- 1 1/2 cups graham cracker crumbs
- 1/4 cup granulated sugar
- 6 tablespoons unsalted butter, melted
- 3 (8 ounce) packages cream cheese, softened
- 1 1/2 cups granulated sugar
- 1 teaspoon vanilla extract
- 4 large eggs
- 12 ounces white chocolate, melted and slightly cooled
Instructions
- Preheat your oven to 350 degrees F (175 degrees C). Wrap the outside bottom of a 9-inch springform pan with heavy-duty aluminum foil.
- Mix graham cracker crumbs, 1/4 cup sugar, and melted butter in a small bowl. Press the mixture firmly into the bottom of the prepared springform pan.
- Beat the softened cream cheese in a large bowl with an electric mixer until smooth. Gradually add 1 1/2 cups sugar and vanilla extract, beating until combined.
- Beat in the eggs one at a time, mixing just until incorporated after each addition.
- Gently stir in the melted white chocolate until just combined. Do not overmix.
- Pour the batter over the crust. Place the springform pan inside a larger baking pan. Fill the larger pan with hot water halfway up the side of the springform pan to create a water bath.
- Bake for 50 to 60 minutes, or until the edges are set and the center has a slight jiggle.
- Turn off the oven and let the cheesecake cool in the oven with the door slightly ajar for 1 hour.
- Remove the cheesecake from the water bath and let it cool completely on a wire rack.
- Chill in the refrigerator for at least 6 hours, or preferably overnight, before serving.
Notes
- Ensure your cream cheese is fully softened to prevent lumps in the batter.
- Melt the white chocolate slowly to avoid scorching.
- The water bath helps the cheesecake bake evenly and prevents cracking.
- Prep Time: 25 min
- Cook Time: 60 min
- Category: Dessert
- Method: Baking
- Cuisine: American
Nutrition
- Serving Size: 1 slice
- Calories: 450
- Sugar: 35g
- Sodium: 250mg
- Fat: 30g
- Saturated Fat: 18g
- Unsaturated Fat: 12g
- Trans Fat: 0.5g
- Carbohydrates: 40g
- Fiber: 1g
- Protein: 7g
- Cholesterol: 100mg
Keywords: white chocolate, cheesecake, dessert, baked cheesecake, graham cracker crust