
Listen, if you want to take your cakes, cookies, or brownies from “okay” to “Wait, I need that recipe right now!” you HAVE to master one thing: flawless homemade frosting. Forget those tubs from the grocery store—they taste like sugar and regret! I’m going to show you my absolute go-to mixture. Trust me, this incredibly easy, creamy **Vanilla Frosting** recipe is the foundation of my entire baking arsenal. Once you nail this simple ratio, you unlock endless possibilities. It solidifies your baking street cred, and honestly, it just tastes like pure joy when it’s fresh off the mixer. It sets you up for success every single time.
Why This Vanilla Frosting Recipe Stands Out
So, why keep using my recipe when there are a million out there? Because this one is different. It’s not fussy, but it gives you that professional, pipe-perfect look that holds up beautifully. After years of baking for events, testing every trick under the sun, I landed right back here. If you want to see some of the other foundations I rely on, check out some general baking tips to make you a better baker. This **Vanilla Frosting** just works!
- It never tastes grainy, even when you’re rushing.
- It’s sturdy enough for piping tall swirls.
- It sets up perfectly without crusting over instantly.
Perfect Creaminess Every Time
It all comes down to the initial creaming stage and using the right amount of sugar relative to the fat. When the butter is beaten long enough with the sugar, you introduce the air needed for that fluffy, cloud-like mouthfeel. It melts beautifully in your mouth, which is exactly what you want from the best topping.

The Ultimate Simple Vanilla Frosting Base
Seriously, this is my starting line for everything. Need chocolate? Add cocoa powder! Want lemon? Add zest and juice! Because this **Vanilla Frosting** starts with such a clean, pure flavor profile, adding other extracts or inclusions is seamless. It’s the workhorse of my kitchen, and I hope it becomes yours too!
Gathering Ingredients for Your Vanilla Frosting
Alright, let’s talk about what you need. Unlike some fancy French buttercream that requires thermometers and triple thermometers, this **Vanilla Frosting** recipe relies on simple pantry staples. But simple doesn’t mean sloppy! If you use crummy ingredients here, you end up with crummy frosting. We’re aiming for quality because, remember, this is the main event!
You’ll need:
- One cup of unsalted butter—and this is important, it has to be properly softened.
- Four cups of powdered sugar, and you absolutely must sift this. Don’t skip the sifting, or you’ll be chasing lumps around your mixer bowl later!
- One teaspoon of good vanilla extract. Don’t skimp here, you can taste the difference!
- About three tablespoons of milk or heavy cream.
- Just a tiny pinch of salt to cut the sweetness.
Ingredient Notes and Substitutions
When it comes to the butter, always go unsalted. Why? Because salt levels vary wildly between brands, and we want total control over the seasoning. If you must use salted butter, cut the pinch of salt in the recipe down to practically nothing, maybe just a tiny whisper of salt. Also, make sure that butter is actually SOFTENED, not melted. If it’s melty, your frosting will be soup. A good test is pressing your finger into it; it should leave a gentle dent.
For the liquid, heavy cream is my absolute favorite because the fat content helps create a richer mouthfeel. Buttermilk is a no-go unless you want tang! If you run out of milk or cream, I’ve made this work in a pinch using a splash of half-and-half, or you can even look up how to make buttermilk substitutions if you need a liquid substitute for something else entirely, though milk is best here.
Step-by-Step Instructions for Perfect Vanilla Frosting
Making this **Vanilla Frosting** is honestly more about technique than complicated steps. Since there’s no baking involved, the whole thing comes together in about 10 minutes—if you’re ready! You’ll want a stand mixer or a sturdy hand mixer for this. I’ve linked to one of my favorite quick mixing recipes if you want to see my process in action for a similar 5-minute miracle buttercream, but the method is the same here.
Creaming the Butter Base
First things first, grab that properly softened butter and toss it into your mixing bowl. Turn the mixer on medium speed and just beat it by itself until it’s totally smooth, maybe about a minute. We are looking for zero lumps or streaks of hard butter left. This smoothing step ensures the sugar mixes in evenly, which stops you from having that gritty issue later on.
Incorporating Sugar and Flavor into Vanilla Frosting
Now for the fun part—the sugar! Remember how I stressed sifting? Do it now. Add the sifted powdered sugar gradually, maybe one cup at a time. Mix well after each addition, scraping down the sides of the bowl halfway through. Once all the sugar is incorporated, toss in the vanilla extract and that tiny pinch of salt. Mix until it just comes together. It’s going to look super stiff and maybe a little crumbly at this stage, but don’t panic!
Achieving the Ideal Consistency for Your Vanilla Frosting
This is where we control the texture of your **Vanilla Frosting**. Take your milk or cream and start adding it in, just one tablespoon at a time. Mix on low speed for the first addition so it doesn’t fly everywhere! Keep adding the liquid slowly until you see the frosting transform from a stiff paste into something lusciously creamy. If you want it for piping tall stars, stop adding liquid sooner. If it’s going to be a thin spread for a gooey layer cake, you might need that fourth tablespoon.
The Final Whip for Light and Fluffy Vanilla Frosting
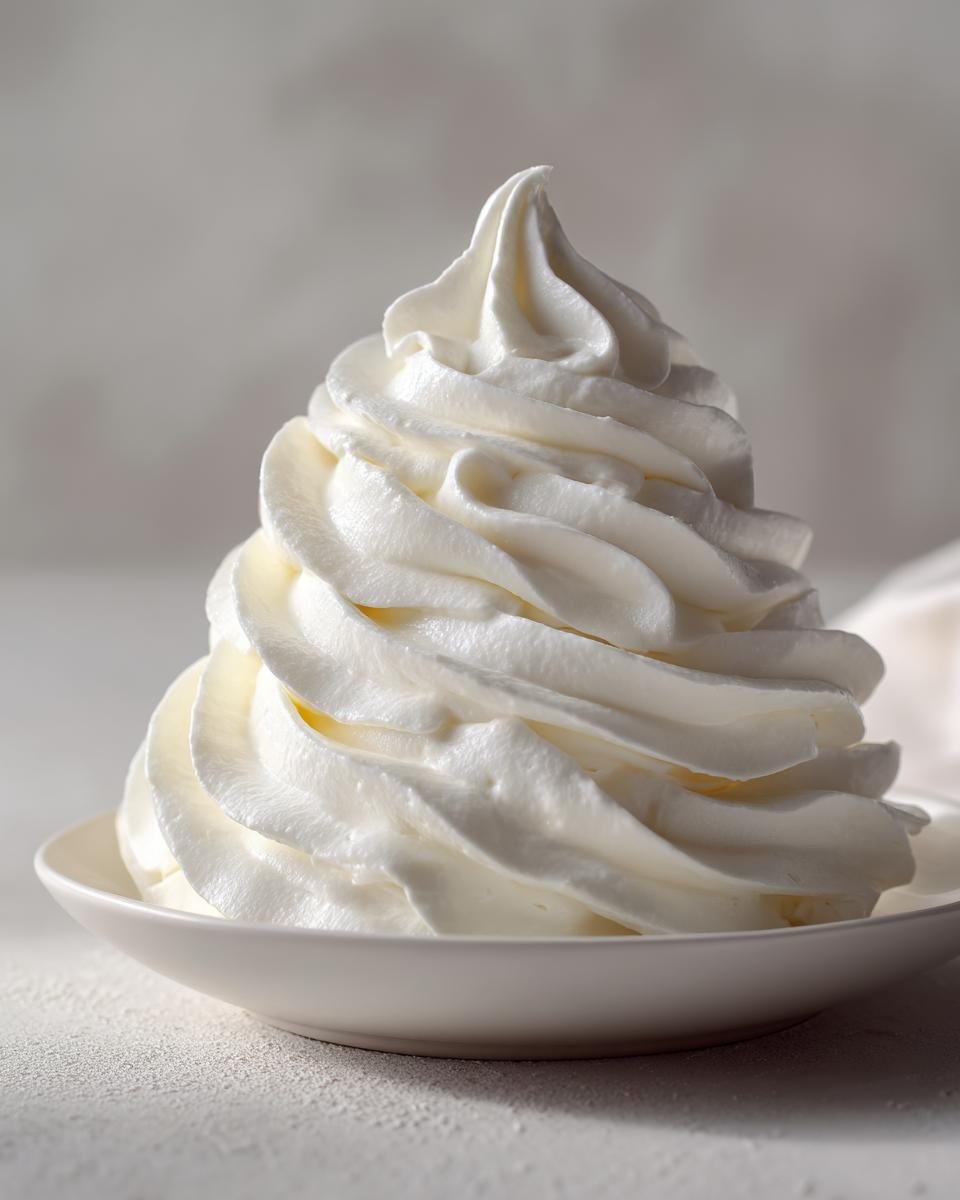
Once you’ve got the consistency close, turn that mixer up to high speed. Let it run for a full two to three minutes without touching it. This final whipping step is what incorporates tons of air, turning your thick mix into the light and fluffy **Vanilla Frosting** you dream about. When you stop, the sides of the bowl should look clean, and the frosting should look bright white and airy. It’s ready to go straight onto your treats!
Tips for the Best Vanilla Frosting Results
We’ve made the perfect batch, but let’s talk about those little bumps in the road. Because this **Vanilla Frosting** is so simple, success hinges on paying attention to things like temperature and liquid volume. If you follow my notes here, you can fix almost any minor issue that pops up while you’re mixing!
Temperature Control for Perfect Vanilla Frosting
Remember that crucial instruction about the butter needing to be properly softened? Well, if your kitchen is hot, or if you let the mixer run too long on medium speed, the butter can warm up too much, and that spells trouble. If your beautiful **Vanilla Frosting** starts looking a little shiny, soupy, or like it’s separating a bit, that means the butter got warm!
Don’t throw it out! Just scrape the bowl, pop the whole thing in the fridge for about 10 to 15 minutes—not longer! You want it to firm up just slightly. When you pull it out, give it another quick whip on medium speed just to bring it back together. That chilling step solves almost every runaway **Vanilla Frosting** issue.
Adjusting Thickness in Your Vanilla Frosting
This is the most common need when adjusting the recipe, whether you’re frosting a delicate layer cake or piping giant swirls onto a spice cupcake. I always give the reader this option because consistency is personal preference. If your **Vanilla Frosting** feels too stiff, like you’re struggling to even stir it with a spatula, you need more liquid. Add milk or cream in slow, controlled teaspoon increments. Mix after every teaspoon until it eases up and spreads nicely.
On the flip side, if your **Vanilla Frosting** is too thin—maybe it’s running right down the side of your cookie, or it’s collapsing when you try to pipe a peak—you need more structure. Don’t add more butter! Just slowly mix in more sifted powdered sugar, about a quarter cup at a time, until it stiffens up again. It’s about patience; just a little addition at a time keeps your perfect batch intact.
Serving Suggestions for This Creamy Vanilla Frosting
Now that you have this incredible, simple **Vanilla Frosting** ready to go, what are you going to smother it on? The possibilities are honestly endless around here! It’s the perfect topping for everything that needs a classic sweet finish. I often use it on my homemade sugar cookies—they look so festive after a quick dip in a thick layer. It’s also amazing spread generously on plain yellow cake rounds.
If you’re looking for inspiration, check out how I use a lighter version of this spread on my pumpkin treats—you can see some ideas when pairing frosting with pumpkin cupcakes. For a really elegant look, this **Vanilla Frosting** works beautifully as a middle layer between thin cake sponges. Or, you can always simplify things and try making a basic white frosting layer on brownies. You just can’t go wrong!
Storage and Reheating Instructions for Vanilla Frosting
So, what happens when you inevitably have leftovers? Because we used real butter and no funky stabilizers, how we store this glorious **Vanilla Frosting** matters immensely. If you’re only planning on keeping it for a day or two, and your kitchen isn’t scorching hot, you can leave it on the counter, tightly covered. Just make sure you use a really good airtight container or plastic wrap pressed directly onto the surface so it doesn’t form that thin skin on top.
But for anything longer than 48 hours, the fridge is your best friend! Transfer your leftover **Vanilla Frosting** to an airtight container. It will get rock hard in the refrigerator; that’s the butter doing its job. Don’t get discouraged when you pull it out!
When you’re ready to use that chilled frosting again, usually the next day or two, you need to let it sit out on the counter for a good hour or so to come back toward room temperature. Once it’s softened up a bit? You absolutely must give it a quick re-whip on medium speed for about 30 seconds. This reintroduces the air we lost while chilling, and bam—it goes right back to being fluffy, pipeable, and perfect. If you skip the re-whip, it will be soft but dense, and it won’t spread nearly as well.
Frequently Asked Questions About Vanilla Frosting
I get so many lovely messages about this recipe, and honestly, most of the confusion just comes down to wanting to customize it or troubleshoot small issues! I pulled together some of the most common things folks ask me about using this easy **Vanilla Frosting**. Hopefully, this clears everything up so you can confidently decorate your next masterpiece!
Can I make this Vanilla Frosting ahead of time?
Yes, you absolutely can! As I mentioned in the storage section, you can keep it airtight in the fridge for up to a week. When you want to use it, just let it sit out on the counter for about an hour until it softens up to room temperature. Then, give it a solid 30-second whip on medium speed in your mixer. That re-whip is essential to get that light, fluffy texture back. If you skip it, your **Vanilla Frosting** will be dense, even if it’s soft.
How do I make a thinner or thicker batch of Vanilla Frosting?
This is my favorite question because it gives you complete control! Remember, we added the liquid (milk or cream) in small amounts. If you need it thinner—say, you want to drizzle it over donuts where it can flow easily—just whisk in another teaspoon of milk at a time until you hit that perfect drizzly consistency. If you need it thicker for piping sharp stars, slowly beat in more sifted powdered sugar, about a quarter cup at a time. This method ensures your **Vanilla Frosting** stays just how you need it for whatever project you’re tackling.
What is the difference between this and American Buttercream?
That’s a great question! Honestly, this simple **Vanilla Frosting** *is* my version of American Buttercream; they are essentially one and the same! American Buttercream is just a very straightforward mix of softened butter, powdered sugar, a bit of liquid, and flavoring. Some recipes add egg whites for a slightly different texture, but mine is just the purest, easiest, creamiest blend of fat and sugar you can make. If you’re ever looking for more complex recipes, you can see how I approach other styles, like my basic easy white frosting variations, but this one is the standard for a reason!

Estimated Nutritional Data for Vanilla Frosting
Okay, let’s look at the boring but important stuff! When you’re making something this delicious, you usually don’t want to think about the numbers, but since we are aiming for the most trustworthy recipes around, I always include the estimates. Remember, this is just a ballpark figure because the brand of butter you use or how generous you are with that vanilla extract can change things slightly!
These estimates are based on a serving size of about 1/4 cup, which, let’s be real, is probably more than anyone stops at when frosting a cupcake! For reference, this batch yields about three cups total.
Here’s the breakdown of what you’re looking at:
- Calories: Around 380 per serving.
- Sugar: Oof, about 55 grams. That’s where all that powdered sugar goes!
- Fat: Roughly 18 grams total fat in that serving size.
- Carbohydrates: About 55 grams total.
Keep in mind this is pure, delightful decadence. It’s not meant to melt off your waistline; it’s meant to melt in your mouth! Just like with any recipe, if you substitute that milk for heavy cream, or use different shortening in your cake base before adding this **Vanilla Frosting**, these numbers are going to shift a little bit. But hey, at least you know exactly what you’re getting into when you decide to lick the spoon!
Share Your Perfect Vanilla Frosting Creations
That’s it! You’ve made it to the end, and I sincerely hope you’re looking at a big bowl of the creamiest, easiest **Vanilla Frosting** you’ve ever seen. I mean, you crushed it! When you use a foundational recipe like this, it feels so rewarding because you realize it wasn’t scary or complicated at all.
Now, here’s my big ask. I absolutely love seeing what everyone whips up! If you take the time to make this, please do me a favor and head back up to the top of the page and give the recipe your honest star rating. It helps other bakers know how well this simple **Vanilla Frosting** works for them!
And if you get a truly beautiful batch piped onto cupcakes or spread perfectly on a layer cake, snap a photo! Share it on social media and tag me—I always check! I want to see your swirl technique! If you have any questions that I missed covering, or if you just want to tell me how much you loved the vanilla flavor, please head over to my contact page and drop me a line. Happy decorating, everyone!
Print
Simple Vanilla Frosting
- Total Time: 10 min
- Yield: About 3 cups 1x
- Diet: Vegetarian
Description
A basic recipe for sweet, creamy vanilla frosting.
Ingredients
- 1 cup unsalted butter, softened
- 4 cups powdered sugar, sifted
- 1 teaspoon vanilla extract
- 3 tablespoons milk or heavy cream
- Pinch of salt
Instructions
- Beat the softened butter in a large bowl until smooth and creamy.
- Gradually add the sifted powdered sugar, one cup at a time, mixing well after each addition.
- Mix in the vanilla extract and salt.
- Add the milk or cream one tablespoon at a time until the frosting reaches your desired spreading consistency.
- Beat on high speed for 2 to 3 minutes until light and fluffy.
Notes
- For a thicker frosting, use less liquid.
- For a thinner frosting, add a little more liquid, a teaspoon at a time.
- If the butter is too warm, the frosting may become runny.
- Prep Time: 10 min
- Cook Time: 0 min
- Category: Dessert Topping
- Method: Mixing
- Cuisine: American
Nutrition
- Serving Size: 1/4 cup
- Calories: 380
- Sugar: 55
- Sodium: 45
- Fat: 18
- Saturated Fat: 11
- Unsaturated Fat: 7
- Trans Fat: 0.5
- Carbohydrates: 55
- Fiber: 0
- Protein: 0.5
- Cholesterol: 45
Keywords: vanilla frosting, buttercream, simple frosting, cake topping, cookie icing