
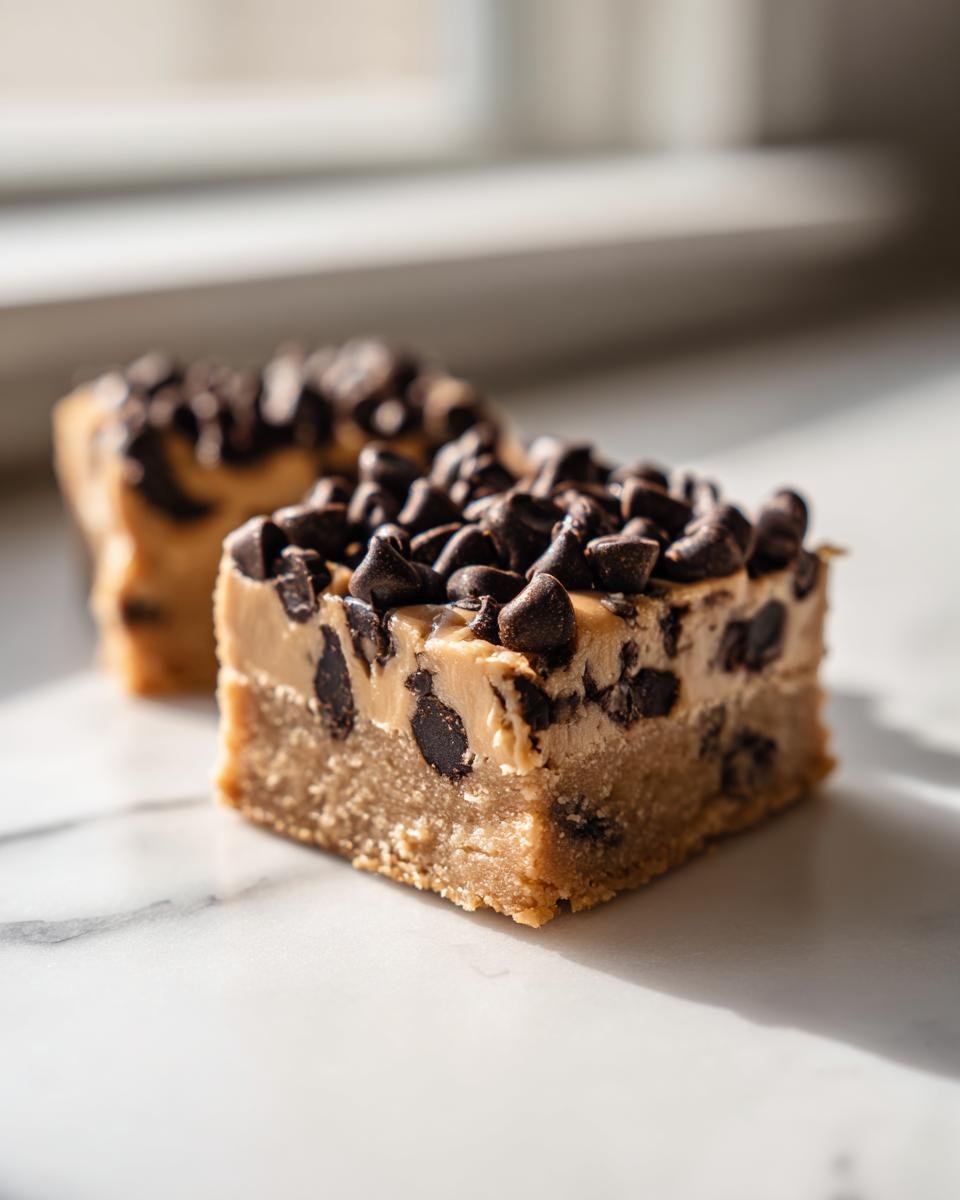
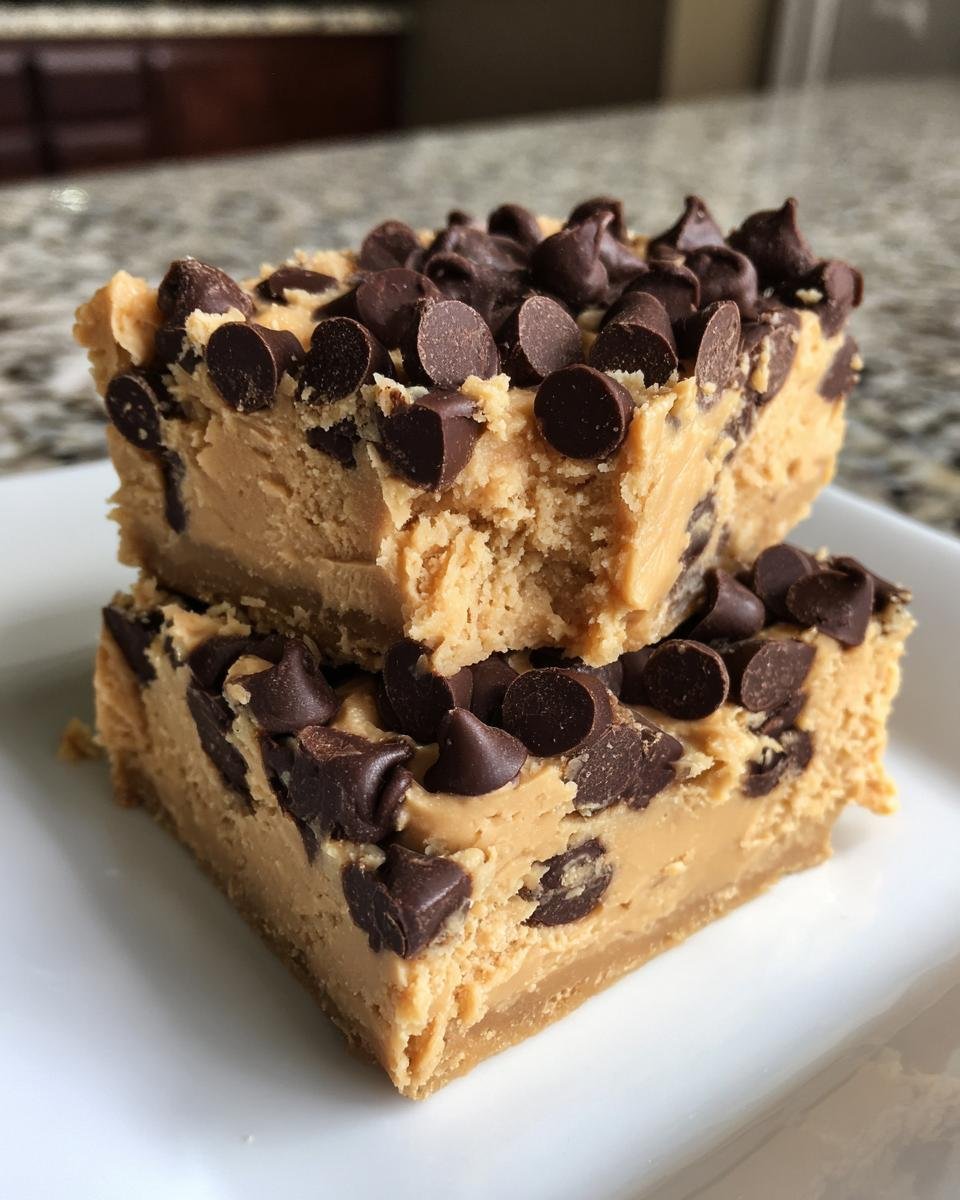
Are you ready to satisfy that intense, gooey cookie dough craving without ever turning on the oven? Me too! That’s why I’m obsessed with these incredible **Peanut Butter Cookie Dough Bars**. Seriously, these taste exactly like cheating and licking the spoon clean after mixing up a batch of classic cookies, but they come together fast. Since they are completely no-bake, they are my absolute savior when the summer heat hits or when I need a decadent dessert in under thirty minutes of active time.
Forget waiting around for the oven to preheat. These bars are pure, concentrated peanut butter joy, studded with chocolate chips, and they set up perfectly in the fridge. Grab your biggest bowl, because we’re about to make the easiest, most satisfying treat you’ll ever whip up!
Why You Will Make These Peanut Butter Cookie Dough Bars Repeatedly
I know you have a lot of dessert recipes bookmarked, but trust me on this one. These bars earn their permanent spot in my rotation, and I think they will for you, too. After you see how little effort is involved, you won’t look back!
- They are genuinely no-bake! That means zero preheating, zero oven time, and absolutely no risk of burning your beautiful dessert. It’s basically just mixing and chilling.
- We get that amazing, slightly salty, deeply rich peanut butter flavor that reminds you of sneaking dough right out of the mixing bowl. It’s that nostalgic taste we all crave.
- Prep time is ridiculously fast—I mean, fifteen minutes max if you’re moving at a leisurely pace. Seriously, you can make the whole base faster than it takes some cakes to bake!
- They are incredibly sturdy once chilled. You can slice them cleanly, pack them up, and they travel beautifully without getting messy. Perfect for potlucks or taking to work.
- You can make them ahead of time! Since they need that 2-hour chill, they are the ultimate stress-free dessert for parties or when unexpected guests drop by.
- If you’re looking for a quick fix when the craving hits, these **peanut butter cookie dough bars** satisfy that sweet tooth instantly. Grab a glass of milk; you’re going to need it! Check out my quick tips for an amazing 15-minute taste test!
Essential Ingredients for Perfect Peanut Butter Cookie Dough Bars
When you aren’t baking, you might think ingredients don’t matter as much, but trust me, quality still shines through even in a no-bake treat like this! Since we skip the heat to kill bacteria in the raw eggs typically found in dough, we focus on making this mixture taste amazing straight from the bowl.
You need the right balance here for that classic cookie structure. The softened butter is non-negotiable—it has to be spreadable, or your creaming process will just fail right out of the gate. You’ll notice the brown sugar goes in here too; it lends that deep, rich molasses undertone that white sugar just can’t deliver in a no-bake recipe.
I always make sure my flour is measured correctly because too much ends up making these bars dry, and we want pure, delicious dough texture. For more tips on making sure your pantry staples behave, check out my full guide to better baking tips!
Here is what you absolutely must gather before you start mixing:
- 1 cup unsalted butter, softened: Remember, softened means room temperature, not melted mush!
- 1 cup packed brown sugar: Yes, pack it into the cup tightly.
- 1 cup creamy peanut butter: Creamy keeps the texture smooth, my preference!
- 2 teaspoons vanilla extract: Don’t skip this; it rounds out all that peanut butter flavor.
- 2 1/2 cups all-purpose flour: Sifted lightly is even better for preventing density.
- 1 teaspoon baking soda: Yes, even in no-bake, this helps with the slight airy structure.
- 1/2 teaspoon salt: Balances the sweetness, absolutely necessary.
- 1 cup semi-sweet chocolate chips: The perfect melty topping, but we only press them in gently.
Step-by-Step Instructions for No-Bake Peanut Butter Cookie Dough Bars
Putting these bars together is almost laughably easy, which is why I love them so much. It’s less baking, more assembling the best sweet mixture you can imagine! Just follow these steps closely, and you’ll have perfect, sliceable bars that taste like pure childhood.
Preparing the Pan and Creaming the Base for Peanut Butter Cookie Dough Bars
First things first, you need to set up for success! Grab that 8×8 inch pan and line it completely with parchment paper. Make sure you leave a decent overhang on two sides—this is your handle later when you need to lift the whole slab out for cutting. That’s my biggest expert tip right there; sticky cleanup is the worst!
Now for the base: In a big bowl, cream together the softened butter, packed brown sugar, and that creamy peanut butter. You want this mixture wonderfully smooth and light before you move on. If your butter is cold, you’ll just mash things around, so make sure it’s room temperature!

Combining Wet and Dry Ingredients for the Peanut Butter Cookie Dough Bars
In a separate bowl, take your time whisking those dry things together—the flour, baking soda, and salt. Whisk them well so you don’t end up with one bite tasting super salty and the next tasting only like flour!
Next, mix in the vanilla with the creamed butter mixture. Then, gradually add the dry ingredients into the wet ingredients. Here’s where you have to show some restraint! Mix just until everything comes together into a cohesive dough. If you mix too much, it gets tough, and we want tender **peanut butter cookie dough bars**!
Setting and Cutting Your Finished Peanut Butter Cookie Dough Bars
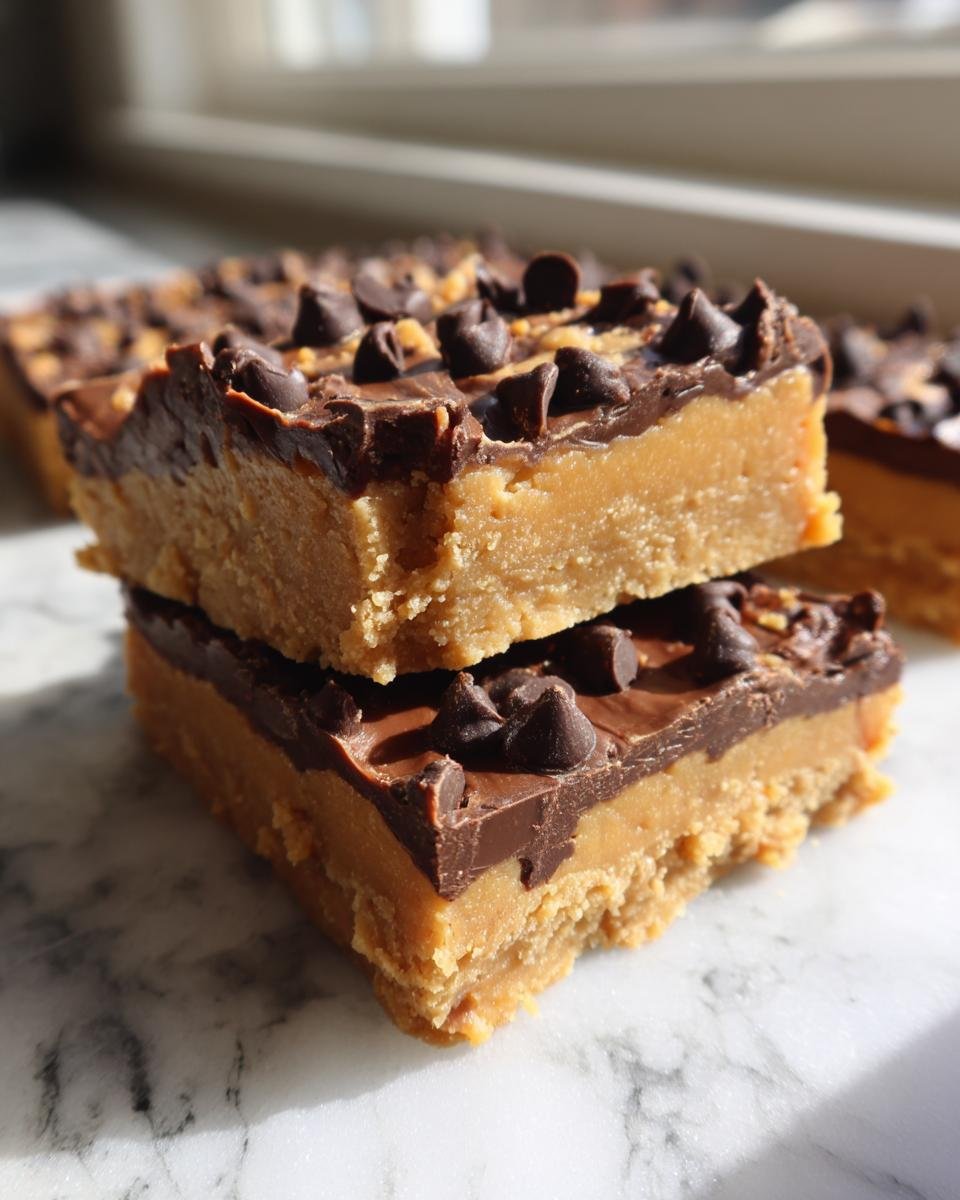
Once mixed, press that gorgeous dough evenly into your parchment-lined pan. You can use the bottom of a flat glass or just your clean hands to get it nice and flat against the bottom. Then, scatter those chocolate chips right over the top and give them a gentle press so they stick nicely.
This is the hardest part because it involves waiting! Refrigerate the whole pan for a minimum of two hours. This chilling time is crucial; it firms up the butter and allows the bars to hold their shape beautifully when you cut them. When they are solid, just grab those parchment handles and lift the whole thing out. Cut them into 16 squares, and that’s it! You can see my technique for handling these no-bake chocolate peanut butter bars here!
Tips for Making the Best Peanut Butter Cookie Dough Bars
We’ve gone over the basic steps, but I want to share a few legendary little tricks I’ve learned over the years. These aren’t in any cookbook, but they absolutely guarantee that your **peanut butter cookie dough bars** taste like they came from a professional bakery—even though you didn’t bake them! A little extra attention to these details makes a huge difference in the final texture and flavor.
First rule: Don’t fight the temperature of your ingredients. I mentioned it above, but it bears repeating because it’s the number one reason these fail to come together right. If the butter is too cold, you end up with lumps of peanut butter clinging to the flour instead of a smooth base.
Here are my top survival tips for no-bake perfection:
- Measure that Flour Carefully: When measuring flour for no-bake recipes, scoop the flour lightly into your measuring cup using a spoon, and then level it off with a knife. Don’t scoop directly from the bag with the measuring cup! If you pack in too much flour, these bars will turn into dense little bricks instead of tender dough.
- Crunchy vs. Creamy Texture Call: I started this recipe using creamy peanut butter because I prefer the uniformly smooth, melty quality of the dough, especially when paired with the soft chocolate chips. However, if you love texture, feel free to swap in crunchy peanut butter! It adds a wonderful bite, but just know the overall texture will be chunkier.
- The Double-Press Technique: When pressing the dough into the pan, do it in two stages. First, gently press the dough across the bottom when it’s still loose. Then, sprinkle the chocolate chips on top and use the flat bottom of a drinking glass to firmly press everything together one last time. This locks the chips in place so they don’t pop off when you slice the bars later.
If you want to dive into even more general baking wisdom that applies everywhere—from cookies to pies—you should definitely check out my detailed resource on becoming a better baker. You got this!
Ingredient Notes and Substitutions for Peanut Butter Cookie Dough Bars
Look, I get it. Sometimes you are standing in the kitchen, ready to make these amazing **peanut butter cookie dough bars**, and you realize you are missing one specific thing the recipe calls for. Don’t panic and abandon ship! This recipe is incredibly forgiving, but we need to be smart about what we swap out so we don’t ruin that perfect no-bake structure.
The main thing to remember is structure. Since we aren’t using eggs or getting chemical lift from an oven, the butter, sugar, and flour ratios are doing all the heavy lifting to keep this dessert solid in the fridge. We are mostly dealing with texture swaps here, not flavor overhauls.
Let’s talk about the two main items people usually question: the peanut butter and the flour.
When it comes to peanut butter, as I mentioned before, creamy gives you that unbelievably smooth dough texture that melts in your mouth. If you use crunchy, you’ll get little peanut shards throughout, which is great if you like texture, but it won’t feel exactly like classic cookie dough. It’s a great swap, just know what you’re getting into!
Now, the flour situation. Because we are not heating the dough, some folks worry about using standard all-purpose flour straight from the bag. While some purists insist on toasting the flour first to eliminate any raw taste or potential issues, usually, when it’s mixed so thoroughly with strong flavors like brown sugar, vanilla, and robust peanut butter, it’s perfectly fine. If you are very concerned, you can gently toast the 2 1/2 cups of flour in a dry skillet over medium-low heat for about five minutes, stirring constantly until it smells faintly nutty. Let it cool COMPLETELY before adding it to the wet ingredients, or you’ll end up melting your butter!
As for swapping the chocolate chips? Go wild! Semi-sweet is the classic partner for peanut butter, but if you have dark chocolate pieces or even those little peanut butter chips sitting around, toss them in instead. Just keep the total amount around one cup so you don’t throw off the balance of the dough underneath.
Storage and Reheating Peanut Butter Cookie Dough Bars
The best part about these no-bake **peanut butter cookie dough bars**? They keep brilliantly! Since they don’t have eggs that cause them to go bad quickly, these are fantastic for making ahead of time. Honestly, they taste even better on Day Two after they’ve had extra time to fully chill and let all those peanut butter and chocolate flavors mingle in the fridge. You want to treat these more like you’d treat a regular candy bar rather than a fresh-from-the-oven cookie.
Always store leftovers in an airtight container. Place parchment paper between the layers if you stack them too high; otherwise, that beautiful chocolate topping might stick to the bottom of the layer above it. They last really well in the refrigerator for about a week if you can keep your hands out of the container, which is tough, I know!
When I know I’m going to have leftovers for longer than a week, I go straight to the freezer. Freezing is excellent for these! You can definitely freeze them for up to three months without any issue at all. Make sure you wrap the whole slab or perfectly cut squares tightly in plastic wrap first, and then maybe toss them in a Ziploc bag just for extra protection against freezer burn.
The thawing process is super easy, too. I usually just take out what I plan to eat that day and let it sit on the counter for about fifteen minutes before serving. They come back to that perfect, slightly firm, chilled dough texture in no time! If you ever need a speedy reminder on making sure your bars survive the week, remember my quick snack bar guide has the storage secrets!
Variations on Classic Peanut Butter Cookie Dough Bars
While these **peanut butter cookie dough bars** are pure perfection in their purest form—just PB, a little salty, and a lot of chocolate—I totally encourage you to play around! Since we aren’t dealing with delicate baking chemistry, you have a lot of room to customize the texture and flavor profile. Experimentation is half the fun in the kitchen, right? Just try not to add so much stuff that the dough won’t set up!
If you want to take these to the next level, especially for a birthday party or holiday gathering, here are my favorite ways to shake up the standard recipe. You can find even more cookie cake inspiration in my peanut butter cookie cake section!
Swap Out Your Chocolate Chips: Everyone loves semi-sweet, but that’s just the beginning! Try using milk chocolate chips if you have a major sweet tooth—they melt a little softer, which is lovely. For a deeper, more bittersweet flavor, go for a good quality dark chocolate. Even better? Mix them! About half a cup of semi-sweet chips and half a cup of white chocolate chips tastes surprisingly sophisticated against the salty peanut butter base.
Add Texture with Mix-Ins: The base dough is smooth, which is nice, but sometimes you want a little extra crunch or color. This is where sprinkles come in handy! If you’re making these for a celebration, toss in colorful rainbow sprinkles right with the chocolate chips. They won’t bleed their color much since the dough is cold, and they look so festive.
Another great textural addition is using chopped pretzels. Crush them up slightly—you don’t want fine powder, just small, irregular pieces—and fold those in with the flour mixture, or just sprinkle them on top with the chocolate. The salty crunch provides an amazing contrast to the creamy peanut butter. It turns these into sweet and salty masterpieces!
A Different Kind of Drizzle: Forget just chopping ingredients and folding them in. Once you’ve pressed the dough into the pan and before chilling, you can top it off with a beautiful drizzle. Melt about a quarter cup of peanut butter with a tablespoon of extra butter until it’s runny. Drizzle that zig-zag pattern right over your chocolate chips. When it chills, you get this extra layer of pure peanut butter flavor that sets up firm. Wow, they are dangerous that way!
Serving Suggestions for Your Peanut Butter Cookie Dough Bars
Since these **peanut butter cookie dough bars** are so rich and satisfying, they really don’t need much fuss! They are perfect straight out of the fridge, maybe cut into smaller squares because they are so decadent. My favorite way to serve them is slightly warm, which you can fix by letting them sit on the counter for just ten minutes after chilling.
But if you want to make a real event out of it, you absolutely must serve them with a tall, cold glass of whole milk. The classic pairing never fails! For an adult dessert experience, pair a small square with a strong cup of coffee or even serve one alongside a scoop of vanilla bean ice cream for a truly indulgent experience. You can even blend one up into a shake, or make a smoothie version if you’re feeling ambitious!
Frequently Asked Questions About Peanut Butter Cookie Dough Bars
I knew you’d have questions! When you’re dealing with a recipe that skips the oven, people always wonder about the details that normally get taken care of by heat. Don’t you worry; I’ve got you covered. These answers cover everything from safety to structure, so you can make these **peanut butter cookie dough bars** with full confidence.
If you’re making similar no-bake treats often, you might want to check out my tips for making no-bake chocolate peanut butter cookies, which addresses a lot of the same structural concerns!
Are these Peanut Butter Cookie Dough Bars safe to eat?
That’s the million-dollar question for any no-bake dough recipe, isn’t it? Standard cookie dough recipes often have two hazards: raw eggs and raw flour. Since we aren’t using eggs in this recipe, we skip that worry entirely! We rely on the butter and peanut butter to bind everything, which is great.
The bigger concern with unbaked dough is usually the flour. If you are using standard all-purpose flour, you technically should toast it first to ensure any potential bacteria are killed, which I mentioned in the substitution section. If you toasted your flour gently on the stovetop until it smelled nutty, then yes, these bars are completely safe and delicious! If you skipped that step, eat them at your own risk, or toast that flour before making your next batch.
How long do I need to chill the Peanut Butter Cookie Dough Bars?
This step is non-negotiable, trust me—you cannot rush the chill time if you want actual bars that look like the photo and cut cleanly!
The recipe calls for a minimum of two hours in the refrigerator. Why two hours? Because the structure of these **peanut butter cookie dough bars** relies 100% on the fat—the butter and the peanut butter—colding down and hardening. If you only chill them for an hour, they’ll be soft and gooey, and when you try to lift them out, they’ll just slump into a peanut butter puddle in the parchment paper. Don’t risk it! Two hours ensures they are firm enough to hold their shape when you lift them out and slice them into perfect squares.
Can I use crunchy peanut butter instead of creamy?
Absolutely, you can! I prefer creamy because I love that smooth texture against the melted chocolate chips, but crunchy peanut butter works perfectly fine if you love texture. It will just give you little bits of peanut suspended throughout the dough base, which many people actually prefer. It adds a slightly different mouthfeel, but the flavor is still deeply peanut-buttery and delicious.
Why do I need to use baking soda if I’m not baking the dough?
That’s a fun quirk of this recipe! We use baking soda in the dry mix primarily for two reasons, even without the oven. First, it adds a slight saltiness and “baked cookie” flavor profile that helps mimic the real deal. Second, even though it won’t cause a rise, the baking soda interacts slightly with the fats and brown sugar to give the raw dough a tiny bit more lift and substance, preventing it from becoming too dense and hard, like fudge. It keeps it feeling more like actual cookie dough!
Serving Suggestions for Your Peanut Butter Cookie Dough Bars
Since these **peanut butter cookie dough bars** are so rich and satisfying, they really don’t need much fuss! They are perfect straight out of the fridge, maybe cut into smaller squares because they are so decadent. My favorite way to serve them is slightly warm, which you can fix by letting them sit on the counter for just ten minutes after chilling.
But if you want to make a real event out of it, you absolutely must serve them with a tall, cold glass of whole milk. The classic pairing never fails! For an adult dessert experience, pair a small square with a strong cup of coffee or even serve one alongside a scoop of vanilla bean ice cream for a truly indulgent experience. You can even blend one up into a shake, or make a smoothie version if you’re feeling ambitious!
Print
Peanut Butter Cookie Dough Bars
- Total Time: 2 hr 15 min
- Yield: 16 bars 1x
- Diet: Vegetarian
Description
Simple, no-bake bars made with a peanut butter cookie dough base and topped with chocolate chips.
Ingredients
- 1 cup unsalted butter, softened
- 1 cup packed brown sugar
- 1 cup creamy peanut butter
- 2 teaspoons vanilla extract
- 2 1/2 cups all-purpose flour
- 1 teaspoon baking soda
- 1/2 teaspoon salt
- 1 cup semi-sweet chocolate chips
Instructions
- Line an 8×8 inch baking pan with parchment paper, leaving an overhang on two sides for easy removal.
- In a large bowl, beat the softened butter, brown sugar, and peanut butter until smooth.
- Mix in the vanilla extract.
- In a separate bowl, whisk together the flour, baking soda, and salt.
- Gradually add the dry ingredients to the wet ingredients, mixing until just combined. Do not overmix.
- Press the dough evenly into the bottom of the prepared pan.
- Sprinkle the chocolate chips over the top of the dough and gently press them in slightly.
- Refrigerate for at least 2 hours, or until firm enough to cut.
- Lift the bars out of the pan using the parchment paper overhang and cut into squares.
Notes
- For easier mixing, ensure your butter is truly at room temperature.
- You can use crunchy peanut butter if you prefer texture in your bars.
- Store leftovers in an airtight container in the refrigerator.
- Prep Time: 15 min
- Cook Time: 0 min
- Category: Dessert
- Method: No-Bake
- Cuisine: American
Nutrition
- Serving Size: 1 bar
- Calories: 280
- Sugar: 22
- Sodium: 120
- Fat: 16
- Saturated Fat: 7
- Unsaturated Fat: 9
- Trans Fat: 0
- Carbohydrates: 32
- Fiber: 1
- Protein: 5
- Cholesterol: 25
Keywords: peanut butter, cookie dough, bars, no-bake, chocolate chip, dessert