
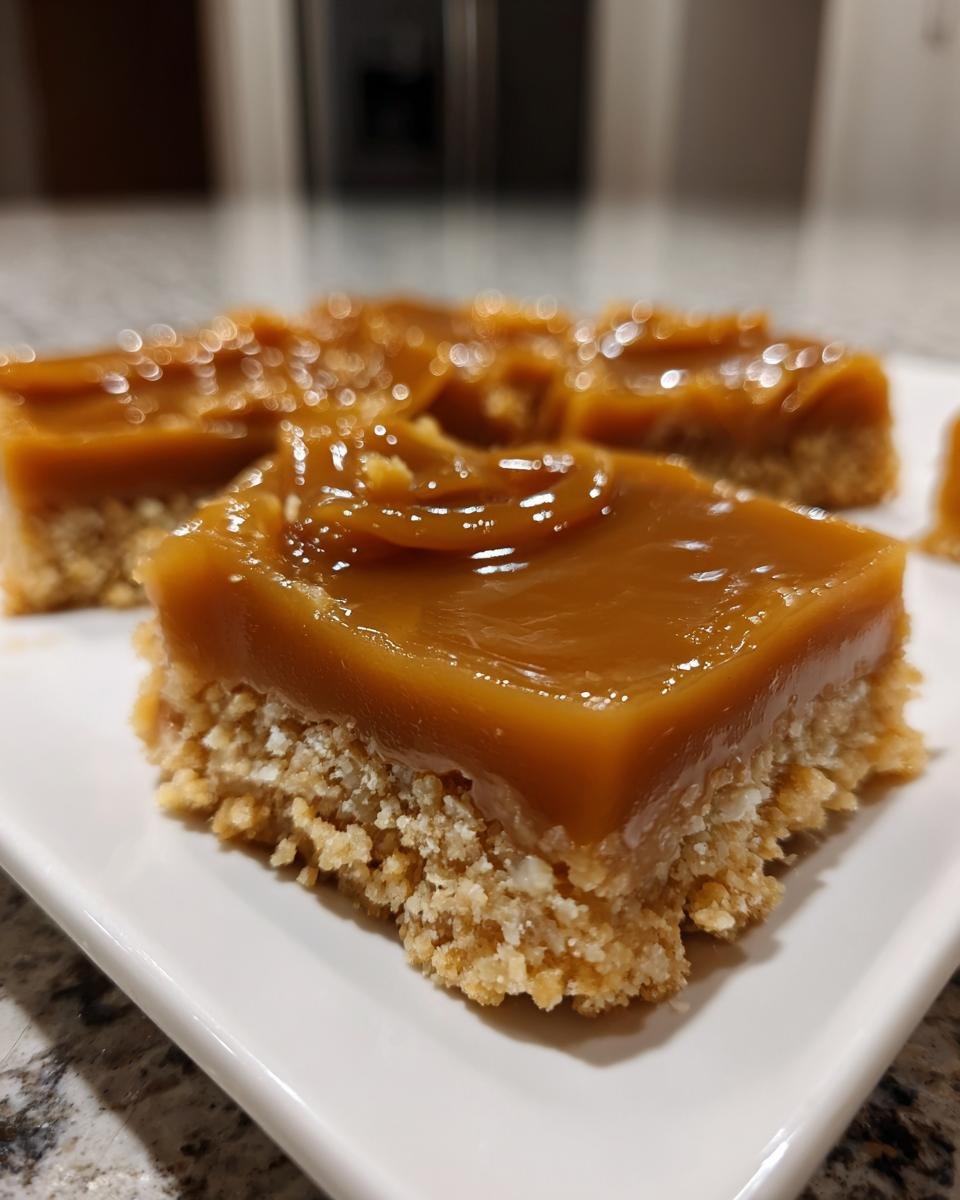
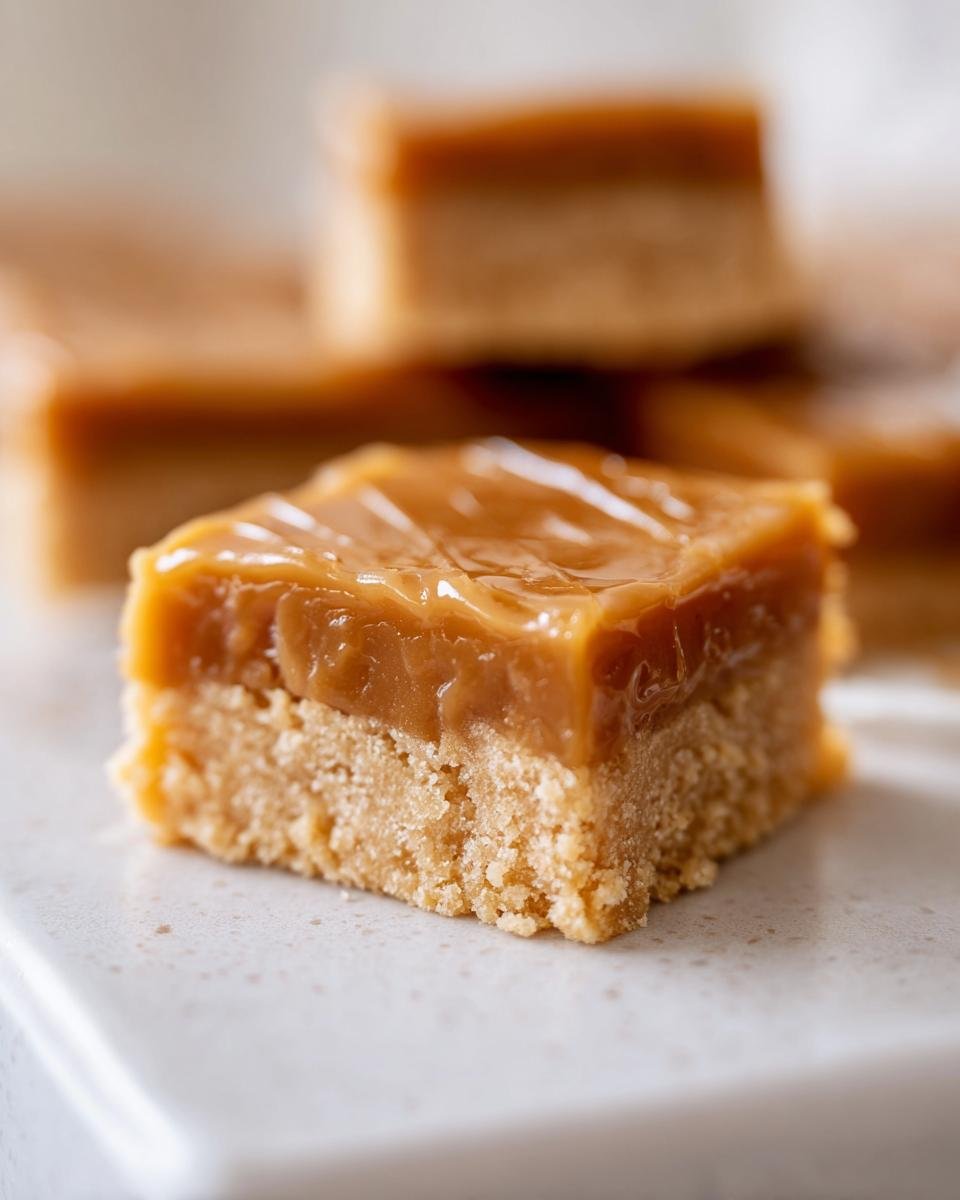
Oh my gosh, when that serious sweet craving hits you—you know the one, the deep, primal need for something truly indulgent—I immediately turn to these bars. Forget fussy layered cakes; these **Peanut Butter Caramel Bars** are my absolute secret weapon. They hit every single note perfectly: you get that salty, slightly crumbly, wonderful peanut butter base, and then you top it with the chewiest, richest caramel that just oozes slightly when you bite into it. Seriously, this recipe is legendary in my circle. I’ve tried other versions, but the ratios in this one—especially for the caramel achieving that perfect viscosity—are just unmatched. If you need a guaranteed crowd-pleaser that takes less than an hour to get in the oven, trust me, these are the **Peanut Butter Caramel Bars** you need right now. I keep a batch in the freezer all the time! If you love peanut butter baked goods, you absolutely have to check out my Peanut Butter Cookie Cake sometime soon, but for serious chewy indulgence, nothing beats these bars.

Why You Will Love These Peanut Butter Caramel Bars
I promise you, these aren’t just another square dessert. These are next-level deliciousness wrapped up in a very easy package. They are almost too good, if I’m honest!
- They are the ultimate texture bomb! You get that slightly soft, crumbly peanut butter layer followed by the decadent, melt-in-your-mouth chewiness of the homemade caramel. It’s addictive!
- Seriously fast! The base only bakes for 15 minutes, and you make the caramel while it’s chilling. It’s one of those surprise recipes that seems way more complicated than it actually is. If you want more quick bakes like this, you should really look at my quick peanut butter bars recipe.
- That perfect sweet-and-salty balance is what makes this dessert sing. The salt in the base just makes the richness of the caramel pop!
- These **Peanut Butter Caramel Bars** hold up beautifully. They don’t crumble everywhere when you slice them (especially if you chill them first!), making them perfect for taking to parties or packing in lunch boxes.
Ingredients for the Perfect Peanut Butter Caramel Bars
Okay, let’s talk ingredients! Honestly, this recipe keeps things straightforward—no weird specialty flours or ten different extracts needed here. But the details matter, especially with how we treat the butter and the sugar for the caramel. If you want the best results, make sure you have everything ready on the counter before you even turn the oven on. It will make the whole process so much smoother!
I always keep a handful of baking essentials stocked, and this recipe uses most of them. For all my best tips on stocking your pantry and troubleshooting ingredients, check out my general baking tips page; it helps tremendously!
Peanut Butter Base Components
This is the foundation, so don’t skimp here! You need that salty-sweet crumb structure to hold up to the heavy caramel later.
- 1 cup all-purpose flour
- 1/2 cup packed brown sugar – Make sure it’s packed tight! That extra molasses richness in the brown sugar makes the base so much better than if we just used white sugar.
- 1/2 cup unsalted butter, softened – And I mean *softened*, not melted! This is key for that crumbly texture.
- 1/2 cup creamy peanut butter – You can play with this one, but creamy blends perfectly into the dough.
- 1/4 teaspoon salt – Don’t skip this! It balances the sweetness coming later.
Chewy Caramel Topping Ingredients
This is where the magic happens. You need sugar, corn syrup, and cream for the chewiness we love so much. Be prepared to watch the thermometer closely!
- 1 cup granulated sugar
- 1/2 cup heavy cream – Heavy cream is crucial here for the right fat content when cooking to soft-ball stage.
- 1/4 cup corn syrup – This is what stops your caramel from crystallizing on you. A lifesaver!
- 1 teaspoon vanilla extract – Added at the very end for that warm flavor boost.
Step-by-Step Instructions for Amazing Peanut Butter Caramel Bars
Alright, let’s get baking! This is such a satisfying process because you see the layers coming together really quickly. First things first: preheat your oven to 350 degrees F. While that’s warming up, grab an 8×8 inch pan and line it with parchment paper. Make sure you leave a nice overhang on two opposite sides—this parchment sling is how we get those beautiful, clean squares out later without wrecking the layers. If you forget this step, you’ll be scraping bars out of that pan! I think getting your pan set up first is half the battle.
If you enjoy making layered desserts that need to set up perfectly, you might also adore my recipe for Caramelita bars; the technique uses oats but the principle of layering is the same!
Preparing the Peanut Butter Base
In a medium bowl, you’re just going to whisk together the flour and that packed brown sugar. Now, for the butter. You need soft butter here. Cut it into the dry mix. You’re not creaming; you’re cutting it in, usually with a pastry blender or two forks, until it looks like coarse, sweet sand. Think crumble, not paste.
Then, stir in your peanut butter and the salt. Mix it only until it just comes together—overmixing the base is a rookie mistake that can make it tough later on. Once it’s combined, press this glorious peanut butter mixture firmly and evenly into the bottom of your prepared pan. And I mean *firmly*! Press it down with the bottom of a measuring cup or your knuckles. A tight base prevents the caramel from seeping down and making everything soggy. This is my number one tip for a sturdy base!
Pop that pan into the oven for 15 minutes while we tackle the best part: the caramel!
Making the Chewy Caramel Topping
This part requires a little concentration, so put your phone down for a minute! Grab a small saucepan—medium heat is key. Combine your granulated sugar, the heavy cream, and the corn syrup. Stir that gently until the sugar looks dissolved. You don’t want any grit when you taste it later.
Once it starts bubbling nicely, you have to let it boil, stirring occasionally so nothing burns on the bottom. The magic number here is 240 degrees F. You absolutely need an oven thermometer, or a candy thermometer, for this! If you hit 240°F, you’ve reached that perfect soft-ball stage—the secret to that glorious chewy texture we want in these bars. If you miss it, the caramel might get rock hard! When it hits that temperature (usually takes 8 to 10 minutes of boiling), yank it off the heat immediately and stir in your vanilla extract. Work fast now; it sets up quickly!
Baking and Cooling Your Peanut Butter Caramel Bars
Once that hot, bubbly caramel is poured evenly over the warm peanut butter base—and I mean *evenly*!—carefully slide the pan back into the 350-degree oven. It only needs another 10 minutes to help the caramel set up just right. When that time is up, pull them out, and now comes the hardest part: waiting! You must let these **Peanut Butter Caramel Bars** cool completely in the pan on a wire rack. Seriously, if you try cutting them warm, the caramel will ooze everywhere and you’ll have a sticky mess. I usually let mine sit on the counter for a few hours, or even better, move them into the fridge for an hour to firm up nicely before using the parchment overhang to lift them out and slice them into squares. Patience pays off here!

Tips for Success When Making Peanut Butter Caramel Bars
I’ve made dozens of batches of these bars over the years, and I’ve learned a few little tricks that save you from sticky disasters or hard candy! These aren’t complicated recipes, but paying attention to these three things ensures you get that perfect, chewy center every single time you make these **Peanut Butter Caramel Bars**. For all my deep-dive advice on general baking techniques that can help with these and other recipes, make sure you check out the great tricks listed on my baking tips page!
Tip One: Mastering the Caramel Temperature
Seriously, buy a cheap candy thermometer if you don’t have one. It’s the difference between a glorious, chewy topping and a burnt-sugar sheet. If you are aiming for that perfect soft-ball stage (240 degrees F), you need to watch it! As soon as that thermometer hits the mark, pull the pan off the heat immediately. Continued residual heat can push it past 240, making the caramel too firm once it cools down. Don’t try to guess this part; the sugar mixture is sneaky!
Tip Two: Press That Base Down Like You Mean It
Remember when we talked about the base? It needs to be compacted! Because we are pouring liquid caramel over a crumbly peanut butter layer, if you don’t press really hard, the caramel will try to find tiny pockets and sink right down into the bottom layer, making it grainy and soft where it should be relatively firm. Use the flat bottom of a measuring cup or even just firm, clean hands to really compact that base mixture into your 8×8 pan before that first 15-minute bake.
Tip Three: The Cooling Commandment
I cannot stress this enough: Resist the urge to cut them warm! I know it’s tough when they smell like heaven, but if you try to slice them while they are warm, the caramel stretches like taffy, and you end up with ragged, uneven bars that stick to your knife. For those clean, perfect edges—ideal for transporting or serving—you must chill them. Pop the fully cooled bars into the fridge, maybe just for an hour or so. Once chilled, the caramel is firm enough to slice cleanly with a big, sharp knife. The note says chill for at least an hour, and I stand by that!
Ingredient Notes and Substitutions for Peanut Butter Caramel Bars
I always get emails asking if they can swap this or that in my recipes, and honestly, with baked goods, you have to be a little careful. But for these fantastic **Peanut Butter Caramel Bars**, there’s some wiggle room! Building trust means knowing what you *can* change and what you absolutely *cannot* touch. For example, the heavy cream in the caramel is one of those things you really shouldn’t swap out for milk—milk just doesn’t have the fat content needed to hit that critical 240-degree soft-ball stage without turning grainy or burning.
If you’re missing an ingredient or have a preference—like hating creamy peanut butter—I’ve got some quick answers to make sure your baking day isn’t ruined! Check out my guide on common ingredient swaps if you ever run into trouble! But for these bars, here’s what you need to know about customizing them.
Crunchy Versus Creamy in the Base
This is up for debate in my family! The original recipe calls for creamy peanut butter in the base because I like a smoother, more uniform layer before the caramel goes on. However, if you love texture and that hearty bite, using crunchy peanut butter instead is absolutely fantastic. It gives the base a little more personality, so feel free to use crunchy if that’s what you have or what you prefer. It doesn’t change the bake time at all, which is the great thing about this simple base mixture!
The Butter Situation
We use unsalted butter because the recipe already has salt added separately, which lets me control the overall salinity perfectly. You must use real butter for the texture here, especially in the base, so please skip the margarine if you can. Margarine often has too much water content, and that extra moisture can seriously affect how that crumbly base comes together. If you are in a pinch, salted butter works, but reduce the added salt in the recipe by just a pinch or two and taste test before adding the full 1/4 teaspoon.
Managing the Corn Syrup
That corn syrup is truly the backbone of the chewiness in the caramel topping. It controls the sugar crystallization, which means preventing those tiny, hard sugar crystals from forming while they cool. You absolutely need it for this recipe to work as intended. If you are out of corn syrup, frankly, I’d just wait until you can grab some rather than risking turning your beautiful caramel into hard candy. It’s that important for achieving the classic mouthfeel of these **Peanut Butter Caramel Bars**.
Storage and Make-Ahead Options for Peanut Butter Caramel Bars
One of the best things about whipping up a batch of these bars is knowing you have dessert sorted for the next few days—or weeks, if you hide them well! They are fantastic for making ahead, which is a lifesaver when you have company coming over or if you just want a quick treat at your fingertips.
Because of that glorious caramel layer, how you store them really matters for maintaining that perfect texture. If you’re interested in other bar recipes that travel well, you should definitely check out my recipe for Caramel Crumb Bars next time you’re in a baking mood!
Keeping Them Fresh at Room Temperature
If you plan on eating these within two or three days, leaving them on the counter is totally fine, provided your kitchen isn’t scorching hot. You want to store them in an airtight container, separated by parchment paper or wax paper layers. You don’t want the caramel layer from one bar touching the base of the one above it, or they’ll weld themselves together! I find that if I leave them out, they stay deliciously soft, but the caramel might get a tiny bit runnier on very warm days.
Refrigeration for Longer Freshness
If you need them to last longer—say, up to a week—the fridge is your best friend. The cold temperature solidifies the caramel layer a bit more, which is actually perfect for slicing them extra clean before serving. Store them in that airtight container, layered with parchment, and they should easily last a full week. When you pull them out to serve, let them sit on the counter for about 15 minutes to take the chill off; that brings back some of that lovely soft chewiness we aim for.
Freezing Your Peanut Butter Caramel Bars
Yes, you can absolutely freeze these! This is my favorite trick for making them last forever. Once they are completely cooled and cut into individual squares, place them on a baking sheet lined with parchment paper and pop that sheet into the freezer for an hour to flash freeze them solid. Once they are frozen solid, transfer the squares into a heavy-duty freezer bag or airtight container. Place parchment paper between the layers so they don’t touch.
They freeze beautifully for up to three months. Honestly, eating a frozen **Peanut Butter Caramel Bar** straight from the freezer is pretty amazing too—it’s like a homemade frozen dessert! When you want one, just pull it out and let it thaw on the counter for about 30 minutes, or grab it right away if you like them rock hard!
Frequently Asked Questions About Peanut Butter Caramel Bars
I get so many wonderful questions about these bars after people try them! It’s great because it means everyone is just as obsessed as I am. Baking is all about learning the little nuances, right? If you’re ever wondering about a process or substitution, just ask! In the meantime, I’ve answered some of the questions I hear most often about these perfect **Peanut Butter Caramel Bars**.
If you’re looking for even more bar recipes, especially ones that don’t require turning on the oven, check out my no-bake chocolate peanut butter bars next—they are a lifesaver in summer!
Can I use a different size baking pan for these Peanut Butter Caramel Bars?
That’s a common question! You absolutely can use a different size, but you have to adjust your expectations and your baking times. Remember, we are using an 8×8 inch pan for that standard thickness. If you use a larger pan, like a 9×13 inch pan, your base layer is going to be super thin, and the caramel layer will be much less chewy because it won’t need to bake as long to set. You might only need 8 minutes for the base and 5 minutes for the topping.
If you use a smaller pan, like a 6×6 inch pan, you’ll end up with super-thick bars, and you absolutely must increase both baking times substantially—probably by 10 to 15 minutes each. Be careful with thick layers in the oven; they can sometimes bake unevenly. For the best results matching my intended structure, stick to the 8×8, but feel free to play if you’re feeling adventurous with your batch of **peanut butter bars**!
Why did my caramel topping get hard instead of chewy?
Oh, that’s the saddest kitchen moment, feeling that hard, brittle layer where the soft chew should be! This is always, always about temperature control when you are boiling that caramel mixture. If you didn’t use a thermometer and just guessed, chances are you cooked it too long or let the heat ramp up too high.
Remember, we need that soft-ball stage, which is 240 degrees F. If you accidentally push it past, say, 248 degrees F, the mixture starts heading toward the hard-crack stage, and you end up with delicious, but very hard, **caramel squares**. The second it hits 240, take it off the heat immediately! The residual heat clinging to the sides of the saucepan will keep cooking it for a minute, so pulling it off just shy of your target is sometimes the safest bet for max chewiness.
Are these Peanut Butter Caramel Bars suitable for a potluck?
Are they ever! They are actually one of my go-to recipes for taking anywhere. They are sturdy once they have cooled and chilled properly. Unlike a cream-based dessert that needs constant refrigeration, these bars behave really well.
The key to potluck success is making sure you bake them, let them cool fully to room temperature, and then chill them completely before you cut them. Once they are cut and layered with wax paper in a sealed container, they travel like a dream. They handle being in the car ride just fine. They are stable, delicious served at room temperature after traveling, and everyone loves that combination of peanut butter and caramel!
Estimated Nutritional Snapshot for Peanut Butter Caramel Bars
I know some of you hardcore bakers like to keep track of what goes into your body, so I worked up a quick estimate based on the standard ingredients listed. Please remember, this is just a close guess! The exact amount can change wildly depending on what brand of peanut butter you use or if you decide to drizzle extra chocolate on top (which you totally should sometimes!).
For the sake of keeping it simple, these estimates reflect one square cut from the 8×8 pan.
- Serving Size: 1 bar
- Calories: Around 250 calories per bar. They are decadent, but they are worth it!
- Fat: About 14 grams total. Remember, that’s peanut butter and butter, serving up that satisfying richness!
- Carbohydrates: Roughly 30 grams, mostly coming from the sugar in the caramel layer.
- Protein: Around 4 grams, mostly thanks to that lovely peanut butter base.
- Sugar: This is a sweet treat, clocking in around 25 grams of sugar per square. Enjoy responsibly!
Share Your Perfect Peanut Butter Caramel Bars Experience
I just absolutely love reading your feedback when you try my recipes. Hearing how much your kids or your neighbors raved about these chewy, salty squares makes all the recipe testing worth it! If you made these amazing **Peanut Butter Caramel Bars**, please take a moment to leave a rating—five stars if they earned it! It truly helps other bakers feel confident trying the recipe.
Did you use crunchy peanut butter? Did you chill them until they were rock hard for the cleanest slices? Let me know all the details down below in the comments! And if you snapped a picture while you were enjoying them, please tag me on social media! Seeing your beautiful results always brightens my day. If you need to get in touch with me directly for a question that needs a bit more privacy, my contact page is always open!
Print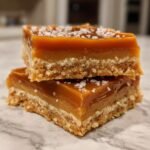
Peanut Butter Caramel Bars
- Total Time: 40 min
- Yield: 16 bars 1x
- Diet: Vegetarian
Description
Simple bars with a peanut butter base and a chewy caramel topping.
Ingredients
- 1 cup all-purpose flour
- 1/2 cup packed brown sugar
- 1/2 cup unsalted butter, softened
- 1/2 cup creamy peanut butter
- 1/4 teaspoon salt
- 1 cup granulated sugar
- 1/2 cup heavy cream
- 1/4 cup corn syrup
- 1 teaspoon vanilla extract
Instructions
- Preheat your oven to 350 degrees F. Line an 8×8 inch baking pan with parchment paper, leaving an overhang on two sides.
- In a medium bowl, mix the flour and brown sugar.
- Cut in the softened butter until the mixture resembles coarse crumbs.
- Stir in the peanut butter and salt until just combined.
- Press this mixture evenly into the bottom of the prepared pan.
- Bake the base for 15 minutes.
- While the base bakes, prepare the caramel. In a saucepan, combine the granulated sugar, heavy cream, and corn syrup.
- Cook over medium heat, stirring constantly until the sugar dissolves.
- Bring the mixture to a boil and continue to cook, stirring occasionally, until it reaches 240 degrees F (soft-ball stage). This takes about 8 to 10 minutes.
- Remove the caramel from the heat and stir in the vanilla extract.
- Pour the hot caramel evenly over the warm baked base.
- Return the pan to the oven and bake for an additional 10 minutes.
- Let the bars cool completely in the pan on a wire rack before lifting out using the parchment overhang and cutting into squares.
Notes
- For easier cutting, chill the cooled bars for at least one hour before slicing.
- You can use crunchy peanut butter if you prefer texture in the base.
- Prep Time: 15 min
- Cook Time: 25 min
- Category: Dessert
- Method: Baking
- Cuisine: American
Nutrition
- Serving Size: 1 bar
- Calories: 250
- Sugar: 25
- Sodium: 80
- Fat: 14
- Saturated Fat: 6
- Unsaturated Fat: 8
- Trans Fat: 0
- Carbohydrates: 30
- Fiber: 1
- Protein: 4
- Cholesterol: 25
Keywords: peanut butter bars, caramel squares, no bake base, dessert squares, sweet treat