
Listen, sometimes you get that intense craving for something ridiculously rich and sweet, but the very thought of the oven heating up makes you sweat just looking at the dial. Been there! That’s why I live and breathe for recipes that skip the heat entirely. These No Bake Chocolate Peanut Butter Bars are my absolute MVP when summer hits or when I need a massive win in under thirty minutes of active time. Seriously, they are the perfect salty, sweet, thick, and decadent treat imaginable. I swear, my neighbor always begs for the recipe because they seem way more complicated than they actually are. You won’t believe this fudgy, satisfying dessert requires zero actual baking!
Why You Will Love These No Bake Chocolate Peanut Butter Bars
I honestly don’t know a dessert that delivers more satisfying flavor for less effort. If you’re hesitant about making them, stop right there! You need these bars in your life. Check out just a few reasons why I make these constantly:
-
Quick Assembly Time
Seriously, this is a 15-minute total active time recipe. You can have the crust pressed, the filling spread, and the chocolate melted before your coffee even finishes cooling down. We can all use more quick wins.
-
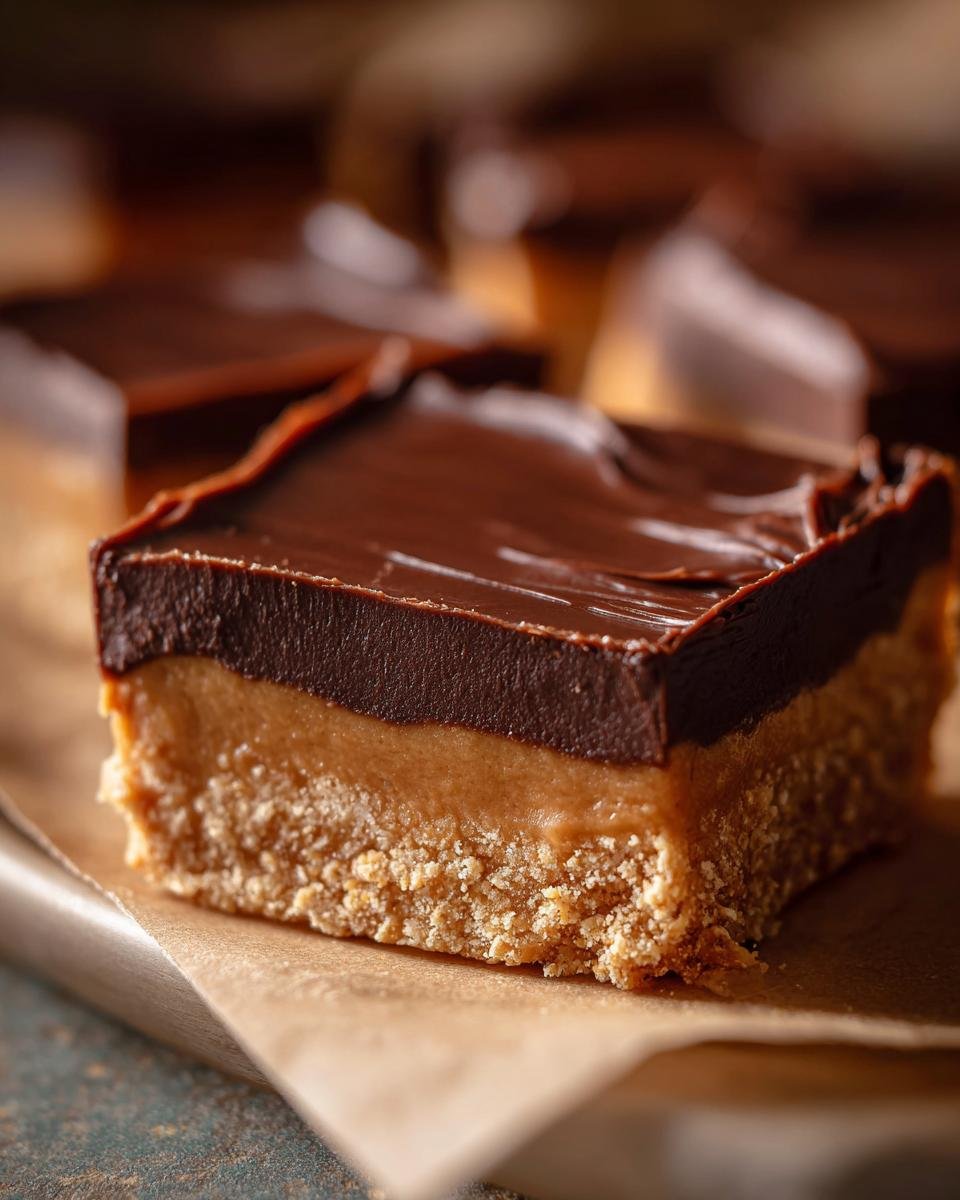
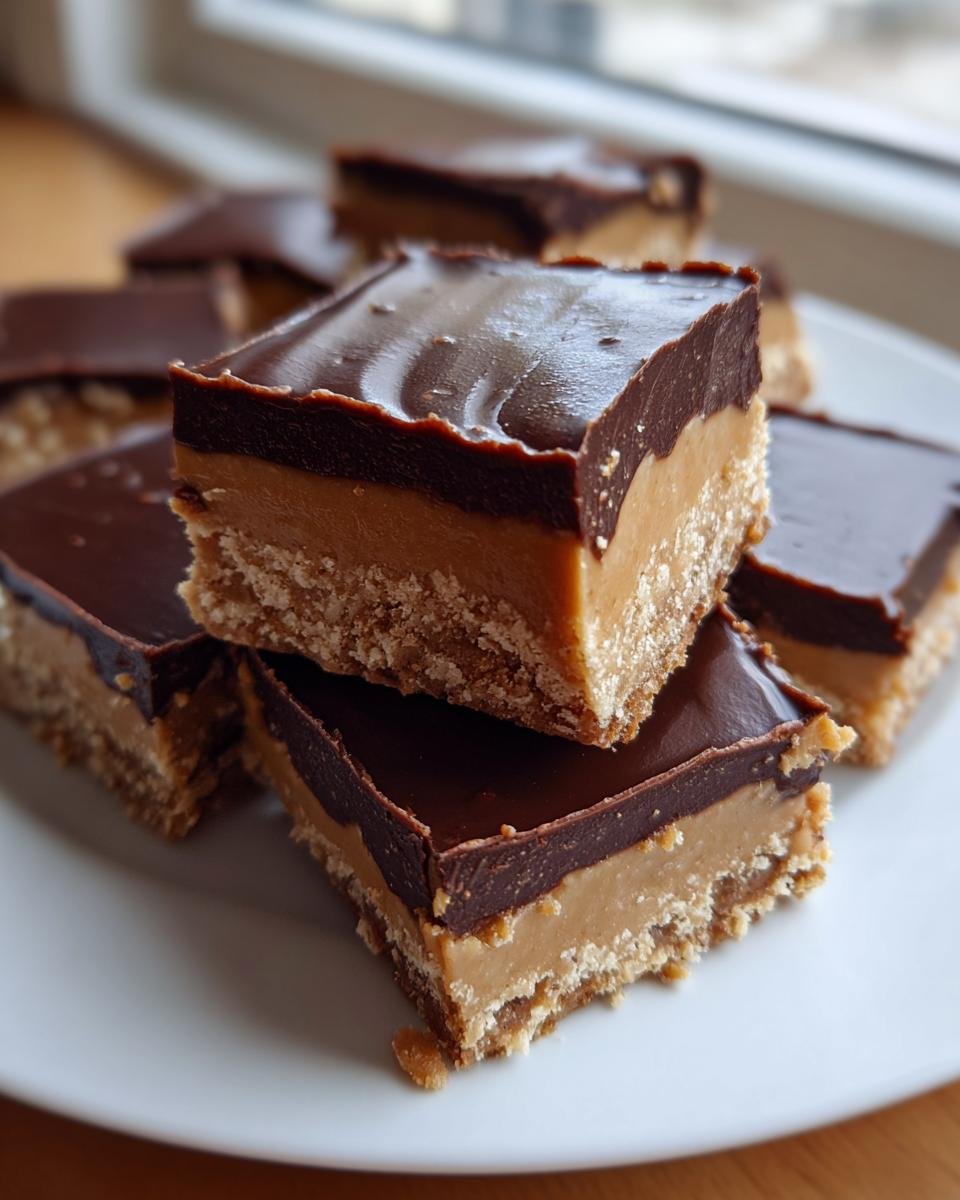
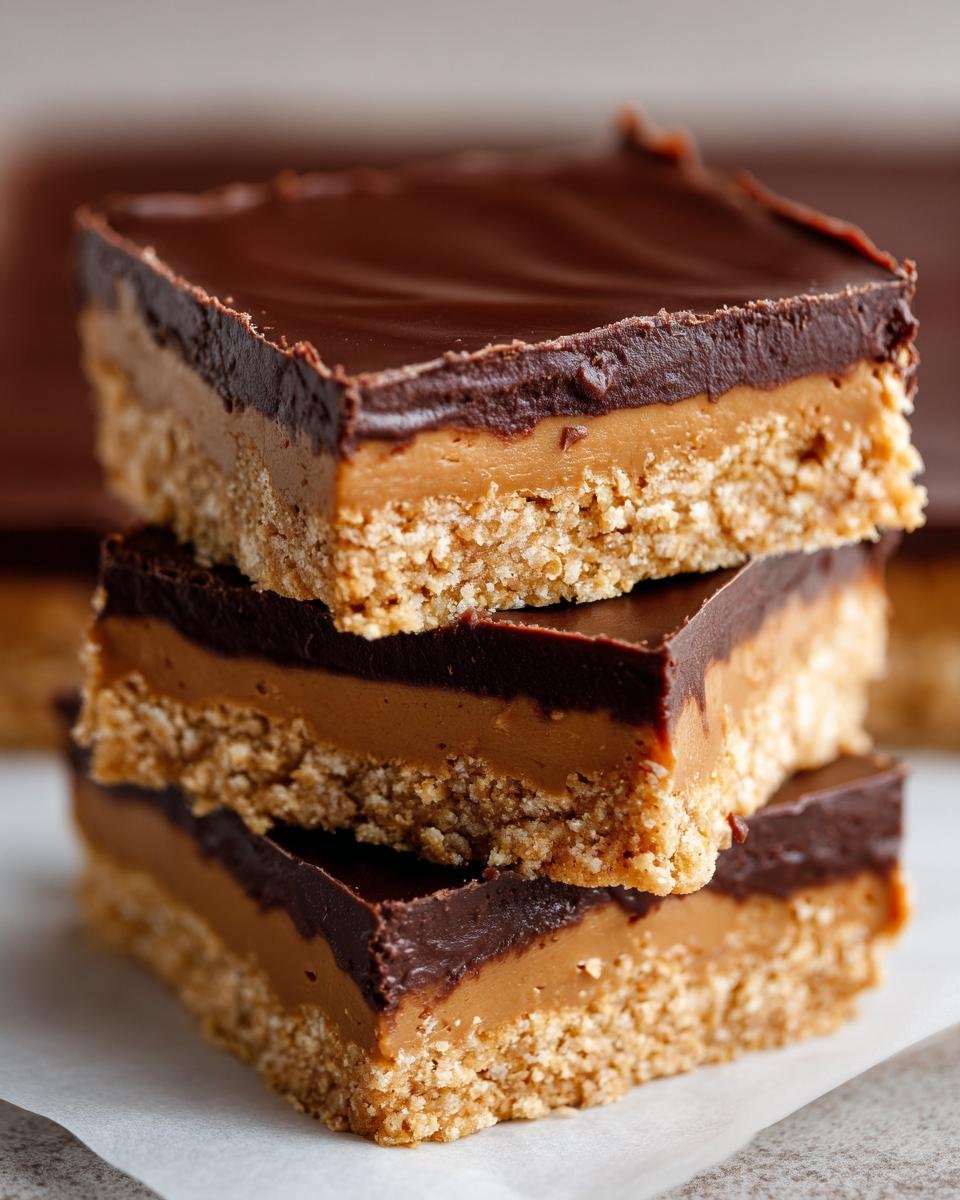
Rich, Two-Layer Flavor Profile
That contrast between the slightly salty, dense peanut butter base and the rich, smooth chocolate topping? It’s pure magic. The deep flavor makes you think you spent hours on this, but nope!

-
No Oven Required
Perfect for those crazy hot days when you just can’t stand the thought of turning on the range, or when your oven is already packed full of bread or a big Sunday roast. Pop it in the fridge and walk away.
If you loved the no-bake goodness of my Funfetti Oreo Icebox Cake, you absolutely have to try this one next!
Essential Ingredients for Perfect No Bake Chocolate Peanut Butter Bars
You know I preach that great results come from great ingredients, even when there’s no oven involved! Since we aren’t baking the flavor in, the quality of what goes into the base and topping really shines through. Don’t even try to substitute that peanut butter for the runny natural kind—I promise you it’ll mess up the velvety texture we are aiming for. We need structure here!
Here is exactly what you need gathered up before you even think about mixing anything:
For the Graham Cracker Crust
This is the foundation, so make sure those crumbs are pressed down tight! You’ll need:
- 1 cup graham cracker crumbs
- 1/2 cup unsalted butter, melted. Make sure that butter is melted smooth, not just softened!
For the Peanut Butter Filling
This layer is thick, sweet, and slightly salty—the real star of the show, if you ask me. You’ll grab:
- 1 cup creamy peanut butter. Gotta be the creamy kind for that smooth spread!
- 2 cups powdered sugar. Yes, two full cups—don’t skimp!
- 1/2 teaspoon salt. Just a half teaspoon lifts all that sweetness up.
For the Chocolate Topping
This melts into that gorgeous, glossy cap protecting the sweet layer underneath. You just need two things:
- 1 cup semi-sweet chocolate chips. My favorite are the standard ones, but use what makes you happy.
- 1/4 cup creamy peanut butter (for topping). This helps keep the chocolate from becoming rock solid when it chills.
If you’re ever out of powdered sugar, check out my guide on the quickest buttermilk substitutions—though for this recipe, powdered sugar is a non-negotiable must!
Step-by-Step Instructions for No Bake Chocolate Peanut Butter Bars
Okay, assembly time! Because we aren’t baking, everything has to be layered perfectly while it’s fresh and warm or at the right room temperature. This process moves fast, so try to have your bowls ready to go. If you follow these steps, you’ll end up with those perfect, sturdy bars that don’t crumble when you move them!
Preparing the Pan and Crust Layer
First things first, get that 8×8 inch pan ready. Line it with parchment paper, but make sure you leave a generous overhang hanging up on two sides. That overhang acts like built-in handles later when we need to lift the whole block out—trust me, it’s your best friend!
Next, mix your graham cracker crumbs and melted butter together in a bowl until it looks like wet sand. Press this mixture evenly and really firmly into the bottom of your lined pan. You want a solid, packed crust here. Little tip: Use the bottom of a flat measuring cup to really compress it down tight!
Creating the Peanut Butter Center
Take a separate bowl, and this is just mixing, no electric mixer needed here! Beat together your main cup of creamy peanut butter, the powdered sugar, and the salt until it’s totally smooth and thick. It should look like stiff frosting. Spread this peanut butter layer evenly right over that crust. Make sure you get it right to the edges so you don’t get a gap later.
Melting the Chocolate Topping
Time for the top layer! Put your chocolate chips and that small amount of extra peanut butter in a microwave-safe bowl. Microwave it in short bursts—thirty seconds at a time—stirring really well between each one. Stop as soon as it looks smooth. Don’t get impatient; if you overheat it, the chocolate can seize up on you, and we don’t want that!
Assembling and Chilling the No Bake Chocolate Peanut Butter Bars
Pour that glorious melted chocolate right over the peanut butter layer. Now, use an offset spatula—that’s my little expert tip!—to spread the chocolate gently until the whole top is perfectly flat and even. Don’t press down too hard or you’ll disturb the peanut butter layer underneath! Finally, we wait. Pop the whole pan into the refrigerator for a minimum of two hours until everything is completely firm and set. Patience is key before the final cut!
For more ways to improve your baking game, check out my general baking tips to make you a better baker!
Expert Tips for Perfect No Bake Chocolate Peanut Butter Bars
Honestly, these bars are tough to mess up—they are no bake, after all! But if you want that professional, beautiful look when you serve them, a few little tricks make all the difference. We want clean lines, not messy smears. These tips are what separates a good batch from the ones that disappear instantly at a party.
I love these bars because they are so forgiving, but for that perfect presentation, pay attention to these details. If you enjoyed my insights on making No Bake S’mores Bars, you’ll appreciate these little tweaks too!
Achieving Clean Cuts on Your No Bake Chocolate Peanut Butter Bars
This is critical! Remember I told you to chill them for at least two hours? Well, that’s just the minimum. If you want those picture-perfect squares? Pull them out after the minimum chill time and let them sit on the counter for about 10 minutes to soften just *slightly*. Then, here’s the big secret: pop them back in the fridge for an extra 30 minutes before you even attempt to slice them. This extra chilling firms everything up just enough so the knife glides right through without dragging the bottom layer.
Peanut Butter Consistency Matters
For the peanut butter filling layer—that gooey, sweet middle part—you absolutely want your main cup of peanut butter to be at room temperature before you start mixing it with the powdered sugar. When the peanut butter is slightly warm and soft, it incorporates the sugar so much better. If it’s too cold straight from the fridge, it fights the sugar, and you end up over-mixing or getting lumps instead of a smooth, velvety spreadable texture.
Variations for Your No Bake Chocolate Peanut Butter Bars
While the classic combo is unbeatable, sometimes you need to shake things up a bit, right? I love adding those little surprises that make a dessert feel completely new. These bars are so sturdy and reliable that they welcome additions without complaint. Switching up the topping or adding some crunch to the bottom are my favorite ways to reinvent them slightly.
If you enjoy experimenting with chocolate and peanut butter, you have to check out my recipe for Chocolate Peanut Butter Sandwich Cookies next time you’re baking!
Swapping the Chocolate Topping
If semi-sweet is just a little too dark for your crowd, don’t hesitate to swap the chips out for milk chocolate chips! They give a much sweeter, creamier finish to the top layer. And for a little flavor pop, try sprinkling a small pinch of flaky sea salt right over the chocolate before it sets up in the fridge. That contrast between salty and sweet is addictive!
Adding Texture to the Crust
The crust is already great with just the graham crackers, but adding texture gives those bars awesome chewiness. I often mix in about a quarter cup of finely chopped pecans or even just some extra chopped peanuts right into the melted butter and crumbs mixture before pressing it into the pan. It totally elevates the whole bite!
Serving Suggestions for No Bake Chocolate Peanut Butter Bars
These bars are rich enough to stand totally on their own, which is what I usually do because they disappear so fast! But if you are serving them after a big dinner or want to make them feel extra fancy, I have a couple of go-to pairings.
A small scoop of vanilla bean ice cream is always a winner. The coldness is just perfect against the rich peanut butter and chocolate. Or, if you need something hot to cut the sweetness, a strong, dark cup of coffee or a creamy Mocha Cheesecake-inspired drink balances things beautifully. Honestly, though, sometimes I just grab a bar and call it a day!
Storage Instructions for Leftover No Bake Chocolate Peanut Butter Bars
First off, let’s be real: there usually aren’t a lot of leftovers when I make these. They vanish almost instantly because they are THAT good! But if you managed to save a few squares from yourself or the crowd, storage is super straightforward, which is another huge bonus of this recipe.
Since we didn’t use the oven and these bars rely on chilling to stay firm, you have to keep them cold. Nobody wants a melted chocolate, runny peanut butter mess on the counter, right? Luckily, the high sugar content helps them last a bit longer in the fridge, but proper airtight storage is key to keeping that crust crisp.
Refrigeration of No Bake Chocolate Peanut Butter Bars
The biggest question I get is, “How long do these last?” The answer is, better than most cookies! You must store any leftovers in an airtight container in the refrigerator. If they are properly sealed away from all those smelly fridge odors—nobody wants peanut butter that tastes like last night’s leftovers—they honestly stay wonderfully fresh for up to a full week. Seriously, a whole week of perfect, cold, chocolatey goodness waiting for you!
Frequently Asked Questions About No Bake Chocolate Peanut Butter Bars
Oh, I totally get it! When you have a recipe this simple, you still have questions. I’ve rounded up the things folks ask me most often after they make their first batch of these amazing No Bake Chocolate Peanut Butter Bars. Don’t worry if you’re unsure about ingredients; that’s why I’m here to walk you through it!
If you want another quick peanut butter fix that doesn’t require an oven, definitely check out my recipe for the Peanut Butter Mug Cake!
Can I use natural peanut butter in these No Bake Chocolate Peanut Butter Bars?
PLEASE don’t! I know natural peanut butter is great for some things, but for these bars, it’s a disaster waiting to happen. Natural peanut butter separates because it has all that oily stuff floating around on top. When you mix that with the powdered sugar, your filling will turn out runny and greasy instead of thick and spreadable. Stick to the creamy, regular stuff—it has the right stability for this no-bake magic.
What is the best way to cut these bars neatly?
You want those clean edges, right? Well, we already talked about chilling them completely, but the knife matters too! Make sure your knife is large and sharp. Before you make the first slice, dip the knife in hot water for a second, wipe it completely dry, and then make your cut. Wipe the knife clean again between every single slice. This keeps the melted chocolate from gumming up the blade and keeps your squares looking beautiful.
Can these bars be frozen?
Yes, absolutely! They freeze surprisingly well because the layers are so dense. After you cut them, stack them, place a small piece of parchment or wax paper between each layer so they don’t stick together, and wrap the whole stack tightly in plastic wrap, maybe even throw that in a freezer bag. They keep great for about a month. Just let them thaw on the counter for about 20 minutes before you plan to eat them!
Estimated Nutritional Data for No Bake Chocolate Peanut Butter Bars
Now, look, I’m a cook, not a dietician! These bars are pure indulgence—rich peanut butter, chocolate, and a graham cracker base. They aren’t exactly health food, but knowing what you are digging into is always part of enjoying your baking, right? I’ve compiled the estimated nutrition based on the ingredients we used, just so you have a general idea of what one serving packs. It’s good to know these things, even if we promise ourselves we’re only having *one* square!
For those of you who like to track things, remember this is based only on cutting this recipe into 16 squares. If you cut them smaller, the numbers change!
- Serving Size is 1 bar
- Calories hover right around 250
- Sugar content is about 22 grams
- We are looking at 16 grams of Fat total
- Protein lands at about 6 grams per bar
- Carbohydrates come in around 25 grams
If you want another quick, decadent treat, you should totally check out my recipe for Peanut Butter Mug Cake—it’s fast and hits that sweet spot!
Nutrition Disclaimer
Just to be super clear, because I want everyone to bake with confidence but also knowledge: The nutritional information provided here is only an estimate we calculated based on standard measurements and brands. It absolutely will vary based on the specific brands of peanut butter, chocolate chips, and the exact size you cut your squares. Use these numbers as a guideline, not a guarantee!
Share Your Experience Making No Bake Chocolate Peanut Butter Bars
That’s it, my friends! You now have the guaranteed, fool-proof method for making the most addictively delicious No Bake Chocolate Peanut Butter Bars without ever turning on your oven. Can you believe how easy that was? I honestly feel like I’m sharing a secret every time someone tries these and realizes they only took minutes to assemble.
Now that you have your pan chilling beautifully, I really, truly want to know what you thought! Did you use milk chocolate or semi-sweet? Did you resist eating them straight from the fridge? Jump down to the comments below and leave me a quick rating—even just a few stars tells me you loved them!
If you ended up with any questions while you were mixing or chilling, feel free to toss them down there too. I try my best to answer everyone personally. If you snap a picture of your perfect squares—especially those clean-cut edges we worked so hard on—please tag me! I love seeing my recipes come to life in your kitchens. If you need to reach out privately about a recipe, you can always use my contact page!
Happy chilling, and enjoy every single perfect, rich bite!
Print
No Bake Chocolate Peanut Butter Bars
- Total Time: 2 hours 15 min
- Yield: 16 servings 1x
- Diet: Vegetarian
Description
Simple, quick bars made with a peanut butter base and topped with a chocolate layer, requiring no oven time.
Ingredients
- 1 cup graham cracker crumbs
- 1/2 cup unsalted butter, melted
- 1 cup creamy peanut butter
- 2 cups powdered sugar
- 1/2 teaspoon salt
- 1 cup semi-sweet chocolate chips
- 1/4 cup creamy peanut butter (for topping)
Instructions
- Line an 8×8 inch baking pan with parchment paper, leaving an overhang for easy removal.
- In a medium bowl, combine graham cracker crumbs and melted butter. Press this mixture firmly into the bottom of the prepared pan.
- In a separate bowl, mix 1 cup peanut butter, powdered sugar, and salt until smooth. Spread this peanut butter mixture evenly over the crust layer.
- In a microwave-safe bowl, combine chocolate chips and the remaining 1/4 cup peanut butter. Microwave in 30-second intervals, stirring between each, until completely smooth.
- Pour the melted chocolate mixture over the peanut butter layer and spread evenly.
- Refrigerate for at least 2 hours, or until firm. Lift the bars out using the parchment paper overhang and cut into squares before serving.
Notes
- For cleaner cutting, chill the bars for an extra 30 minutes before slicing.
- Store leftovers in an airtight container in the refrigerator.
- Prep Time: 15 min
- Cook Time: 0 min
- Category: Dessert
- Method: Chilling
- Cuisine: American
Nutrition
- Serving Size: 1 bar
- Calories: 250
- Sugar: 22
- Sodium: 120
- Fat: 16
- Saturated Fat: 6
- Unsaturated Fat: 10
- Trans Fat: 0
- Carbohydrates: 25
- Fiber: 1
- Protein: 6
- Cholesterol: 10
Keywords: no bake, chocolate, peanut butter, bars, dessert, easy, quick