
You know, some appetizers just scream ‘party’ the second you see them, and nothing does that better than a perfectly crafted deviled egg. Honestly, I feel like every family has *that* one recipe they swear by, and after years of trying every pickle juice trick and mustard variation out there, I can finally say I nailed it. These are My Favorite Deviled Eggs, and I mean that!
They are exactly what you want: impossibly creamy filling, just the right pop of tanginess, and seasoned right to the edge. I always bring them to neighborhood BBQs, and I swear, I have to make a triple batch because everyone cleans the platter before the burgers are even done grilling. Trust me, you need this classic, foolproof recipe in your life right now.

Gathering Ingredients for My Favorite Deviled Eggs (Yields 24 Halves)
Okay, ingredient gathering! This is the easy part, and it’s why I love these so much. You don’t need a dozen fancy things; you just need quality for the base mix. This recipe is designed to yield a perfect two dozen halves, which usually means it disappears instantly at any gathering.
Having everything portioned out means the second those boiled eggs cool down, we can move straight to the filling stage without scrambling for the mustard. Here’s exactly what you’ll need to grab before we get mixing!
Essential Components for My Favorite Deviled Eggs
- 12 large eggs – Make sure they’re large! Small ones just look sad in the tray.
- 1/2 cup mayonnaise – Use your favorite full-fat version, please! Low-fat just doesn’t give you the right richness here.
- 1 tablespoon yellow mustard – Classic and bright.
- 1 teaspoon white vinegar – This is the secret little tang that cuts through the richness.
- Salt to taste – Start small, you can always add more!
- Black pepper to taste – Freshly cracked makes a difference, even if I sound fussy.
- Paprika for garnish – The pretty finishing touch!
Expert Tips for Perfect Hard-Boiled Eggs for My Favorite Deviled Eggs
Getting the hard-boiled egg right is half the battle, honestly. If you look up how to do this a million different ways, don’t worry! My method, which has never failed me for making deviled eggs, is based on stopping the cooking process dead in its tracks. A rubbery egg white or green ring around the yolk is a total mood killer when you’re trying to make something beautiful.
Here’s something I learned way back when I first started hosting big picnics: super fresh eggs are a nightmare to peel! Seriously, if your eggs are only a day or two old, the shell clings on for dear life. I always try to grab eggs that have been in my fridge for about a week or so; they practically slip right out of their shells. You can check out some more science behind the perfect boil right here: perfect boiled eggs for potato salad.
The Boiling and Cooling Process for My Favorite Deviled Eggs
The procedure is simple, but you have to follow the timing exactly. Place all 12 eggs in a big saucepan and just barely cover them with cold tap water. Then, turn the heat to high and bring that water to a rolling, vigorous boil. The second it hits that full boil? Kill the heat completely, slap the lid on tight, and just let them sit there undisturbed for exactly 12 minutes.
When the timer goes off, you have to move fast! Drain all that hot water out immediately and flood the pan with ice water—I mean use tons of ice! This rapid cooling keeps the yolks from cooking further, preventing that gross greenish-gray layer you want to avoid. Once they are fully cool, the peeling is much gentler. Just tap firmly all over and roll them gently on the counter to crack the shell, then peel under cool running water if you need to.
Creating the Creamy Filling for My Favorite Deviled Eggs
This is where the magic happens, people! Once those egg whites are peeled and halved, we move on to building that ridiculously smooth, tangy center. We are aiming for a filling that looks like it came from a fancy catering tray, not something slapped together five minutes before the guests arrive.
I know most folks just mash the yolks with a fork, and that works fine, but if you really want that professional texture, I have a little trick up my sleeve. If you happen to have a fine-mesh sieve, press those cooked-up yolks through it *before* you add any wet ingredients. It takes an extra two minutes, but the resulting creaminess is unreal. Seriously, this little step is what separates good deviled eggs from *My Favorite Deviled Eggs*!
Mashing Yolks and Seasoning My Favorite Deviled Eggs Filling
First things first: get those yolks mashed smooth—or sieved, if you’re feeling fancy, like I suggested! Once they are powdery soft, start adding your wet ingredients. I always add the mayonnaise first so I can gauge the texture before anything else goes in. Then comes the yellow mustard for color and that classic sharp taste, followed by the white vinegar.
Mix it all diligently until you have a homogenous, gorgeous paste. Now, taste it! This is crucial. Add salt and freshly cracked black pepper until it sings. Don’t be shy with the salt; those whites need that flavor too! Also, if you’re feeling adventurous next time, don’t hesitate to swap that yellow mustard out for Dijon; it adds such a nice kick. If you want to check out some broader baking alchemy that helps with texture, you can peek at some general tips here: baking tips to make you a better baker.
Assembling and Garnishing My Favorite Deviled Eggs
We’re at the fun part now—putting it all together! Once you have that unbelievably creamy yolk mixture, it’s time to make these look professional. You have two main choices here for filling those pretty egg white halves. If you’re in a rush or just want that perfect rustic, homemade feel, a simple teaspoon works great. Just scoop it in neatly!
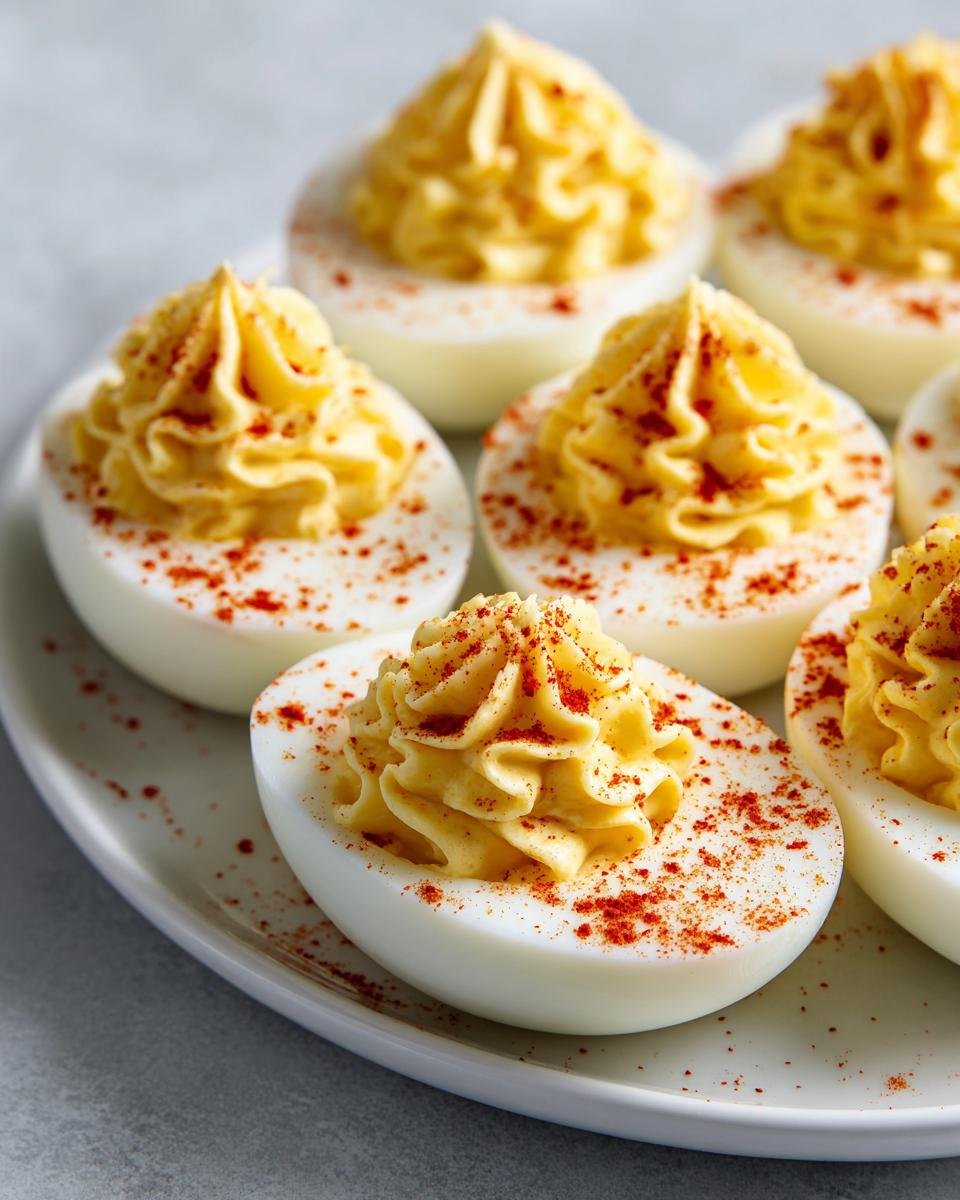
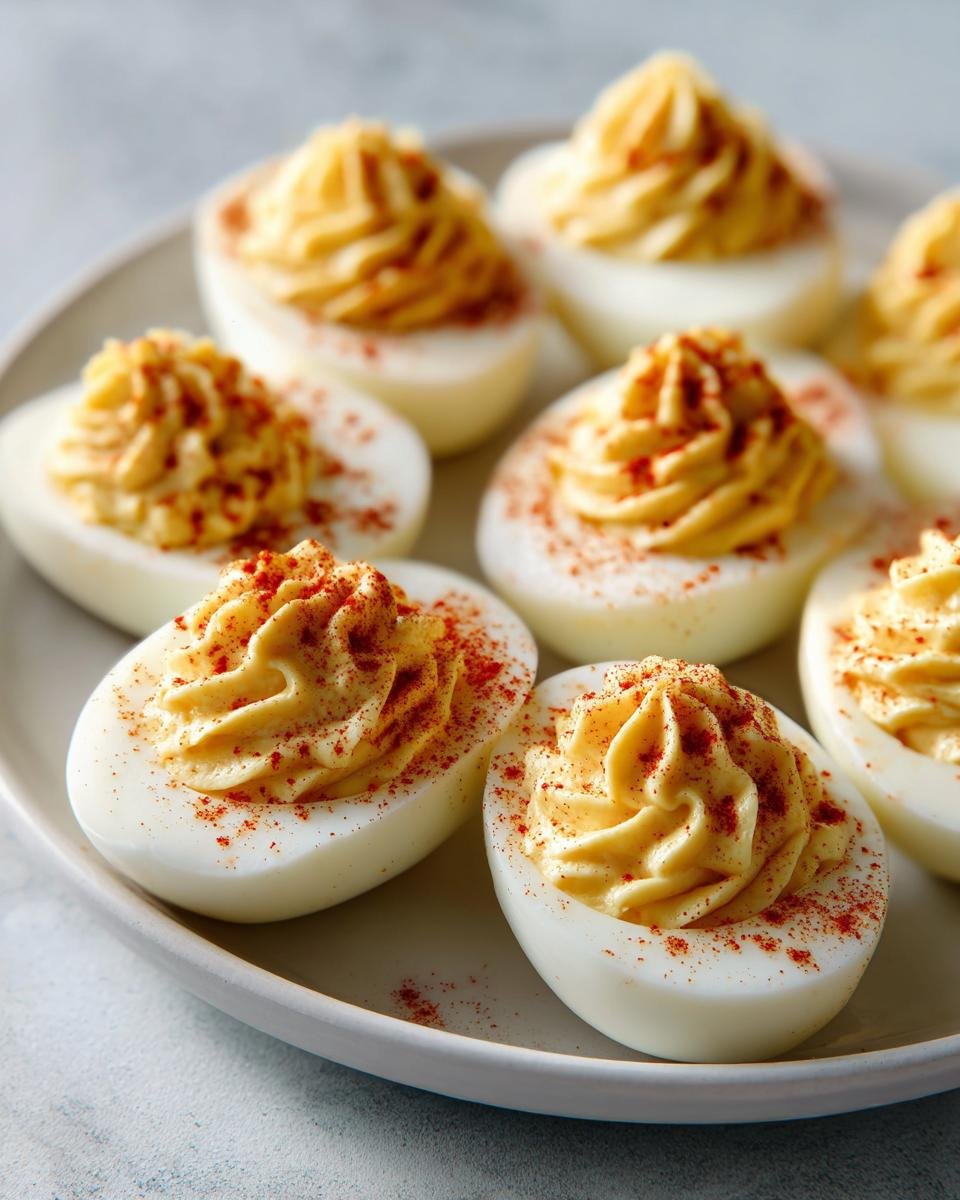
But if you want that Instagram-worthy swirl, grab a piping bag fitted with a large star tip. Trust me, swirling the filling makes them look instantly fancier, even though they taste exactly the same! Once they are all filled up and sitting pretty in their tray, you need the final pop of color.

The Final Touches on My Favorite Deviled Eggs
Take your paprika and sprinkle a light dusting right over the top of that creamy mound. Don’t go overboard; we want color, not a spice bomb! Just a gentle shake is all it takes. Now, this next step is non-negotiable if you want the absolute best flavor and texture: you absolutely must chill them.
Cover the tray very tightly with plastic wrap—make sure the wrap isn’t touching the peaks of the filling so it doesn’t smear! Pop them in the fridge for at least an hour, but two or three hours is even better. That chilling time lets the mayonnaise, mustard, and vinegar really marry together perfectly.
Why My Favorite Deviled Eggs are a Party Essential
I bring these to every single potluck, birthday, and tailgate, and they are always the first things gone. Honestly, they are the ultimate party MVP! Part of why I love this recipe so much—besides the taste, of course—is how fuss-free they actually are, especially once you get the hang of the boiling part. You can make them completely ahead of time, and they travel like a dream.
They just make everyone happy! They aren’t fussy like layer cakes or messy like dips you need chips for. They are bite-sized perfection. If you are on the fence about making them for your next event, let me just convince you with a few bullet points about why I rely on My Favorite Deviled Eggs every single time.
Key Advantages of This My Favorite Deviled Eggs Recipe
- Prep Time is So Fast! The total time is only about 32 minutes once you get into a rhythm. Boiling might take 15 minutes, but the filling comes together in a flash, meaning you aren’t stuck in the kitchen while everyone else is socializing.
- The Flavor is Universally Loved. This isn’t a weird flavor profile; it’s that perfect, nostalgic mix of creamy, salty, and tangy that appeals to every single person, from kids to your pickiest Aunt Carol.
- Perfect for Travel. Once they are chilled and set in their tray, they are super stable. They don’t melt like cheese dips, and they don’t get soggy like many other picnic foods. Just cover them securely and go!
- Simple Ingredients List. You aren’t tracking down obscure mustards or specialty herbs. Everything here is basic pantry stuff, so you can whip them up anytime you need an appetizer fast.
- Crowd-Pleaser Guaranteed! Seriously, I have never brought a tray of these that didn’t get completely demolished within the first hour.
Storing and Serving My Favorite Deviled Eggs
Sometimes, you just can’t eat 24 deviled eggs in one afternoon, even if you try! So, what do you do with the leftovers? That’s the important question, because when it comes to egg-based dishes, food safety is key. You don’t want these beauties sitting out on the counter too long at a party; they’re best served cold, and they need to be treated like any other dairy or meat product.
Luckily, storing them is super easy, provided you keep them cold. I always make sure to grab the plastic deviled egg carrier from the back of the pantry specifically for this. If you don’t have a special holder, just use a regular shallow dish. The main thing is protection!
Best Practices for Keeping My Favorite Deviled Eggs Fresh
For storage, you want them totally covered. Use plastic wrap or a tight-fitting lid, and make sure nothing can bump into the filling and mess up those nice paprika sprinkles! They need to go straight into the coldest part of your refrigerator—think below 40 degrees Fahrenheit. That’s the magic temperature range for safety.
Now, here is the most important part about how long they last: While they are technically *safe* for about four days in the fridge if kept properly cold, I’m going to level with you—they are honestly at their absolute peak texture within the first 24 to 48 hours. After that, the filling starts to soak into the whites a little too much, and they just lose that fresh, firm snap. So, try your best to enjoy My Favorite Deviled Eggs within two days!
And for serving? Absolutely don’t try to reheat these! Deviled eggs are meant to be served chilled or maybe at cool room temperature for a very short time. Pop them out of the fridge about 20 minutes before you plan to serve them, but take them off the snack table after two hours max, especially if it’s warm outside. Nobody wants a warm, mayo-filled egg!
Common Questions About Making My Favorite Deviled Eggs
Even though this recipe is rock-solid reliable, I always get questions when I share it with friends. It seems like everyone has had one bad batch of deviled eggs somewhere in their past, usually involving dry filling or impossible-to-peel whites! So, let’s just clear up any potential confusion right now so you can make my favorite version perfectly the very first time.
Getting an appetizer this beloved just right requires a tiny bit of troubleshooting knowledge, and I’m happy to share the wisdom I’ve picked up over years of making dozens and dozens of these little beauties for parties. If you need more general kitchen wisdom to support your baking journey, I found some great tips on kitchen handling techniques that can help everything else you make, too!
Troubleshooting and Variations for My Favorite Deviled Eggs
Here are the three big concerns I hear most often when people try out this recipe:
Why are my yolks dry, even after mixing in the mayo?
Nine times out of ten, if your yolk mixture is too dry, it means your yolks weren’t fully cooked or you didn’t mash them enough before adding the mayonnaise. Remember, the yolk itself needs to be crumbly *before* the wet stuff goes in. If they are still a little chunky when you add the mayo, it stiffens up fast. Another reason? Maybe you needed that extra little tap of vinegar or milk! Always trust your eyes and taste buds over the exact measurements sometimes.
Can I make these ahead of time? I’m worried about food safety spreading them out on a platter.
Yes, you absolutely can make them ahead, which is honestly one of the best selling points for any party platter! Boil and cool your eggs early, scoop out the yolks, and store the filling in a sealed container in the fridge. You can even mix the filling the day before; it gets even better overnight, trust me! When you are ready to serve, just fill the whites an hour or two before the guests arrive, add the paprika, and keep them chilled until serving time.
What spices can I add besides paprika? I want to mix things up!
Paprika is mandatory for tradition, sweet or smoked! But if you want to explore other flavors, a tiny pinch of cayenne pepper mixed right into the yolk filling adds a surprising, subtle warmth that people love. Or, if you are making these for a summer picnic, stir in about a tablespoon of very finely chopped fresh dill or chives right along with the mustard. They blend beautifully and give it a vibrant green speckle instead of the red dust.
Nutritional Estimation for My Favorite Deviled Eggs
Okay, let’s talk fuel for a minute! I know most people aren’t reaching for deviled eggs looking for a low-calorie snack, but I think it’s important to just know what you’re grabbing, especially when you’re making something this rich with mayo and yolks.
I pulled all the numbers together based on the recipe (that’s 12 eggs split into 24 halves), so this is the estimate for just two glorious little halves. Keep in mind, this is just an estimate, because my mayonnaise might be different than yours, and I definitely play fast and loose with the salt shaker! You know how it goes.
Key Nutritional Estimates Per Serving (2 Halves)
- Calories: Around 100—shockingly reasonable for how decadent they taste!
- Fat: About 9 grams total. That’s where the richness comes from, mostly the yolk and the creamy mayonnaise.
- Protein: A solid 5 grams, thanks entirely to those beautiful eggs!
- Carbohydrates: Super low, usually right around 0.5 grams, since there’s no sugar added to my base recipe (unless you count the tiny bit in the mustard).
- Sodium: You’ll see about 150mg, so definitely watch how much extra salt you dust on top if you’re counting!
- Cholesterol: Yep, it’s up there at 180mg; that’s the egg yolks doing their job!
So, while these aren’t exactly ‘diet food,’ they pack a serious punch of protein and flavor for just about 100 calories per serving. Enjoy them guilt-free!
Share Your Thoughts on My Favorite Deviled Eggs
Now that you’ve got the secrets to making the absolute dreamiest, creamiest deviled eggs? I really, really want to hear what you think! Cooking is just better when we share our successes, right?
Did you try the sieved yolk trick? Did you stick with the classic yellow mustard, or did you go for that zesty Dijon I mentioned? Don’t keep your genius variations locked up—we are all in this kitchen together!
Tell Me How You Liked It!
When you make My Favorite Deviled Eggs, please come back here and leave a rating! I keep hoping this recipe hits that perfect five-star mark because, honestly, I put a lot of love into perfecting this classic. Just click those stars and let me know if it was everything you hoped for in a party appetizer.
Also, drop a comment below! Talking about what spices you added, or what you served them with (are you a pickle slice-on-top person or strictly paprika?), really helps other readers who are gathering the courage to try them next. Seeing your successes makes my day!
And hey, if these became your new go-to, would you mind hitting that share button? Sharing this recipe helps spread the love for truly classic, great appetizers! For more essential party food ideas that always wow a crowd, you should definitely check out some of the other tried-and-true recipes I have saved right here: other fantastic kitchen recipes.
Print
Classic Deviled Eggs
- Total Time: 32 min
- Yield: 24 halves 1x
- Diet: Vegetarian
Description
A simple recipe for making traditional deviled eggs.
Ingredients
- 12 large eggs
- 1/2 cup mayonnaise
- 1 tablespoon yellow mustard
- 1 teaspoon white vinegar
- Salt to taste
- Black pepper to taste
- Paprika for garnish
Instructions
- Place eggs in a large saucepan and cover with cold water.
- Bring water to a boil over high heat.
- Remove pan from heat, cover, and let stand for 12 minutes.
- Drain hot water and immediately cover eggs with ice water to stop cooking.
- Once cool, peel the eggs and slice them in half lengthwise.
- Carefully scoop the yolks into a medium bowl.
- Mash the yolks with a fork until smooth.
- Mix in the mayonnaise, mustard, and vinegar.
- Season the mixture with salt and pepper.
- Spoon or pipe the yolk mixture back into the egg white halves.
- Sprinkle paprika over the top of each filled egg half.
- Chill before serving.
Notes
- For easier peeling, use slightly older eggs rather than very fresh ones.
- You can substitute Dijon mustard for yellow mustard for a different flavor.
- For a smoother filling, press the mashed yolks through a fine-mesh sieve before mixing.
- Prep Time: 20 min
- Cook Time: 12 min
- Category: Appetizer
- Method: Boiling
- Cuisine: American
Nutrition
- Serving Size: 2 halves
- Calories: 100
- Sugar: 0.5
- Sodium: 150
- Fat: 9
- Saturated Fat: 2.5
- Unsaturated Fat: 6.5
- Trans Fat: 0
- Carbohydrates: 0.5
- Fiber: 0
- Protein: 5
- Cholesterol: 180
Keywords: deviled eggs, eggs, appetizer, picnic food, party snack, mayonnaise, mustard