
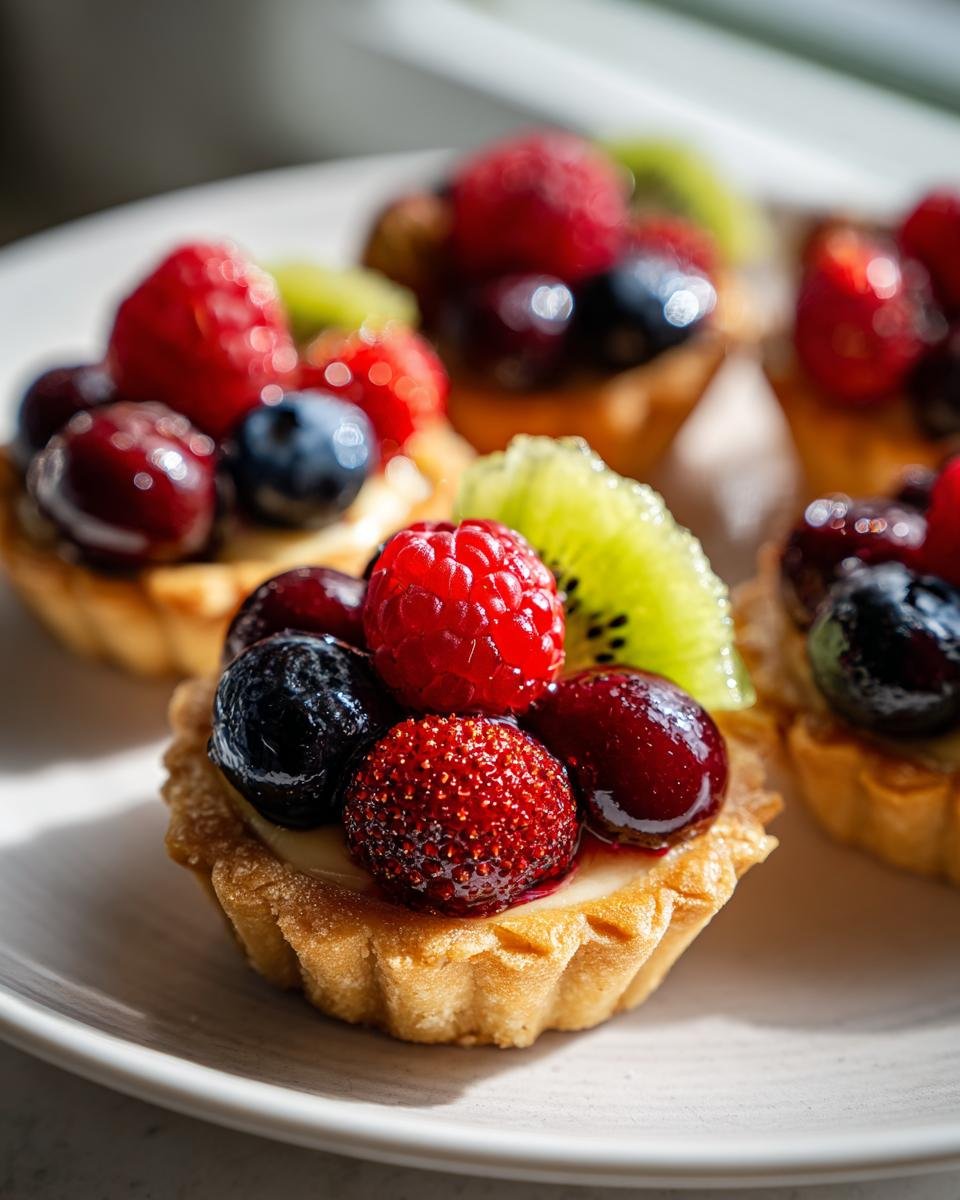
Oh, I just love anything that comes in its own little package, don’t you? There’s something so satisfying about serving dessert when everyone gets their own perfect little creation, no messy slicing required! That’s why **Mini Fruit Tarts** completely stole my heart when I first tried making them. Forget those giant, intimidating pies; these are charming little bites of heaven.
The beauty of this recipe isn’t just the portion size, though. It’s the textures working together! You get the sandy, buttery crumble of a homemade shortbread crust, followed by that cool, velvety indulgence of real pastry cream. Then, of course, you top it all with the brightest, freshest fruit you can find! Trust me, once you master these components, you’ll be making these individual tartlets for every single get-together.
Why You Will Love These Mini Fruit Tarts
Honestly, these aren’t just dessert; they are little edible works of art! If you need a reason to skip right to the instructions, here are the top five things I adore about whipping up batches of these individual tartlets:
- The Crust Texture: Forget soggy bottoms! This shortbread crust is surprisingly sturdy, buttery, and has the most lovely sandy crumble when you bite into it. It holds up perfectly to the rich cream.
- Portion Control Heaven: It’s the ideal serving size, right? You get that perfect balance of crust, cream, and fruit without committing to a giant slice of cake. Great for parties because everyone can grab one easily!
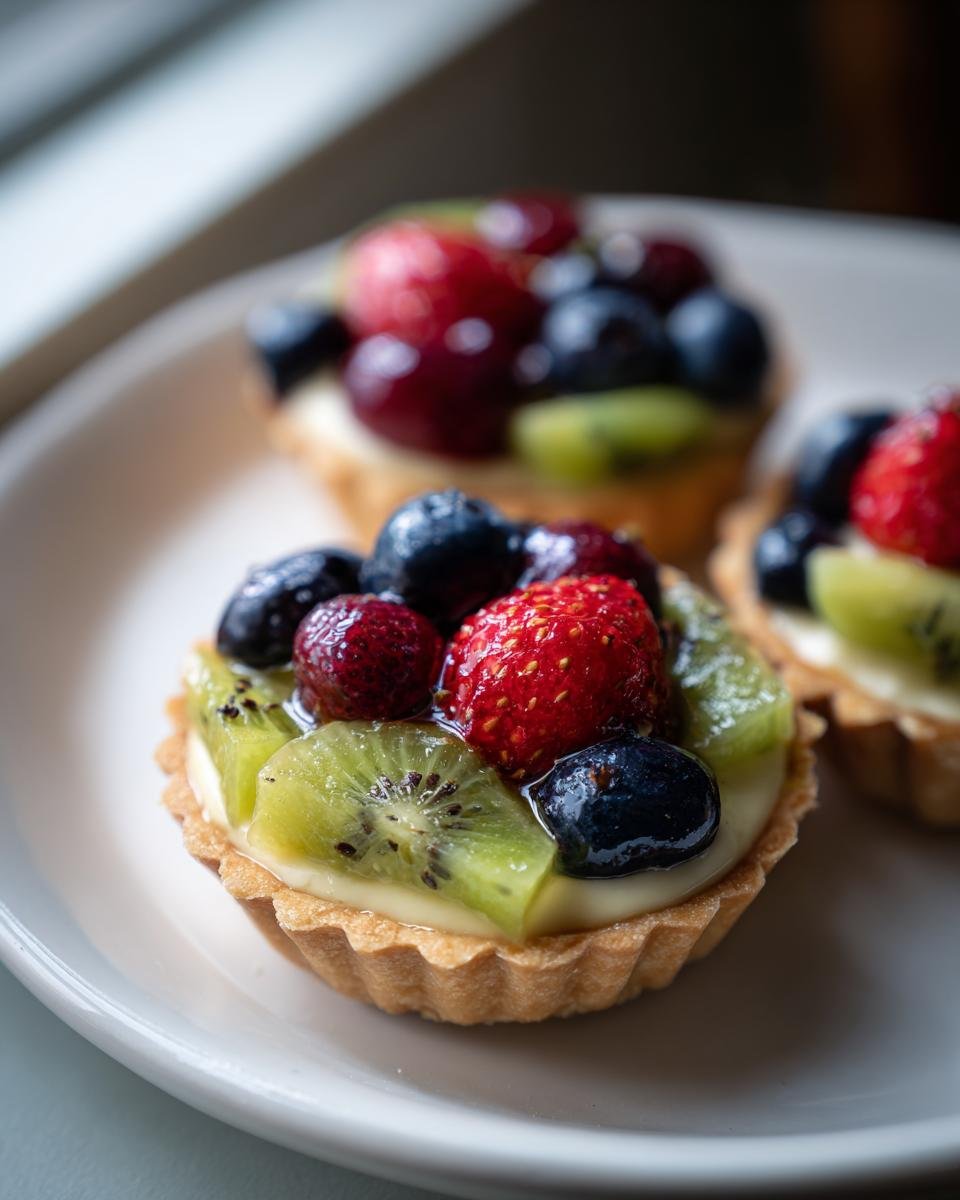
- Stunning Visual Appeal: Because they are small, you can arrange the fruit in beautiful little mosaic patterns. I love using contrasting colors—the deep purple of blueberries next to the bright red strawberries really pops, especially once you add that shiny apricot glaze on top.
- Make-Ahead Magic: While you assemble them the day of, the crusts and the pastry cream can both be made a day ahead. This means party day is way less stressful! You just pull things out of the fridge and start building.
- They’re Customizable: Seriously, this is a blank canvas. You can experiment with flavors in the cream or use whatever stunning fresh fruit is in season right now. I even link to some general baking tips over here if you want to boost your general baking confidence before starting!
Gathering Ingredients for Perfect Mini Fruit Tarts
Okay, now that you’re totally sold on how amazing these little pastries are, we have to talk about what we need to actually make them happen! Remember, with baking, especially when dealing with delicate shortbread crusts and creamy fillings, the quality of the ingredients really shows through. Don’t skimp here; these ingredients are what make the difference between a good tart and a mind-blowing **mini fruit tart**.
We’ve got three main players here: the crust that needs to be perfectly sandy and buttery, the luxurious pastry cream that needs to set up just right, and of course, the beautiful fresh fruit on top. I’ve broken down the list so you can easily shop or check your pantry. If you ever need substitutes for things like milk, I have a guide to buttermilk substitutions that might come in handy for other baking escapades!
For the Shortbread Crust
This is your foundation, so make sure that butter is properly cold! You’ll need:
- 1 1/2 cups all-purpose flour – standard stuff works perfectly here.
- 1/2 cup powdered sugar – this makes the crust tender instead of tough!
- 1/4 teaspoon salt – just a pinch to balance out all that sweetness.
- 1/2 cup cold unsalted butter, cubed – cube it small and keep it icy cold!
- 1 large egg yolk – just the yolk for richness, no whites please.
- 2 tablespoons cold water – use only what you need to bring the dough together.
For the Pastry Cream Filling
This filling is what separates the professional-looking tarts from the homemade ones. You want it smooth, thick, and rich. For extra decadence, you can swap the milk for heavy cream—it makes the texture even silkier, though it will be a touch richer!
- 1 cup milk – or use heavy cream if you’re feeling fancy!
- 1/4 cup granulated sugar – for sweetening the custard base.
- 2 tablespoons cornstarch – our thickening agent, crucial for stability.
- 1 large egg – this helps it set beautifully when it chills.
- 1 teaspoon vanilla extract – make sure this is pure vanilla for the best flavor!
For the Fruit Topping and Glaze
This is where you get to play stylist! Keep your fruit dry and colorful. The glaze adds that professional shine that makes people go “wow.”
- 2 cups mixed fresh fruit – think berries, sliced kiwi, or little mandarin orange segments. Wash and dry them super well before using!
- 1 tablespoon apricot jam for the glaze – this is essential for that glossy finish that seals in the fruit’s freshness.
Step-by-Step Instructions for Mini Fruit Tarts
Alright, let’s get baking! These instructions might look like a lot, but I promise you, once you see how those components come together, it feels like building something really special. We’re tackling the crust first because it needs a little nap in the fridge. Don’t skip that chill time; it keeps the shortbread crust from shrinking up on you in the oven! If you want to see some tips on making crusts amazing in general, I’ve got a great article on shortbread techniques right here.
Preparing and Baking the Tart Shells
First, we treat the dry stuff—flour, powdered sugar, and salt—to a quick whisk. Now, toss in your very cold, cubed butter. You need to cut that butter in until the mix looks like coarse, slightly damp sand. I usually cheat and use a pastry blender, but you can use your fingertips if you work fast! Next, gently mix in the egg yolk and cold water just until a shaggy dough forms. Don’t knead it, seriously. Wrap that little disc snugly and let it chill for a solid 30 minutes. Preheat your oven to 375°F (190°C). Then, roll out the dough, cut circles to fit your mini tart pans, and press it in gently. Remember to prick the bottoms all over with a fork—that prevents air bubbles! Bake these beauties for about 12 to 15 minutes until they are just lightly golden brown on the edges. Let those shells cool off completely on a wire rack before you even think about putting cream in them; warm shells melt happy pastry cream!

Making the Pastry Cream
This part requires your full attention, trust me! In a saucepan, whisk together your milk, sugar, cornstarch, and your whole egg. Put it over medium heat. The secret here is *constant stirring*. If you walk away for even ten seconds, you’ll get lumps or scorch the bottom, and nobody wants grumpy custard. Keep stirring until it gets thick—I mean, properly thick, like it’s hard to stir. Once it’s thick, yank it off the heat and stir in that vanilla. Immediately transfer the cream to a small bowl and press a piece of plastic wrap directly onto the surface of the cream. This sounds dramatic, but it stops that horrid skin from forming while it chills thoroughly in the fridge.
Assembling Your Beautiful Mini Fruit Tarts
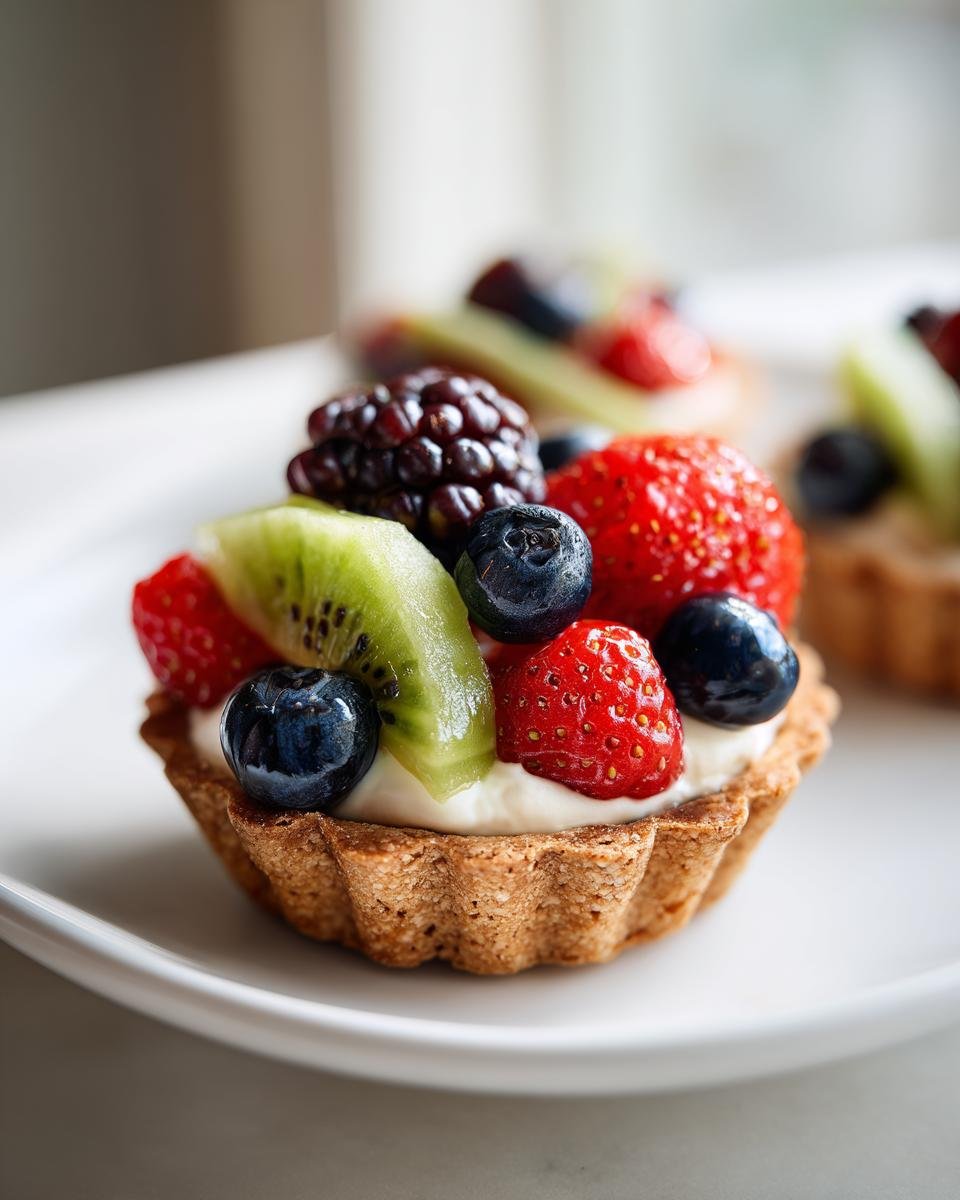
Once everything is cold—the shells and the cream—you’re in the home stretch! Scoop that beautifully dense, chilled pastry cream into each cooled tart shell. Don’t be shy; mound it up a little! Now for the fun part: arranging your fresh fruit. Get creative here! Make little patterns or color blocks because presentation truly matters with these tarts. To get that professional, jewel-toned shine, warm up your apricot jam slightly—I just microwave mine with a tiny splash of water for about 10 seconds to thin it out. Use a pastry brush or the back of a spoon to gently brush this glaze over all the gorgeous fruit. It seals them up and makes them look irresistible!
Tips for Perfect Mini Fruit Tarts Every Time
I’ve certainly learned a few things the hard way over the years attempting these delicate little things! Mostly, it comes down to keeping things cold and being patient during assembly. If you pay attention to these three little secrets, your fruit tarts will look like they came straight out of a fancy French bakery.
First, about your pans: sometimes life happens and you don’t have exactly eight matching mini tart pans. Don’t panic! If you have sturdy cookie cutters, you can use those. Just press the dough into the cutter sitting directly on a parchment-lined baking sheet. They won’t have the nice fluted edges, but they still taste exactly the same. I’ve had to do this when I had too many people show up!
Second crucial point: the chilling stage. I know, I know, nobody wants to wait when there’s delicious pastry cream staring at them, but hear me out. Once you assemble the whole **mini fruit tart**—crust, cream, and fruit—it needs a minimum of 30 minutes in the fridge before it hits the table. This time allows the cold pastry cream to firm up nicely and the apricot glaze to set. If you skip this, the cream can ooze out sideways when someone tries to pick it up; we want structure!
Finally, let’s talk fruit moisture. If your berries are looking a little damp after washing, you can gently blot them dry on paper towels, but honestly, the apricot glaze does most of the heavy lifting here. That thin layer seals the fruit and gives it a fantastic shine. If you want some more general pointers on avoiding baking mishaps, I wrote down a few extra ideas for success here. Happy tart making!
Variations on Classic Mini Fruit Tarts
Don’t feel like you have to stick to only berries and vanilla cream, even though that combination is spectacular! Part of the fun of mastering a reliable base recipe like these **Mini Fruit Tarts** is learning how to remix it using what you have on hand or what you’re craving that day. Think of the shortbread shell as the perfect little edible bowl, waiting for your personal flavor signature!
The easiest place to pivot is almost always the filling. While the classic pastry cream is divine, you can swap it out for something bolder. Maybe you’re obsessed with citrus? You can use a prepared lemon curd instead of making the pastry cream—it’s thicker and tangier, which cuts through the richness of the butter nicely. Or, if you want to keep a creamy base but change the aroma, try swapping out the vanilla extract for almond or even a touch of high-quality lemon zest when you finish cooking the cream.
Another fun trick is adjusting the glaze, depending on your fruit choice. If you decide to skip the standard mixed berries and go for something like sliced peaches which have a softer flavor profile, try warming up some peach preserves instead of apricot jam for the glaze. It enhances the fruit’s natural flavor profile beautifully. And honestly, if you end up with extra lemon curd, you’ve got the base for my amazing lemon raspberry cupcakes, which you can check out right here!
Bottom line: once you have that crumbly shortbread crust down, the possibilities are seriously endless. These mini tartlets are just waiting for you to make them uniquely yours!
Storing and Serving Your Mini Fruit Tarts
So, you’ve made these gorgeous little **mini fruit tarts**, and maybe you have a few leftovers—or perhaps you planned ahead and made the components early! Knowing how to store them properly is key to making sure that shortbread crust stays crisp and the pastry cream stays perfectly set.
For the components made ahead of time, think separate storage until the very last minute. The baked tart shells? You can keep those in an airtight container at room temperature for up to three days. They are surprisingly resilient! They just need protection from any humidity that might sneak in and soften that buttery base. The pastry cream, however, is dairy-based, so it needs to go straight into the fridge immediately after chilling. It will stay perfectly good for about four days when tightly covered.
Best Practices for Refrigeration
Once you have assembled the entire **mini fruit tart**—crust, cream, and fruit—you need to treat it like a delicate piece of jewelry. These absolutely must be stored in the refrigerator. The cream needs that cold temperature to stay firm, and the fresh fruit will last much longer when chilled. I recommend covering the whole tray loosely with plastic wrap or putting them into a large container, making sure the wrap doesn’t touch the fruit topping, or you’ll mess up that beautiful glaze!
How long do they last once assembled? Honestly, they are at their peak the day you make them, but they are still wonderfully delicious for up to two days in the fridge. After that, the moisture from the cream starts to seep a little bit into that lovely shortbread crust, and eventually, it starts to lose its satisfying crunch. So, save any extras for treats the very next day!
Serving Suggestions
When it’s time to serve, the one thing I insist on is that they must be served chilled. Don’t leave them sitting out on a party buffet for hours, especially if it’s warm! If you’ve had them chilling away in the cold for several hours, you might want to take them out about 15 minutes before your guests arrive, just to take the harsh chill off the pastry cream. It makes the cream softer and lets you appreciate the flavors more.
If you want to make them feel extra special right before serving, a tiny dusting of powdered sugar over the top once they are plated is always a nice touch—it contrasts beautifully with the shiny glazed fruit. Enjoy every little bite!
Frequently Asked Questions About Mini Fruit Tarts
I’ve gathered up some of the most common questions I get asked when people try this recipe out! Don’t hesitate to reach out via my contact page if you have something extra specific after reading these!
Can I use store-bought pastry shells for these mini fruit tarts?
Oh, you *can*, but let me tell you, you’ll be missing out on the best part! The beauty of this recipe is that buttery, tender, melt-in-your-mouth shortbread crust. Store-bought shells are often flavorless, thicker, and just don’t have that perfect sandy texture we worked so hard to achieve. If you are absolutely in a pinch, go for it, but trust me, taking the extra 15 minutes to make your own crust elevates these **mini fruit tarts** from good to absolutely incredible. It’s worth the effort!
How long does the pastry cream hold up in these mini fruit tarts?
The stability of the pastry cream is great, but it is still a dairy-based custard, so we can’t push it too far. If you assemble the whole thing—crust, cream, and fruit—I firmly suggest eating them within two days for the very best result. After that, the moisture from the cream starts to really soften up that gorgeous shortbread crust, and you lose that lovely contrast in texture. If you make the cream ahead, keep it sealed tight in the fridge; four days is the absolute maximum for the cream by itself.
What is the best way to prevent the fruit from weeping on the mini fruit tarts?
Weeping fruit is the nemesis of any pretty tart topping! There are two things that help here. First, make sure your fruit is completely dry before you arrange it on the pastry cream—I pat berries gently with a paper towel if they look damp. But the real secret weapon we use in this recipe is that apricot glaze. Warming the jam slightly and brushing it over the arranged fruit seals the edges and traps most of the moisture inside the fruit itself. It gives a beautiful barrier, plus that professional shine!
Nutritional Estimate for Mini Fruit Tarts
Now, those of you who track macros or are just curious about what you’re munching on—here is a general look at the nutrition behind our beautiful little **Mini Fruit Tarts**. Look, I’m a home cook, not a registered dietitian, so take these numbers with a grain of salt, okay? They are just good estimates based on the typical breakdown of flour, sugar, butter, and fresh fruit. The exact values will change depending on whether you used heavy cream instead of milk, or how much jam you brushed on top!
I generally find that knowing the approximate numbers helps when planning a menu, especially when you realize you’ve accidentally eaten three tartlets because they were just *that* good. Whoops! These estimates are for one single, perfect serving.
- Serving Size: 1 tart
- Calories: 280
- Sugar: 18g (That apricot glaze adds a little kick!)
- Sodium: 90mg
- Fat: 14g
- Saturated Fat: 8g (That’s the buttery shortbread crust talking!)
- Unsaturated Fat: 6g
- Trans Fat: 0g
- Carbohydrates: 35g
- Fiber: 2g
- Protein: 5g
- Cholesterol: 65mg
Keep in mind, since we are using fresh fruit and high-quality butter in that amazing shortbread crust, these tarts are going to be richer than something you picked up from a major grocery chain’s pre-packaged case. But trust me, the quality difference in taste? Totally worth every number!
Share Your Experience Making Mini Fruit Tarts
Now that you’ve got the rundown on the buttery shortbread crust, the unbelievably smooth pastry cream, and how to get that perfect professional glaze on your **Mini Fruit Tarts**, I just can’t wait to hear all about your creations!
Baking is just so much more fun when you can share the results, even if it’s just sharing a picture in the comments below! I really want to know what you thought of the texture contrast—did the crust crumble exactly as you hoped it would? Did you stick to the classic berries, or did you get adventurous?
If you made these for a party or a special occasion, please tell me what fruit combination you chose! I’m always looking for new inspiration for next weekend’s baking project. And if anything tripped you up along the way—maybe your jam wasn’t thinning right, or your cream seemed too thin at first—drop your questions right here in the comments section. I check these often and truly love helping fellow bakers figure out those little kitchen quirks.
If you absolutely loved this recipe and think it deserves a spot in your permanent rotation, please take a moment to leave a star rating above! It really helps other folks find these recipes. I’m so proud of this recipe and the little pieces of kitchen joy they bring. If you want to learn more about me and why I love sharing these traditional-but-accessible recipes, you can sneak a peek at my About Page!
Happy baking, and I truly hope these little tartlets bring a smile to your face!
Print
Mini Fruit Tarts
- Total Time: 60 min
- Yield: 8 servings 1x
- Diet: Vegetarian
Description
Small, individual fruit tarts with a shortbread crust and pastry cream filling.
Ingredients
- 1 1/2 cups all-purpose flour
- 1/2 cup powdered sugar
- 1/4 teaspoon salt
- 1/2 cup cold unsalted butter, cubed
- 1 large egg yolk
- 2 tablespoons cold water
- 1 cup milk
- 1/4 cup granulated sugar
- 2 tablespoons cornstarch
- 1 large egg
- 1 teaspoon vanilla extract
- 2 cups mixed fresh fruit (berries, kiwi, mandarin segments)
- 1 tablespoon apricot jam (for glaze)
Instructions
- Make the crust: Combine flour, powdered sugar, and salt in a bowl. Cut in the cold butter until the mixture resembles coarse crumbs. Mix in the egg yolk and cold water until a dough forms. Wrap the dough and chill for 30 minutes.
- Preheat your oven to 375°F (190°C). Roll out the dough and cut circles to fit mini tart pans (about 3 inches diameter). Press the dough into the pans. Prick the bottoms with a fork.
- Bake the tart shells for 12-15 minutes, or until lightly golden. Cool completely on a wire rack.
- Make the pastry cream: Whisk milk, granulated sugar, cornstarch, and egg in a saucepan. Cook over medium heat, stirring constantly, until the mixture thickens significantly. Remove from heat and stir in the vanilla extract. Cover the surface directly with plastic wrap and chill until cold.
- Fill the cooled tart shells with the chilled pastry cream.
- Arrange the mixed fresh fruit attractively on top of the cream filling.
- Prepare the glaze: Warm the apricot jam slightly with a teaspoon of water. Brush the glaze lightly over the fruit.
Notes
- You can substitute heavy cream for milk in the pastry cream for a richer flavor.
- Chill the finished tarts for at least 30 minutes before serving for best texture.
- Use small cookie cutters if you do not have mini tart pans.
- Prep Time: 45 min
- Cook Time: 15 min
- Category: Dessert
- Method: Baking
- Cuisine: French
Nutrition
- Serving Size: 1 tart
- Calories: 280
- Sugar: 18
- Sodium: 90
- Fat: 14
- Saturated Fat: 8
- Unsaturated Fat: 6
- Trans Fat: 0
- Carbohydrates: 35
- Fiber: 2
- Protein: 5
- Cholesterol: 65
Keywords: mini fruit tarts, pastry cream, shortbread crust, fresh fruit dessert, individual tartlets