
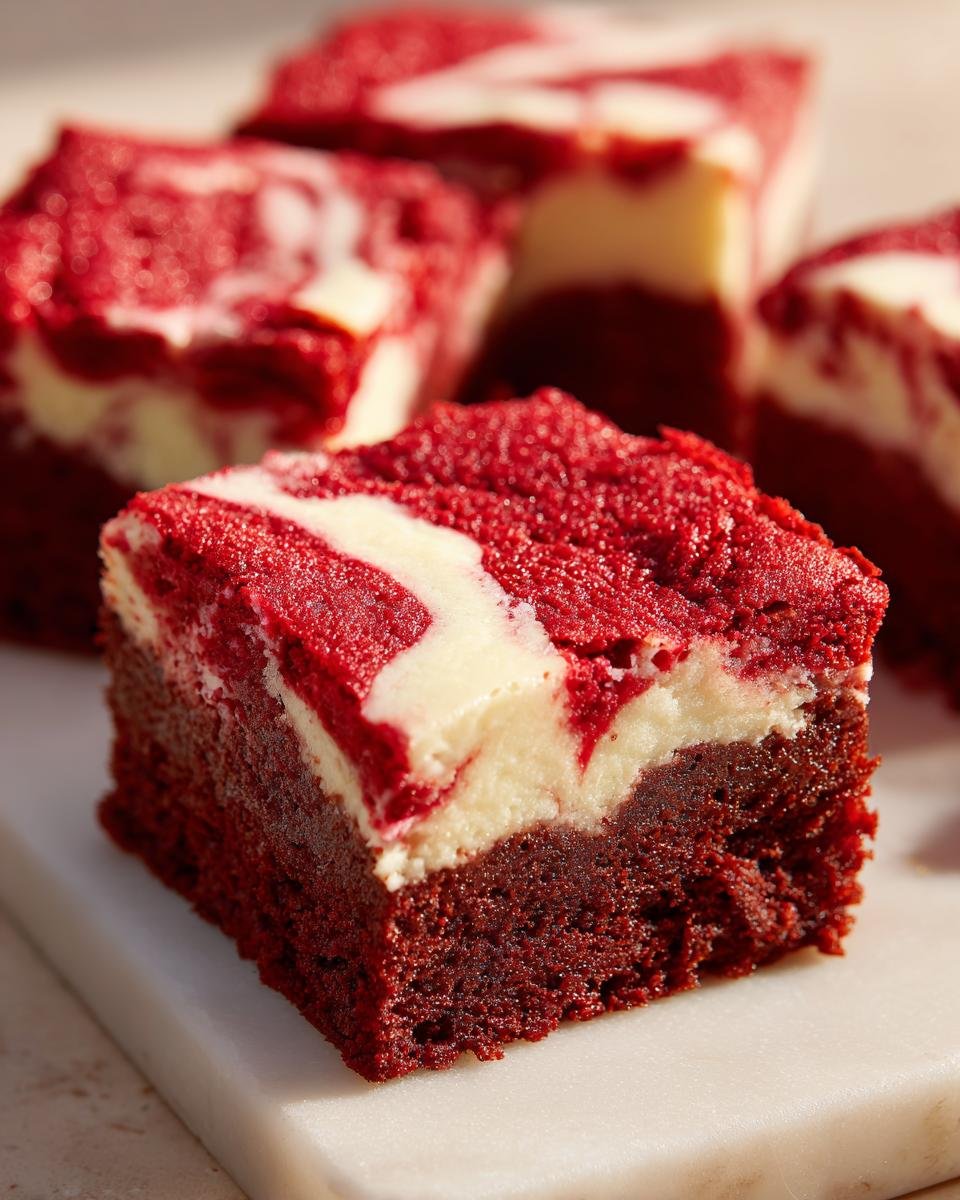
Oh my goodness, if you are looking for that perfect bite—the one where the doughy middle meets the slightly crisp edge—then stop scrolling right now! I live for fudgy desserts, especially brownies, and I’ve finally cracked the code on the absolute best way to make them. These truly are the fudgiest, easiest red velvet brownies you will ever meet, complete with that heavenly, tangy cream cheese swirl.

Forget everything you think you know about complicated baking projects. This Irresistible Red Velvet Brownies Recipe Youll Love became my weeknight obsession because the flavor is huge, but the cleanup is tiny. I’m so excited to share this one with you; it’s now officially on my ‘must-make-monthly’ list.
If you want to dive deeper into getting that perfect dense texture, check out the science behind the fudgy factors. Trust me on this one—you need this recipe in your life!
Why This Irresistible Red Velvet Brownies Recipe Youll Love Stands Out
I’ve tried every brownie recipe under the sun, and honestly, most of them end up too cakey or just not red enough. This one is different. It hits all the right notes every single time I whip up a batch! It’s the kind of simple recipe you can rely on when you need a showstopper without stressing out.
You’re going to fall in love with these five things:
- The texture is pure fudge—dense, rich, and melts in your mouth.
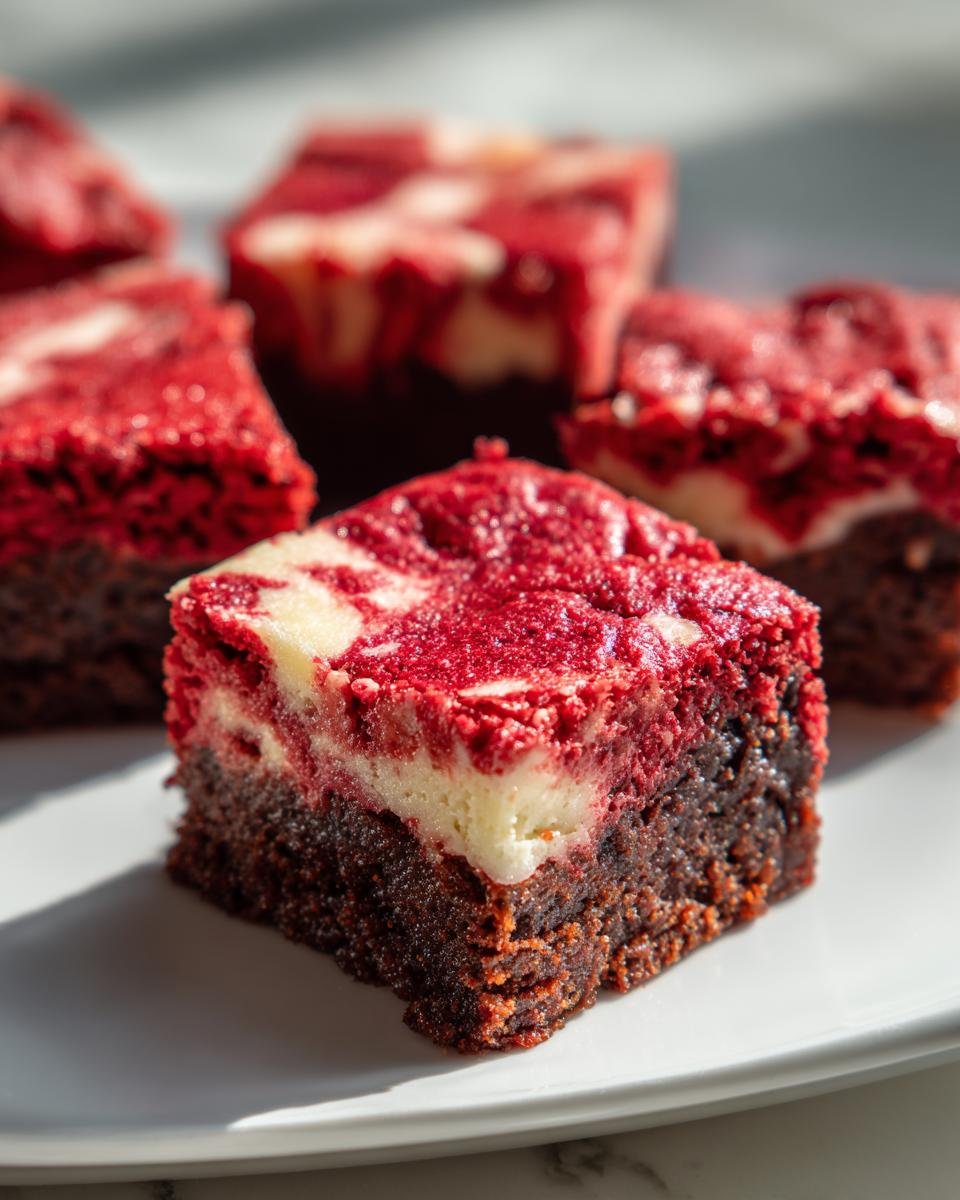
- That bright, vibrant red color pops, even without using a million drops of food coloring.
- The cream cheese swirl is mandatory! It adds that necessary tangy contrast.
- It’s way faster than making a layer cake; we’re talking minimal fuss.
- These are incredibly sturdy once cooled, making for the cleanest square cuts you’ve ever made.
If you want to level up your baking game overall while nailing this recipe, make sure you check out my top baking secrets. But for these brownies? Just follow the steps—you’ll see!
Gather Your Ingredients for Irresistible Red Velvet Brownies Recipe Youll Love
Okay, let’s talk supplies! You need the right stuff for these to turn out truly irresistible, especially that swirl. Don’t worry, nothing too exotic is required, but you do need to pay attention to how things are prepped. For example, we need the butter melted, but the cream cheese absolutely has to be softened up by the time we mix that topping. This recipe pulls moisture from the melted butter and richness from the sour notes, so stick to the list!
If you ever run out of buttermilk (though we aren’t using it here, you might need it later!), I have some great quick substitutes saved on the site. Now, here is exactly what you need to pull together before we start mixing:
For the Fudgy Red Velvet Brownie Batter
- 1 cup (2 sticks) unsalted butter, melted – make sure it’s totally melted!
- 2 cups granulated sugar
- 4 large eggs, room temperature is best
- 1 teaspoon vanilla extract
- 1 teaspoon white vinegar – trust me, this helps the color pop!
- 1/4 cup unsweetened cocoa powder
- 2 1/4 cups all-purpose flour
- 1 teaspoon salt
- 1 teaspoon baking soda
- 1/4 cup red food coloring (liquid or gel—gel gives you that deep color)
For the Cream Cheese Swirl
- 4 ounces cream cheese, make sure this is softened completely so there are no lumps
- 1/4 cup powdered sugar
- 1/4 teaspoon vanilla extract
Step-by-Step Instructions for Your Irresistible Red Velvet Brownies Recipe Youll Love
This is where the magic happens, but stay alert! Brownies demand respect, especially when aiming for that ultimate fudgy texture. The goal here is minimum mixing once the flour comes into play. We want everything totally combined, but we do *not* want to develop any tough gluten structure. Keep your pace steady and your focus sharp!
Preparing the Pan and Mixing the Batter
First things first: Get your oven heating up to 350°F (175°C). I always advise greasing a 9×13 inch pan, then laying down a sheet of parchment paper with some overhang on the long sides. That overhang is your friend later when you need to lift the whole slab out for clean cutting! No one likes digging around in a pan with a knife.
Start by whisking that melted butter right into your sugar until they look happy together. Then, beat in those four eggs, one by one, making sure each one is totally incorporated before adding the next. A little splash of vanilla and white vinegar goes in next. In a separate bowl, whisk your dry stuff—flour, cocoa, salt, and baking soda—just to get them acquainted. Now comes the crucial bit: Add the dry mixture to the wet, and mix only until you see the last streak of flour disappear. Seriously, stop right there! Then, stir in all that gorgeous red food coloring until it’s a uniform, gorgeous color.
Creating the Cream Cheese Layer and Swirling
While your red batter is resting (briefly!), you need to whip up the cream cheese swirl. Grab that softened cream cheese and beat it vigorously with the powdered sugar and that little bit of vanilla until it’s totally smooth and looks like thick frosting. No lumps allowed!
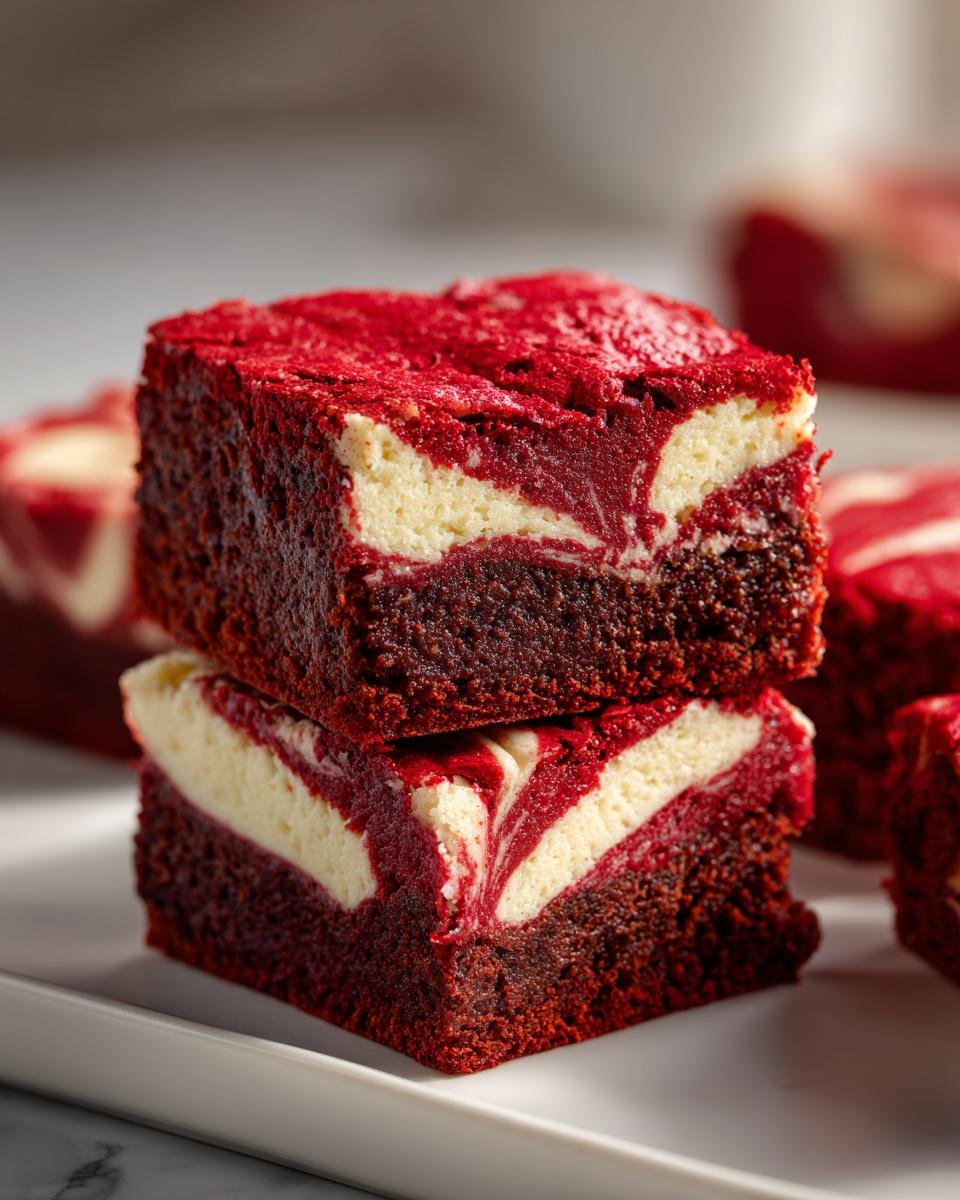
Now, pour half of your beautiful red batter into that prepared pan. Dollop spoonfuls of the cream cheese mixture evenly over the top. Don’t try to spread it out or push it down—just drop the clumps where you want the tanginess to be! Then, pour the rest of the red batter right over the top. For the swirl, take a butter knife and gently run it through the layers just once or twice. You want ribbons, not soup! If you over-swirl, the red will eat the white, and you lose that beautiful contract.
Baking and Cooling the Irresistible Red Velvet Brownies Recipe Youll Love
Slide that pan into the preheated oven. You’ll bake these babies for 25 to 30 minutes. You are looking for moist crumbs on your toothpick—if it comes out totally clean, you’ve baked too long and they might be dry! We checked out some tips on keeping them gooey, which you can see right here, but the main thing is don’t push past that moist crumb stage.
This last step is the hardest, but absolutely necessary: Let them cool completely in the pan. I mean it! If you try to cut them warm, they turn into a total, gooey mess, and you won’t get those gorgeous squares you deserve. Patience pays off here, my friend!
Tips for the Best Irresistible Red Velvet Brownies Recipe Youll Love
Getting these brownies perfect every time is easy if you know a couple of little tricks! Honestly, the difference between a good brownie and one you dream about comes down to tiny details, which is why I always tell people to focus on the color and the tang.
If you want that truly deep, rich red—the classic look—skip the liquid food coloring and use the gel kind. It gives you intense color payoff without adding extra moisture to the batter. That’s a pro move right there!
For the cream cheese swirl, remember that little note about tang? If you’re feeling classic and want a bit of a sharp kick against the chocolate, swap out that tiny bit of vanilla in the swirl for half a teaspoon of fresh lemon juice. It brightens everything up wonderfully. And always, always remember that cooling period; it’s non-negotiable if you want clean edges!
You can always find more general tricks on achieving perfection in any bake over on my baking tips page!
Ingredient Notes and Substitutions for Red Velvet Brownies
Listen, I know sometimes you’re making these irresistible red velvet brownies and you realize you’re missing *one* thing, or maybe you just prefer a different flavor profile. That’s life! In the kitchen, we improvise, but we do it smartly so we don’t ruin that perfect fudgy texture we worked so hard for.
For instance, the food coloring situation is huge. Liquid coloring is fine, and it’s what I had when I first made these, but using the gel version really pushes that red deep into velvet territory without thinning out your beautiful batter. If you only have liquid, you might need a bit more, so keep pouring slowly until you hit that color you love, but stop once you see the liquid dye is totally mixed in!
If you suddenly realize your cream cheese for the swirl is still rock hard straight from the fridge? Don’t panic! Cut it into small cubes, zap it in the microwave for about 10 seconds—no more!—and then let it sit for just a minute. It usually softens up just enough to beat smoothly after that quick warm-up. If you are looking for ways to swap out other common baking liquids down the road, I keep a running list of great substitutions here.
And remember that white vinegar? It seems odd in a brownie, I know! But it reacts slightly with the cocoa powder to help bring out that classic red velvet tang and color. If you don’t have it, you can try using a teaspoon of fresh lemon juice instead, which should give you a similar effect when paired with the baking soda. Just don’t skip that acidic element completely!
Storage and Reheating Instructions for Your Brownies
Now that you’ve made this incredible batch of irresistible red velvet brownies, you have to know how to keep them perfect! If you manage to have any leftovers, that is, because they tend to disappear fast around my house. The secret to keeping that dense, fudgy texture is all about controlling the air around them, which stops them from drying out.
For short-term storage—say, the next couple of days—keeping them at room temperature is totally fine. You must cover them tightly, though. I usually cut them into squares first, then I line an airtight container with parchment paper, maybe put a sheet between layers if I stacked them, and snap that lid on tight. This keeps them soft for about three days. The cream cheese swirl stays just fine this way.
If you really need them to last, or if your kitchen gets super warm, go ahead and use the fridge! Put them in an airtight container, and they should be good for almost a week. Just be warned: brownies can seize up and get a little firmer when chilled, so you have to give them a little love before you eat them warm!
To bring them back to that glorious, fresh-from-the-oven state, don’t use the microwave for too long, or you’ll end up with rubbery edges. Take one or two squares out of the fridge about 20 minutes before you plan to eat them. That lets them warm up naturally to room temp. If you’re impatient (like me sometimes!), just zap them for about 10 to 15 seconds. That’s enough heat to soften the fudge center and bring that cream cheese swirl back to perfect creaminess without cooking them again!
Serving Suggestions for Irresistible Red Velvet Brownies Recipe Youll Love
You’ve made the brownies, you’ve waited the agonizing hours for them to cool, and now—it’s time to serve! Because these red velvet brownies are already so rich, fudgy, and loaded with that essential tangy cream cheese ribbon, they really don’t need much dressing up. Honestly, just cutting them into squares and putting them on a plate is a major win!
But if you’re serving them for a special occasion or want to make them feel extra decadent? I have a couple of ridiculously easy ideas that take zero extra fuss.
The absolute classic way to serve any stunning brownie is warm with a scoop of really good vanilla ice cream. The contrast between the slightly warm, dense brownie and the cold, sweet ice cream is just heaven. If you’re feeling bold, a little drizzle of melted chocolate on top just before serving never hurt anyone!
If you absolutely insist on adding a frosting touch but don’t want the full complexity of the cream cheese swirl, you can always lean into a super light topping. I have a brilliant, simple vanilla frosting recipe over here that you can thin down just a touch with milk. Dusting the cooled brownies lightly with powdered sugar is another gorgeous and simple option. See? Serving these irresistible red velvet brownies is just as easy as making them!
Frequently Asked Questions About Red Velvet Brownies
It’s totally normal to have questions when you are trying out a new favorite recipe! Brownies, especially fudgy ones like these, sometimes need a little extra guidance to ensure they come out picture-perfect. Don’t stress if you’ve ever had a batch that turned out too cakey—we can fix that!
Here are the things I get asked the most about achieving perfection with this recipe:
How do I get the fudgiest texture in my Irresistible Red Velvet Brownies Recipe Youll Love?
This is the million-dollar question for any brownie baker! The secret to true fudgy brownies lies in two things: fat and time. First, you want a high ratio of fat (butter, eggs) to flour; this recipe is balanced perfectly for that dense, gooey result. Second, and this is non-negotiable, do *not* overbake them! Pull them out when the toothpick comes out with moist crumbs attached, not slick wet batter, but definitely not dry. That residual heat finishes the cooking process after they leave the oven.
Can I make these red velvet brownies without food coloring?
You absolutely *can* technically bake them without the red food coloring, yes. But they won’t really be “red velvet,” right? The chocolate flavor is still there because of the cocoa powder, but the visual appeal—that classic, deep crimsom look that contrasts so beautifully with the bright white cream cheese swirl—that’s what the coloring provides! If you skip it, you end up with dark brown, fudgy chocolate swirl brownies, which are still delicious, just not true to the red velvet name. For the best look, I really recommend using at least a little bit of gel coloring.
Estimated Nutritional Data for This Dessert
Okay, friends, let’s talk fuel for a second! While we are definitely here to indulge in the most *irresistible* fudgy treat, I know some of you like to keep track of what you’re eating. So, here is the breakdown based on the ingredients we used and yielded 24 perfect squares. Remember, this is my best guess!
I always say these numbers are just a guideline because, let’s be honest, the exact amount of sugar I used in the cream cheese swirl or the size of my eggs can shift things slightly. Plus, if you swap out butter for coconut oil or something wild, all bets are off! But for a standard single brownie square, this is what we are looking at:
- Serving Size: 1 brownie
- Calories: 220
- Total Fat: 12g (You can see the breakdown, but we’ve got about 7g of that saturated fat from the butter and cream cheese!)
- Total Carbs: 28g (That sugar content is about 25g, so maybe pair this with black coffee, ha!)
- Protein: 3g
See? Rich, satisfying, and totally worth enjoying with a big glass of milk. Don’t stress too much about the numbers when you’re eating something this delicious—just savor that fudge!
Share Your Irresistible Red Velvet Brownies Recipe Youll Love Experience
Alright, that’s it! You’ve got the secrets, the steps, and all the little tips I’ve gathered over the years to make these the best fudgy brownies ever tasted. Now the only thing left to do is get baking!
I truly hope you love this recipe as much as my family does. When you pull that pan out of the oven and the kitchen smells like chocolate and vanilla—man, there’s nothing better! Once you’ve let them cool completely (I know, that part is brutal!) and you’ve cut those perfect squares, I need to know what you think!
Please, please, please come back down to the comments section below and leave a rating for this Irresistible Red Velvet Brownies Recipe Youll Love. Tell me how the swirl turned out! Did you go for the lemon tang, or stick to the vanilla? Did you actually manage to wait till they were cool before slicing?
If you made these and snapped a picture—and I bet you did, because they are gorgeous—tag me on social media! Seeing your amazing fudgy creations always makes my day. Happy baking, sweet friends!
Print
Irresistible Red Velvet Brownies
- Total Time: 50 min
- Yield: 24 brownies 1x
- Diet: Vegetarian
Description
A recipe for rich, fudgy red velvet brownies.
Ingredients
- 1 cup (2 sticks) unsalted butter, melted
- 2 cups granulated sugar
- 4 large eggs
- 1 teaspoon vanilla extract
- 1 teaspoon white vinegar
- 1/4 cup unsweetened cocoa powder
- 2 1/4 cups all-purpose flour
- 1 teaspoon salt
- 1 teaspoon baking soda
- 1/4 cup red food coloring (liquid or gel)
- 4 ounces cream cheese, softened
- 1/4 cup powdered sugar
- 1/4 teaspoon vanilla extract
Instructions
- Preheat your oven to 350°F (175°C). Grease and flour a 9×13 inch baking pan, or line it with parchment paper.
- In a large bowl, whisk together the melted butter and granulated sugar until combined.
- Beat in the eggs one at a time, mixing well after each addition. Stir in the vanilla extract and white vinegar.
- In a separate bowl, whisk together the cocoa powder, flour, salt, and baking soda. Gradually add the dry ingredients to the wet ingredients, mixing until just combined.
- Stir in the red food coloring until the batter is uniformly red.
- Pour half of the batter into the prepared baking pan.
- In a small bowl, beat the softened cream cheese with the powdered sugar and vanilla extract until smooth. Drop spoonfuls of the cream cheese mixture over the batter in the pan.
- Pour the remaining red batter over the cream cheese layer. Use a knife to gently swirl the layers together slightly.
- Bake for 25 to 30 minutes, or until a toothpick inserted near the center comes out with moist crumbs attached. Do not overbake.
- Let the brownies cool completely in the pan before cutting into squares.
Notes
- For a deeper red color, use gel food coloring instead of liquid.
- If you prefer a tangier swirl, use 1/2 teaspoon of lemon juice instead of vanilla extract in the cream cheese mixture.
- Cooling completely makes cutting cleaner squares easier.
- Prep Time: 20 min
- Cook Time: 30 min
- Category: Dessert
- Method: Baking
- Cuisine: American
Nutrition
- Serving Size: 1 brownie
- Calories: 220
- Sugar: 25
- Sodium: 150
- Fat: 12
- Saturated Fat: 7
- Unsaturated Fat: 5
- Trans Fat: 0
- Carbohydrates: 28
- Fiber: 1
- Protein: 3
- Cholesterol: 60
Keywords: red velvet brownies, fudgy brownies, cream cheese swirl, chocolate dessert, easy baking