
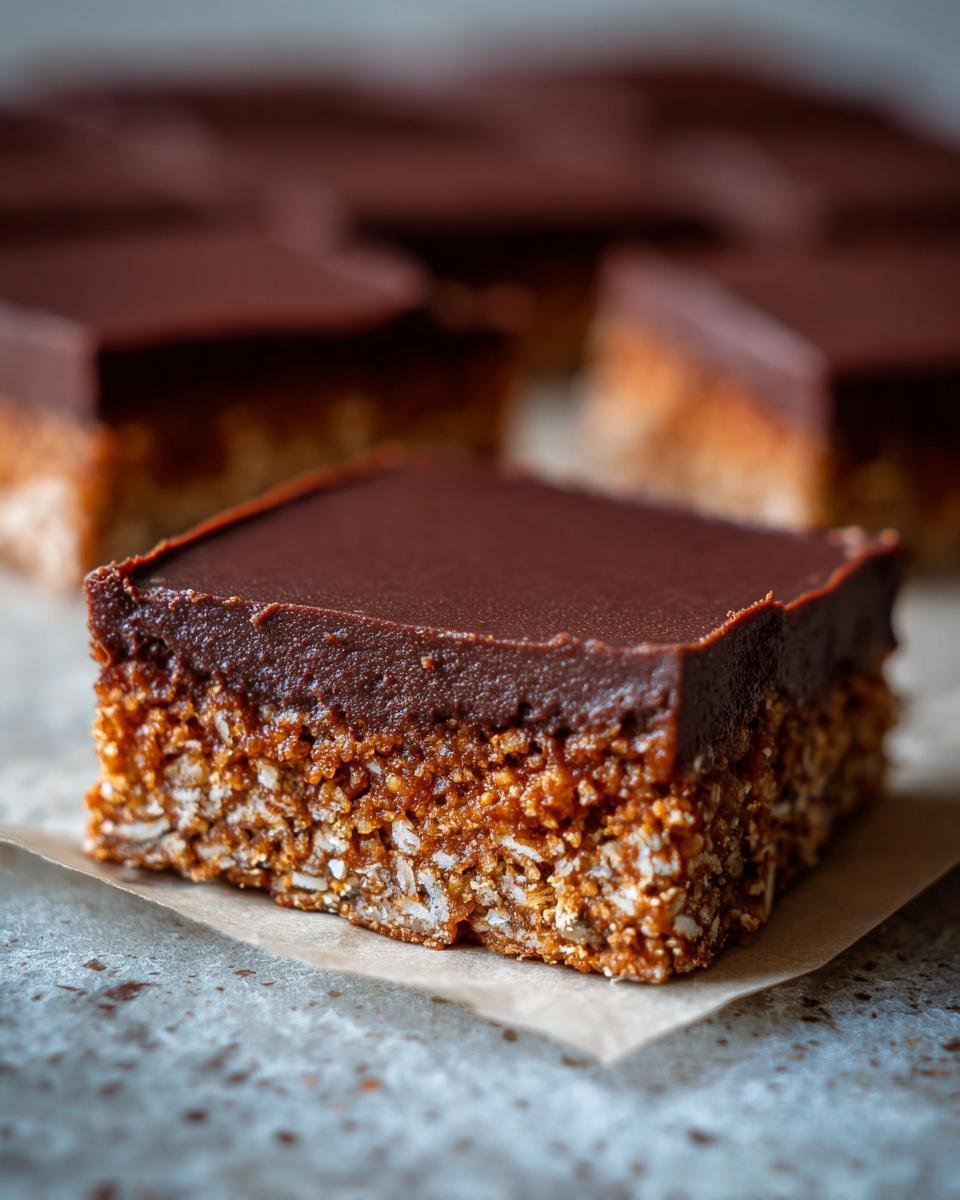
Oh my goodness, are you ever craving something intensely chocolatey but just cannot face turning on the oven? I totally get it. That’s why I have perfected my absolute go-to recipe that hits all the right satisfying notes every single time: the ridiculously easy, no-bake Hedgehog Slice! Trust me, this recipe is your best friend when you need something fast.
I remember the first time I made this—I was about ten, and my mom basically just dumped the ingredients in a pot while I crushed the biscuits with a rolling pin. It felt like magic watching the stuff come together so quickly. It is genuinely the simplest chocolate slice you will ever make, super crunchy, and it just sets itself in the fridge. Seriously, perfect for beginners!
Why You Will Love This Easy Hedgehog Slice Recipe
There’s just no competition when it comes to this simple treat. It’s the ultimate crowd-pleaser, and honestly, it’s almost impossible to mess up. You’ll find yourself whipping this up for unexpected guests all the time!

- Zero Baking Required: Absolutely no oven preheating or stressing about rise times—just mix and chill!
- Lightning Fast Prep: You can have the base mixed, popped in the pan, and ready for the fridge in under 25 minutes.
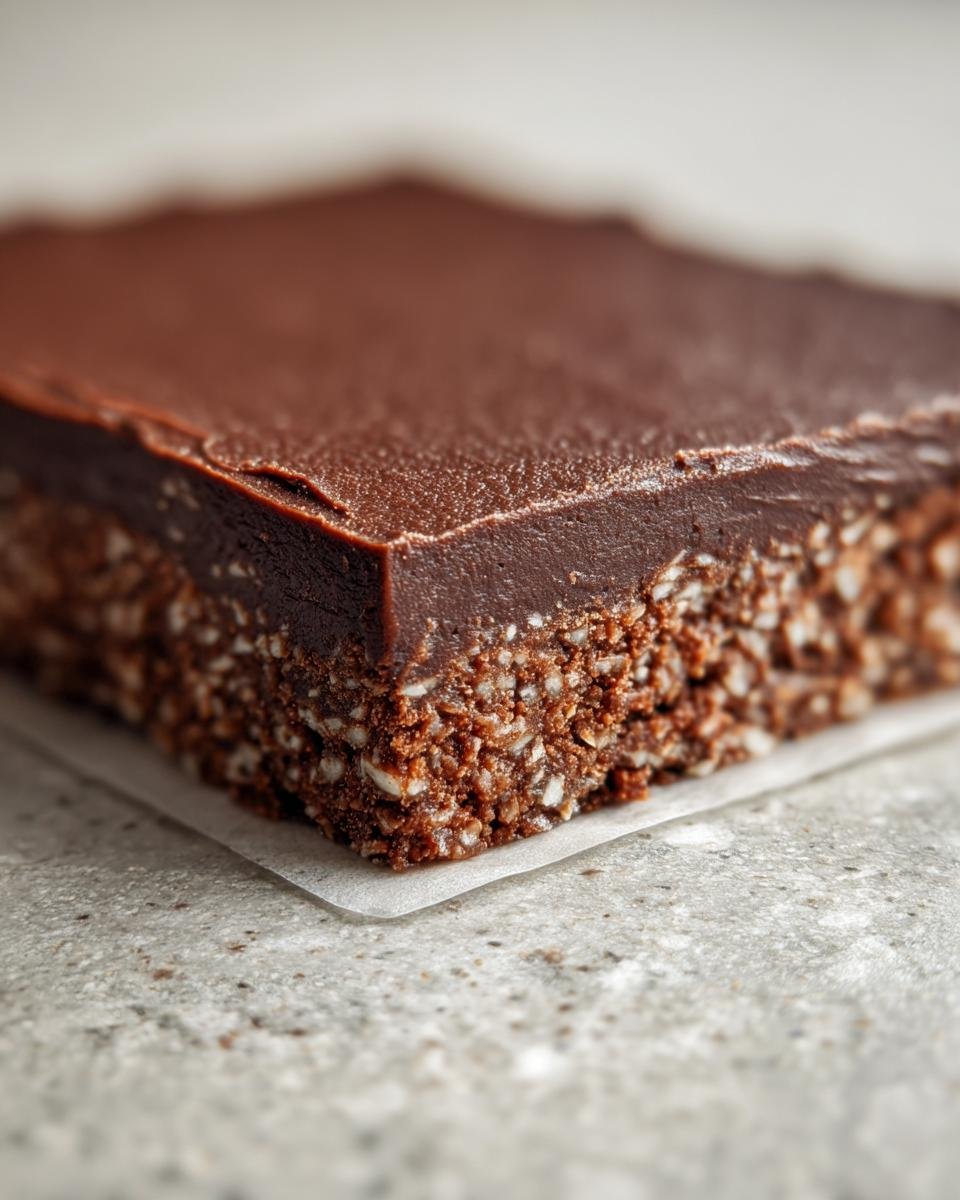
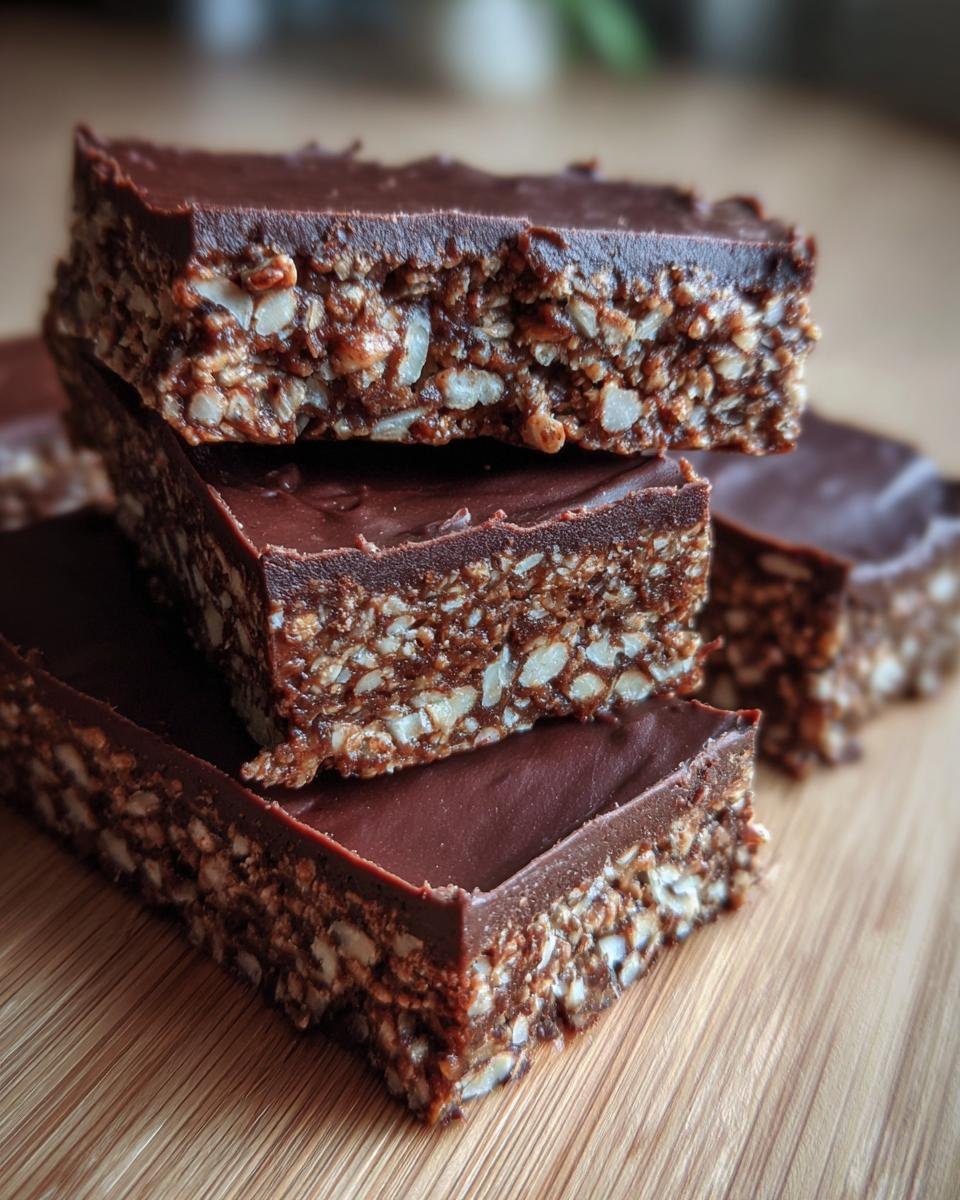
- That Classic Crunch: The texture is everything! Those biscuits and coconut bits give it that signature satisfying chewiness.
- Rich, Deep Chocolate Flavor: Using real dark chocolate makes this taste incredibly decadent, even though it’s so minimal.
Essential Ingredients for the Perfect Hedgehog Slice
Okay, let’s get down to the good stuff. Because this is a no-bake recipe, every single ingredient really shines through! You can’t hide anything here, so we need the good stuff. I’ve got the full list right here, but let me give you some quick pointers so your slice sets up perfectly.
First up, the biscuits! You absolutely need plain, slightly sweet biscuits—Marie biscuits or digestive biscuits are my favorites. Avoid the highly flavored ones; we want a neutral base so the chocolate can sing. A good baker knows ingredient quality matters, even here!
For the binding, we use a nice blend of 200g of butter, 200g of good dark chocolate, three tablespoons of rich cocoa powder, and two tablespoons of golden syrup to give it that beautiful sticky quality. And don’t forget the texture builders: one cup of desiccated coconut, and half a cup of nuts if you’re feeling fancy (I usually throw in some chopped walnuts!).
Finally, remember that extra 100g of dark chocolate? That’s just for the gorgeous, shiny top layer. Keep it separate until the very end. That’s the magic ratio for the ultimate crunchy, chocolatey hit!
Equipment Needed for Your Hedgehog Slice
You don’t need a massive setup for this, which is another reason I love bringing this slice out at short notice! Honestly, you probably have most of this already tucked away in a drawer.
First, you absolutely must have an 8-inch square baking pan. It gives us that ideal thickness. Make sure you grab a good sheet of baking paper—I always cut mine a bit bigger than the pan so I can use the overhang handles, which saves so much heartache later!
You’ll also need a sturdy medium saucepan for melting things gently, a wooden spoon for mixing (it stops scratching!), and a rolling pin if you plan on crushing those biscuits yourself, which I highly recommend.
Step-by-Step Instructions to Make Hedgehog Slice
This is where the alchemy happens, my friend! It’s so quick, but you have to pay attention when you’re melting the chocolate, or you might end up with seized, unhappy chocolate. Just follow these steps, and you’ll have a perfect base ready for the fridge in minutes. Ready to dive into this classic no bake recipe? I included a link to my favorite no-bake bar guide if you get hooked on this style of dessert!
Preparing the Pan and Melting the Base Ingredients
First things first: get that 8-inch square pan lined completely with baking paper. Make sure you leave plenty of overhang on two sides—these are your handles later! Now, jump to the stove. We need to melt the 200g butter, 200g of the dark chocolate, cocoa powder, and golden syrup together in your saucepan. Keep the heat LOW! I mean it—low and slow. Stir constantly until everything is beautifully smooth. The biggest rule here is: Do not let it boil. If it gets too hot, the chocolate texture gets ruined, and we can’t have that!
Combining the Dry Ingredients for the Hedgehog Slice
Once that base mixture is perfectly glossy and melted, immediately whisk it off the heat. We don’t want any residual heat cooking it further. This is when you toss in your crushed biscuits, the desiccated coconut, and those optional chopped nuts. Give everything a really good fold through until every single crumb is coated in that gorgeous chocolatey goodness. Don’t be shy with the mixing; we want complete coverage!
Pressing and Setting the Hedgehog Slice Base
Now, scrape that whole sticky mess into your prepared pan. Use the back of a spoon or a damp spatula to press the mixture down really firmly and evenly across the bottom. Compact it tight so it holds together when you serve it! Pop the pan into the refrigerator now. It needs a solid chill—I always aim for at least three hours before we even think about touching the topping.
Applying the Chocolate Topping to the Hedgehog Slice
While the base is chilling, handle the final 100g of dark chocolate for the topping. Melt this gently either over a small bowl of simmering water (a double boiler works so well here) or carefully, in 15-second blasts in the microwave, stirring between bursts. Once smooth, pour that molten goodness over your chilled, firm base. Use an offset spatula to spread it right to the edges. That’s it! Back into the fridge for at least another hour until that top layer is rock hard. Then you lift it out using those paper handles and slice!
Tips for the Best Ever Hedgehog Slice Texture
Getting that perfect snap and crunch in a hedgehog slice is all about paying attention to the small stuff! My most crucial piece of advice revolves around those biscuits. Don’t just pulse them in the food processor; you’ll end up with dust. I prefer to put them in a sturdy freezer bag and really go at them with a rolling pin until I have varied sizes—some fine crumbs and some nice chunky pieces. That variety is what gives you that great texture contrast.
When you’re folding that base mixture together, take your time! It’s sticky, I know, it always gets on my hands even though I try to be careful. But you must mix until every single bit of biscuit is coated in the chocolate base. If you leave dry patches, the slice won’t hold together, and you get those annoying dusty bits when you cut it!
And for the topping layer? Make sure that second batch of chocolate is beautifully smooth and slightly warm when you pour it on. If it’s too hot, it can sometimes melt the chilled base a little, making a huge mess. Take it easy, use a thin layer of coconut oil if you need to keep it loose, and you’ll get that perfect shiny finish.
Variations on the Classic Hedgehog Slice
While my recipe is truly the classic, and I think it’s the best, I totally get that sometimes you need to mix things up a bit! This slice is so forgiving, it practically begs you to experiment. Honestly, if you like chocolate shortbread, you’ll adore how easy it is to adapt this recipe!
For starters, let’s talk chocolate. If you find dark chocolate a bit too intense for a casual afternoon snack, just swap it out! Use good quality milk chocolate for the base mixture. It makes the whole thing sweeter and softer. Just remember to adjust the golden syrup slightly if it seems overly gooey, though usually, the biscuits soak up the difference.
Nuts are fun, but you can go in so many directions! If you’re avoiding nuts, try adding a cup of dried fruit instead. Dried apricots, chopped finely, mix in beautifully with the coconut and add a lovely chewiness that’s different from raisins. Cherries are fantastic too, especially if you like a bit of color breaking up all that brown.
Want something a little different for the topping? Instead of plain melted chocolate, try mixing about a teaspoon of coconut oil into your topping chocolate before you spread it. It makes the final layer super shiny and sometimes even a tiny bit easier to cut! Or, if you want to get really wild—and I only suggest this for real chocolate lovers—you can drizzle white chocolate over the dark base once the dark chocolate has just started to set. It makes it look fancy for parties!
Happy experimenting! But seriously, start with the original. You can find some extra dessert inspiration right here if you’re keen on more baked and no-bake treats like my popular chocolate shortbread.
Storing and Serving Your Homemade Hedgehog Slice
So, you’ve managed to resist eating the whole thing straight from the pan? Good job! Storing this Hedgehog Slice is super easy because it’s naturally sturdy, but it does need to stay chilled to keep that amazing crunch.
Keep leftovers in a completely airtight container. Try not to stack them too high, or you risk squishing that beautiful chocolate top! They store perfectly happily in the refrigerator for up to a week. Honestly, I think it tastes even better on day two when everything has fully settled in.
When it’s serving time, make sure it’s nice and cold. If it gets too warm, that gooey bottom layer gets a bit soft. I always use a large, sharp knife—and I wipe the blade clean between cuts—to get those nicely defined squares. Enjoy that glorious crunch!
Frequently Asked Questions About Hedgehog Slice
I always get a flood of questions when this amazing recipe makes the rounds! People want to know all the little tricks to make sure their no bake chocolate slice turns out perfect. Don’t worry, I’ve answered the most common ones right here for you!
Can I make Hedgehog Slice without nuts?
Absolutely, yes! Nuts are totally optional here. If you’re dealing with allergies or just aren’t a fan, you can easily skip them. However, if you remove the nuts, I highly suggest beefing up the coconut a little, maybe adding an extra quarter cup. That helps keep the texture interesting underneath all that gorgeous chocolate topping. You still get a fantastic biscuit slice that way!
What is the best biscuit to use for this no bake chocolate slice?
For me, the very best biscuit is a plain, sweet digestive or a Marie biscuit. They have the perfect density and the right amount of sweetness. When you crush them, they create those beautiful, slightly varied crumb sizes—chunky and fine—that give the Hedgehog Slice its signature structure. Avoid anything too heavy or too flavorful, like ginger snaps, as they’ll change the fundamental taste profile we are going for here!
How long does this Hedgehog Slice last in the fridge?
Because it’s packed full of chocolate and butter, it lasts way longer than most other treats! I find that if you keep it in a truly airtight container, it stays perfectly fresh and firm in the refrigerator for about seven to ten days. If you ever need to make it further ahead of time, it freezes beautifully too! You can check out my tips for freezing other no-bake desserts here if you need more make-ahead ideas.
Estimated Nutritional Data for Hedgehog Slice
Now, I’m certainly not a nutritionist—I’m a cook who loves butter and chocolate! So, take these numbers with a grain of salt, but they should give you a good idea of what you are getting into per square. Since this famous Hedgehog Slice is rich, it definitely packs a punch!
I calculated all this based on the standard recipe above and getting 16 nice-sized squares. Remember, these values can shift a little depending on the exact brand of biscuits or how much butter you used for greasing the topping!
- Serving Size: 1 square
- Calories: About 280
- Total Fat: Roughly 18g, with 11g of that being saturated fat—it is mostly butter and chocolate, after all!
- Carbohydrates: Around 28g
- Sugar: Coming in near 20g
- Protein: A small boost at about 3g
- Sodium: Approximately 110mg
It’s certainly a treat! It’s not exactly a health food, but wow, is it satisfying when that chocolate craving hits hard. Enjoy it responsibly!
Print
Simple Hedgehog Slice
- Total Time: 3 hours 25 min
- Yield: 16 squares 1x
- Diet: Vegetarian
Description
A straightforward recipe for a classic no-bake chocolate slice with a crunchy texture.
Ingredients
- 200g butter
- 200g dark chocolate
- 3 tablespoons cocoa powder
- 2 tablespoons golden syrup
- 2 cups crushed biscuits (like Marie or digestive)
- 1 cup desiccated coconut
- 1/2 cup chopped nuts (optional)
- Extra 100g dark chocolate for topping
Instructions
- Line an 8-inch square baking pan with baking paper, leaving an overhang.
- Melt the butter, 200g dark chocolate, cocoa powder, and golden syrup together in a saucepan over low heat, stirring until smooth. Do not boil.
- Remove the pan from the heat.
- Stir in the crushed biscuits, desiccated coconut, and chopped nuts (if using). Mix until everything is evenly coated.
- Press the mixture firmly and evenly into the prepared pan.
- Melt the remaining 100g of dark chocolate in a separate bowl over simmering water or in short bursts in the microwave.
- Spread the melted chocolate evenly over the slice mixture.
- Refrigerate for at least 3 hours, or until firm.
- Lift the slice out using the paper overhang and cut into squares before serving.
Notes
- Use plain, sweet biscuits for the best texture.
- If you prefer a smoother topping, stir a teaspoon of coconut oil into the topping chocolate before spreading.
- Store leftovers in an airtight container in the refrigerator.
- Prep Time: 20 min
- Cook Time: 5 min
- Category: Dessert
- Method: No-Bake
- Cuisine: Australian
Nutrition
- Serving Size: 1 square
- Calories: 280
- Sugar: 20
- Sodium: 110
- Fat: 18
- Saturated Fat: 11
- Unsaturated Fat: 7
- Trans Fat: 0.1
- Carbohydrates: 28
- Fiber: 1
- Protein: 3
- Cholesterol: 45
Keywords: hedgehog slice, chocolate slice, no bake, coconut, biscuit slice, dessert