
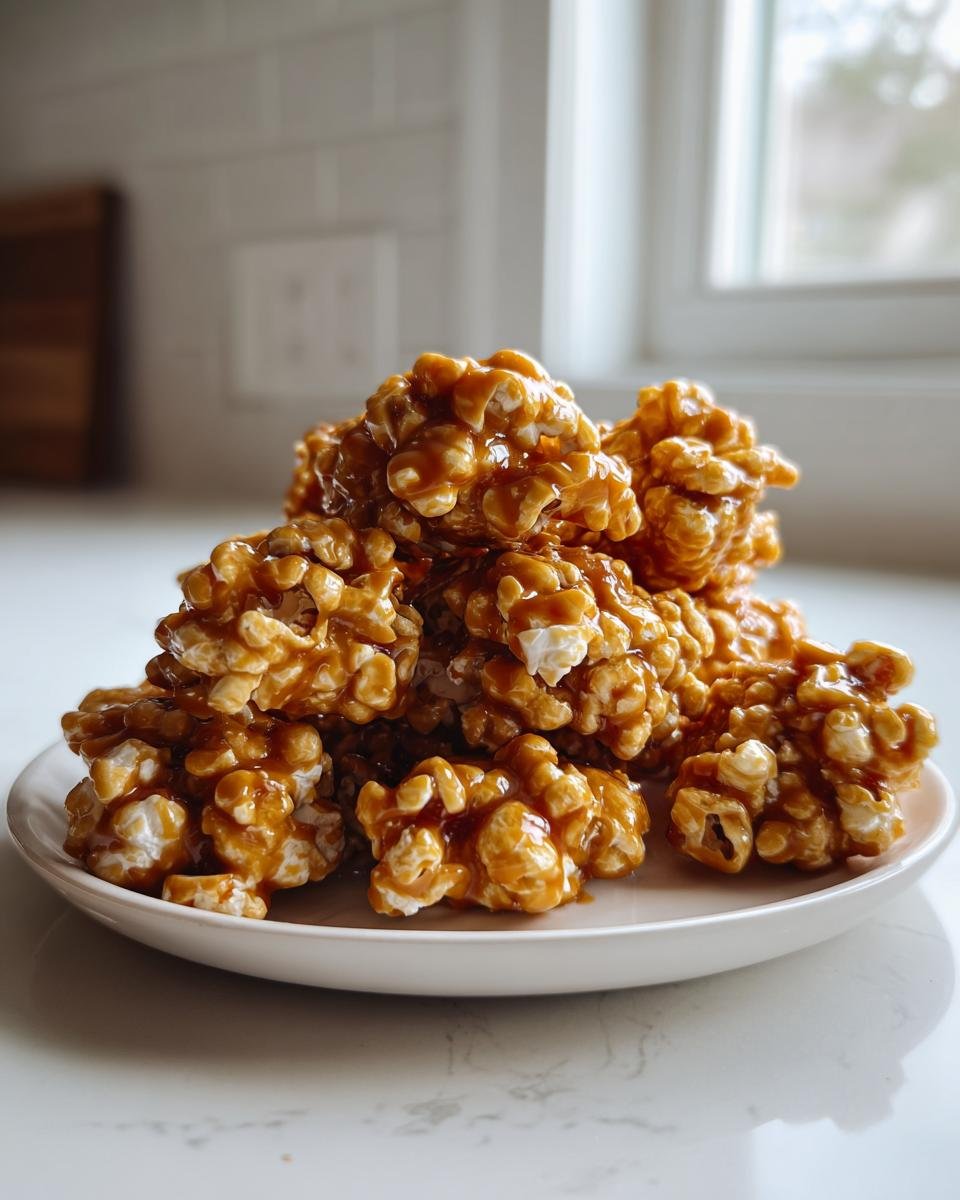
Oh, honey, let’s talk about that sound. You know the sound—that perfect, loud *crunch* when you bite into a piece of caramel corn? Nothing beats it, right? Store-bought stuff always seems to fall flat or turn that weird, soft chewiness. Well, guess what? I’m finally sharing the recipe that changed everything for me. It’s honestly the most straightforward, rock-solid reliable way to make crunchy Caramel Corn right here in your own kitchen. I swear by this one! I almost ruined an entire movie night during the Super Bowl once because I forgot to grab a snack, and in a total panic, I whipped up a batch of this. It was done before halftime, and everyone forgot about the game! That’s how fast and foolproof this simple Caramel Corn recipe is.

Why This Simple Recipe Makes the Best Caramel Corn
Listen, some folks swear by only cooking their caramel on the stovetop, but that usually guarantees you’ll end up with rock-hard or sticky popcorn. The magic here is the baking step. Trust me on this one; it dries out the coating just enough to lock in that amazing, satisfying crunch! It’s so simple, but that low and slow baking totally changes the texture.
This approach is way more forgiving than trying to judge sugar stages on the stovetop. And seeing those trays coming out of the oven golden brown? Pure heaven. If you want to check out more pointers on nailing those textures in baking in general, I found a great little guide about baking tips to make you a better baker.
Key Details for Perfect Caramel Corn
- Prep Time: A snappy 10 minutes!
- Cook Time: Just 45 minutes in the oven.
- Yield: Enough to share—about 10 nice servings.
Gathering Ingredients for Homemade Caramel Corn
Okay, don’t panic when you see the ingredient list; it looks basic, and that’s the beauty of it! We’re keeping things lean so the caramel flavor really shines through. The most important thing you need to start with is good popcorn—10 cups worth! If you are using kernels, you need fresh kernels that pop up light and airy. Pop it fresh on the stovetop if you can, or use a good air popper. Skip the microwave bags with all that weird butter flavoring, we need clean kernels for coating!
The caramel sauce uses simple pantry staples, but the quality matters for that deep, rich flavor. Make sure you grab **packed** brown sugar. That little bit of molasses in the brown sugar versus regular white sugar makes a huge difference in flavor depth for your Caramel Corn.
Here’s what you need to have lined up before we even think about turning on a burner:
- 10 cups of perfectly popped popcorn (light and unsalted is best!)
- 1 cup of brown sugar, packed tight in the cup.
- 1/2 cup of real butter—none of that margarine nonsense for this coating!
- 1/4 cup of light corn syrup. This is crucial for that smooth texture, so don’t try to skip it. If you were somehow making a buttermilk-based recipe, I’d tell you how to substitute, but not here—corn syrup it is! You can read about other baking swaps here too, but be careful with this one.
- 1 teaspoon of vanilla extract.
- And the tiny powerhouse: 1/2 teaspoon of baking soda. Don’t measure this wrong; it’s what makes the caramel foam later!
That’s it! Ten cups of fluffy popcorn waiting patiently for the sweet, buttery bath. Having everything measured out first is the secret to staying calm when that caramel starts bubbling.
Essential Equipment for Making Caramel Corn
Before you even start scooping that brown sugar, you need to get your cooking station totally organized. Trust me, when that caramel is ready, you need everything lined up, ready to go. If you have to stop and search for a big bowl while the baking soda is fizzing, you’re going to have a bad time—and sticky clumps! This recipe is so straightforward because the equipment list is short and sweet.
You’re going to need four main things to make this homemade Caramel Corn come out perfectly:
- A medium saucepan. This is just for cooking down the sugar, butter, and syrup. Nothing too huge, nothing too tiny.
- One truly massive mixing bowl. Seriously, grab the biggest one you own! We need space to toss 10 cups of popcorn with all that hot caramel without wearing it on the ceiling.
- A large baking sheet—the bigger, the better! We want that coated popcorn to lay out in a single layer so it bakes evenly and gets crunchy, not steamy.
- Parchment paper. This is non-negotiable for easy cleanup and preventing sticking. You don’t want to be scraping burnt sugar off your pan later; nobody has time for that!
See? Simple setup! You’re basically just assembling ingredients in containers, and then the oven does the heavy lifting in the last 45 minutes. Get those few items ready, and you’re halfway to snack perfection.
Step-by-Step Instructions for Perfect Caramel Corn
Alright, this is where the actual magic happens, but you need to move with a little bit of purpose, especially toward the end! Don’t worry, it moves fast, but if you follow the steps exactly, you won’t end up with a burnt mess or sticky popcorn. First things first: Get that oven humming at 250 degrees Fahrenheit. While it heats up, line up your big baking sheet with parchment paper. We are lining it now, so we aren’t scrambling later when the caramel is scorching hot!
Once everything is cozy, we move to the stovetop. This is a delicate dance, so pay close attention to the timing. You’ll see how this process is just plain easy once you know the secrets. If you’re struggling with timing or just want to see some common pitfalls explained visually, I always refer back to this great piece on 1 mistake to avoid for homemade perfection.
Preparing the Caramel Base for Your Caramel Corn
In your medium saucepan, you’re going to combine the brown sugar, the butter, and the corn syrup. Set the heat to medium and just stir everything until it’s fully melted and combined—that’s easy enough! Now comes the crucial part—and please, *please* listen—once it starts boiling, stop stirring! You need to let it boil for exactly four minutes. No more, no less. If you stir it, or if you let it go for five minutes, you risk making it too hard to eat later. Keep your eye on the clock!
When those four minutes are up, whisk that pan off the burner immediately. You need to work quickly but carefully now. Stir in your vanilla extract. Then, take your baking soda and dump it right in and stir like your life (and your snack) depends on it! It’s going to foam up like crazy—it looks explosive, but that’s normal! This is what makes the coating light and helps it set up nicely instead of clumping.
Coating and Baking Your Caramel Corn
As soon as that baking soda has done its fizzing thing, don’t hesitate! Pour that glorious, foaming caramel mixture over your 10 cups of popcorn, which should already be waiting in that giant bowl. Stir it fast and gently to coat every single piece. You want an even, light coat, not big globs everywhere. Once it looks nicely covered, immediately spread it out onto that parchment-lined baking sheet in a single, manageable layer. If you pile it up, it won’t crisp up!
Now, pop it into the 250°F oven. We let it bake for 45 minutes, but here’s the second critical step to avoid burning: You have to pull the tray out and give it a good, gentle stir every 15 minutes. This ensures all sides get baked, not just the ones facing up. Honestly, this part makes all the difference between crunchy Caramel Corn and sad, soggy popcorn. When the time is up, pull it out, and then you absolutely must let it cool completely on the pan before you even think about breaking it apart. Patience is the final ingredient!
Expert Tips for Flawless Caramel Corn Texture
Okay, we’ve baked it, we’ve coated it, but how do we guarantee that totally addictive, non-chewy, perfect crunch every single time? It comes down to a couple of small habits I’ve picked up over the years. First and foremost, remember what I said about the boil time? Do not flirt with those four minutes! Overcooking the caramel is the number one way to get shards of glass instead of delicious Caramel Corn. Pull it right at four minutes, no matter what!
Also, focus on your popcorn volume. If you try to cram 14 cups of popcorn into a bowl that’s meant for 10, you won’t get enough coating on every piece, and those naked spots will burn during baking. Stick to the 10 cups, seriously.
Here’s my extra little trick for pure precision:
- Invest in a cheap candy thermometer if you struggle with timing. You want that caramel base to hit exactly 245°F before you pull it off the heat. It takes the guesswork out of it completely, and you can see more about general baking accuracy right here.
- Make sure your baking sheet isn’t too crowded when you spread it out. If pieces are stacked high, they steam instead of crisping up. Thin layers equal maximum crunch, people!
Follow those little rules, and that crisp texture will be yours!
Variations on Classic Caramel Corn
Honestly, this simple Caramel Corn recipe is so wonderful on its own, but I love playing around with it once it’s cooled down. Why follow the rules when you can have fun, right? It’s already got that perfect sweet crunch, but we can definitely add some extras to make it interesting for different parties or just because we feel like it!
Since the caramel has to be cooked so precisely, we always wait until the popcorn is completely cool before adding anything that might melt or interfere with the initial coating process. Once it’s set and crunchy, it’s ready for mix-ins!
Adding Crunchy Goodies: Nuts and More!
My absolute favorite thing to do is toss in some nuts. Pecans are divine with caramel—they get crunchy and toasted while they bake with the coating! If you’re heading this route, make sure you add your nuts right when you add the baking soda and vanilla, before you pour it over the popcorn. That way, they get coated evenly and baked right into the mixture.
You could try adding peanuts for a classic ballpark vibe, or maybe some crunchy roasted almonds if you have them around. Just remember, if you add anything bulky or heavy, you might need to bump up your popcorn volume slightly so everything gets coated without being squished on the pan.
A Dash of Spice or Salt
Sometimes, I just want to wake up the flavor a bit without adding bulk. A tiny sprinkle of ground cinnamon or even a pinch of nutmeg mixed right into the dry sugar and corn syrup helps warm up the flavor profile beautifully. The cinnamon just melts right into that brown sugar.
But the real game-changer for me, especially when I plan on eating more than a small bowl myself, is a sprinkle of flaky sea salt right after it comes out of the oven, before it fully cools. That salty-sweet combination is just irresistible! It cuts through the richness of the caramel so nicely. For other ways to play with rich, sweet flavors in my baking, I sometimes look at how I treat things like chocolate chips, you can see what I mean over at my post about chocolate chip pumpkin oatmeal cookies—it’s all about layering those simple flavors!
Drizzle and Dip: The Post-Bake Finish
If you are feeling really decadent, wait until the Caramel Corn is completely cool and broken into pieces. *Then*, melt down some quality semi-sweet or dark chocolate. You don’t need a fancy double boiler; just do it carefully in short bursts in the microwave.
Drizzle that melted chocolate artfully all over the cooled stacks of Caramel Corn. Let that set up completely—this guarantees you won’t make a mess! It turns it into a fancy treat that looks like it took hours instead of just 45 minutes of baking time.

Storing Your Homemade Caramel Corn
Okay, you’ve done the hard work—you baked it perfectly, and it’s cooled down into those fantastic, crunchy clusters. Now we have to protect this treasure from its number one enemy: humidity! Trust me, nothing collapses the spirit of a great Caramel Corn batch faster than opening the container a day later only to find it’s gone soft and sticky. It’s heartbreaking!
The goal is to keep the air out. Air equals moisture, and moisture equals the enemy of crunch. The very best way to store this is in an airtight container. I mean *airtight* here—not just a bowl with plastic wrap slapped over it. Think about the containers with the rubber seals, or even heavy-duty zip-top bags where you squeeze every last bit of air out before sealing.
Keep that container at room temperature. Do not try to keep it in the fridge! Refrigerators are full of fluctuating temperatures and moisture, which is exactly what softens up that beautiful caramel coating we worked so hard to dry out in the oven.
If you’ve followed the recipe exactly and stored it right, this Caramel Corn is really impressive. It stays perfectly crisp for at least a week! Seriously, a full week if your container seals tight. If you find that after a few days it’s lost just a *tiny* bit of its snap, don’t fret. You can usually revive it!
Reviving Soft Caramel Corn
If you grab a handful and it’s a little chewy instead of crisp, don’t toss it! Just spread it back out onto that same parchment-lined baking sheet you used before. Pop it back into that low oven—the 250°F setting works great—for about 5 to 7 minutes.
Pull it out, let it cool completely, and it should have regained most of its snap. It’s like hitting a reset button! Just make sure you let it cool *all the way* before putting it back into the storage container, or you’ll seal in new moisture.
Keep your Caramel Corn away from sunny windows or the top of the stove where heat might build up, and you’ll be enjoying that incredible crunchy snack for days!
Frequently Asked Questions About Caramel Corn
I know you’re probably eager to get started, but just in case you have one of those lingering questions that keeps you reaching for the phone, let’s cover a few things readers ask me all the time. Getting these little details right is what separates the good Caramel Corn from the great Caramel Corn!
Can I skip the baking step entirely?
Oh, I really, really wish you could, but no, you shouldn’t skip that baking part! If you just pour the caramel over the popcorn and let it set on the counter, it will cool down too fast, and the coating will be sticky and super hard. The 45 minutes in the low oven is what dries out that coating just enough to give you that perfect, lasting crunch. It’s essential! If you want to see exactly why timing is everything, I found a helpful look at a common error right here.
Why is my Caramel Corn chewy instead of wonderfully crunchy?
That’s usually one of two issues, and we covered both of them when we talked technique! The main culprits are either overcooking the caramel base on the stove (making it too soft later) or not baking it long enough in the oven to drive off the residual moisture. Make sure you stick rigidly to the 4-minute boil time and then ensure it bakes for the full 45 minutes while you stir it regularly.
Can I use pre-popped microwave popcorn?
You certainly can in a pinch, but you’re sacrificing texture! Microwave popcorn is often popped in oil, and it’s already a bit denser and sometimes a little stale feeling. For the lightest, airiest Caramel Corn that absorbs the caramel beautifully, you absolutely need freshly popped, plain popcorn. Save those microwave bags for movie night munching, not for coating!
What if I accidentally added too much baking soda?
Oops! If you add too much baking soda, your Caramel Corn will bake up super airy, almost hollow, and might taste a bit metallic or soapy. It won’t be good. If you realize you messed up the measurement *before* pouring it over the popcorn, you have to dump that batch. It’s too late to fix the reaction once it starts foaming, sadly!
Estimated Nutritional Snapshot for Caramel Corn
Now, I’m not a nutritionist, not even close! But I like to give everybody a general idea of what they’re digging into when they grab a big handful of this homemade goodness. Remember, this is an estimate based on the ingredients for this recipe, and it all depends on how perfectly you coat every piece of popcorn.
For a serving size of about 1.5 cups, here’s a ballpark look at what you’re working with:
- Calories: Around 250 a serving.
- Sugar: Yep, it’s a treat, so expect about 35g of sugar.
- Total Fat: Generally around 10g.
- Protein: A small boost at about 3g.
- Carbohydrates: About 40g.
It’s a snack, so enjoy it responsibly! The joy of homemade Caramel Corn is definitely worth every spoonful of that delicious, crunchy coating.
Print
Simple Caramel Corn
- Total Time: 55 min
- Yield: 10 servings 1x
- Diet: Vegetarian
Description
A straightforward recipe for making sweet and crunchy caramel corn at home.
Ingredients
- 10 cup popped popcorn
- 1 cup packed brown sugar
- 1/2 cup butter
- 1/4 cup light corn syrup
- 1 teaspoon vanilla extract
- 1/2 teaspoon baking soda
Instructions
- Preheat your oven to 250 degrees Fahrenheit. Line a large baking sheet with parchment paper.
- In a medium saucepan, combine the brown sugar, butter, and corn syrup.
- Cook over medium heat, stirring constantly, until the mixture boils. Continue boiling for exactly 4 minutes without stirring.
- Remove the saucepan from the heat. Stir in the vanilla extract.
- Quickly stir in the baking soda; the mixture will foam up.
- Pour the hot caramel mixture over the popped popcorn in a large bowl. Stir quickly to coat all the popcorn evenly.
- Spread the coated popcorn onto the prepared baking sheet in a single layer.
- Bake for 45 minutes, stirring every 15 minutes to prevent burning and ensure even coating.
- Remove from the oven and let it cool completely before breaking it into pieces.
Notes
- Use freshly popped popcorn for the best texture.
- Do not overcook the caramel mixture after it starts boiling, or it may become too hard.
- Stirring during baking is necessary for consistent results.
- Prep Time: 10 min
- Cook Time: 45 min
- Category: Snack
- Method: Baking
- Cuisine: American
Nutrition
- Serving Size: 1.5 cups
- Calories: 250
- Sugar: 35g
- Sodium: 150mg
- Fat: 10g
- Saturated Fat: 6g
- Unsaturated Fat: 4g
- Trans Fat: 0g
- Carbohydrates: 40g
- Fiber: 2g
- Protein: 3g
- Cholesterol: 25mg
Keywords: caramel corn, popcorn, sweet snack, homemade caramel, baked treat