
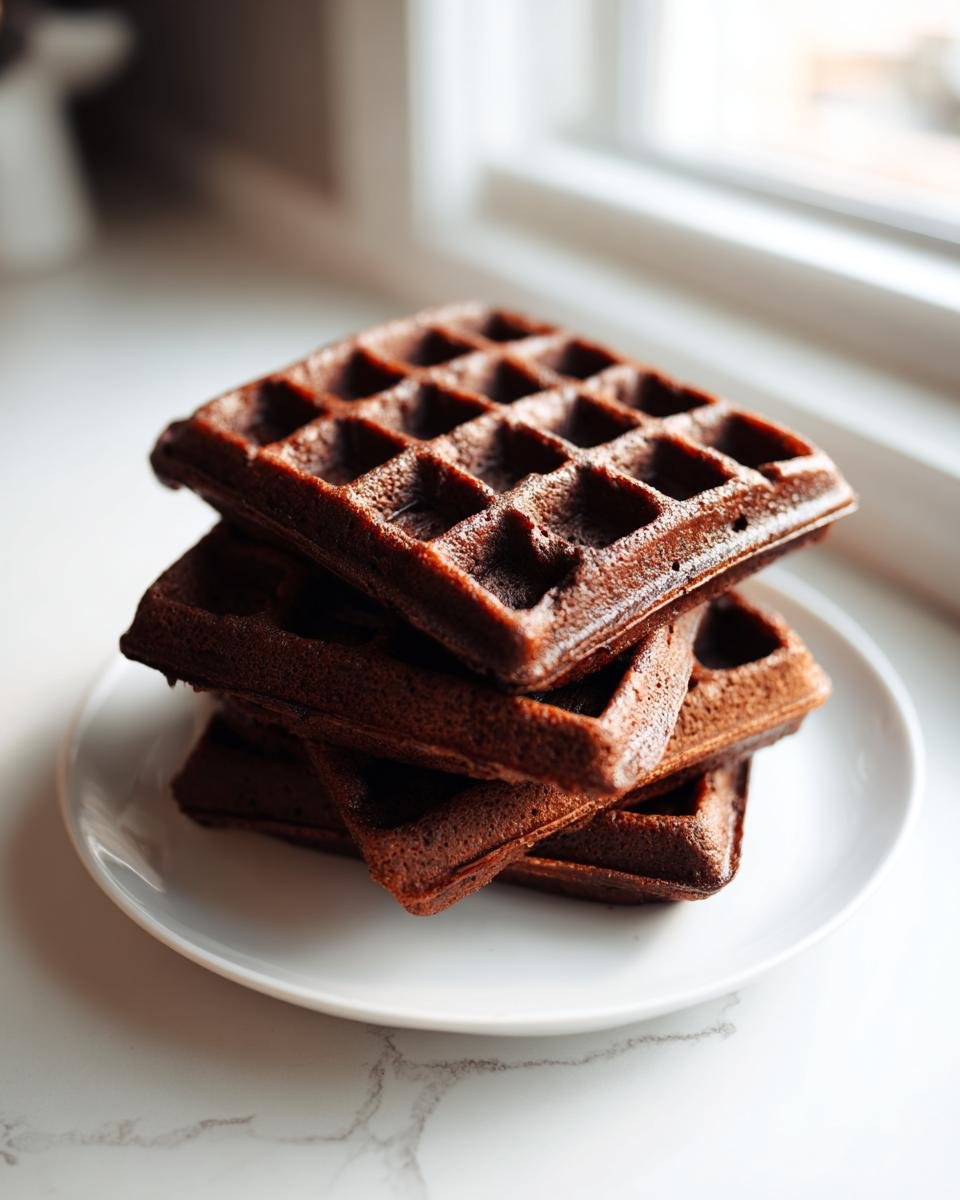
Are you staring at your waffle iron on a rainy Saturday morning, already dreaming past boring syrup? Trust me, I know that feeling! We’ve all been there, needing that rich, satisfying breakfast fix fast. That’s why I finally perfected my recipe for the ultimate Simple Chocolate Waffles. They are ridiculously easy to whip up, taking less than 25 minutes start to finish, but they don’t compromise on flavor.

The secret to these babies—the thing I fussed over for weeks—is the balance of cocoa. Too little, and it tastes like sad brown cardboard. Too much, and they get gritty. I finally hit that sweet spot where the chocolate is deep and satisfying, yet light enough for a weekend morning. Forget those box mixes; these homemade chocolate waffles are about to change your breakfast game immediately!
Why These Chocolate Waffles Are Your New Favorite Breakfast
Why mess around when you can have something this good this fast? Honestly, these chocolate waffles are my go-to when I need a serious weekend win without spending half the morning in the kitchen. They truly check every box!
- They are lightning fast—we’re talking ten minutes of active prep time, which is wild for the flavor you get.
- That deep, dark cocoa flavor hits just right; it always tastes like something you ordered from a fancy brunch spot.
- They get wonderfully crisp edges, which is the mark of a truly great waffle, even though the inside stays tender.
- Since you most likely have the dry ingredients already, this is a great ‘use what you have’ recipe without needing specialty chocolate bars. You can see a similar easy-to-make sweetness over here if you ever need a crepe swap!
Essential Ingredients for Perfect Chocolate Waffles
You probably have everything needed for these chocolate waffles sitting in your pantry right now! That’s the beauty of a simple recipe. The key here, and I can’t stress this enough, is the quality of your cocoa powder. Skip the weak stuff; you want a good unsweetened cocoa powder that really packs a punch. When you mix these ingredients, you want to make sure everything is totally married together, especially the leavening, so your waffles puff up beautifully.
If you decide to use buttermilk instead of milk (which I highly suggest when you have it on hand!), you’ll get an even nicer texture. It reacts with the baking powder to make the chocolate waffles tender. If you aren’t sure how to whip up a quick substitute, I have a super easy guide on making buttermilk substitutions right here!
Dry Ingredients for Rich Chocolate Waffles
Get your whisk ready for this part! You need to make sure the baking powder gets distributed everywhere so you don’t end up with one flat, sad patch on your waffle. Whisking these ingredients together first is non-negotiable for fluffy chocolate waffles.
- 1 3/4 cups all-purpose flour
- 3/4 cup unsweetened cocoa powder (Use the dark stuff!)
- 1/4 cup granulated sugar
- 1 tablespoon baking powder
- 1/2 teaspoon salt
Wet Ingredients for Moist Chocolate Waffles
This is where the moisture magic happens. Using oil instead of melted butter keeps these waffles super soft, even after they cool down a bit. The milk keeps things simple, but remember, buttermilk adds that lovely little tang and tenderness that makes these chocolate waffles just sing.
- 2 large eggs
- 1 3/4 cups milk (or buttermilk for extra softness!)
- 1/2 cup vegetable oil
- 1 teaspoon vanilla extract
Step-by-Step Instructions to Make Fluffy Chocolate Waffles
Okay, now that you have your pretty little piles of dry and wet ingredients ready, let’s make some magic happen! The cooking process itself is super fast, so you want to make sure you have your waffle iron already screaming hot. Seriously, a cold iron equals a sad, limp waffle, and we are not about that life here.
When you mix the wet and dry, remember my biggest rule for any good waffle, especially these chocolate waffles: Do not overmix! I mean it. If you mix until it’s perfectly smooth, you’ve already worked out all the air bubbles we worked so hard to create with the baking powder. You want to mix until the flour streaks are *just* about gone. A few lumps are totally fine—they are your friends! You can check out more general tips on mixing batter right here if you want to geek out on baking science.
Preparing the Waffle Iron and Mixing the Batter for Chocolate Waffles
First things first, get that waffle iron heated up according to its instructions. That heat is crucial for that crisp exterior we all crave on our chocolate waffles! While it’s warming up, go ahead and pour all those lovely wet things—eggs, milk, oil, vanilla—into your bowl of wet stuff and whisk them quickly until they look happy together.
Now, pour the wet ingredients right into the large bowl holding your sifted dry ingredients. Use a spatula and fold everything together gently. Stop mixing the second you don’t see large patches of dry flour anymore. It should look shaggy, not pourable like thin pancake batter.
Cooking and Serving Your Homemade Chocolate Waffles
Once the batter is mixed (but still a little lumpy!), it’s time to scoop! Pour the batter onto your hot iron. Don’t crowd it; let the iron tell you when it’s ready to close. Cook these beauties until they are steaming less aggressively and look totally golden brown and crisp—that’s your visual cue that they’re done!
The absolute best way to enjoy these chocolate waffles? Immediately! Get them straight from the iron onto a plate. They lose that perfect texture fast if they sit around waiting for the rest of the batch to finish cooking. Serve them hot!
Expert Tips for Next-Level Chocolate Waffles
Look, the base recipe is fantastic, I promise you that. But if you want to stop the presses and make these chocolate waffles legendary? You have to try a couple of little tweaks I discovered through sheer trial and error (and a lot of eating!). These tips aren’t scary; they’re just ways to elevate something already great into something truly spectacular.
My biggest discovery involves coffee. I know, I know, you’re making breakfast, but trust me on this one. Adding a tiny bit of instant espresso powder dissolves right into the cocoa and makes the chocolate taste unbelievably deep and rich, without actually tasting like coffee. It’s a secret weapon for any cocoa-based recipe.
Here are a couple of things I swear by:
- The Crisp Factor: If your iron is usually a little lukewarm, or if you prefer that really audible *crunch* when you bite in, brush the upper and lower plates with vegetable oil or melted butter right before you pour the next batch of chocolate waffle batter in. It creates a fantastic barrier against sogginess.
- Waffle Rest Time: Don’t stack them straight out of the iron! If you’re making a huge brunch feast, put the cooked waffles on a wire cooling rack set over a baking sheet. This lets the steam escape all around the waffle, keeping the bottoms from getting sweaty while you finish the rest of the batch.
- Flavor Boost: For that deep chocolate flavor I mentioned, mix 1 teaspoon of instant espresso powder in with your dry ingredients. You won’t taste the coffee, I promise, but you will taste *better chocolate*! It’s magic, pure and simple.
Follow these little hints, and those chocolate waffles won’t just be good; they’ll be the highlight of your entire week!
Ingredient Notes and Substitutions for Chocolate Waffles
You know how some recipes get fussy when you try to switch things up? Thankfully, these chocolate waffles are pretty forgiving, but there are a few key ingredient choices that I’ve decided are non-negotiable for the best results. When I first started playing around with the base recipe, I made some common swaps that just ruined the texture, so I want to save you the hassle!
The biggest player here is the fat. We use vegetable oil instead of melted butter, and it’s intentional! Melted butter browns up too fast in the high heat of the waffle iron, often leading to that greasy film and a slightly dry final product. Oil stays liquid at room temp, which keeps the crumb tender and moist long after they come off the iron. It locks in that moisture so well!
Now, let’s talk about the milk substitution, which I mentioned earlier. If you don’t have regular milk but you have plain yogurt, sour cream, or even heavy cream, you can easily make a quick buttermilk substitute. You just mix buttermilk into the milk until you have the right volume—it’s a lifesaver in a pinch! If you have buttermilk already, even better. It adds a little acidity that really mellows out the intensity of the cocoa powder, making these deeply flavored chocolate waffles taste less heavy.
And if you want to go wild with toppings later, maybe save some of that beautiful homemade white frosting for spreading on top of these warm chocolate waffles? I won’t judge!
Serving Suggestions for Your Delicious Chocolate Waffles
Okay, you’ve got your perfect stack of hot, crisp, chocolatey goodness sitting on the counter. Now comes the fun—and slightly controversial—part: toppings! Powdered sugar and maple syrup are classic for a reason, and they are absolutely wonderful here. But when I’m making these for my kids or when company comes over, I like to go a little more over the top. It’s breakfast, after all; it deserves some drama!
Don’t be afraid to mix textures here. The crisp waffle needs something soft and creamy to balance it out. I love using fresh raspberries because the tartness cuts through the richness of the cocoa so beautifully. It’s a stunning contrast!
Here are a few ways I like to dress up my homemade chocolate waffles—some are simple, and some are major weekend vibes:
- The Classic Drizzle: A generous amount of warm, pure maple syrup is always a winner. If you want to step it up, use a homemade caramel fudge sauce warmed just slightly so it melts into the little pockets of the waffle. Wow!
- Creamy & Light: A big dollop of real whipped cream, maybe with a hint of vanilla mixed in, feels decadent. Dust lightly with powdered sugar after the cream goes on.
- Fruity Indulgence: Sliced bananas and strawberries are perfect, but try grilling or sautéing some cherries in a tiny bit of butter until they just start to release their juice. Spoon those warm, sweet cherries over the top!
- The Double Chocolate Fanatic: If you’re serving kids (or just being a kid yourself!), try a light drizzle of chocolate syrup and a handful of mini chocolate chips sprinkled over the top while the waffle is still piping hot so they melt just a touch.
- Peanut Butter Swirl: Warm up a spoonful of creamy peanut butter until it’s easily pourable and zigzag it artfully across the top. That salty, nutty flavor with the dark chocolate is incredible.
Whatever you choose, make sure you serve these chocolate waffles right away. They wait for no one!
Storage and Reheating Instructions for Leftover Chocolate Waffles
If you somehow managed to have leftover chocolate waffles—I’m seriously impressed! These are usually gone in seconds at my house. But if you couldn’t devour the whole batch right away, don’t just shove them in the fridge unwrapped; they’ll turn into sad, bendy sponges, and we absolutely can’t let that happen.
The trick to keeping them nice is letting them cool completely first, maybe even for just five minutes on a rack. Then, wrap them tightly in plastic wrap or foil. They keep well in the fridge for about three days!
When it’s time to reheat and bring back that golden crispness, the microwave is your enemy! It makes them hot but soft. I beg you, use a toaster oven or a regular oven set to about 350 degrees. Just a few minutes sitting on the rack, and they are crispy and perfect again. It gets them almost as good as fresh off the iron!
Frequently Asked Questions About Making Chocolate Waffles
When I started sharing this recipe, I got so many great questions popping up in the comments, which tells me you all are serious about your breakfast game! It’s always nice to know I’m not the only one wondering about these small details. Here are the top things people ask me about getting these chocolate waffles absolutely perfect.
Can I use cocoa powder instead of melted chocolate?
Yes, absolutely! That’s exactly what this recipe calls for, which makes it so much easier than dealing with melting down baking chocolate. Cocoa powder gives you that intense, slightly bitter chocolate foundation that you simply need to balance out the sugar. If you tried to use melted chocolate chips, the batter would instantly become too thick, and you’d end up with heavy, dense clumps instead of light and fluffy chocolate waffles.
Can this batter be made ahead?
This is a tricky one! You *can* absolutely mix the dry ingredients ahead of time and keep them in an airtight container—that saves morning time! However, I strongly advise against mixing the wet and dry ingredients until you are ready to cook. Batter that is already activated with baking powder starts to deflate the longer it sits. For the best, fluffiest chocolate waffles that really hold their shape when cooked, mix them right before you heat up the iron.
How do I make my Chocolate Waffles crispier?
I totally covered this in the expert tips, but it’s worth repeating because everyone wants that shatteringly crisp exterior! The absolute best way, besides making sure your iron is screaming hot, is to use a little bit of oil when cooking. Brush the iron plates lightly with neutral oil or melted butter before you pour in the batter for each waffle. This fries the outside just a little bit and locks in the crunch. Also, make sure you don’t leave them stacked up waiting—serve them immediately or place them on a wire rack to cool!
What if I don’t have vegetable oil? Can I use something else?
Vegetable oil is cheap and does a great job keeping things moist without adding competing flavors. If you are out, canola oil works identically! Melted butter is okay in a pinch, but remember what I said about the texture changing slightly. You could also use light olive oil, but I wouldn’t use anything super flavorful like coconut oil, because you want that rich cocoa flavor to shine through, not a tropical note! If you’re looking for other baking swaps, I put together a great resource on shortbread variations that touches on fat choices too!
Estimated Nutritional Information for Chocolate Waffles
Before you dive headfirst into that stack of warm chocolate waffles, I always like to give you a quick heads-up about the numbers. I’ve tallied up the averages based on the ingredients we used and the recipe yield (which makes about four nice servings). But remember, this is just my best guess—your toppings, your waffle maker size, and how heavy you pour the syrup can all change things!
Think of this as a fun guide rather than strict diet data. We used sugar and oil, so they aren’t exactly low-cal health food, but they are homemade, and that always tastes better, right? These values are based on one waffle serving.
- Serving Size: 1 waffle
- Calories: About 350
- Sugar: Right around 12 grams
- Fat: Roughly 16 grams total
- Protein: A solid 10 grams to keep you full for a while!
- Carbohydrates: About 45 grams
You can see the breakdown for fats shows we’ve got a good amount of unsaturated fat here, thanks to that vegetable oil. It is what it is—a delicious breakfast loaded with cocoa goodness! Enjoy every bite!
Print
Simple Chocolate Waffles
- Total Time: 25 min
- Yield: 4 servings 1x
- Diet: Vegetarian
Description
A recipe for making basic chocolate waffles at home.
Ingredients
- 1 3/4 cups all-purpose flour
- 3/4 cup unsweetened cocoa powder
- 1/4 cup granulated sugar
- 1 tablespoon baking powder
- 1/2 teaspoon salt
- 2 large eggs
- 1 3/4 cups milk
- 1/2 cup vegetable oil
- 1 teaspoon vanilla extract
Instructions
- Preheat your waffle iron according to the manufacturer’s directions.
- In a large bowl, whisk together the flour, cocoa powder, sugar, baking powder, and salt.
- In a separate medium bowl, whisk the eggs, milk, vegetable oil, and vanilla extract until combined.
- Pour the wet ingredients into the dry ingredients. Mix until just combined; do not overmix. A few lumps are acceptable.
- Pour the batter onto the preheated waffle iron and cook according to your iron’s instructions until golden brown and crisp.
- Serve immediately.
Notes
- For richer flavor, use buttermilk instead of regular milk.
- Serve with powdered sugar, fresh berries, or maple syrup.
- Prep Time: 10 min
- Cook Time: 15 min
- Category: Breakfast
- Method: Waffling
- Cuisine: American
Nutrition
- Serving Size: 1 waffle
- Calories: 350
- Sugar: 12
- Sodium: 350
- Fat: 16
- Saturated Fat: 3
- Unsaturated Fat: 13
- Trans Fat: 0
- Carbohydrates: 45
- Fiber: 3
- Protein: 10
- Cholesterol: 65
Keywords: chocolate waffles, cocoa waffles, breakfast, sweet waffles, homemade waffles