
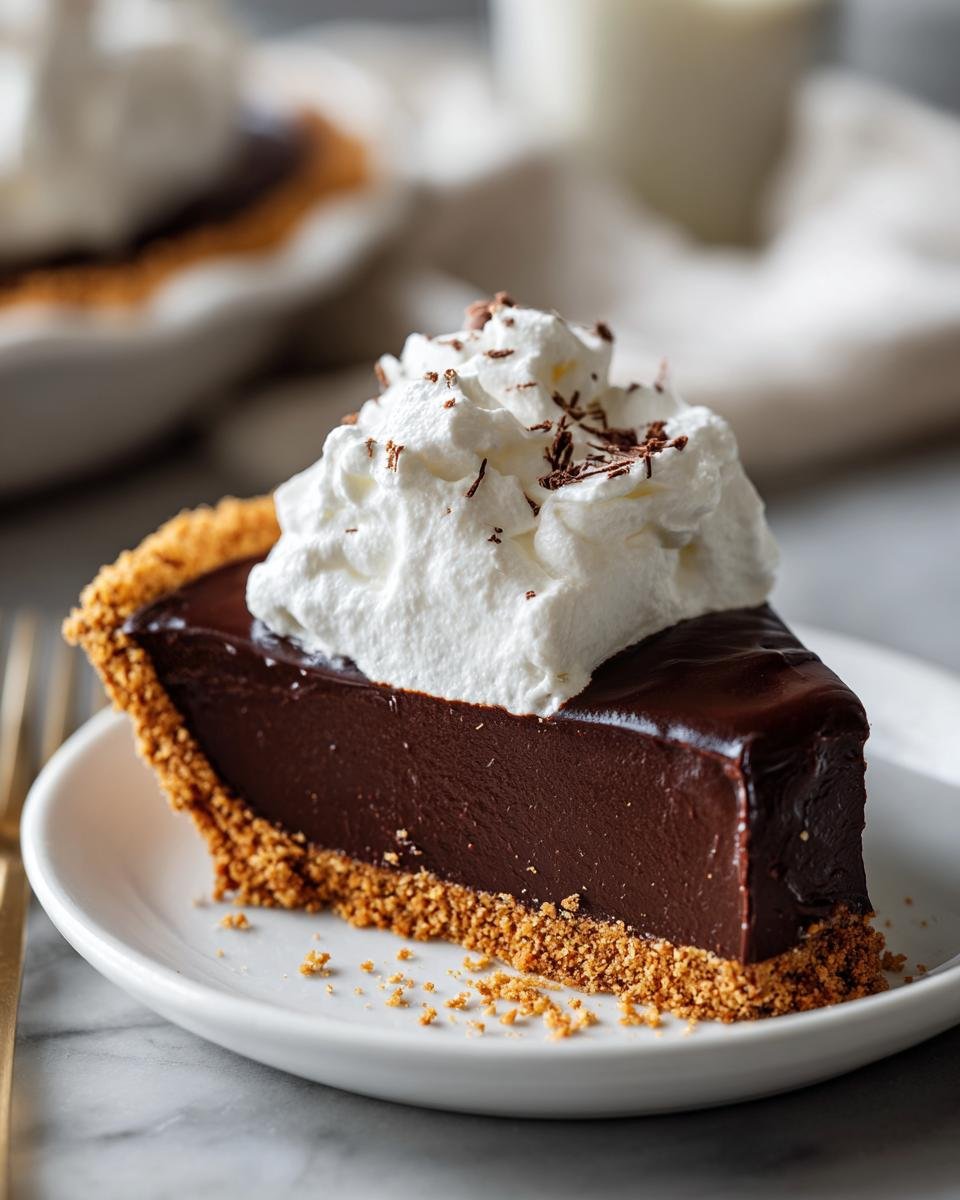
Oh my gosh, you know those nights when you desperately need dessert but just cannot handle turning on the oven? I live for those moments because that is when this absolutely ridiculously easy Chocolate Pudding Pie comes to the rescue. Seriously, this is my secret weapon when company shows up unexpectedly or when I just need a major chocolate fix without any fuss. We’re talking about the quickest, creamiest, richest Chocolate Pudding Pie you will ever make, and the best part? It barely needs four ingredients! If you think you can’t bake, you can absolutely nail this recipe on a Tuesday night before bedtime. Trust me on this one.
Why This Chocolate Pudding Pie Recipe Stands Out
Listen, I’m all about fancy baking, but sometimes you just need a win, right? This pie is pure instant gratification. It’s so fast you’ll wonder if you forgot a step, but nope—that’s just the magic of using a simple, pre-made crust and instant mixes! If you’re looking for the ultimate quick fix, this will forever be your go-to Chocolate Pudding Pie.
- It takes about ten minutes of actual work. Ten minutes!
- No turning on the big scary oven when it’s already hot outside.
- The filling is impossibly smooth and wonderfully chocolatey.
If you need a dessert fast, you’ve found your treasure. Check out the stats below so you can plan your quick indulgence!
Key Details for Your Chocolate Pudding Pie
Here’s the quick rundown so you know exactly what you’re getting into. This recipe is perfect for feeding a small crowd or just treating yourself.
- Prep Time: 10 min
- Total Time: 70 min (Most of that is chilling!)
- Yield: 8 servings
Ingredients Needed for the Perfect Chocolate Pudding Pie
You absolutely won’t believe how few things you need to grab for this showstopper! It’s the beauty of a classic recipe that relies on quality basics. When I grab these items, I know I’m only minutes away from dessert bliss. Forget tracking down weird extracts—this is straight to the point!
- One 9-inch pre-made graham cracker crust—don’t try to make your own unless you have extra time!
- One standard package (3.9 ounces) of instant chocolate pudding mix. Make sure it says INSTANT!
- Two cups of milk that is seriously cold. Ice cold!
- One container (8 ounces) of frozen whipped topping, which you need to thaw out completely before you start mixing anything.
That’s literally it. Four things! Isn’t that just the best news?
Step-by-Step Instructions to Make Your Chocolate Pudding Pie
Okay, now for the fun part where we assemble this magnificent easy dessert! This process is incredibly fast, but you have to pay attention during the mixing so that lovely pudding sets up exactly right. It’s all about movement and patience (for just a moment!).
- First things first: Make the pudding! Dump your instant chocolate pudding mix into a bowl and pour in the two cups of really cold milk. Remember that tip about chilling the milk? Do it! It makes the pudding thicken much faster, which means less waiting later. Now, grab your whisk—and I mean really whisk! You need to beat it continuously until it starts getting thick, which usually takes about two minutes. Don’t stop early, or your filling will be sloppy!
- Once that pudding is thick, gently spoon all of it right into your waiting graham cracker crust. If you decided to use a deep-dish crust like I sometimes do when I’m feeling extra hungry, that’s fine, but it might need an extra 15 minutes chilling time later. Smooth the top layer out with the back of a spoon.
- Take half of that lovely thawed whipped topping and spread it carefully over the pudding layer. You want an even layer here because this section sets up beautifully under the cold! Save the rest for the finale.
- Now for the hard part: waiting. Pop the whole thing into the refrigerator for at least one full hour. This waiting time is non-negotiable; it lets the instant pudding truly seize up so your pie doesn’t turn into soup when you slice it.
- When it’s firm and ready to serve, bring out the remaining whipped topping and cover the entire pie for a gorgeous finish. Slice immediately and enjoy your super fast, satisfying no bake pie!

Expert Tips for the Best Chocolate Pudding Pie Results
Even though this is seriously the easiest pie ever, there are just a few little tricks I’ve learned over the years to make sure your Chocolate Pudding Pie looks fancy and tastes incredible. We aren’t just aiming for ‘okay’ here; we want ‘the best no-bake pie in the neighborhood.’
First, let’s talk about the texture of that pudding. If you are worried about it not setting firmly enough, try using skim milk or 2% milk instead of whole milk. Sometimes the higher fat content in whole milk can make instant pudding a little softer than we want for clean slices. I know, it sounds backwards, but trust me on the colder, lower-fat milk for firmness!
When spreading that first layer of thawed whipped topping over the pudding, use a small offset spatula if you have one! If not, just use the back of a spoon, but do it gently. You don’t want to disrupt that perfect, already-set pudding layer underneath. Go slow, like you’re petting a shy cat.
Presentation is everything, even with a simple pie. When you add that final layer of whipped topping, try making gentle swirls with the back of a spoon or even a fork. Fancy peaks look lovely! If you’re worried about condensation making the top soggy later, cover the pie loosely with plastic wrap *after* it has chilled fully, but before you put on that final topping. This helps keep moisture locked into the pie itself, not sitting on top!
Oh, and a final thing about serving: make sure your knife is sharp! If you try to cut it with a dull knife, you’ll just smear the whipped topping everywhere. A quick, decisive cut through the chilled pie gives you those beautiful, clean wedges everyone wants to grab first.
Ingredient Notes and Substitutions for Your Chocolate Pudding Pie
Since this recipe relies heavily on convenience items like the pre-made crust and the instant pudding mix, people always ask me if they can swap things out. I get it! Ingredient flexibility is huge, especially if you have allergies or just ran out of something mid-recipe. For this particular Chocolate Pudding Pie, we have to be a little careful.
The biggest rule here is that if you mess with the instant pudding, you are changing the entire structure. Instant pudding relies on specific stabilizers to set firm in just minutes. If you decide to make a stovetop pudding from scratch—which is totally fine, by the way—you will need to let it cool completely *and* you might need an extra half cup of milk to keep it soft enough to spread into the crust. Also, homemade puddings usually involve eggs, so it stops being a true ‘no-bake’ situation, doesn’t it?
Now, let’s talk about that crust, because the pre-made graham cracker one is such a time-saver. If you absolutely must make your own, you can use crushed vanilla wafers or even Oreo cookies mixed with melted butter. Just press that mixture firmly into your pie plate, make sure you bring it all the way up the sides, and chill it solid for about 30 minutes *before* pouring in the pudding. If you skip chilling the crust, the butter melts just enough to make the whole bottom greasy and soft when the cold pudding hits it.
As for the flavor? You can definitely play with that! While I love the classic rich chocolate, using instant vanilla pudding or even butterscotch instant pudding instead of the chocolate will give you a whole new dessert with zero extra work. Just make sure you use the same amount of milk, and you’re all set to customize your filling.
Storing and Reheating Your Delicious Chocolate Pudding Pie
One of the genuinely wonderful things about this Chocolate Pudding Pie is that it’s completely happy living in the fridge. Unlike cakes that dry out or get stale, this pie actually tastes better the next day because the pudding has time to fully firm up against that graham cracker crust.
You absolutely must store leftovers in the refrigerator. Keep it covered, but make sure the cover isn’t touching that beautiful whipped topping! If you press plastic wrap directly onto the topping, you’ll end up with an ugly, sticky mess when you try to serve the next slice. I usually secure the wrap loosely around the edges of the pie plate, or I use a cake carrier if I have one handy. It will stay perfectly delicious for about three to four days if you keep it chilled.
People often ask if they can freeze this, and here’s the honest answer: It’s tricky! Because we are dealing with a commercial whipped topping and instant pudding, freezing and thawing can really mess up the texture. The topping gets weepy, and sometimes the filling can get a little grainy once it thaws out. If you absolutely must freeze it, here’s my chaotic recommendation: Take the pie apart before freezing.
Here’s how I’d attempt the freezer trick:
- Slice the pie first, making sure the whipped topping is on each slice.
- Place the individual slices on a parchment-lined baking sheet and freeze them until they are rock hard—this keeps them from sticking together.
- Once frozen solid, quickly wrap *each slice* tightly in plastic wrap, and then put those wrapped slices into a freezer bag.
To eat a frozen slice, just let it sit on the counter near the fridge for about 45 minutes to an hour. It will still be very cold, which honestly tastes fantastic with all that chocolate, but it prevents the whipped topping from weeping sticky puddles all over your plate. If you plan ahead, though? Just make it the day before!
Serving Suggestions for Your Chocolate Pudding Pie
This Chocolate Pudding Pie is fantastic all on its own—I mean, it’s chocolate and it’s creamy, what more could you ask for? But honestly, the real fun comes when we start dressing it up! Even though this is my super-duper-quick recipe, a few simple additions can make it look like you spent hours lovingly decorating it. Presentation matters, trust me!
The best pairings with this rich pie usually balance out the sweetness or double down on the chocolate vibe. I always keep a few things on hand specifically for pie topping emergencies like this!
Fresh Berries for a Little Pop
If you want something bright and tangy to cut through that deep chocolate flavor, you absolutely have to go with fresh berries. Raspberries are my number one favorite. They are so tart and look gorgeous against the white clouds of whipped topping. Strawberries sliced thin are also a classic; they look elegant when fanned out over the top layer.
You don’t need a complicated sauce. Just wash them, dry them really well (we don’t want extra water dripping onto our set pie!), and artfully place them on top right before you serve it. It makes the whole pie feel lighter and much more elegant than its simple ingredient list suggests!
Chocolate and Caramel Overload
If you are entertaining chocoholics, then you have to go all in! I often grab a can of chocolate syrup—the drippy kind, not the thick fudge—and drizzle it back and forth over the entire top layer. It looks so decadent when it runs down the sides a little bit.
For an extra layer of flavor, grab some caramel sauce too! Mix the chocolate and the caramel together and drizzle them both on. It’s getting kind of messy, but who cares when it tastes this good? A little drizzle of caramel really makes the graham cracker crust sing, bringing out that nice salty/sweet contrast we all love.
Easy Crunch Factor
Sometimes you just want texture, right? Because this is a soft pie, adding something crunchy right at the end is heavenly. You can take a few chocolate chips and just lightly dust them over the top, or grab some chopped nuts if you don’t have allergies at your party. Pecans or walnuts work great.
But here’s a little secret I learned when hiding the fact that I didn’t have time to bake cookies: Use crushed chocolate chip cookies! Seriously! Just crush up a few crisp cookies in a baggie and sprinkle that sandy, buttery crunch over the whipped cream. It adds incredible interest to every smooth bite!
Frequently Asked Questions About Making a Chocolate Pudding Pie
I know everyone has questions when they are trying out a new, super-quick recipe like this! It’s natural to wonder if you can tweak it or if you’ve done something wrong if it looks a little funny when you pull it out of the fridge. Don’t sweat it! We’ll cover the most common concerns about making this Chocolate Pudding Pie so you end up with perfect slices every time.
Can I use homemade pudding instead of instant for this Chocolate Pudding Pie?
You technically can, but if you do, it’s not really the same quick, foolproof rescue dessert anymore! The instant pudding mix is designed to thicken rapidly once it hits cold milk and heavy whisking because it has stabilizers already mixed in. If you use a stovetop pudding recipe, you’ll have to cook it, let it cool completely on the counter, and *then* chill it for several hours to get it firm enough to spread into the crust. If you switch, you are essentially turning your 70-minute no bake pie into a multi-hour project. I recommend sticking to the instant pudding for this recipe to guarantee that fast, smooth texture!
How long does the Chocolate Pudding Pie need to chill?
The absolute bare minimum time you should let this set is one hour in the refrigerator. If you try to slice it before that hour is up, I promise you, the pudding layer will just ooze right out of your graham cracker crust. That initial hour lets the pudding molecules lock together. For the absolute prettiest slices—the kind you see in magazines—I always aim for two hours chilling time. If you can manage that, your cuts will be super clean!
My crust seems soggy on the bottom after chilling, what happened?
Oh, that’s the worst! That usually happens for one of two reasons, and both are easy to fix next time. First, if your instant pudding was mixed a little too thin (maybe your milk wasn’t cold enough?), the moisture leaches down into the crust faster. Second, if you accidentally used a refrigerated crust instead of a shelf-stable pre-made one, it might have already been too damp. The best fix, which I mentioned before, is to press your own crust ingredients (like crushed cookies) into the pan and chill that crust solid for 30 minutes *before* you pour in any liquid pudding. That firm barrier stops the sog!
Why did my whipped topping deflate after I put it on?
This usually happens if the whipped topping wasn’t fully thawed, or if the filling underneath wasn’t cold enough when you added it. If the pudding is even slightly warm, it melts the frozen topping right away, and then when you go to chill the whole thing, the thawed topping settles and deflates. Always make sure your pudding layer is quite chilled, and your thawed topping is barely soft enough to spread—not runny—before layering.
Recipe Feedback and Sharing Your Chocolate Pudding Pie
Whew! I hope that clears up any little worries you had about whipping up this incredibly simple Chocolate Pudding Pie. Honestly, if I can get this right after a long day, anyone can! This recipe has been such a lifesaver time and time again, and I just love seeing how everyone puts their own little spin on the final topping.
If you followed along and made this magical dessert, please, please come back and tell me what you thought! Did you stick to the simple whipped topping, or did you try adding berries or caramel drizzle? I live for hearing your successes (and what you learned!). Drop a rating below—it really helps other folks who are nervous about attempting their first no bake pie. And if you snap a picture of your perfect piece, tag me! You can reach me easily through my contact page if you have crazy recipe questions that weren’t covered here. Happy baking—or, well, happy *not* baking!
Print
Simple Chocolate Pudding Pie
- Total Time: 70 min
- Yield: 8 servings 1x
- Diet: Vegetarian
Description
A straightforward recipe for a rich chocolate pudding pie with a pre-made crust.
Ingredients
- 1 (9 inch) pre-made graham cracker crust
- 1 package (3.9 ounces) instant chocolate pudding mix
- 2 cups cold milk
- 1 container (8 ounces) frozen whipped topping, thawed
Instructions
- Prepare the instant chocolate pudding according to package directions, using 2 cups of cold milk. Whisk until the mixture thickens, about 2 minutes.
- Pour the prepared pudding into the graham cracker crust.
- Spread half of the thawed whipped topping evenly over the pudding layer.
- Refrigerate the pie for at least 1 hour to allow the pudding to set.
- Before serving, top the pie with the remaining whipped topping.
Notes
- Use a deep-dish crust for a thicker filling.
- Chill the milk before mixing for faster pudding setting.
- Prep Time: 10 min
- Cook Time: 0 min
- Category: Dessert
- Method: No Bake
- Cuisine: American
Nutrition
- Serving Size: 1 slice
- Calories: 300
- Sugar: 35
- Sodium: 350
- Fat: 15
- Saturated Fat: 8
- Unsaturated Fat: 7
- Trans Fat: 0
- Carbohydrates: 38
- Fiber: 1
- Protein: 4
- Cholesterol: 15
Keywords: chocolate pudding pie, easy dessert, no bake pie, instant pudding