
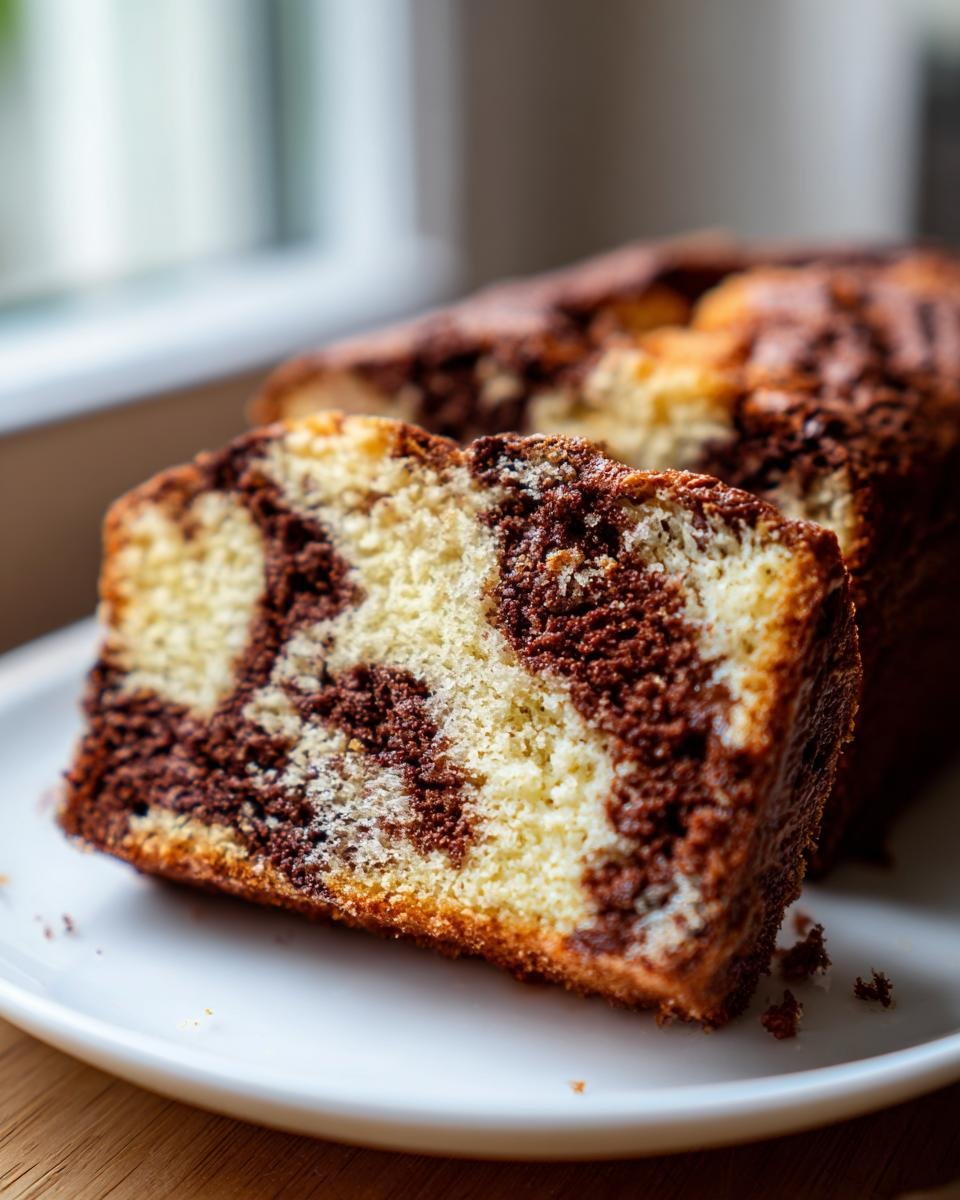
There’s just something magical about a cake that promises two things in every bite, isn’t there? That swirl! When I first tried making a marbled dessert years ago, I ended up with a muddy brown mess—totally depressing. But trust me, friends, this recipe for **Chocolate Marble Cake** is a game-changer. It’s so straightforward; you mix one big base batter and then split it to make the swirl. It delivers the absolute perfect moist texture every single time. You get that beautiful vanilla cloudiness right next to deep, rich chocolate. Honestly, it’s the easiest way to feel fancy in the kitchen!
Gathering Ingredients for Your Chocolate Marble Cake
Don’t let the beautiful presentation fool you; this cake uses wonderfully simple pantry staples! When you’re making something this classic, the ingredient list needs to be spot on. That’s how we guarantee a moist crumb that stays fresh for days. The key here is grabbing everything and having it ready to go, because once you start mixing, things move quickly!
Dry and Wet Components for the Chocolate Marble Cake Batter
We’re starting with the basics for the main batter. You need 1 and 3/4 cups of all-purpose flour, the same amount of granulated sugar so it’s perfectly sweet, plus 1 teaspoon of baking soda and half a teaspoon of salt. For the wet side of things, buttermilk is absolutely vital here—it reacts with the soda and keeps everything so tender! You’ll also need 1 cup of buttermilk, a half cup of vegetable oil, two large eggs, and a teaspoon of vanilla extract.
Now, if you don’t have buttermilk on hand, don’t panic! I have a super simple trick for making a substitute right at home, which is a lifesaver when you’re about to start baking. You can find that little helper tip right here.
Creating the Rich Chocolate Swirl for the Chocolate Marble Cake
This is where we section off a third of our batter to turn dark and dreamy. For this, you only need two things: 1/4 cup of good quality unsweetened cocoa powder and 2 tablespoons of hot water. The hot water helps bloom the cocoa, which deepens that chocolate flavor instantly. My little secret—and you have to promise not to tell anyone—is using strong, hot brewed coffee instead of water if you want the richest chocolate swirl imaginable. It really wakes up the cocoa without making the cake taste like coffee!
Expert Tips for a Perfect Chocolate Marble Cake Swirl
Getting that beautiful, distinct swirl is where most marble cakes fall flat, but this one is foolproof if you follow my few simple rules. It’s all about respecting the separation of those two batters before they go into the oven. If you want to see tons of tips on general baking confidence, I’ve compiled a list of must-know advice to help you make you a better baker!
Preparing the Pan and Oven for the Chocolate Marble Cake
First things first: get that oven warming up to 350 degrees F (that’s 175 degrees C). We’re using a 9×13 inch pan for this recipe, which gives us that perfect shallow depth for easy swirling. You absolutely must grease and flour that pan well. Seriously, don’t skimp! A sticky pan means a broken cake, and nobody wants to rescue a cake that’s clinging to the corners.
Techniques for Achieving the Best Marble Effect in Your Chocolate Marble Cake
Once the two batters are ready, pour the plain batter into your prepared pan first. Then, just drop spoonfuls of the chocolate batter right over the top. They should look like separate puddles. Now for the magic: grab a long, thin knife or even a wooden skewer. Gently drag it through the batters just once or twice—don’t stir! Overmixing is the enemy here; it turns your stunning **Chocolate Marble Cake** into a dark brown block. We want clear ribbons, not mud!

Step-by-Step Instructions for Baking Your Chocolate Marble Cake
Okay, time to get baking! Since we already prepped our ingredients, this part flies by. Remember, we’re aiming for a quick, moist cake, so efficiency is key here. Make sure your oven has been warming up to 350 degrees F while you were mixing; that upfront heat is important!
- First thing’s first, make sure that 9×13 inch pan is greased and floured like your future reputation depends on it.
- Grab your largest bowl and whisk together all your dry base ingredients: the flour, sugar, baking soda, and salt. No lumps allowed in this foundation!
- Now, add the buttermilk, oil, and eggs right into that bowl. You need your electric mixer for this part—beat it on medium speed for a full two minutes until it looks nicely combined. Then, gently stir in that lovely vanilla extract by hand. This creates the main, lighter batter.
- Carefully scoop about two-thirds of that fresh batter into a second, separate bowl. This is going to be your plain vanilla section.
- Take the remaining one-third of the batter left in the original bowl. Whisk in your cocoa powder and that hot water until it’s completely smooth and deeply colored. This is your chocolate layer for the **Chocolate Marble Cake**.
- Pour the plain batter into your prepared pan first. Try to keep it in one layer if you can! Then, gently spoon dollops of that dark chocolate batter right over the top of the plain batter. They should sit next to each other, not mix yet!
- Grab your knife or skewer and just gently drag it through the batters—maybe only three or four passes—to get that pretty swirl. Stop stirring the second you think you see a decent pattern!
- Pop it into the hot oven for about 30 to 35 minutes. You know it’s done when a wooden pick stuck right in the middle comes out clean, with maybe a few moist crumbs sticking to it—that’s the sweet spot!
- Let it cool completely in the pan before you even think about slicing it up. Seriously, patience now equals perfect slices later!
Troubleshooting Common Chocolate Marble Cake Issues
Even with the best recipe—and I truly think this one is fantastic—baking still has its little surprises! If your cake didn’t turn out exactly as you pictured, don’t sweat it. Most issues are super easy fixes for next time. I’ve wasted plenty of batter learning these little lessons the hard way, so let me save you the trouble! We just need to look at the technique!
Why Did My Chocolate Marble Cake Swirl Fade?
This is the saddest thing, isn’t it? You work so hard to divide that beautiful batter, and then boom—it looks like a uniform dark brown cake. That happens when you get too enthusiastic with the knife! Remember, when you pour the chocolatey part onto the vanilla, they are separate entities. If you stir them vigorously or make too many passes with your skewer, you are just blending them back together prematurely. You only need a gentle pull through to get those ribbons. Less is always, honestly, always more with the swirl!
How to Prevent a Dry Chocolate Marble Cake
Dryness almost always traces back to two things: too much baking time or not enough fat/moisture mixture in the batter. Since this recipe already has great moisture from the oil and buttermilk, we usually blame the oven! You have to look at the cake, not the clock. If the recipe says 30 to 35 minutes, start checking faithfully right at 30. Push that wooden pick in near the middle; if it comes out with wet batter clinging to it, give it three more minutes and check again. If it comes out totally dry and clean, pull it out immediately! A little moist clinging is what we’re aiming for in this **Chocolate Marble Cake**!
Serving Suggestions for Your Homemade Chocolate Marble Cake
Okay, the absolute best part: deciding how to serve this beauty! Because this **Chocolate Marble Cake** already has two fantastic flavors built right in, I actually prefer keeping the topping really simple. When you have that lovely, moist crumb, you don’t want to bury it under heavy, overpowering frosting, you know?
For a casual dessert, a light dusting of powdered sugar is elegant and lets the vanilla and chocolate notes shine totally on their own. It just looks beautiful sitting on the cooling rack!

If you’re feeling a little more celebratory, you can certainly frost it, but go light! I love using a simple vanilla buttercream. If you want a recipe that lets the cake remain the star, I have my go-to recipe for simple white frosting that whips up in minutes and doesn’t feel too heavy. A thin layer is all you need. You can even add a tiny pinch of cocoa powder to half the batch and do a quick vanilla-and-chocolate swoosh right on top—another little swirl for good measure!
Serving it slightly warm with a tiny scoop of vanilla bean ice cream is just heaven on a plate, especially on a cold evening. The warmth melts the ice cream just enough to create its own little creamy sauce.
Storage and Make-Ahead Options for Chocolate Marble Cake
This is the best part about a cake that relies on oil instead of butter—it stays moist for days! You do not have to rush to eat this whole **Chocolate Marble Cake** in one sitting, which is great news for my family who usually battles over the last slice.
Since this recipe is so moist, it holds up beautifully on the counter. Don’t bother sticking it in the fridge unless your kitchen is incredibly hot or humid! Refrigeration actually dries out cakes faster, which cuts against everything we’ve worked for here.
Here’s my standard procedure for keeping leftovers:
- Cover that pan tightly with plastic wrap once the cake is completely cool. And I mean *tightly*! You want to keep the air out so it doesn’t get that dry crust on top.
- It will stay wonderfully fresh at room temperature for three to four days like this. I usually just leave it right on the counter, covered, and people just grab squares as they walk by. It’s a great afternoon snack!
Can you freeze slices of this easy marble cake?
Yes, you absolutely can! Freezing works perfectly if you want to make the cake ahead of time for a big party or just stockpile dessert for a rainy day. You need to make sure it is totally cooled down first, which I know I keep repeating, but it’s worth saying one last time.
Wrap individual slices or the whole thing in a couple of layers of plastic wrap first. This prevents freezer burn. Then, throw that beautifully wrapped cake into a heavy-duty freezer bag. It lasts great for about three months in the freezer. When you’re ready to eat it, just pull a slice out in the morning and let it thaw on the counter for a couple of hours. It comes out tasting just as fresh as the day you baked it!
Frequently Asked Questions About This Chocolate Marble Cake
I’ve answered a few common questions I get about this recipe down below. Baking can bring out so many questions, but honestly, most of the time the answers are simpler than you think! Don’t hesitate to drop your own questions in the comments if yours isn’t covered here!
Can I make this Chocolate Marble Cake in a Bundt Pan?
Oh, absolutely you can! This cake batter is actually really happy living in a Bundt pan; it gives such a gorgeous presentation. Just keep in mind that Bundt pans are usually deeper than the 9×13 inch pan we use in the main instructions. Deeper pans mean the heat takes longer to reach the very center of the batter. If you switch to a Bundt, plan on checking it closer to the 40 or 45-minute mark instead of 30. It’s always best to start checking early, though. Trust me, it looks amazing when you pour an icing glaze over a swirled Bundt!
What is the best way to get a sharp vanilla chocolate swirl cake?
The sharpness of that **vanilla chocolate swirl cake** comes down to two main things, both dealing with patience! Number one is how you divide the batter. Make sure you are truly reserving one-third for the chocolate and two-thirds for the vanilla, that makes the contrast cleaner. Number two, and this is the big one: when you put the chocolate dollops on top of the plain batter in the pan, you must only swirl gently. Think of it like guiding a paintbrush gently across the surface, not scrubbing hard. You want ribbons to stay visible when you cut into it, and overmixing is what melts those ribbons together into one color.

Why does the recipe call for hot water with the cocoa?
That’s a clever little trick for making an **easy marble cake** taste like it took all day! The hot water, or especially the hot coffee I mentioned, helps bloom the cocoa powder. What that means is it dissolves the cocoa solids better than just mixing it into cool batter. It lets the true, deep chocolate flavor come out instantly, giving you that richness without having to use a ton of extra powder. It makes a noticeable difference in the depth of flavor, I promise!
Can I use milk instead of buttermilk in this easy marble cake?
You technically *can*, but I strongly advise against it if you are looking for the moistest result. Buttermilk is acidic, see? That acidity reacts with the baking soda to create lift and tenderness in the final structure of our **Chocolate Marble Cake**. If you use regular milk, the cake will still bake, but it will be heavier and slightly duller in texture. If you have regular milk and no vinegar nearby for a quick substitute, it’s better than nothing, but buttermilk is definitely preferred for that light, airy crumb we are aiming for!
Estimated Nutritional Snapshot of This Chocolate Marble Cake
Now, I know we bake for love and joy, but sometimes it’s helpful to know what you’re serving up! I always tell people that since this is a homemade cake, the nutrition facts are always just an educated guess. We’re using averages here, and if you switch out oil for applesauce or use different types of sugar, those numbers are going to wiggle around a bit!
But based on the standard ingredients list for this simple **Chocolate Marble Cake**, here is a general idea of what one slice provides when cut into 12 even pieces. Don’t worry too much about it—it’s meant to be a treat!
- Serving Size: 1 slice
- Calories: 280
- Sugar: 35g (This is why it tastes so good!)
- Fat: 13g
- Carbohydrates: 40g
- Protein: 4g
- Cholesterol: 45mg
See? It’s not too heavy, which is part of why this cake is so great for gatherings—everyone can enjoy a nice big piece! Enjoy every bite!
Share Your Chocolate Marble Cake Creations
That’s truly it! You’ve got everything you need now to whip up what I believe is the absolute best and easiest **Chocolate Marble Cake** out there. Seriously, that swirl is just calling your name!
I put so much love into getting this recipe just right for you all, and nothing makes me happier than seeing your bakes. When you try this recipe, please come back and tell me how it went! Did you try my coffee trick for the chocolate part? Did your swirl turn out perfectly sharp?
Feel free to leave me a rating right here on the page—five stars if you loved it! Even better, snap a picture! I adore seeing your beautiful **vanilla chocolate swirl cake** creations on social media; tag me so I can cheer you on. Happy baking, everyone!
Print
Chocolate Marble Cake
- Total Time: 50 min
- Yield: 12 servings 1x
- Diet: Vegetarian
Description
A simple recipe for a moist cake featuring a swirl of vanilla and chocolate batter.
Ingredients
- 1 3/4 cups all-purpose flour
- 1 3/4 cups granulated sugar
- 1 teaspoon baking soda
- 1/2 teaspoon salt
- 1 cup buttermilk
- 1/2 cup vegetable oil
- 2 large eggs
- 1 teaspoon vanilla extract
- 1/4 cup unsweetened cocoa powder
- 2 tablespoons hot water
Instructions
- Preheat your oven to 350 degrees F (175 degrees C). Grease and flour a 9×13 inch baking pan.
- In a large bowl, whisk together the flour, sugar, baking soda, and salt.
- Add the buttermilk, oil, and eggs to the dry ingredients. Beat with an electric mixer on medium speed for two minutes. Stir in the vanilla extract.
- Pour about two-thirds of the batter into a separate bowl.
- Whisk the cocoa powder and hot water into the remaining one-third of the batter until smooth.
- Pour the plain batter into the prepared pan. Gently spoon dollops of the chocolate batter over the plain batter.
- Use a knife or skewer to gently swirl the two batters together to create a marble effect. Do not overmix.
- Bake for 30 to 35 minutes, or until a wooden pick inserted into the center comes out clean.
- Cool completely before serving.
Notes
- For a richer chocolate flavor, use strong brewed coffee instead of hot water when mixing the cocoa powder.
- You can use a bundt pan; adjust baking time as needed.
- Prep Time: 15 min
- Cook Time: 35 min
- Category: Dessert
- Method: Baking
- Cuisine: American
Nutrition
- Serving Size: 1 slice
- Calories: 280
- Sugar: 35g
- Sodium: 180mg
- Fat: 13g
- Saturated Fat: 2g
- Unsaturated Fat: 11g
- Trans Fat: 0g
- Carbohydrates: 40g
- Fiber: 1g
- Protein: 4g
- Cholesterol: 45mg
Keywords: chocolate marble cake, vanilla chocolate swirl cake, easy marble cake, homemade cake