
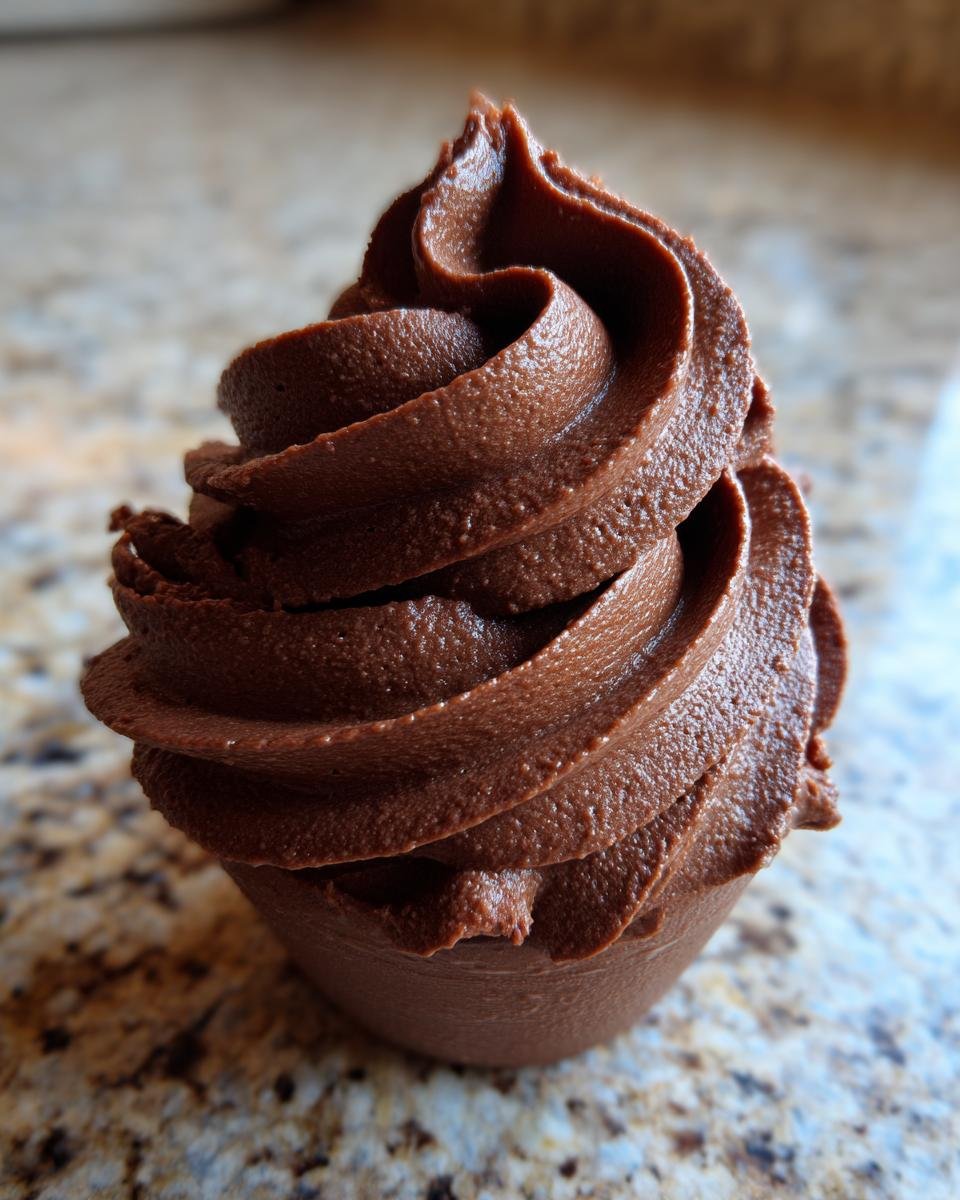
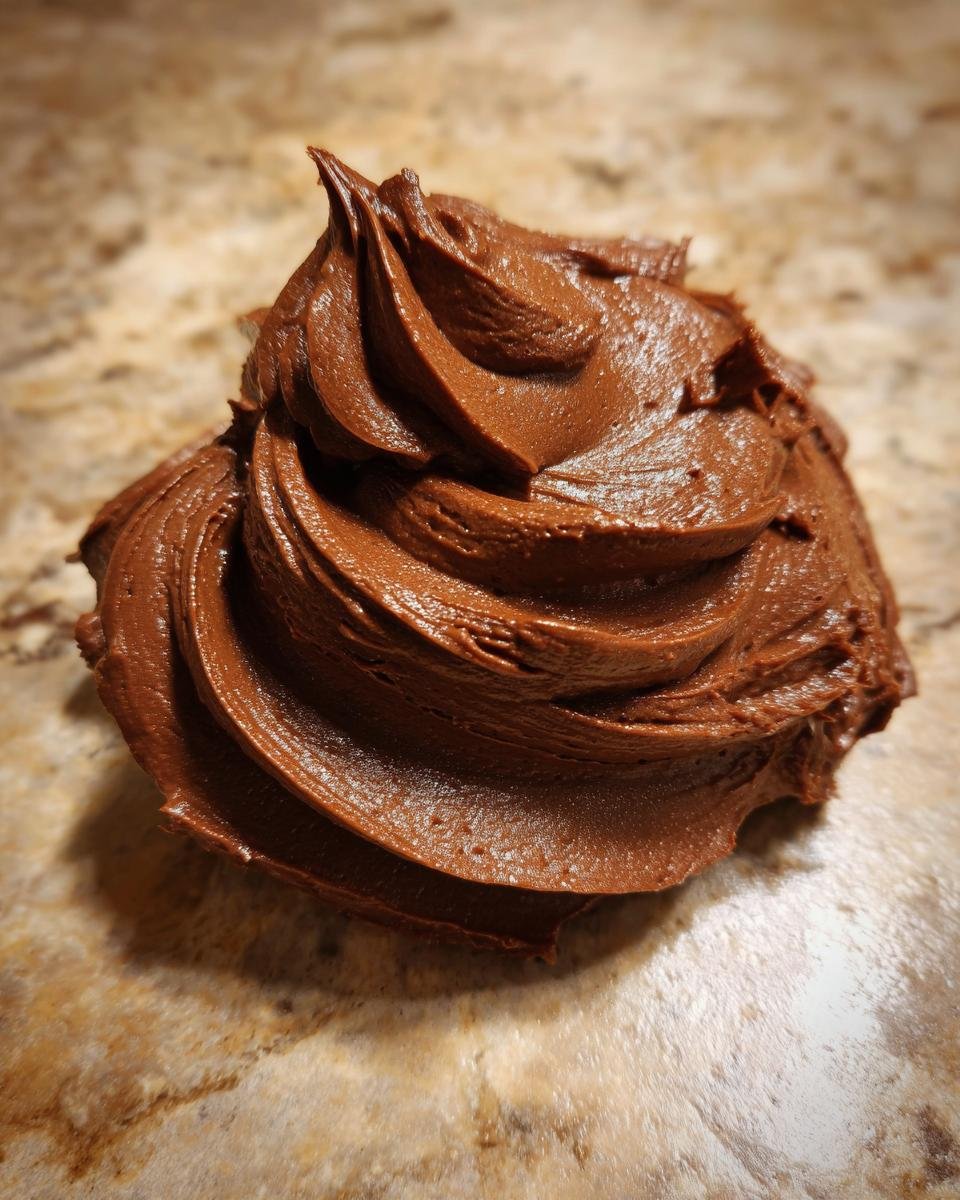
Oh, there is honestly nothing better than scraping the sides of the bowl after whipping up a batch of homemade frosting. The smell hits you first, right? It’s that deep, comforting cocoa scent that instantly transports you back to childhood birthday parties. If you’re looking for the absolute easiest, smoothest **Chocolate Frosting** on the planet, stop looking right now. This is the one. I swear this simple mixture saved my life last Christmas Eve when I realized I’d forgotten to buy store-bought icing for my husband’s hastily baked gingerbread cake. Ten minutes, five ingredients, and boom—gorgeous, perfect buttercream.
Why This is the Best Simple Chocolate Frosting Recipe
I’ve tried every fancy frosting recipe out there, with complicated melting steps involving double boilers and endless stirring. Honestly, this one beats them all in reliability! When you need chocolate goodness fast, this is your go-to. It just works, every single time. It’s amazing for beginners, too, because I always send them to check out my baking tips before they start this one, because even simple recipes benefit from knowing the basics!
- It uses pantry staples that I usually always have on hand.
- It requires zero cooking time—it’s entirely quick mixing magic!
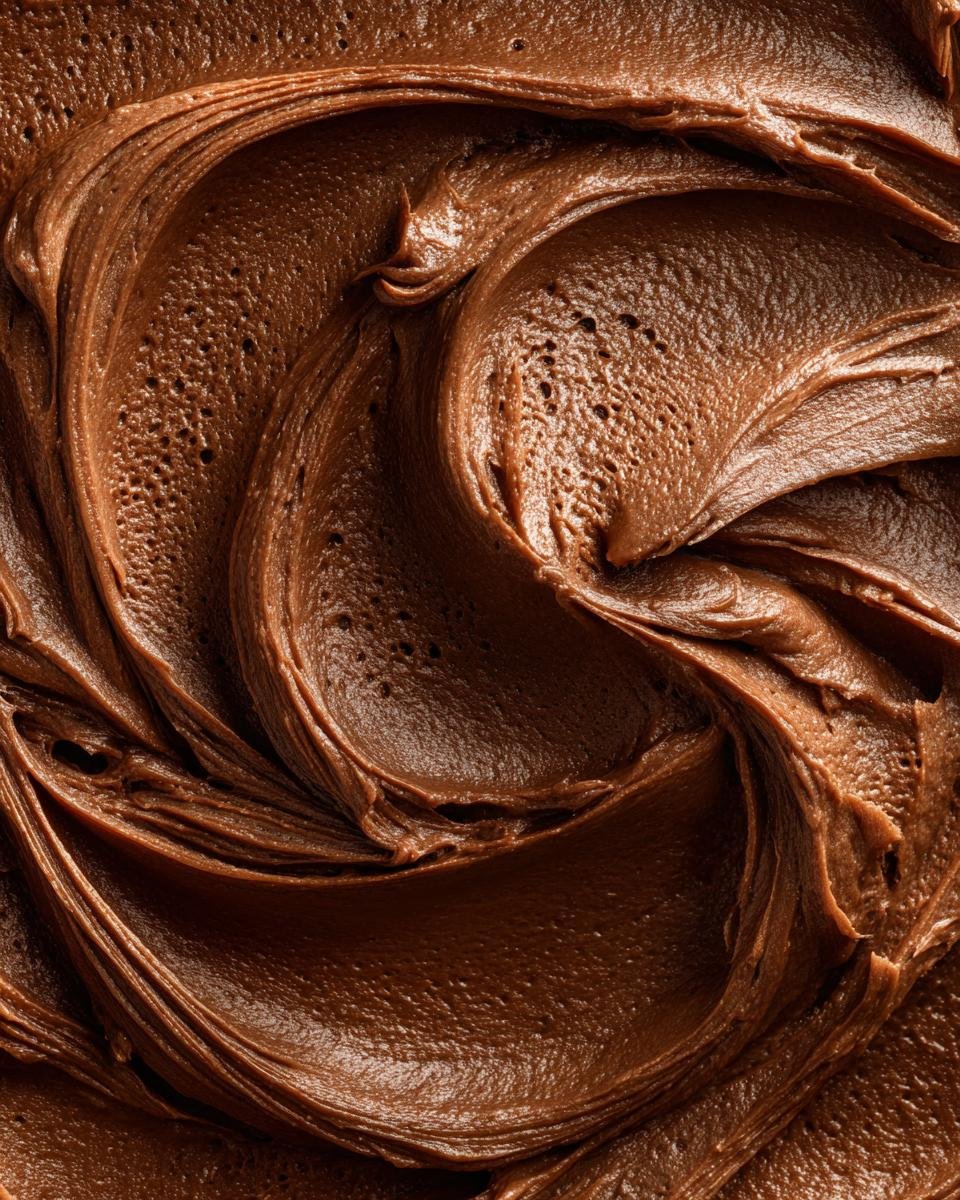
- The final texture is unbelievably light and fluffy, never grainy or heavy in a **Chocolate Frosting**.
- I can whip up a batch while the cake is still cooling on the rack.
Quick Preparation Time for Your Chocolate Frosting
Seriously, we are talking ten minutes total from start to finish. That’s less time than it takes to find the right spatula! Because it’s such a quick recipe, you can bake a cake, whip up this **Chocolate Frosting**, and have everything cooled and iced before your dinner guests even start asking about dessert. Amazing, right?

Achieving the Perfect Smooth Texture
The secret weapon here is making sure your butter is perfectly softened. Not melted, not cold—just soft enough that your finger leaves a gentle dent when you press it. This room-temperature fat is what lets the sugar incorporate without resisting. That one step is key to avoiding any hint of grit in your final, dreamy **Chocolate Frosting**.
Essential Ingredients for Rich Chocolate Frosting
Listen, since this recipe is so fast, we rely heavily on the quality of our five core ingredients. Don’t try to skimp here, because there aren’t many places to hide! The success of this simple **Chocolate Frosting** really hinges on getting these measurements right. Like always, I keep unsalted butter on hand—I like to control the salt myself, you know?
You need half a cup of that butter, and it must be soft. If you forgot to pull it out, I have a few tricks up my sleeve, but usually, letting it sit on the counter while you mix up dry things does the trick. Then comes the cocoa—a third of a cup of unsweetened powder gives us that deep, dark color we want. Don’t reach for the sweetened stuff, or you’ll end up with frosting that tastes like a candy bar that’s been sitting in the sun!
Next up, the sugar. Three cups of powdered sugar. This is where the texture comes from, so make sure you’re using the fine stuff. I alternate that with the moisture from one-third cup of milk. If you ever need to make substitutions for milk, you can check out my guide on milk substitutes, though I usually stick to regular whole milk for this buttercream.
Finally, just a teaspoon of vanilla extract to round things out and make that chocolate really sing. Keep these measurements precise, and you won’t need the troubleshooting section later!
Step-by-Step Guide to Making Chocolate Frosting
Okay, getting the steps right here is what separates this amazing **Chocolate Frosting** from a lumpy mess. It really is so simple, but speed matters. If you follow these mixing order steps exactly, you’re going to have that perfect, spreadable consistency ready in about ten minutes flat. If you’re feeling stressed about the cocoa powder, I always have a little trick for that!
My favorite little secret is to add the cocoa powder to the *softened butter first*, before the sugar. Then, I use my rubber scraper and physically mash it against the side of the bowl for a few seconds to break up any little cocoa clumps right there in the fat. Trust me, this saves you from sifting later!
Creaming the Butter Base for Your Chocolate Frosting
We start with that softened butter in your mixing bowl. I use the paddle attachment, and I beat it on its own for a good minute until it looks really pale and almost fluffy on its own. We are aiming for ‘creamy,’ remember? Like smooth peanut butter, but lighter. It shouldn’t look greasy or have any hard edges left.
Incorporating Sugar and Milk for Ideal Chocolate Frosting Consistency
This is the most important part for texture balance. You can’t just dump the sugar in all at once—that’s how you end up with a sugar cloud explosion! You need to add the three cups of powdered sugar gradually, alternating with your milk. I usually do one cup of sugar, mix it a bit, then about half the milk, mix, then another cup of sugar, the rest of the milk, and finally that last cup of sugar.
This alternation keeps things moving nicely in the bowl. Once it’s all incorporated, you turn the speed up to medium for just two glorious minutes. It should look completely homogeneous, thick enough to hold a shape, but soft enough to slide easily off the spatula. If you want to see a few other incredible frosting ideas, you can check out my Nutella frosting guide!
Troubleshooting Common Chocolate Frosting Issues
Even when you follow the steps perfectly for this **Chocolate Frosting**, sometimes the atmosphere in the kitchen, or maybe just how soft your butter was, throws things off slightly. Don’t panic and dump the whole batch! Buttercream is very forgiving, assuming you know the little tricks. I’ve been there—thinking I ruined a whole batch of what should have been perfect chocolate buttercream—but it always comes back from the brink, I promise.
Fixing Chocolate Frosting That Is Too Thick
If you turned that mixer on high for two minutes and it barely moved, or it looks stiff enough to use as spackle, it’s simply too thick. This usually happens if your powdered sugar was packed down tight when you measured it. The fix is incredibly easy, but you have to be patient.
I start by adding liquid—just plain milk—one teaspoon at a time. I mix on low speed until it starts to loosen up. Stop the mixer, scrape down the sides, and check the texture. You might need three or four teaspoons total, but going slow prevents you from over-correcting and making it too runny later!
Adjusting Chocolate Frosting That Is Too Thin
Okay, if that frosting is looking more like a puddle than something you can swirl beautifully on top of a cake, it’s too thin! This almost always means your butter was a little too warm when you started, or maybe you added one too many splashes of milk trying to incorporate the sugar.
The solution here is your other main dry ingredient: powdered sugar! Just like with fixing the thickness, you can’t rush it. Add a tablespoon of powdered sugar at a time, mix on low until it’s just combined, then check the consistency. A little bit of extra sugar will firm up that **Chocolate Frosting** beautifully, restoring that classic buttercream body without making it stiff again.
Ingredient Notes and Flavor Variations for Chocolate Frosting
Now that you have the base down—and I hope you got that perfectly smooth result from the mixing stage—let’s talk about dialing up the flavor a tiny bit. While this recipe is fantastic as is, every good home cook knows you can tweak things to make the frosting truly yours. I found that the type of cocoa powder you choose makes a huge impact on the final taste of your **Chocolate Frosting**.
If you want something really deep and almost bitter to contrast a super sweet cake, I highly recommend using dark cocoa powder—it really amps up the richness, as noted in my little recipe card notes. Don’t be shy; that deeper flavor profile lasts through the sugar.
Also, about that milk! If you really want this **Chocolate Frosting** to feel decadent—like something you’d buy at an expensive bakery rather than whip up in ten minutes—you absolutely must try substituting the milk with heavy cream. It adds glorious fat content, making the frosting thicker, richer, and almost fudgy without needing extra sugar!
But my favorite little trick lately, especially when I frost a chocolate pound cake or brownies, is adding a tiny bit of instant espresso powder. You only need about half a teaspoon dissolved in a teaspoon of hot water before you add it with the vanilla. It doesn’t make the **Chocolate Frosting** taste like coffee, but wow, does it make the chocolate taste more intensely chocolatey! It’s such a simple addition that makes me look like I spent hours fussing over it.
If you want to see how you can use slightly different base ingredients to create something entirely pale but still gorgeous after mastering this dark version, you have to look at my guide on making white frosting. It’s a nice contrast!
Serving Suggestions for Your Homemade Chocolate Frosting
Once you have this amazingly quick **Chocolate Frosting** ready, you’re going to want to spread it on everything! It’s so versatile, and frankly, it’s way better than anything store-bought, so you might as well use it generously. Forget keeping it just for layer cakes; this stuff deserves a starring role on all sorts of treats around the house.
My absolute go-to use, besides frosting actual birthday cakes, is piling it high on brownies. You know those really dense, almost fudgy brownies? A thick layer of this fluffy chocolate buttercream on top takes them from a good snack to a serious dessert experience. I actually frost the brownies while they are still slightly warm—not hot, just the barest hint of warmth—because it makes the frosting melt just enough to spread like silk without disappearing entirely.
Another fantastic use is the sandwich cookie situation. If you make a batch of sturdy chocolate wafers or even just use some simple sugar cookies, this frosting makes the most incredible filling. You just need two cookies and a nice dollop in the middle. It’s much better than jam because it has that lovely lightness, and it holds together like a dream. If you’re looking for a great partner cookie for this frosting, you absolutely should try making my double chocolate cookie cake—it needs a serious frosting upgrade!
Finally, don’t overlook using it as a dip! Seriously. Put a big bowl of this **Chocolate Frosting** out with some strawberries, pretzel rods, or maybe even apple slices if you’re feeling adventurous. It feels so indulgent, and it only took you ten minutes to whip up!
Storage and Reheating Instructions for Chocolate Frosting
So, you made your fantastic **Chocolate Frosting**, and your baked goods didn’t quite manage to finish it all off? Good news! This buttercream is really stable, but you have to treat it right so it doesn’t get weird or grainy later. It all comes down to how you store that leftover magic.
If you think you’ll use the rest of it within a day or two, leaving it on the counter is totally fine, provided your kitchen isn’t blazing hot! Just make absolutely sure it’s sealed up tight. I use plastic wrap pressed directly onto the surface of the frosting inside an airtight container. That way, the air can’t dry out the top layer, which is the number one cause of sad, crusty leftover **Chocolate Frosting**.
For long-term storage, though, the fridge is your friend. Pop that sealed container in the refrigerator for up to a week. It will get rock hard, naturally, because of all that butter we used to make it perfect. Don’t even think about trying to spread that cold brick on a cupcake!
When you’re ready to use the refrigerated **Chocolate Frosting** again, you have to bring it back to life slowly. Take it out about two hours before you plan to use it and let it sit on the counter to soften up. Once it’s soft to the touch—kind of like when you first made it—I recommend giving it a quick blast with the mixer for maybe 30 seconds on medium speed. That little bit of beating just reunites everything and makes it airy and spreadable again, just like using it fresh. No messy microwaves needed for this simple recipe!
Frequently Asked Questions About Chocolate Frosting
I get so many sweet messages about this recipe, and a lot of the questions pop up right here! It’s great to tackle these common concerns so everyone can have perfect results when making this simple **Chocolate Frosting** for their cakes or cookies. I’ve put the most common ones right here so you don’t have to search around!
Can I make this Chocolate Frosting ahead of time?
Yes, absolutely! This is one of the perks of a solid buttercream base. You can make it and store it in an airtight container in the fridge for up to a week. Just remember what I mentioned before: it’s going to be hard as a rock when you pull it out. Let it sit on the counter for about two hours, and then give it a quick 30-second whip with the mixer. It comes right back to life! If you’re looking for something that doesn’t need chilling, you might enjoy my recipe for rocky road candy instead.
What is the best cocoa powder substitute for this frosting?
That’s a great question because not all cocoa powders react the same way! For this recipe, which uses milk (a neutral liquid), both natural unsweetened cocoa powder and Dutch-processed cocoa work fine. However, Dutch-processed cocoa is less acidic, which gives you a deeper, smoother chocolate flavor that I think really shines in a simple **Chocolate Frosting**. If you don’t have any cocoa powder at all, you *could* substitute it with about 4 ounces of good quality, melted semi-sweet chocolate, but you’ll definitely need to increase your milk slightly to compensate for the missing volume, and the texture might be a little denser.
Recipe Details and Estimated Nutrition
Even though this **Chocolate Frosting** comes together so quickly, I always like to give you the hard facts so you know exactly what you’re making and how much you get. It’s one of those recipes that seems too simple to provide such great yield, but those three cups of powdered sugar really bulk things up! You’re looking at about two lovely cups of frosting, which is generally enough to slather a decent layer on a 9×13 pan or frost a standard two-layer 8-inch cake.
On the time front, my prep time is listed at ten minutes, and honestly, that’s if I’m moving slowly! It’s a completely no-cook project, which is wonderful for busy days. This frosting fits perfectly into the ‘Dessert Topping’ category, or maybe ‘Emergency Dessert Rescue’ when you’re short on time but need something impressive.
Now, for the numbers part. I always want to be super upfront that these nutritional estimates are just based on the standard calculations for these ingredients—they aren’t lab-tested, you know? Things like the exact fat content in your butter or how much cocoa powder you packed down can change things slightly. But as a rough guide, here’s what you can expect per quarter-cup serving of this rich **Chocolate Frosting**:
- Calories: About 300
- Sugar: Yikes, around 40g (but it’s worth it!)
- Fat: About 15g total
- Protein: A tiny boost at 2g
It’s certainly a treat, not an everyday food, but that’s what buttercream is supposed to be! If you wanted to see how this kind of creamy texture works in a different context, you should check out my recipe for chocolate cream pie—it uses a stabilized base that is just as satisfying!
Print
Simple Chocolate Frosting
- Total Time: 10 min
- Yield: About 2 cups 1x
- Diet: Vegetarian
Description
A basic recipe for smooth chocolate frosting.
Ingredients
- 1/2 cup unsalted butter, softened
- 1/3 cup unsweetened cocoa powder
- 3 cups powdered sugar
- 1/3 cup milk
- 1 teaspoon vanilla extract
Instructions
- Beat the softened butter in a medium bowl until creamy.
- Add the cocoa powder and mix until combined.
- Gradually add the powdered sugar, alternating with the milk, mixing on low speed until smooth.
- Stir in the vanilla extract.
- Beat on medium speed for 2 minutes until light and fluffy.
- If the frosting is too thick, add a little more milk, one teaspoon at a time. If it is too thin, add a little more powdered sugar.
Notes
- For a richer flavor, use dark cocoa powder.
- You can substitute heavy cream for milk for a thicker frosting.
- Prep Time: 10 min
- Cook Time: 0 min
- Category: Dessert Topping
- Method: Mixing
- Cuisine: American
Nutrition
- Serving Size: 1/4 cup
- Calories: 300
- Sugar: 40g
- Sodium: 50mg
- Fat: 15g
- Saturated Fat: 9g
- Unsaturated Fat: 6g
- Trans Fat: 0g
- Carbohydrates: 42g
- Fiber: 1g
- Protein: 2g
- Cholesterol: 35mg
Keywords: chocolate frosting, cocoa frosting, buttercream, cake topping, simple frosting