
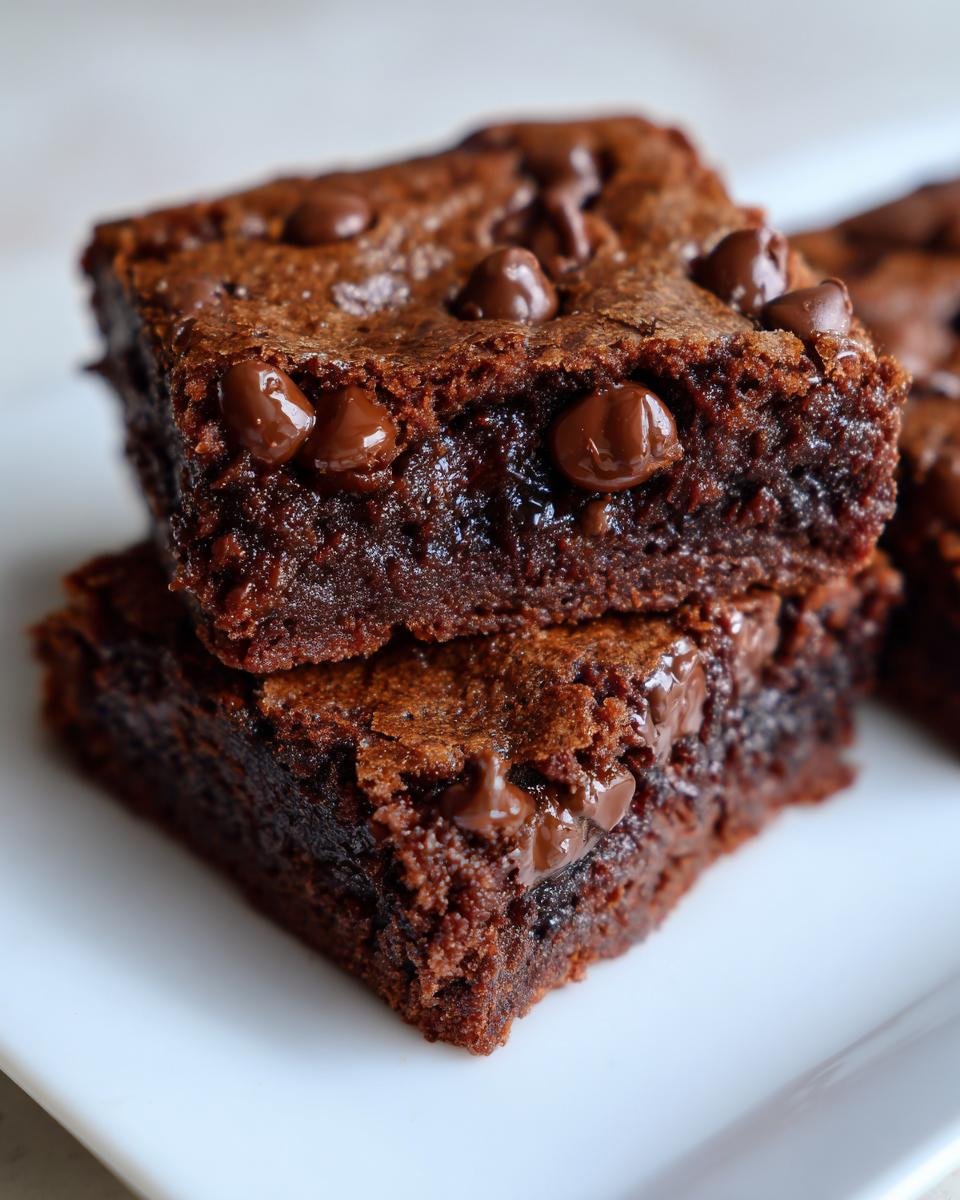
Are you ever hit with that sudden, powerful need for chocolate? Not fancy cake, not just a quick bite, but something rich, dense, and deeply satisfying? Well, stop what you’re doing because I’ve got the absolute best thing for you: my game-changing Chocolate Cookie Bars. Seriously, these are the easiest, chewiest bars you will ever make—I promise! I spent years tweaking the butter and sugar ratios until I got that perfect, glorious melt-in-your-mouth texture that tastes like your favorite chocolate chip cookie, but in bar form. I’ve tested this recipe so many times (I think my waistline shows it!) to ensure it’s foolproof for everyone. Get ready for the best easy dessert!

Why You Need These Chewy Chocolate Cookie Bars
Look, sometimes you just need chocolate goodness right now, and you don’t have time for fussy layering or complicated steps. That’s why this recipe is an absolute life-saver. I keep coming back to these bars because they deliver pure comfort food flavor with almost no effort. They hit the spot every single time!
-
Quick Prep Time
We are talking a solid 15 minutes of active prep time! That’s less time than it takes for my oven to fully preheat sometimes. You toss everything together, press it in the pan, and wait for magic. It’s the perfect quick dessert when company drops by unexpectedly.
-
Perfectly Chewy Texture
This is my favorite part, hands down. The secret to these amazing Chocolate Cookie Bars is the balance between the granulated and brown sugar. That heavy dose of brown sugar keeps them incredibly moist and chewy, almost like the absolute best part of a fresh-from-the-oven chocolate chip cookie, just baked in one giant slab. If you love a fudgy center, these are for you.
-
Minimal Equipment Needed
No stand mixer required unless you just really love using it! I usually just grab one big bowl and a whisk for the dry stuff. You really only need two bowls, a spatula, and that 9×13 pan. It means cleanup is super fast, which is always a win in my book. If you want to see another great one-pan dessert, check out my thoughts on double chocolate cookie cake—but this bar recipe is faster!
Essential Ingredients for Perfect Chocolate Cookie Bars
So, let’s talk about what goes into these beauties. When you’re making a simple recipe like this, every single ingredient needs to pull its weight, and I’ve listed them for you right here. Trust me, these precise measurements are how we get that amazing, non-cakey texture that makes them classic Chocolate Cookie Bars. Don’t try to eyeball the flour—it’ll throw the whole thing off!
Here’s what you’ll need to gather before you even think about turning on the oven:
You need one full cup, so two full sticks, of unsalted butter. This butter absolutely must be softened—not melted! Then we call for one cup of regular granulated sugar and one full cup of dark brown sugar, packed tightly into the measuring cup. For moisture and binding, grab two large eggs, and don’t forget a full tablespoon of vanilla extract for that classic warmth. As for the dry stuff, measure out 2 1/4 cups of all-purpose flour, one teaspoon of baking soda (this gives them that little lift!), and half a teaspoon of salt to balance all that sweetness. And finally, the star of the show: a whopping 2 cups of semi-sweet chocolate chips. I usually use the regular kind, but feel free to mix it up!
If you want to learn some more general tricks about how ingredients work together when you’re baking, I’ve got some great background reading on common baking tips right here.
Ingredient Notes and Substitutions for Chocolate Cookie Bars
Paying attention to the butter and sugar is truly non-negotiable for achieving that perfect chew. If you melt your butter instead of softening it, the bars end up dense and almost greasy, like fudge that didn’t quite set right. We want chewy, not heavy!
Also, don’t mess too much with the sugar ratio! The white sugar helps with structure, but that full cup of brown sugar is what brings the moisture and that slight molasses depth we need. If you swap the brown sugar for white, your Chocolate Cookie Bars will flatten out and become crispy rather than chewy.
As for the chips—you can absolutely substitute! If you love intense chocolate flavor, use dark chocolate chips. If you prefer a sweeter, milder experience, milk chocolate works great too. And sometimes, just for fun, I’ll throw in a handful of chopped walnuts, but you should definitely wait until the very end mixture step to fold those in!
Step-by-Step Instructions to Make Chocolate Cookie Bars
Okay, making these Chocolate Cookie Bars is so straightforward, you’re going to wonder why you didn’t make them years ago! I always tell people that the key to success here is organization—get your ingredients out, and you are practically done. We want that perfect texture, so we use the standard creaming method. Don’t rush the creaming part, but definitely don’t overwork the flour later on. It’s a delicate balance, really!
Preparing the Pan and Oven for Your Chocolate Cookie Bars
First things first: get that oven warmed up to 350 degrees Fahrenheit. Seriously, do this first! While it’s heating, grab your 9×13 inch pan. I never bake these without lining it with parchment paper first; trust me on this. You want plenty of overhang on the long sides so you can use it like a sling to lift the cooled bars out later. It makes cutting so much cleaner!
Mixing the Wet and Dry Components for Chocolate Cookie Bars
In your big bowl, cream that softened butter with both sugars until it looks light and fluffy—this might take a few solid minutes with your hand mixer, but be patient! Then, drop in the eggs one at a time, followed by that big splash of vanilla. In a separate bowl, just whisk together the flour, baking soda, and salt until they look friendly working together. Now, this is critical: add the dry stuff to the wet stuff gradually. Do not grab a big handful! Mix it only until you barely see streaks of flour disappearing. The second that flour is incorporated, stop mixing! If you overmix, those chewy bars turn into tough hockey pucks, and we don’t want that disaster.
Baking and Cooling Your Chocolate Cookie Bars
Pour in the chocolate chips and fold them in gently—we don’t want to deflate all that air we just beat in! Press the dough evenly into your prepared pan. They go into the hot oven for about 20 to 25 minutes. You are looking for the edges to just start turning a light gold, and the center should look mostly set, not wet. The biggest mistake people make is cutting these too soon! You absolutely must let them cool completely in the pan—at least an hour, maybe two. If you try to cut them warm, they turn into a melted, gooey mess. Once they are totally cool, just lift them out using the parchment sling and slice them into squares. For more tips on perfect chocolate bakes, check out my guide on making classic chocolate chip cookies!
Tips for Achieving the Best Chocolate Cookie Bars Texture
We already covered the basics, but if you want these Chocolate Cookie Bars to go from “very good” to “I might need to hide these from my family,” you need to pay attention to the finer points. Texture is everything in a bar cookie, and it all comes down to temperature control and timing.
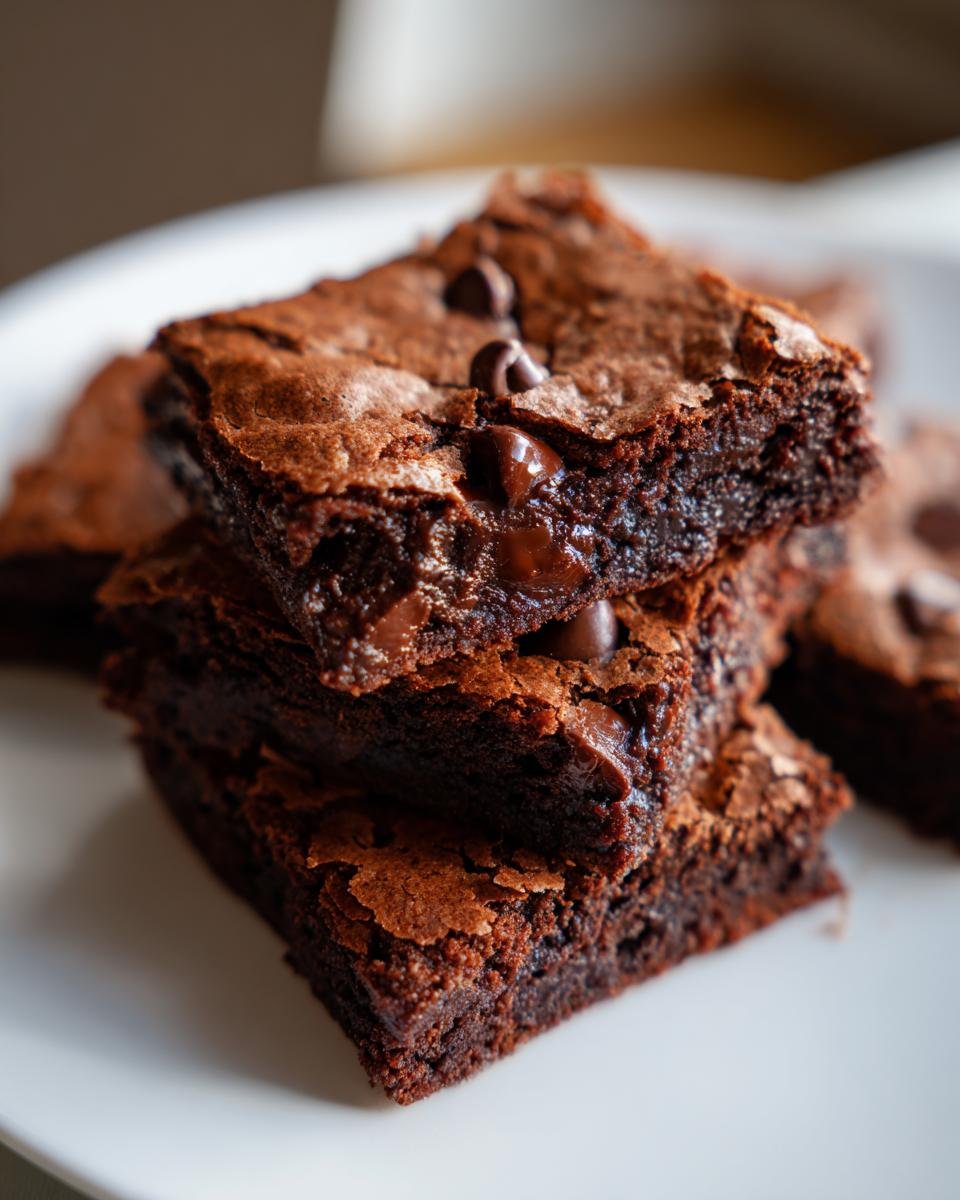
My absolute favorite trick, which I touched on in the notes, is messing with the baking time to tweak fudginess. If you pull them out right at the 20-minute mark, the very center will be borderline underbaked—and when it cools, that results in an unbelievably dense, almost brownie-like chocolate cookie bar! If you want slightly more cake-like structure, go for the full 25 minutes.
Another thing that drives me crazy is when people try to rush the cooling process. That lingering heat in that 9×13 pan is still cooking your bars! Resist the urge, I promise it’s worth the wait. If you cut them while they are still warm, the chocolate chips will smear everywhere and you’ll just end up with a chocolate chip soup instead of neat squares.
Also, sometimes I swap out about a quarter cup of the white sugar for an extra tablespoon of molasses if I don’t have packed brown sugar at home. It’s not exactly the same, but it brings back some of that deep, caramel flavor that helps keep things chewy. It’s one of those quick fixes I learned when I ran out of the good stuff for my usual batch of chocolate chip cookies without brown sugar, which is a fantastic recipe I’ve shared if you ever run out of brown sugar!
Remember, the goal here is chewiness. That means keeping the flour addition minimal and making sure your butter is soft enough to cream properly, not oily. If you follow those few extra steps, you’ll find these Chocolate Cookie Bars are the best easy dessert you’ve ever folded together.
Storage and Reheating Instructions for Chocolate Cookie Bars
These Chocolate Cookie Bars are so good, the biggest challenge is making them last long enough to actually need storage instructions! But don’t worry, they hold up beautifully, which is another reason they are my go-to easy dessert for bake sales and potlucks. They are much more stable than regular drop cookies.
The rule here is simple: airtight containers are your best friends. As the recipe notes suggest, you need to store them at room temperature. I just stack them in a sturdy container, making sure there’s a layer of wax paper or parchment between layers if your bars are particularly gooey; this stops them from sticking together into one giant chocolate brick. On the countertop, they stay perfectly fresh for several days—maybe four or five if you have excellent willpower!
Now, what if you left them out, or maybe they got a little too enthusiastic in the oven and dried out just a tiny bit? No problem! You can easily revive them.
If they seem a bit stale, just pop a square or two onto a microwave-safe plate. Heat them for about 10 to 15 seconds. That little bit of warmth softens the butter and the chocolate chips right back up, making them taste like they just came out of the oven ten minutes ago. It’s brilliant for serving warm with a scoop of ice cream!
I’ve never tried freezing them for long periods, honestly, because they never last that long around here! But if you needed to stash them away for a couple of months, I’d recommend wrapping individual squares tightly in plastic wrap first, then placing them all together in a freezer-safe zip-top bag. Thaw them on the counter overnight before serving.
Creative Variations for Your Chocolate Cookie Bars
While these Chocolate Cookie Bars are fantastic just as they are—pure, unadulterated chocolate goodness—sometimes you just want to shake things up a little bit, right? I treat the base recipe like a perfect canvas. You don’t want to change the fundamentals—we need that sugar ratio for chewiness—but folding in a little something extra right at the end adds a fun surprise.
My biggest rule on variations is: keep the additions easy and don’t overdo it. You only have about two cups of chocolate chips to work with, so adding too many mix-ins will stop the dough from setting right, and we don’t want dense, greasy failure on our hands!
Here are a few easy ways I like to customize these chewy bars:
- Coarse Sea Salt Sprinkle: This is my favorite low-effort modification. Right after you press the dough into the pan, take a pinch of flaky sea salt—not table salt!—and just gently sprinkle it over the top. The salty hit cuts through the richness of the chocolate chips perfectly. It makes them taste instantly gourmet, and it takes literally five seconds.
- Nutty Crunch: If you love the taste of cookies with nuts, just toss in about a cup of chopped pecans or walnuts with those chocolate chips. Make sure they are chopped small; we don’t want giant chunks poking through the dough. The crunch of the nuts mixed with the chewy cookie bar base is phenomenal. If you’re exploring other baking adventures involving nuts and chocolate, you might want to check out my chocolate chip pumpkin oatmeal cookies for inspiration!
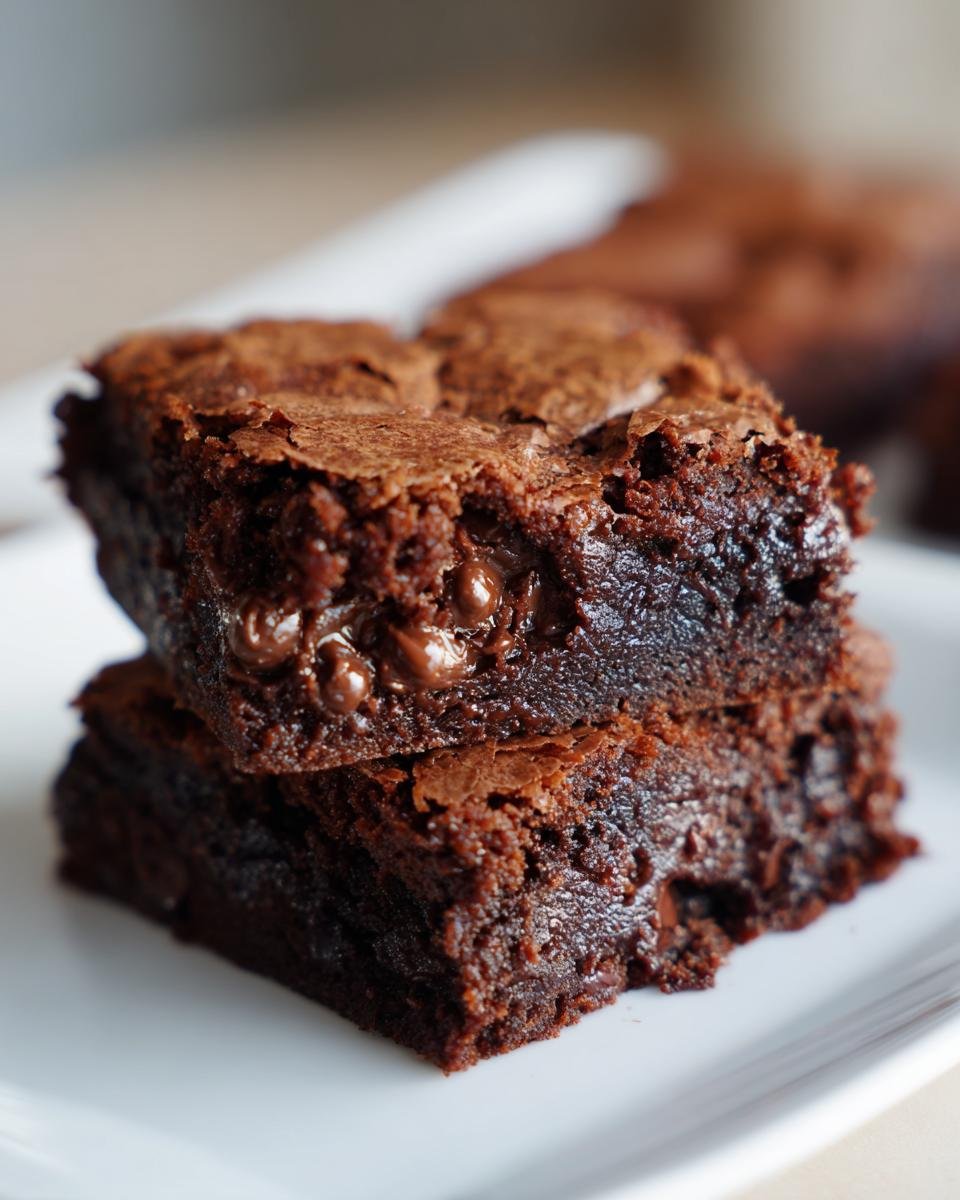
- Double The Chocolate Flavor: Why stop at semi-sweet? I often ditch about half a cup of the semi-sweet chips and replace them with dark chocolate chunks *and* a half cup of white chocolate chips. The mix of dark, sweet, and creamy melting textures when you bite into these Chocolate Cookie Bars is just incredible. It adds depth without adding extra work.
Keep these little extras simple, and you maintain that easy dessert status while feeling like a truly creative baker!
Serving Suggestions for These Easy Chocolate Cookie Bars
Okay, you’ve baked them, you’ve cooled them, and resisting eating the whole batch whole is proving difficult. Now what? These Chocolate Cookie Bars are so versatile, but honestly, pairing them with the right accompaniment just takes them to the next level from “great snack” to “must-have dessert.” I usually keep things simple because the bars themselves are so rich, but here are the pairings that always end up on my plate.
The absolute classic, can’t-go-wrong partner for these chewy bars is a big, tall glass of ice-cold milk. Seriously, there’s something about the simple, clean flavor of whole milk cutting through that rich chocolate and brown sugar that just resets your palate. It’s the way my family always ate them growing up, and I still sneak a glass while I’m cooling them down.
But if you want to get a little fancier without putting in any actual effort, you have to try them warm with ice cream. Remember how I said they taste even better slightly warm? Take one square—maybe heat it up for just 10 seconds in the microwave—and then top it with a scoop of the best vanilla ice cream you can find. The contrast between the warm, gooey bar and the freezing cold, creamy vanilla is just heavenly. It’s basically a built-in sundae!
If you’re serving them at a party or after a nice dinner, consider upgrading that ice cream to a scoop of salted caramel flavor. The saltiness mimics the sea salt topping I mentioned earlier, and the caramel marries beautifully with the molasses notes from our brown sugar base. It feels decadent but took zero extra effort on your part. Honestly, once you have these bars, a little ice cream is all you need!
If you are looking for other amazing chocolate treats to serve alongside them, you absolutely have to check out my classic chocolate chip cookie post. Sometimes you just need options, and cookies are always welcome next to bars!
Frequently Asked Questions About Chocolate Cookie Bars
I know sometimes all the instructions can feel overwhelming, even when it comes to making something as simple as these super easy dessert bars. People always have a few questions popping up about how to keep these Chocolate Cookie Bars absolutely perfect! Don’t you worry; I’ve answered the most common ones right here so you can bake with confidence and get those chewy bars exactly as they should be.
Can I use melted butter instead of softened butter in these Chocolate Cookie Bars?
Oh, I hear you asking this one a lot! While it’s tempting to melt the butter to save time, please, please try to resist. If you use melted butter, you are skipping the crucial creaming step where we beat air into the sugars. When you skip that air-beating step, the resulting Chocolate Cookie Bars end up being much denser and flatter—they become more like a thin, firm fudge rather than that glorious, light, chewy bar we are aiming for. Softened butter is key to that perfect height and texture!
How do I know when my Chocolate Cookie Bars are fully baked?
This is where people often mess up by accidentally overbaking and ending up with a dry cookie instead of a chewy bar! Don’t just set a timer and walk away. Look for visual signs: the edges of the pan should look lightly golden brown, and the very middle should look mostly set, meaning it’s not liquid shiny anymore. If you gently poke the center with your finger, it should feel firm, maybe with a tiny bit of give. Trust me, if they look *slightly* underdone when you pull them out, you’ve hit the sweet spot for the best possible chewiness once they cool down.
What is the best way to get clean cuts on my Chocolate Cookie Bars?
This is my favorite trade secret for making them look store-bought pretty! Once those bars are completely cooled—and I mean cool to room temperature, which can take an hour or two—the trick is using a warm knife. Get a nice sharp chef’s knife and run the blade under very hot water for about 30 seconds. Wipe it dry quickly, and then slice through the bar. The warmth melts just enough of that chocolate on the surface to give you a beautiful, clean line. Wipe the knife clean between every cut for the sharpest edges possible. It makes presenting these easy dessert bars so much nicer!
Estimated Nutritional Information for Chocolate Cookie Bars
Now, I know some of you are watching macros, and others are just curious how much indulgence is packed into these amazing Chocolate Cookie Bars, so I went ahead and broke down the estimated nutrition facts. Keep in mind what I always say: these numbers are based on standard recipe calculations using the ingredients listed, and they might shift a little bit depending on which brand of butter or chocolate chips you use!
We factored this out for a standard serving of one square, yielding 24 bars total. They are definitely a treat, but hey, they’re worth every single bite, right?
Here is the breakdown:
- Serving Size: 1 bar
- Calories: 220
- Sugar: 18g (That brown sugar really adds up there, but it’s the good stuff!)
- Sodium: 95mg
- Fat: 12g
- Saturated Fat: 7g
- Unsaturated Fat: 5g
- Trans Fat: 0.2g (Which is pretty low, which is great!)
- Carbohydrates: 28g
- Fiber: 1g
- Protein: 3g
- Cholesterol: 30mg
Please remember that this is just homework information! These are homemade Chocolate Cookie Bars, not diet food, but they are incredibly delicious and satisfying. Don’t let the sugar content scare you away from enjoying one of the best easy desserts ever created!
Print
Simple Chocolate Cookie Bars
- Total Time: 40 min
- Yield: 24 bars 1x
- Diet: Vegetarian
Description
Make easy, chewy chocolate cookie bars with this straightforward recipe.
Ingredients
- 1 cup (2 sticks) unsalted butter, softened
- 1 cup granulated sugar
- 1 cup packed brown sugar
- 2 large eggs
- 1 tablespoon vanilla extract
- 2 1/4 cups all-purpose flour
- 1 teaspoon baking soda
- 1/2 teaspoon salt
- 2 cups semi-sweet chocolate chips
Instructions
- Preheat your oven to 350 degrees F (175 degrees C). Line a 9×13 inch baking pan with parchment paper, leaving an overhang on the sides.
- In a large bowl, cream together the softened butter, granulated sugar, and brown sugar until light and fluffy.
- Beat in the eggs one at a time, then mix in the vanilla extract.
- In a separate bowl, whisk together the flour, baking soda, and salt.
- Gradually add the dry ingredients to the wet ingredients, mixing until just combined. Do not overmix.
- Stir in the chocolate chips.
- Press the dough evenly into the prepared baking pan.
- Bake for 20 to 25 minutes, or until the edges are lightly golden brown and the center is set.
- Let the bars cool completely in the pan before lifting them out using the parchment paper overhang.
- Cut into squares.
Notes
- For fudgier bars, use slightly less baking time.
- You can substitute milk chocolate or dark chocolate chips for semi-sweet.
- Store cooled bars in an airtight container at room temperature.
- Prep Time: 15 min
- Cook Time: 25 min
- Category: Dessert
- Method: Baking
- Cuisine: American
Nutrition
- Serving Size: 1 bar
- Calories: 220
- Sugar: 18g
- Sodium: 95mg
- Fat: 12g
- Saturated Fat: 7g
- Unsaturated Fat: 5g
- Trans Fat: 0.2g
- Carbohydrates: 28g
- Fiber: 1g
- Protein: 3g
- Cholesterol: 30mg
Keywords: chocolate cookie bars, chewy bars, easy dessert, chocolate chips, baked dessert