
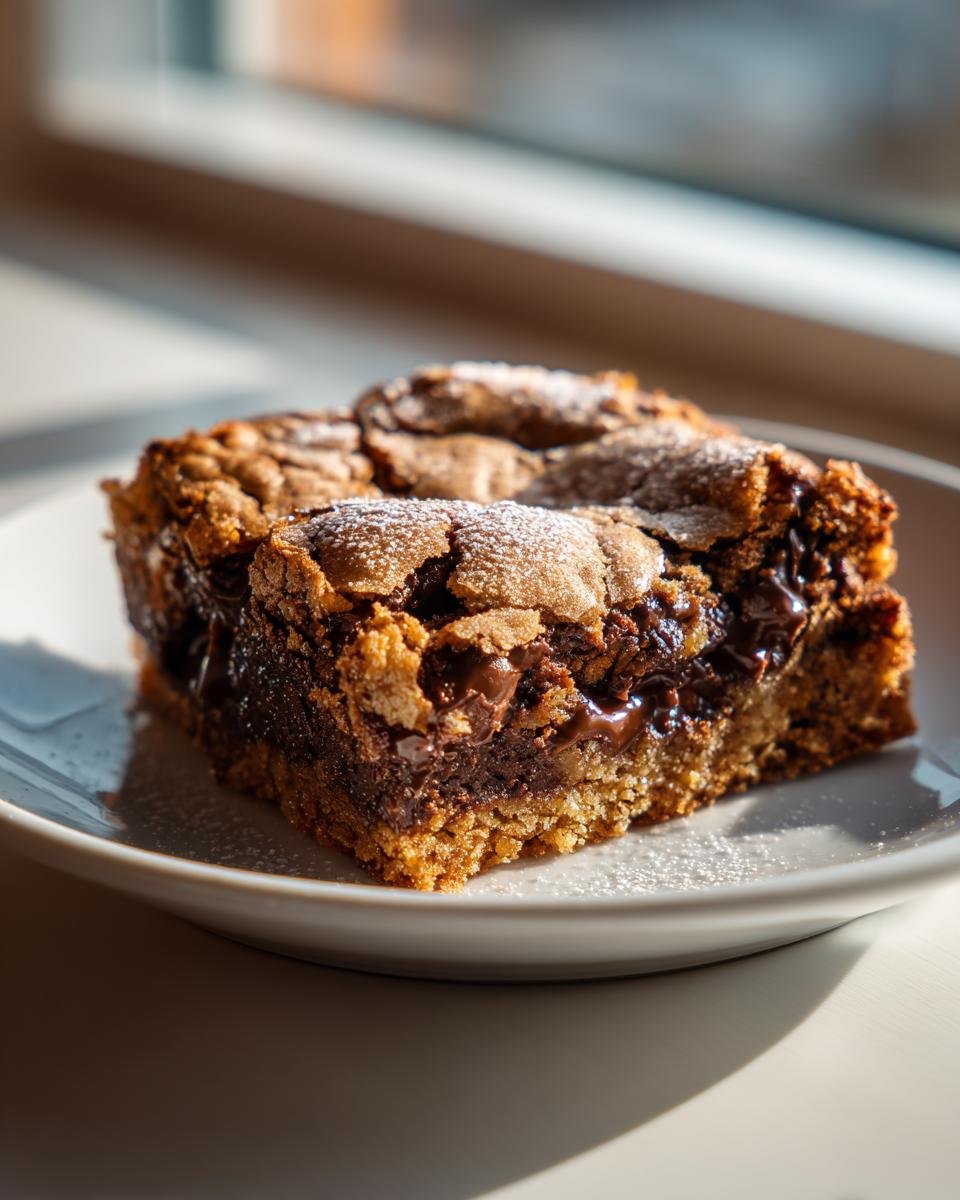
Sometimes you just don’t have the time, or frankly, the patience, for pulling out frosting bags and dealing with finicky layers. That’s why bar desserts are my absolute lifeline when the craving hits! These Chocolate Chip Cake Bars are the perfect solution because they give you everything you love about a cozy, soft cake, but with the amazing chewiness of your favorite chocolate chip cookie. It’s the best of both worlds, really.
I mean, honestly, compared to baking a whole layer cake? This recipe is a dream! We’re talking 15 minutes of prep, and you get 24 squares of pure happiness. You just mix, spread, and bake! Trust me, once you try these straightforward, buttery bars loaded with chocolate, you won’t ever look back at fussy desserts on a busy weeknight.

Why You Will Love These Chocolate Chip Cake Bars
Honestly, what’s not to love about a dessert that’s ready faster than you can decide what layer cake to make? These bars are pure magic. You get that wonderful, buttery softness, but with a satisfying chew that keeps you reaching for another square.
- They are unbelievably soft and perfectly chewy—not dry, ever!
- Prep time is seriously short, making it a fast weeknight fix.
- Everyone loves chocolate chips, so these disappear instantly at parties.
- You can even aim for slightly fudgier results, like gooey chocolate chip cookies!
It’s just such an easy win for any occasion, big or small. You’ll become addicted to this simplicity, trust me.
Essential Ingredients for Perfect Chocolate Chip Cake Bars
Okay, let’s talk ingredients because while this recipe is simple, quality really matters here! Since these bars are basically a mashup of cake and cookie, we need reliable fats and sugars to get that perfect, buttery chew. If you need a little boost on technique, check out my general guide on baking tips to make you a better baker.
The most important E-E-A-T tip I have right up front? Make sure your butter is truly softened—not melted, but easy to press your finger into. And eggs? They absolutely need to be at room temperature; cold eggs don’t incorporate right into the creamed fats.
- 1 cup (2 sticks) unsalted butter, softened
- 1 cup granulated sugar
- 1 cup packed brown sugar
- 2 large eggs (make sure they are room temp!)
- 1 teaspoon vanilla extract
- 2 1/4 cups all-purpose flour
- 1 teaspoon baking soda
- 1/2 teaspoon salt
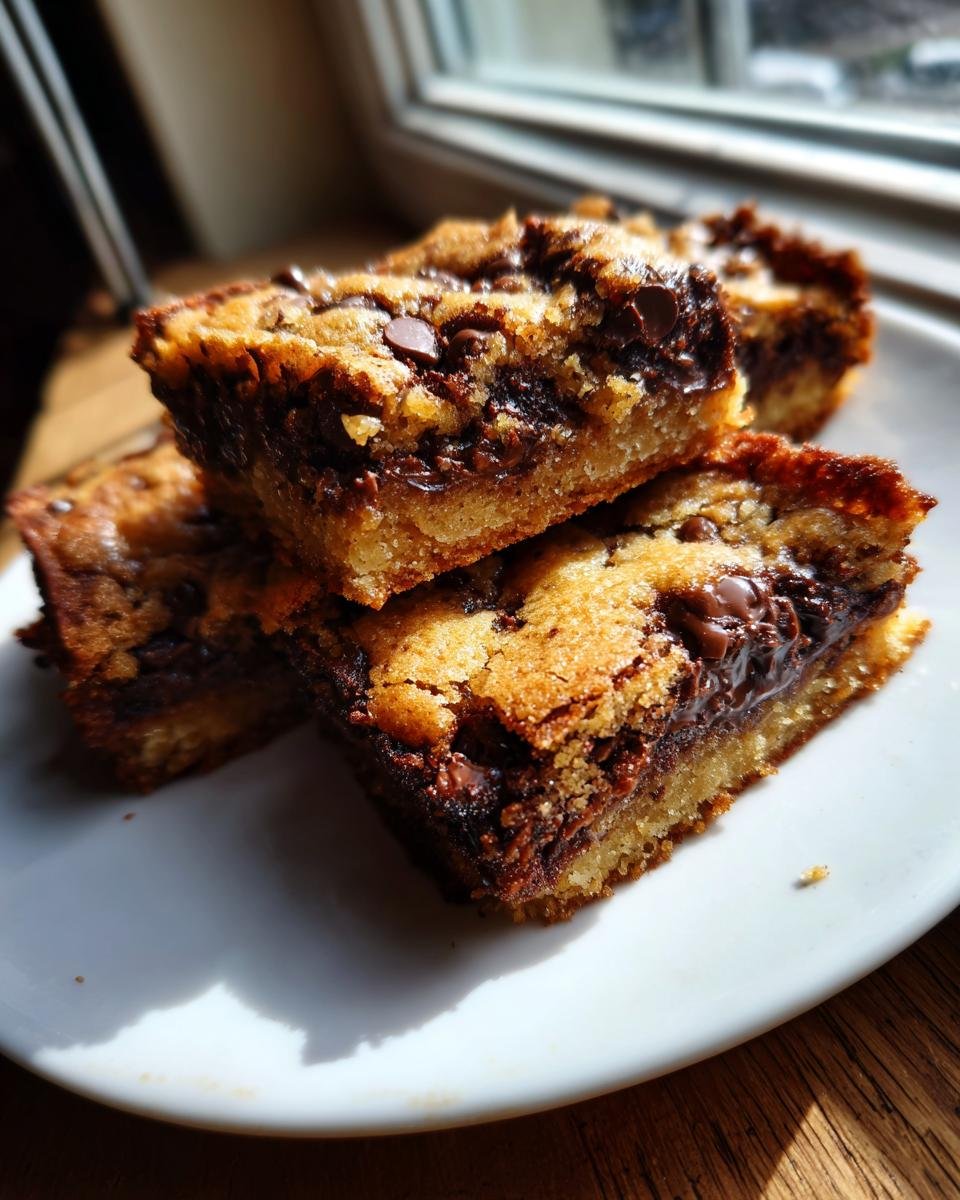
- 2 cups semi-sweet chocolate chips (don’t skimp on these!)
That’s it! Two cups of chocolate chips are non-negotiable, in my book. That’s what makes these truly spectacular.
Step-by-Step Instructions for Making Chocolate Chip Cake Bars
Making these bars is honestly so straightforward, I feel like even someone who has never baked before could manage this. My goal here is to get you a soft, chewy bar with minimal fuss. Just follow these main stages, and you’ll be smelling that lovely buttery aroma in no time!
Preparation and Oven Setup for Chocolate Chip Cake Bars
First things first, get your environment ready! We need the oven warmed up to 350°F (175°C). This prevents any shock to the batter once it goes in. Next, grab that 9×13 inch baking pan. I always thoroughly grease mine and then dust it lightly with flour. This makes sure absolutely nothing sticks while these beautiful bars are baking. Set that aside.
Creating the Rich Base for Your Chocolate Chip Cake Bars
Grab your biggest bowl because this is where the texture starts! You need to cream the softened butter, the granulated sugar, and that beautiful brown sugar together. You’re looking for something pale yellow and really fluffy—use your electric mixer or a sturdy wooden spoon and put some elbow grease into it! Once that’s looking dreamy, beat in those two large eggs, one at a time, followed by that teaspoon of vanilla extract for depth.
Combining Dry Ingredients and Folding in Chocolate Chips
Now, switch bowls for just a second. Whisk your flour, baking soda, and salt together quickly. This is crucial because it distributes the leavening agents evenly, so you don’t get weird clumps. Slowly add this dry mixture into your wet mixture, mixing only until you see the flour streaks disappear. Seriously, *do not overmix*—that is how you lose the cakey softness! Once barely combined, gently fold in those two cups of chocolate chips. Just a couple of turns is plenty.
Baking and Cooling Your Chocolate Chip Cake Bars
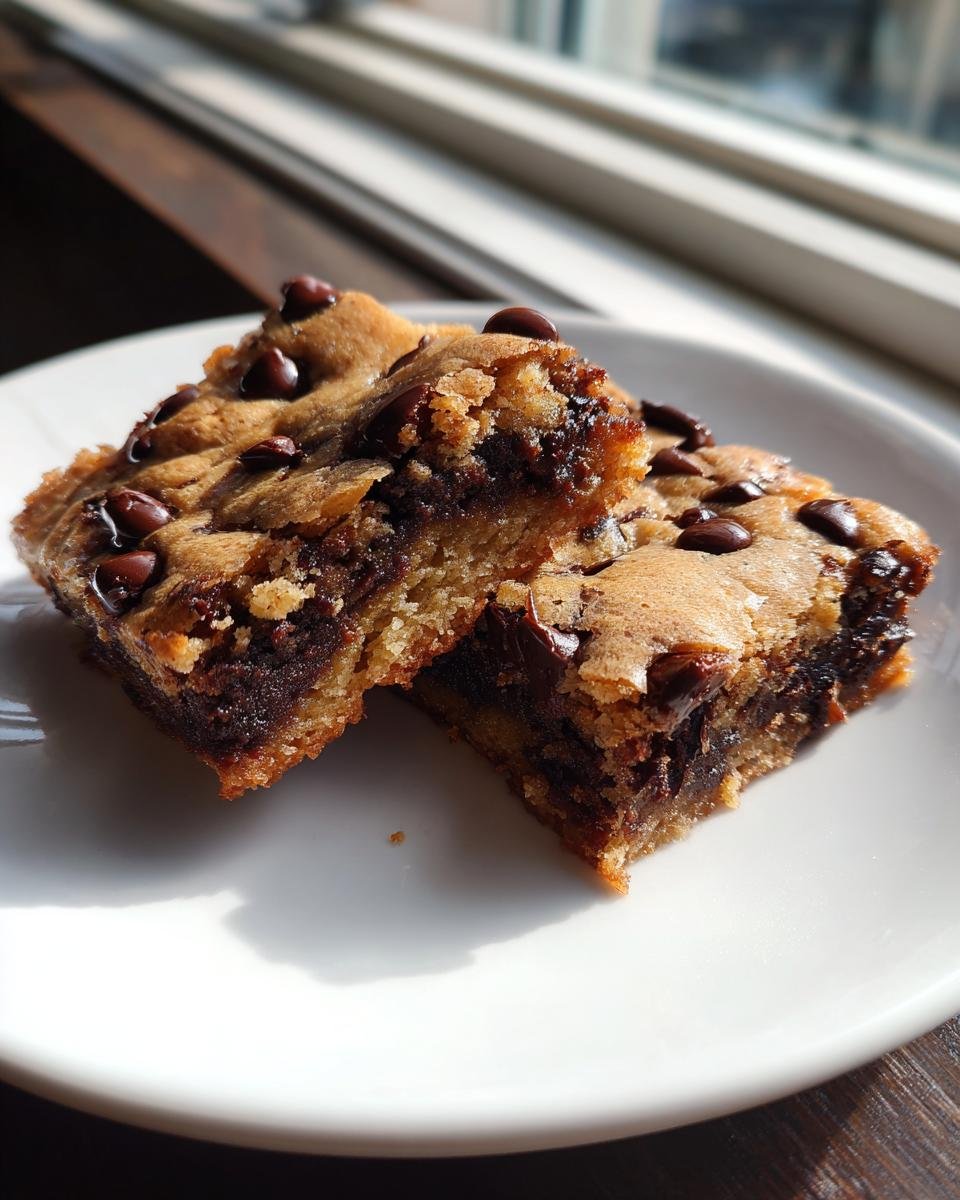
Pour that thick batter right into your prepared pan and spread it out evenly with a spatula. It’s thick, so flatten it gently. Pop it into the preheated oven for about 25 to 30 minutes. You’re looking for golden brown edges. Test it with a toothpick near the center; you want moist crumbs clinging to it, not wet batter.
Here’s the hardest part: you have to let them cool completely in the pan on a wire rack before you even *think* about cutting them. If you cut them warm, they crumble everywhere. Patience pays off; cool bars cut into perfect squares!
Tips for Achieving the Best Chocolate Chip Cake Bars Texture
Listen, getting that perfect texture—that chewy edge meeting that soft, almost cakey center—is what separates a good bar from a legendary bar. It all comes down to two main things: temperature and mixing. If you’ve struggled with bars coming out too crumbly or too tough, I’ve got the secrets right here. For a deeper dive into how technique impacts everything, check out my guide on baking tips to make you a better baker.
First, remember what I said about the butter and eggs? If those ingredients go into the mixer cold, they won’t combine properly with the sugars. You miss out on trapping all those crucial air bubbles. It results in a dense brick instead of a tender cake bar. Always give your butter and eggs a solid hour on the counter before you start!
The Golden Rule: Do Not Overmix the Flour
This is the biggest giveaway clue for anyone who wants cakey goodness! Once you add the flour mixture to the wet stuff, you switch gears completely. You aren’t aiming for smooth anymore; you are aiming for *just* combined. Overmixing develops the gluten in the flour, which is great for chewy bread but terrible for a tender bar!
Mix only until you can no longer see streaks of dry flour. Seriously, stop the mixer right there. If you see a few tiny lumps or streaks, don’t worry! They will disappear as the batter settles in the pan, and adding those chocolate chips for the final fold is generally the last movement you should make. Stop fussing with it!
How to Achieve Peak Chewiness (The Undercook Trick)
This is my personal, slightly chaotic trick for maximum chewiness, which is noted in my recipe file. If you pull these bars out of the oven just a tiny bit early—say, when the toothpick has moist crumbs attached but isn’t quite totally clean—they will set up perfectly as they cool. This gives you that wonderful, fudgy pull.
Be careful, though! We are aiming for moist crumbs, not raw batter. Pull them when the edges look beautifully golden brown and set, but the very center still looks slightly softer than the rest of the pan. They firm up beautifully while resting on the cooling rack. It’s risky, but wow, the payoff is worth the slight hesitation at the oven door!
Why Room Temperature Matters More Than You Think
I mentioned it above, but I’m saying it again because it’s that important for the texture. Softened butter traps air when creamed with sugar. Room temperature eggs emulsify properly with that creamed butter mixture. This smooth structure is what gives your **Chocolate Chip Cake Bars** their lift and keeps them from being greasy or separating. Don’t rush this prep time; it’s the foundation!
Ingredient Notes and Substitutions for Chocolate Chip Cake Bars
I always get asked about ingredient swaps, and that’s fair! Baking is personal, and sometimes you have to work with what you’ve got in the pantry. We can definitely play around with the chocolate here, but some components are sacred for getting that ‘cake bar’ hybrid texture rather than just a flat cookie.
The original recipe calls for lovely semi-sweet chips, but if that’s too dark for your crew, feel free to swap them straight up for milk chocolate chips. That just makes them sweeter! For a fun twist, maybe mix a bag of semi-sweet with a handful of white chocolate chips. They melt together beautifully.
What If I Only Have Salted Butter?
This happens to me all the time when I forget to grab the unsalted sticks! If you use salted butter in this recipe, which calls for 1/2 teaspoon of added salt in the dry ingredients, you need to cut that added salt back significantly. I would start by skipping the 1/2 teaspoon entirely. Taste the dough right after you mix the chips in—yes, I taste the dough—and if you feel it needs it, sprinkle just a tiny pinch over the top before it goes into the oven.
Using salted butter can actually add a nice brightness that cuts through all that sugar and chocolate, so don’t panic if you make the switch! Just taste as you go.
Can I Swap Out the Vanilla Extract?
Vanilla is tricky because it’s the background note that helps everything taste like *dessert*. If you are completely out, you can leave it out, but the bars will taste a bit flatter. A fun, non-vanilla swap is using a teaspoon of almond extract instead. It gives a totally different, slightly marzipan-esque flavor that pairs surprisingly well with chocolate.
If you’re looking for deeper tips on making dairy substitutes, especially if you ever need to make buttermilk, I wrote a whole rundown on make buttermilk substitutions that might help you out later!
Nut Additions: Adding Pecans or Walnuts
If you want crunch, go nuts! About a cup of roughly chopped walnuts or pecans works wonderfully here. These additions are structural, so you can treat them exactly like the chocolate chips. Make sure they are toasted first if you have the time; toasting them really wakes up their flavor, making them pop against the soft cake texture.
Just fold them in right at the very end with the chocolate chips. Don’t stress about the mixture being too crowded; these bars are sturdy enough to handle the extra bulk!
Storage and Make-Ahead Options for Chocolate Chip Cake Bars
Now, I know when you bake something this good, the question quickly becomes: How do I keep them around long enough to enjoy tomorrow? Luckily, these **Chocolate Chip Cake Bars** are fantastic keepers because of that high butter and sugar content. They are designed to last!
Storing at Room Temperature
If you plan on eating these within three or four days, the counter is your best friend. The key is making sure they stay sealed tight! Once they are completely cool—and I mean stone cold, don’t cheat this step!—place them in an airtight container. I like to stack them with a little square of parchment or wax paper between the layers. This keeps the bottoms from getting sticky or sticking to each other.
They stay perfectly soft and chewy at room temperature for about four days. Honestly, they usually don’t last that long in my house, but keeping them sealed protects them from grabbing any weird smells from the kitchen pantry.
Refrigeration and Freezing for Later
If you need them to hang around longer, the fridge works well, but I have a little warning for you: sometimes refrigeration can firm up the butter too much, making them taste a little drier than they should be. If you refrigerate them, just pull the container out about 30 minutes before you want to eat them so they can warm back up to room temperature.
For freezing? These things are freezer superheroes! Wait until they are cut into squares. Wrap each bar tightly first in plastic wrap, and then tuck those wrapped bars into a heavy-duty freezer bag. They keep beautifully for up to three months. When you need a treat, just unwrap one or two and let them thaw on the counter for an hour. It’s like having fresh-baked **Chocolate Chip Cake Bars** ready anytime!
Serving Suggestions for Your Chocolate Chip Cake Bars
Okay, once you’ve managed to let these incredible **Chocolate Chip Cake Bars** cool completely and you’ve wrestled them out of the pan in perfect squares (a victory in itself!), the next inevitable question is: What am I going to serve this with?
The beauty of these bars is they are perfect all on their own, especially served slightly warm if you sneak one out early! But, if you want to elevate the experience from a quick snack to a real dessert moment, you don’t need anything fancy.
Simple Pairings for Maximum Enjoyment
My absolute favorite way to eat these is just like my kids prefer: standing by the counter with a tall, cold glass of whole milk. The milk cuts through the richness of the butter and chocolate perfectly, and it’s just nostalgic, isn’t it? It’s classic for a reason!
For a treat after dinner, though, you seriously can’t beat ice cream. A small scoop of good quality vanilla ice cream melting slowly over a warm bar is just heaven. The cold creaminess against the warm, dense chocolate chip texture is unbeatable. If you wanted to get a tiny bit fancier, you could certainly add a drizzle of something, but always remember that the bar itself is the star here.
Dressing Them Up (If You Must!)
While these are great plain, sometimes you want a little extra something, especially if company is coming over. You could whip up a super simple topping if you’re feeling ambitious! I use a very basic recipe for vanilla frosting, which you can find the details for simple vanilla frosting right here.
But if you’re doing a drizzle instead of a full spread, just melt a couple of extra chocolate chips with a tiny splash of coconut oil—maybe a teaspoon—to make it runny. Drizzle that artfully over the cooled bars. It looks professional, but it takes zero extra effort! Honestly, though, a strong cup of coffee alongside these is often the best compliment they’ll ever get.
Frequently Asked Questions About Chocolate Chip Cake Bars
I always get a million questions about these bars, which just tells me how much everyone loves making them! Here are the most common things I hear after people try the recipe for the first time. Don’t worry if your first batch looks a little different; baking is all about learning!
Are these cake bars chewy or cakey?
That’s the million-dollar question, right? They are absolutely meant to be a wonderful hybrid! Because we use a good amount of brown sugar and make sure not to overbake them, they lean heavily toward the chewy side, especially toward the edges. But they are softer than a typical flat cookie, so they definitely have that tender cake quality inside. If you peeked at my tips above, you know I slightly underbake them for maximum chewiness!
Can I add nuts to the Chocolate Chip Cake Bars?
Yes, please! I love adding nuts, and I even gave some advice on toasting them in a previous section. Walnuts and pecans are classics. If you toss in about a cup of chopped nuts along with your chips, you get amazing pops of crunchiness. It really breaks up the buttery softness nicely! If you’re interested in other amazing chocolate treats, you should look at my recipe for classic chocolate chip cookies for comparison!
Why do my bars stick to the pan even though I greased it?
Oh, that’s the worst feeling when you pull the pan out, and half your beautiful bars are stuck to the bottom! For recipes this rich in sugar and butter, I really recommend lining the 9×13 pan with parchment paper, leaving an overhang on two sides—that way, you have natural ‘slings’ to lift the whole thing out once it’s cool. If you don’t want to use parchment, make sure you really coat the bottom and sides thoroughly with butter, flour, or even a touch of cooking spray designed for baking!
Can I use self-rising flour instead of all-purpose flour?
I wouldn’t recommend it for this specific recipe. Since we are adding baking soda separately, using self-rising flour throws off the delicate balance of leavening agents needed for this specific soft texture. Keep the flour as all-purpose flour unless you’re planning a major recipe overhaul. Sticking to the plan keeps these the perfect **Chocolate Chip Cake Bars**!
Estimated Nutritional Snapshot for Chocolate Chip Cake Bars
I know many of you are curious about the numbers, so here’s a quick rundown of what you can generally expect from one of these delicious squares. Remember, because we are using real butter and generous amounts of chocolate chips, these are definitely a treat!
This information is based on dividing the recipe yields into 24 even servings using standard ingredients. If you added nuts or used a different type of chocolate, the numbers will shift slightly, so consider this a helpful guideline rather than a hard-and-fast rule.
- Serving Size: 1 bar
- Calories: Approximately 220
- Total Fat: 12g (with 7g being Saturated Fat)
- Sugar: Around 25g
- Carbohydrates: 28g
- Protein: 3g
This is why we say they pair perfectly with a tall glass of milk—you’re getting a good hit of energy! Just enjoy them in moderation because, let’s be honest, one bar is never enough when they taste this good. Bake often and enjoy the sweet life!
Print
Chocolate Chip Cake Bars
- Total Time: 45 min
- Yield: 24 bars 1x
- Diet: Vegetarian
Description
Simple recipe for soft, chewy chocolate chip cake bars.
Ingredients
- 1 cup (2 sticks) unsalted butter, softened
- 1 cup granulated sugar
- 1 cup packed brown sugar
- 2 large eggs
- 1 teaspoon vanilla extract
- 2 1/4 cups all-purpose flour
- 1 teaspoon baking soda
- 1/2 teaspoon salt
- 2 cups semi-sweet chocolate chips
Instructions
- Preheat your oven to 350°F (175°C). Grease and flour a 9×13 inch baking pan.
- In a large bowl, cream together the softened butter, granulated sugar, and brown sugar until light and fluffy.
- Beat in the eggs one at a time, then stir in the vanilla extract.
- In a separate bowl, whisk together the flour, baking soda, and salt.
- Gradually add the dry ingredients to the wet ingredients, mixing until just combined. Do not overmix.
- Stir in the chocolate chips.
- Spread the batter evenly into the prepared baking pan.
- Bake for 25 to 30 minutes, or until the edges are golden brown and a toothpick inserted near the center comes out with moist crumbs attached.
- Let the bars cool completely in the pan before cutting into squares.
Notes
- For fudgier bars, slightly underbake them.
- You can substitute milk chocolate chips for semi-sweet.
- Prep Time: 15 min
- Cook Time: 30 min
- Category: Dessert
- Method: Baking
- Cuisine: American
Nutrition
- Serving Size: 1 bar
- Calories: 220
- Sugar: 25g
- Sodium: 100mg
- Fat: 12g
- Saturated Fat: 7g
- Unsaturated Fat: 5g
- Trans Fat: 0g
- Carbohydrates: 28g
- Fiber: 1g
- Protein: 3g
- Cholesterol: 30mg
Keywords: chocolate chip, cake bars, dessert, easy baking, sweet treat