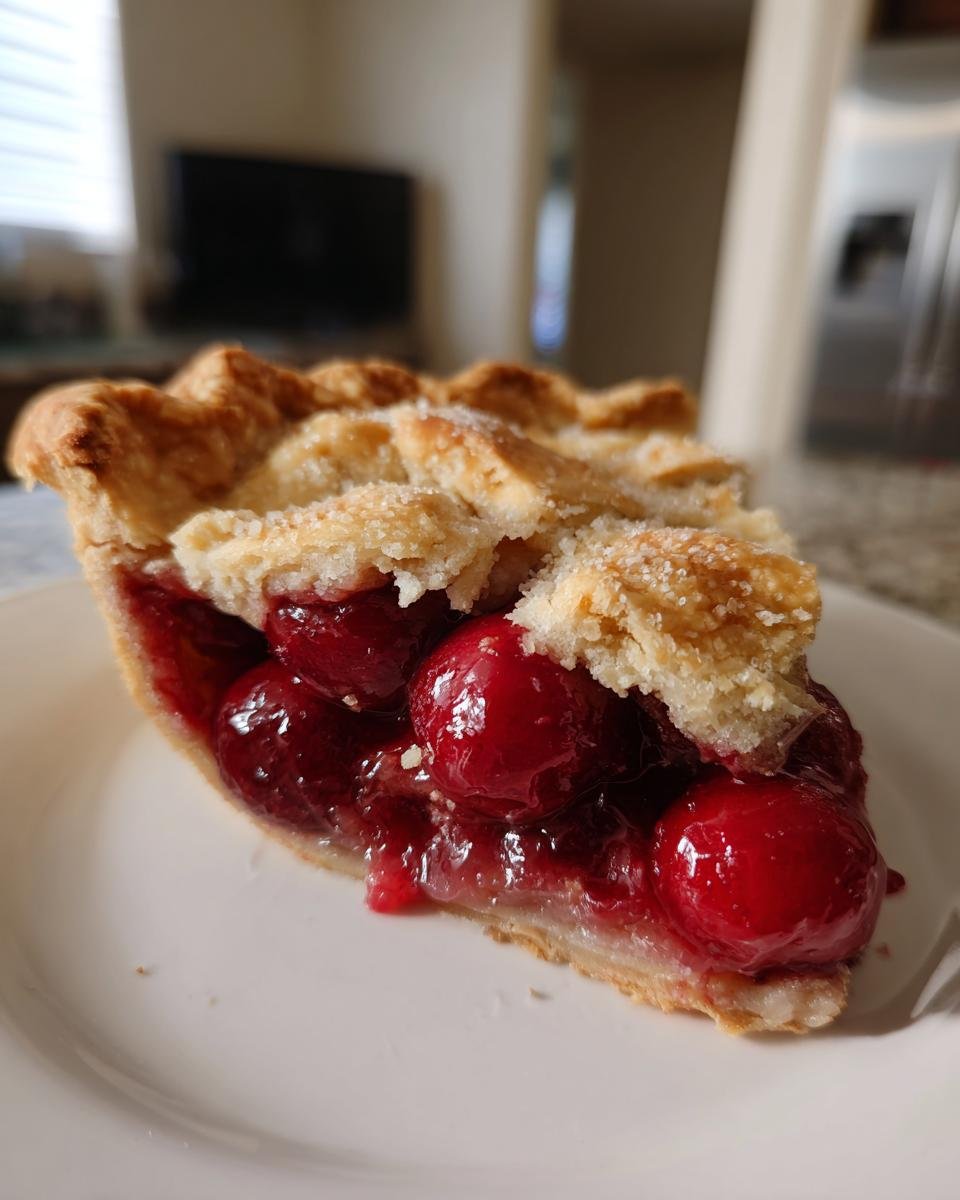
There is just something about the sight of a perfectly golden, slightly cracked pie crust that whispers home and holidays, isn’t there? For me, nothing beats the nostalgia of a classic, double-crust Cherry Pie bubbling happily on the cooling rack. I spent years wrestling with runny fillings and soggy bottoms before this recipe finally clicked. Trust me when I say this one is foolproof!
We nail the balance here: the pastry is flaky—and yes, I mean truly flaky—and the cherry filling is vibrant; it’s sweet enough to feel like a treat but has that beautiful, necessary tartness. When I finally got that first gorgeous, evenly browned edge, I felt like I’d won the baking lottery. This is the traditional American fruit pie you’ve been searching for.

Why This Classic Cherry Pie Recipe Works
It’s one thing to have a recipe; it’s another thing to have a recipe that reliably produces that gorgeous, bakery-worthy result every single time! This classic cherry pie shines because we focus on two main things: getting that pastry whisper-light and ensuring the filling sets up beautifully in the oven.
Honestly, this combination means no more weeping pies or tough crusts. It’s just pure, easy-to-make perfection guaranteed!
Perfect Flaky Pastry for Your Cherry Pie
I always tell people that the secret to wonderful pastry is keeping everything cold—I mean *freezing* cold! When that super-cold butter hits the hot oven, it steams beautifully, creating those distinct layers we all love. It’s vital that you don’t overwork the dough once you bring it out of the fridge. Keep handling minimal, and you’ll get that light, shatteringly crisp crust. For all my deep-dive tips on achieving that perfect texture, you can check out my guide on flaky pie crust secrets.
Balanced Sweet-Tart Cherry Filling
Too many recipes lean way too sweet, right? Not this one! We use just enough sugar to complement the natural tartness of the cherries. Plus, we rely on cornstarch—and we use the right amount—to thicken everything up properly while it bakes. That lemon juice is key, too; it just wakes up the cherry flavor so it doesn’t taste flat. When you pull this pie out, the filling should be thick and glossy, not runny glue!
Gathering Ingredients for the Best Cherry Pie
Okay, let’s get organized! Ingredient quality makes or breaks a homemade pie, especially one like this classic Cherry Pie where the fruit has to shine. We aren’t bringing out any fancy substitutions here; we need the basics, handled correctly. If your butter isn’t cold enough, you might as well just buy a store-bought crust, honestly!
Don’t be tempted to skip the chilling time for the dough, either. That rest period allows the gluten to relax and the butter to re-solidify. This recipe works best with either sweet or tart cherries—I usually lean toward tart cherries because they handle the sugar better, but use what you have access to!
For the Homemade Double Crust Pastry
This is where we make magic happen just using four things! Remember, the colder the better for all of these components. You need lots of good quality, cold, unsalted butter, cut into small cubes. That cubing helps it mix properly without melting. And please, use ice water—not tap water. I promise it makes a difference!
- 2 1/2 cups all-purpose flour
- 1 teaspoon salt
- 1 cup (2 sticks) cold unsalted butter, cut into cubes
- 1/2 cup ice water
For the Sweet Cherry Pie Filling
This combination guarantees a filling that’s deeply flavorful and won’t end up running all over your plate when you slice into it later. The cornstarch is non-negotiable for that perfect set! If you decide to check out my tips on other baking basics, even things like buttermilk substitutes—though not needed here—I break down ingredient replacements over here.
- 6 cups fresh or frozen pitted cherries (sweet or tart)
- 1 1/2 cups granulated sugar
- 1/4 cup cornstarch (this is the magic thickener!)
- 1 tablespoon lemon juice
- 1/4 teaspoon almond extract (just a hint for depth!)
- 1 large egg, beaten (for that beautiful egg wash on top)
Step-by-Step Instructions for Your Cherry Pie
Alright, this is the main event! Don’t panic about the steps; we’re just taking this classic Cherry Pie journey one manageable piece at a time. We start with the pastry because that needs chilling time—you can’t rush good dough! Then we whip up the filling, assemble it all, and then it’s bake time. Patience here pays off huge dividends.
If you want a truly shatteringly crisp bottom crust, here’s my little secret that I learned the hard way: heat up a sturdy baking sheet in the oven while it preheats. When you slide your pie in, put it right on that hot surface for the first 15 minutes. Wow, does that ever crisp things up!
Making and Chilling the Flaky Pastry Dough
First things first: get that flour and salt mixed in a bowl. Now, take your cubed, freezing-cold butter and cut it into the flour using a pastry blender or even your fingertips. You’re trying to smash the butter into flat, pea-sized pieces. Don’t blend it completely smooth! Once you have those coarse crumbs, drizzle in your ice water, just a tablespoon at a time, mixing until the dough barely holds together when you pinch it. Divide it into two equal disks, wrap them tight, and stick them in the fridge for at least one hour. Seriously, don’t pull them out early!
Assembling the Perfect Cherry Pie Filling
While that dough is getting nice and cold, let’s focus on flavor! Gently combine your pitted cherries—frozen are fine, just toss ’em in as is!—with the sugar, cornstarch, lemon juice, and that little bit of almond extract. Mix it just until everything is coated. You need to let this mixture sit on the counter for about 15 minutes. This resting time is when the cornstarch starts working its magic, drawing moisture out of the fruit so your filling thickens up perfectly later on. Don’t skip this little nap time!
Rolling, Filling, and Sealing the Cherry Pie
Pull one disk of dough out; it should roll easily now. Roll that into a big circle and gently ease it into your pie plate. Pour that beautiful cherry mixture right over the bottom crust. Now, roll out your second disk for the top. Lay it over, trim the edges, and crimp them tightly together—make sure it’s sealed so none of that glorious juice leaks out! Use a sharp knife to cut four or five good vents right on top so steam can escape. Then, brush that whole top crust lightly with your beaten egg wash. That’s what gives it that shiny, deep golden color!
Baking Your Double Crust Cherry Pie Correctly
Get your oven hot—425 degrees F is where we start, especially if you’re using that preheated baking sheet tip! Bake it hard for 15 minutes. This sets the crust. Then, drop the heat down significantly to 375 degrees F. Now, let it bake for another 35 to 45 minutes. You’ll know it’s done because the crust is gloriously golden brown, and when you peek through the vents, you see that cherry filling bubbling thick and slow. If you’re looking for more general advice on nailing baking temperatures, check out my baking tips page!
Expert Tips for the Ultimate Cherry Pie Crust
Look, the filling is important, but we all know the crust makes or breaks this whole Cherry Pie experience. If you follow the chilling rules, you are already winning! My biggest personal struggle years ago was handling the dough on a hot August day—it got greasy fast. My fix? I run the whole mixing bowl through the sink with cold water for a minute to chill the exterior before I start cutting in the butter.
For vent patterns, don’t just cut slits—get creative! Odd numbers look best, so try five cuts instead of four. I like to make my slits slightly curved or even cut out tiny leaf shapes using a cookie cutter if I feel fancy. It just lets the steam escape gracefully and looks so much nicer than just a straight slice. For more detailed pointers on pastry, my comprehensive guide on pie crust mastery has everything you need!
Ingredient Substitutions for Your Cherry Pie
Sometimes you look in the pantry, and you just don’t have exactly what the recipe calls for, right? Don’t let that stop you from making this fantastic Cherry Pie! We can certainly make a few smart swaps without sacrificing quality, but a couple of items are pretty essential to the final texture.
The goal here is to keep that flaky pastry working and that filling set. Let’s look at the common substitutions you might need to make.
Adapting the Cherry Pie Fruit Base
If you can’t get fresh or frozen pitted cherries, canned ones will work in a pinch! Just make sure you drain them *very* well. Since canned cherries are often packed in syrup, you’ll need to cut back on the granulated sugar you add—maybe start with just 1 cup instead of 1 1/2 cups and taste before you commit.
If you use dried cherries, you need to rehydrate them! Soak them in hot water for about 30 minutes before draining and mixing them with the other filling ingredients. Because dried fruit is more concentrated, you might even be able to reduce the sugar slightly more. Also, if you use dried cherries, you might want to add an extra tablespoon of lemon juice to keep that bright tartness!
Egg Wash Alternatives for a Golden Cherry Pie Top
That egg wash gives the top crust of our Cherry Pie that gorgeous, deep, shiny brown look, but if you have an allergy or simply ran out of eggs before baking, don’t worry!
You have a couple of great options. A simple mix of milk and a tiny pinch of salt brushed on top will still give you lovely browning, just maybe not as reflective. If you want high shine, try brushing the crust lightly with a little plain heavy cream or even a teaspoon of melted butter mixed with a tablespoon of milk. Both work beautifully to enhance the color!
Storing and Serving Your Homemade Cherry Pie
I know you’re staring at that beautiful, fragrant Cherry Pie fresh from the oven, wanting to cut into it immediately, but please, please resist that urge! If you slice it hot, all that gorgeous, thick filling is going to run out over your plate, and that’s just a sad situation for everyone involved.
You absolutely have to let it cool down so the cornstarch can firm up the juices. For storage, this pie does great on the counter under a loose covering for about two days. If it’s a super warm day, or if you know you won’t finish it quickly, pop it in the fridge, though room temp is best for texture!
Cooling Time: The Key to a Set Cherry Pie
This is non-negotiable, friends! I recommend a minimum of four hours cooling time on a wire rack after it comes out of the oven. Five hours is even better if you can wait that long. You need that time for the filling to set completely. If it’s still hot when you cut it, you’ll end up with hot cherry soup, not slices!
Once it’s cool, it should hold its shape perfectly. If you chill it overnight, it will be even firmer, which is great if you plan to serve it with ice cream!
Frequently Asked Questions About Cherry Pie
I know you might have a few quick questions rattling around after reading through this recipe for the ultimate Cherry Pie. It happens! Baking is chemistry, but it’s also gut instinct, and sometimes you just need confirmation on the small stuff before you slide that masterpiece into the oven. Here are the things I get asked most often about getting this classic fruit pie just right.
How do I prevent the bottom crust of my Cherry Pie from getting soggy?
Oh, the dreaded soggy bottom! We hate those. You have two big defenses here, and you should use both if you are worried about it. The first and best defense is preheating that baking sheet! Putting the pie right onto the hot metal for the first 15 minutes of baking shocks the bottom crust and starts cooking it fast before all that wet filling can seep in. Secondly, make darn sure your filling isn’t too watery. Did you let it rest for the full 15 minutes after mixing? That resting time lets the cornstarch grab some of the cherry liquid before it ever hits the dough.
Can I make this Cherry Pie ahead of time?
Absolutely, you can! The pastry dough is actually better made a day ahead of time because it chills nicely. Just keep those disks tightly wrapped in the fridge. If you want to bake the whole thing ahead of time, I find that a fully cooled, uncut Cherry Pie is perfect stored loosely tented with foil at room temperature for up to 24 hours. If you need longer, the fridge works, but let it sit out for an hour before slicing so the crust softens up again. For more general tips on making recipes ahead, I have a great resource on flavorful fruit pie success!
If you try this recipe and want to let me know how your crust turned out, please drop a note down below!
Estimated Nutritional Data for This Cherry Pie
Now, let’s talk about the numbers. Because this is homemade perfection, the nutrition facts can vary wildly based on how much thickener you used or exactly how much butter ended up in your crust! So, take this information with a grain of salt—or maybe a shake of sugar!
This data is based on dividing the entire classic Cherry Pie into 8 equal slices, using standard ingredient amounts as listed in the recipe. It’s helpful for tracking, but remember, real cooking has flair, and flair isn’t always perfectly measurable!
- Serving Size: 1 slice
- Calories: 450
- Sugar: 45g
- Sodium: 250mg
- Fat: 25g
- Saturated Fat: 15g
- Unsaturated Fat: 10g
- Trans Fat: 0g
- Carbohydrates: 55g
- Fiber: 3g
- Protein: 5g
- Cholesterol: 50mg
Just a quick note: because we use plenty of butter, the fat content is higher, but that’s what makes that double crust so incredibly flaky! Enjoy your slice of Americana!
Share Your Classic Cherry Pie Experience
Well, we made it! We tackled the pastry, we perfected the sweet-tart filling, and we baked a gorgeous, bubbly Cherry Pie! I truly, truly hope you love pulling this slice of tradition out of your oven. There is nothing better than hearing from you folks about how it turned out!
Did the crust shatter just the way you wanted? Was the almond extract just the right touch? Don’t be shy! Please head down to the comments section below and leave a star rating for this recipe. It helps me know what’s working well and keeps me excited to share more family favorites.
If you snapped a photo while you were enjoying your dessert—maybe sneaking a slice while it was still slightly warm (I won’t tell!)—I’d love to see it! You can always share your culinary triumphs with me. If you ever need to get in touch about substitutions or have a burning question that wasn’t answered above, my contact page is right here!
Thanks so much for baking with me today. Happy eating!
Print
Classic Cherry Pie
- Total Time: 105 min
- Yield: 8 servings 1x
- Diet: Vegetarian
Description
A recipe for a traditional double-crust cherry pie.
Ingredients
Scale
- 2 1/2 cups all-purpose flour
- 1 teaspoon salt
- 1 cup (2 sticks) cold unsalted butter, cut into cubes
- 1/2 cup ice water
- 6 cups fresh or frozen pitted cherries (sweet or tart)
- 1 1/2 cups granulated sugar
- 1/4 cup cornstarch
- 1 tablespoon lemon juice
- 1/4 teaspoon almond extract
- 1 large egg, beaten (for egg wash)
Instructions
- Prepare the pie crust: Combine flour and salt in a bowl. Cut in the cold butter until the mixture resembles coarse crumbs. Gradually add ice water until the dough just comes together. Divide the dough in half, flatten into disks, wrap, and chill for at least 1 hour.
- Prepare the filling: In a large bowl, mix cherries, sugar, cornstarch, lemon juice, and almond extract. Let stand for 15 minutes.
- Preheat your oven to 425 degrees F (220 degrees C).
- Roll out one dough disk and place it in a 9-inch pie plate. Trim the edges.
- Pour the cherry filling into the bottom crust.
- Roll out the second dough disk and place it over the filling. Crimp and seal the edges. Cut several slits in the top crust for venting.
- Brush the top crust with the beaten egg wash.
- Bake for 15 minutes at 425 degrees F. Reduce the oven temperature to 375 degrees F (190 degrees C) and continue baking for 35 to 45 minutes, or until the crust is golden brown and the filling is bubbly.
- Cool completely on a wire rack before slicing.
Notes
- If using frozen cherries, do not thaw them before mixing with the sugar and starch.
- For a crispier bottom crust, place the pie plate on a preheated baking sheet during the first 15 minutes of baking.
- Prep Time: 45 min
- Cook Time: 60 min
- Category: Dessert
- Method: Baking
- Cuisine: American
Nutrition
- Serving Size: 1 slice
- Calories: 450
- Sugar: 45
- Sodium: 250
- Fat: 25
- Saturated Fat: 15
- Unsaturated Fat: 10
- Trans Fat: 0
- Carbohydrates: 55
- Fiber: 3
- Protein: 5
- Cholesterol: 50
Keywords: cherry pie, double crust, fruit pie, homemade pastry, sweet dessert