
Oh my gosh, stop what you are doing! If you think you know chocolate cake, wait until you try this one. This isn’t just any dessert; it’s pure, melt-in-your-mouth indulgence that frankly, feels illegal to eat this quickly. I spent almost a year trying to nail a chocolate cake that would satisfy my need for density without relying on anything wheat-based. My early attempts were disastrous—either too crumbly or just a dense puck!
But I cracked the code! This is the recipe for the most unbelievably rich, fudgy, and truly decadent Flourless Chocolate Cake you will ever bake. It’s naturally gluten-free, which is wonderful, but honestly, you won’t even notice what’s missing because the pure dark chocolate flavor hits you first. I used to save this just for birthdays, but now I make it whenever I need a serious chocolate fix. Trust me, it comes together in under an hour of active time!
Why This Flourless Chocolate Cake Recipe Stands Out
I’ve tried using almond flour substitutes and lentil flours, but nothing beats the simplicity and intensity of this cake. This recipe strips everything back so you get pure, unadulterated chocolate magic. It’s my go-to when I want to impress, especially since it’s naturally gluten-free!
- The texture is impossibly rich, almost like a dense fudge layer floating on air.
- It relies on technique, meaning less expensive specialty flour needed.
- The dark chocolate flavor cuts through beautifully—it’s sophisticated without being fussy.
If you’re looking to up your baking game, check out some foundational tips to make you a better baker first; it really helps with steps like this! It really helps with steps like this!
Achieving the Perfect Flourless Chocolate Cake Texture
The structure of this gorgeous cake comes entirely from the eggs, that’s the secret sauce! We whip the whites until they are stiff enough to hold their shape, and that trapped air is what gives us lift instead of flour. It’s amazing how much powerhouse structure you can get from just four eggs when mixed correctly. This reliance on eggs is why we have to be so gentle when folding!
Essential Ingredients for Your Flourless Chocolate Cake
You only need a handful of things for this cake, but let me tell you, the quality of those few ingredients makes a world of difference. Since we aren’t masking anything with flour, these items have to sing! Don’t be tempted to skimp here, especially on the chocolate—it’s the star of the show.
Here is exactly what you need to gather before you start melting anything:
- 8 ounces bittersweet chocolate, chopped into small pieces—this is important for quick melting!
- 8 tablespoons unsalted butter, cut into a few cubes so it melts evenly.
- 4 large eggs, separated (we need those yolks and whites to be buddies later, but not yet).
- 1/2 cup granulated sugar—keep this handy for the yolks and the whites.
- 1 teaspoon vanilla extract—the warm hug that balances the dark chocolate.
- A tiny pinch of salt—don’t skip this; it makes the chocolate taste even chocolatier!
Ingredient Notes and Substitutions for Flourless Chocolate Cake
Alright, let’s talk specifics, because this is where people trip up. For the chocolate, I insist on using bittersweet. If you use semi-sweet, you’ll get something nice, sure, but for the ultimate decadent Flourless Chocolate Cake experience, you need that slightly bitter edge to cut through the richness. Look for something with at least 60% cocoa solids, if you can.
Also, a huge, huge tip: make sure your eggs are at room temperature! Cold eggs just don’t whip up as nicely, especially the whites. If your eggs are cold, they won’t incorporate air properly, and that air structure is literally holding the cake up. Pop them out of the fridge about an hour before you plan to bake, or put them in a bowl of warm (not hot!) water for about ten minutes. It’s a small step that makes a massive difference for this cake.
Gathering Equipment for the Best Flourless Chocolate Cake
Okay, before we dive into the actual mixing, let’s make sure you have your little workstation ready. Because this cake moves fast once we start whipping those egg whites, you don’t want to be scrambling for bowls mid-process. I learned that the hard way—lots of overmixed, sad batter back in the day!
You don’t need a fancy stand mixer for this, though if you have one, that works great for the whites. For me, hand tools are often faster because I don’t have to drag out the big machine! Make sure you have these essentials close by:
- One 8-inch round cake pan. This size is crucial for getting the right height and baking time.
- Plenty of parchment paper. You cannot skip lining the bottom! I mean it, or you’ll be scraping this fudgy goodness off the metal forever.
- A couple of good mixing bowls—one medium one for melting the chocolate and one large one for the batter.
- A small saucepan if you plan on melting the chocolate over a double boiler setup (which I always recommend).
- A sturdy whisk for the yolks and sugar.
- A flexible rubber or silicone spatula. This is the MVP tool for gently folding in those egg whites without deflating all your hard work.
Having everything prepped and ready to go means the transition from melting chocolate to folding batter is smooth, and that’s key to getting that beautiful, airy finish on your Flourless Chocolate Cake.
Step-by-Step Instructions to Make Flourless Chocolate Cake
Alright, this is the main event! Don’t be intimidated by the steps. Just take your time, follow the order, and remember that folding gently is the name of the game. I always turn my oven on first thing, even before I start measuring anything, because we need it sitting at 350 degrees F (175 degrees C) nice and ready.
Also, make sure you prep your 8-inch round cake pan right away! Grease it well, and then cut a circle of parchment paper to fit the bottom perfectly. This cake is sticky—seriously sticky—so that parchment is your best friend. You’re aiming for an outcome where the edges look set when you pull it out, but the center still feels a little wobbly, almost soft. Remember, this beautiful cake sinks as it cools; that’s normal and expected!
If you’re doing something complicated with your eggs, check out this tip so you don’t make one specific mistake that ruins your bake!
Melting and Combining the Chocolate Base for Flourless Chocolate Cake
For melting, please, please use a makeshift double boiler. Set your heatproof bowl over a saucepan that has just an inch of simmering water—don’t let the bottom of the bowl touch the water, or you’ll scorch that beautiful chocolate! Stir gently with a wooden spoon until everything—the 8 ounces of chocolate and the 8 tablespoons of butter—is one smooth, glossy pool of deliciousness. When it’s perfect, take it off the heat and let it hang out for just a few minutes to cool down a touch.
While that cools, get your yolks ready. Whisk the egg yolks, your sugar, and vanilla extract together in a separate bowl until they look pale yellow and feel thick when you lift the whisk. Now, slowly stream the slightly warm chocolate mixture into the yolks while whisking constantly. This merging step needs your attention so you don’t scramble the yolks!
Whipping Egg Whites to Stiff Peaks for Your Flourless Chocolate Cake
This is where the structure builds! Grab a completely clean bowl—and I mean spotless. Any trace of fat or yolk in there will stop those whites from whipping up big and beautiful. Add your egg whites and that tiny pinch of salt.
You’re going to beat them until you reach stiff peaks. What does that look like? When you lift the whisk straight up, the peaks should stand up tall and hold their perfectly sharp point without flopping over at all. They shouldn’t look wet or floppy; they should look proud and firm!
The Art of Folding: Achieving Lightness in the Flourless Chocolate Cake Batter
This step separates the perfect cake from the sad, flat one. We have to incorporate those airy whites without knocking all the air out after all that hard work!
First, take about a third of those stiff egg whites and dump them right into the chocolate base. You can mix this third in pretty vigorously, don’t worry. This is called ‘sacrificing’ the first batch; it loosens up that heavy chocolate mixture.
Then, add the rest of the whites in two batches. This time, you must be gentle! Use your spatula to cut down the middle of the bowl, scrape along the bottom curve, and gently lift the mixture up and over. Turn the bowl a little bit and repeat. Stop folding the second you no longer see streaks or pockets of pure white. Seriously, under-mixing the fold is better than overmixing here. Pour that glorious batter into your prepared pan and get it into that preheated oven for about 30 to 35 minutes.
Tips for a Successful Flourless Chocolate Cake Bake
Even with perfect technique, this cake is special because it changes as it cools—you have to expect the unexpected! The primary thing to know is that this gorgeous, dark, dense bake will sink right in the middle of the pan after you pull it out. Don’t panic! That sinking action is what creates that lovely, deeply fudgy center we are chasing after. If you want a cake that stays perfectly flat, this recipe isn’t it, and that’s okay!
Let the cake cool completely right there in the pan on a wire rack. Trying to move it too soon means you risk tearing its delicate structure. Once it’s totally cool—and I mean totally cool, maybe even let it chill for an hour—then you can carefully run a thin knife around the edge before inverting it onto your plate. I’ve found that if you try to rush this cooling step, you’ll end up with chocolate shards everywhere!
Also, have you ever struggled with getting enough flavor bang out of your ingredients? I have a secret spice blend trick for savory bakes that makes a huge difference, and using that same concept (maximizing flavor!) helps tremendously when you only have a few ingredients, like in this chocolate cake. Check out how I boost flavor in my 4-ingredient orange chicken—it’ll make you think differently about your pantry! It’ll make you think differently about your pantry!
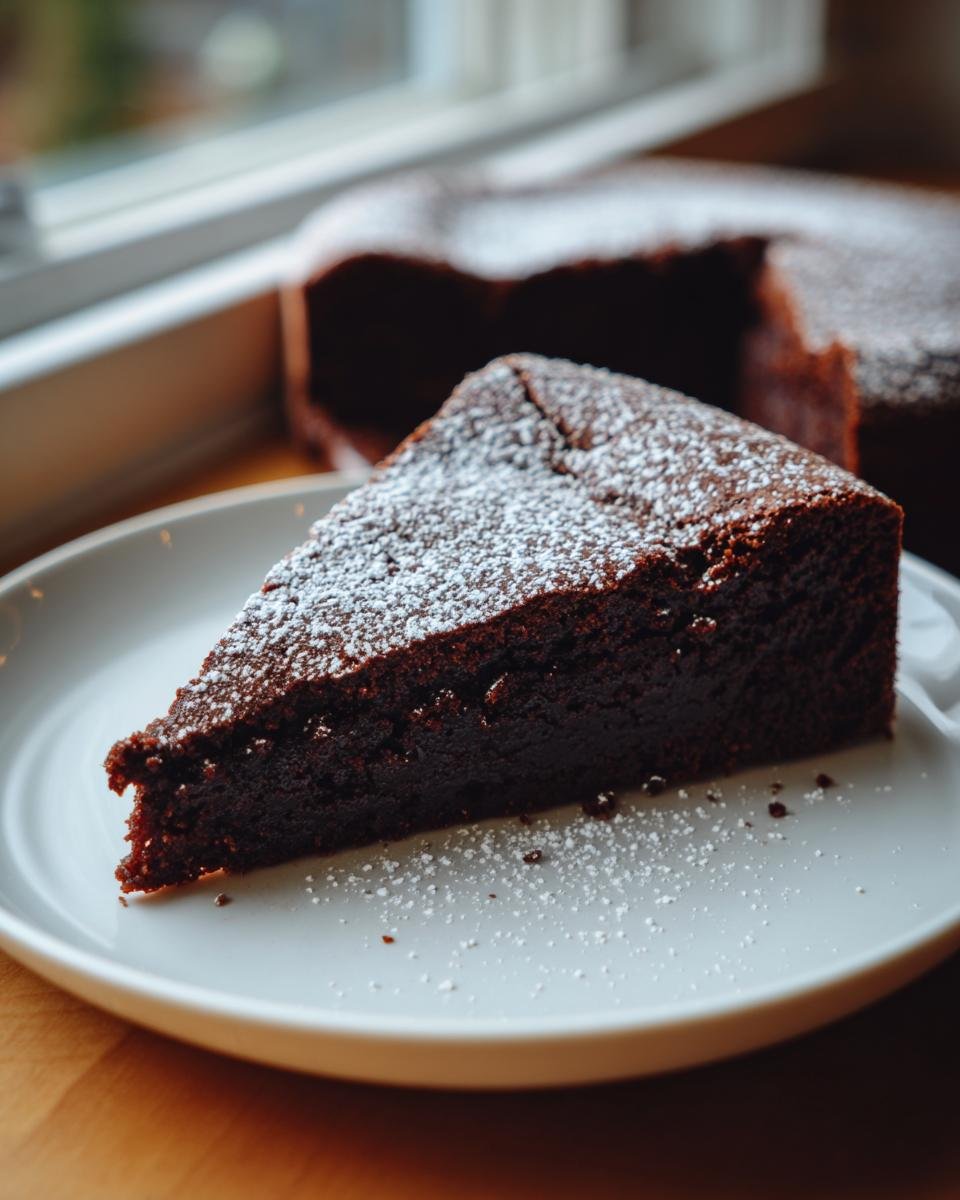
For the simplest finish, which I really love because it lets the chocolate shine, just dust the top lightly with powdered sugar right before serving. It gives it that elegant, dusty look, like a fresh snowfall on dark velvet. Of course, you can add a few raspberries on top too, but that simple sugar dusting is classic!

Serving Suggestions for Your Decadent Flourless Chocolate Cake
Now that you have this deeply rich, gorgeous cake cooling, we have to talk about what’s going onto that plate next to it! Because this Flourless Chocolate Cake is so intense on its own—it’s practically pure chocolate ganache in cake form—you need toppings that provide a little brightness or a beautiful textural contrast.
I almost never serve this cake plain. It deserves a royal send-off! My favorite thing in the world is a big dollop of barely sweetened whipped cream. You want the cream to still taste milky and airy, so you don’t want to load it up with sugar. That lightness cuts right through the bittersweet intensity of the cake.

But if you want to go next level, a vibrant fruit sauce is just heavenly. If you’re feeling fruit-forward, a quick homemade raspberry sauce really sings next to dark chocolate. It only takes a few minutes to make! You can follow my simple instructions for a really tasty strawberry sauce, just swap in raspberries or cherries and it works like a charm.
If you want elegant sophistication without the fuss of a sauce, try this: dust the top lightly with powdered sugar (as we discussed!), and then scatter a few fresh raspberries or thinly sliced strawberries around the plate. The burst of tartness from the fruit cleanses your palate after every rich bite. You won’t believe how sophisticated it looks!
Storing and Reheating Your Flourless Chocolate Cake
Because this cake is so concentrated and doesn’t have the benefit of flour to dry out, storing it correctly is key to keeping that unbelievably fudgy texture intact. Honestly, this Flourless Chocolate Cake tastes even better the next day—if you can resist eating it all in one sitting!
When it comes to storage, you want to protect it from the air. Air is the enemy of moist desserts! Once the cake is completely cool (remember, we let it chill down fully after it sinks), I carefully cover it right in the pan with plastic wrap. If you’ve inverted it onto your serving plate, cover the whole thing tightly with a cake dome or just tent some plastic wrap over it, making sure the plastic doesn’t actually touch the chocolate surface—that causes sticking, and we don’t want that mess!
You have two options for keeping it fresh:
- Room Temperature: If your kitchen isn’t too hot or humid, it’s perfectly happy sitting covered on the counter for a day or two. It stays soft and ready to eat instantly.
- Refrigeration: If you need it to last longer—say, up to five days—the fridge is the spot. Just know that it will firm up significantly when chilled because of all that butter and chocolate!
Bring it Back to Perfection
If you store it in the fridge, you absolutely cannot serve it straight out of there. It will slice like a block of cold fudge, which isn’t what we want for this decadent dessert. You need to bring it back to life first!
My rule is simple: if you remember, pull it out of the fridge at least an hour—maybe even two if it’s a warm day—before you plan on serving it. Let it sit on the counter, still covered, for that time. It warms up just enough for the texture to soften back to that beautiful, sliceable, nearly-gooey consistency we worked so hard for.
Reheating individual slices is also an option, but you have to be gentle. I would wrap a small slice loosely in foil and put it in a very low oven—maybe 250 degrees F—for just five to seven minutes. That little bit of warmth brings the chocolate right back up to a molten state. Never microwave it—the microwave just cooks the sugar unevenly and can make the edges tough. Keep it low and slow if you must reheat!
Frequently Asked Questions About Flourless Chocolate Cake
Baking a specialized cake like this sometimes brings up a few unique questions! You know how it is—you get halfway through melting all that gorgeous bittersweet chocolate, and suddenly you think, “Wait, what about this ingredient?” Don’t worry, I’ve been there, and I’ve figured out the little quirks of this recipe over the years. Most people are just thrilled it’s a naturally gluten-free recipe, which is a huge bonus!
Here are the things folks ask me most often about this rich chocolate dessert:
Is this Flourless Chocolate Cake truly gluten-free?
Yes, absolutely! That’s one of the best things about it. If you look at our ingredient list, we don’t use a drop of wheat flour—or any flour for that matter! The structure comes entirely from the eggs and the incredible richness of the melted chocolate itself. As long as you ensure your chocolate is pure and doesn’t have any gluten cross-contamination warnings (which is rare, but good to check!), you are completely safe with this Flourless Chocolate Cake.
Why did my Flourless Chocolate Cake sink in the middle?
Oh, my dear baker, if your cake sank, that means you did it RIGHT! This is the single most common thing people worry about, and I want you to breathe easy. Unlike regular cakes, which have flour to build a stable structure that sets hard while baking, this cake is essentially a giant, baked ganache held up by whipped air. When it cools, that air contracts, and the center sinks down beautifully.
That sinking creates that signature crater, which is honestly the perfect spot to dust with powdered sugar or spoon on some homemade raspberry sauce later! If it stays puffed up like a mushroom, something went wrong, or maybe you accidentally left too much flour in the bowl! Trust the process; sinking equals fudgy perfection in this recipe.
Can I make this Flourless Chocolate Cake ahead of time?
You absolutely can! In fact, I think it’s better made ahead. This is one of those dense chocolate desserts that improves overnight. The flavors of the dark chocolate really have time to deepen and marry once the cake has rested. Once it’s completely cooled and settled (remember, let it sink!), I cover it tightly and store it at room temperature if serving the next day, or pop it in the fridge for up to five days. Just remember to let it warm up a little before slicing so it returns to that soft, melt-in-your-mouth texture!
Can I substitute the bittersweet chocolate?
Yes, you can substitute, but only if you are careful. If you use semi-sweet chocolate, the cake will be noticeably sweeter and less complex. Since this cake is basically chocolate concentrated, the quality matters a ton! If you want to use dark chocolate that is 70% cocoa, that is wonderful—it will be richer and slightly less sweet, which I adore. However, if you go too far into the super-bitter realms (like 85%+), you might confuse the chemistry a bit, so stick to that 60-70% range for the best results when whipping up this gluten-free cake.
Estimated Nutritional Information for Flourless Chocolate Cake
Now, I know some of you are watching macros, and some of you just want to know what you’re diving into, so here is the estimated nutritional break-down for one slice of this pure chocolate heaven. Remember, since we are dealing with high-quality bittersweet chocolate and lovely butter, it is going to be rich, alright? It’s totally worth every single bite, though! Don’t let the calorie count scare you off when you’re already this deep into baking perfection.
These figures are based on an 8-serving yield, assuming you slice it nicely and don’t sneak any extra bites while serving. Keep in mind that if you add a giant mountain of whipped cream or a thick layer of raspberry sauce, those numbers are going to jump up, so measure your toppings!
Here’s the quick look:
- Calories: Right around 350 per slice.
- Fat: About 25 grams. Remember, a lot of this fat is coming from the beautiful butter and rich cocoa solids, not cheap oils!
- Carbohydrates: Roughly 30 grams.
- Protein: We get a nice little boost here, around 7 grams, all thanks to those four big eggs!
- Sugar: Just about 25 grams.
- Fiber: We sneak in about 3 grams of fiber from the cocoa solids, which is a nice little bonus.
- Sodium: Quite low, around 50mg.
Just a little disclaimer, because I’m not a certified nutritionist running a lab over here! These numbers are estimates based on standard ingredient densities. If you decide to use milk chocolate instead of bittersweet, or if your butter brand is slightly different, your final numbers will shift a bit. But honestly, when you’re enjoying a magnificent piece of Flourless Chocolate Cake, worrying too much about micronutrients is just missing the point, am I right? Just enjoy the richness!

Flourless Chocolate Cake
- Total Time: 50 min
- Yield: 8 servings 1x
- Diet: Gluten Free
Description
A rich, dense chocolate cake made without any flour.
Ingredients
- 8 ounces bittersweet chocolate, chopped
- 8 tablespoons unsalted butter
- 4 large eggs, separated
- 1/2 cup granulated sugar
- 1 teaspoon vanilla extract
- Pinch of salt
Instructions
- Preheat your oven to 350 degrees F (175 degrees C). Grease and line the bottom of an 8-inch round cake pan with parchment paper.
- Melt the chocolate and butter together in a heatproof bowl set over a saucepan of simmering water, stirring until smooth. Remove from heat and let cool slightly.
- In a separate bowl, whisk the egg yolks, sugar, and vanilla extract until pale and thick. Stir the melted chocolate mixture into the egg yolk mixture.
- In a clean bowl, beat the egg whites with the salt until stiff peaks form.
- Gently fold one-third of the egg whites into the chocolate mixture to lighten it. Then, fold in the remaining egg whites until just combined. Do not overmix.
- Pour the batter into the prepared cake pan.
- Bake for 30 to 35 minutes, or until the edges are set and the center is slightly soft.
- Let the cake cool completely in the pan on a wire rack. The cake will sink as it cools.
- Invert the cake onto a serving plate before serving.
Notes
- Dust with powdered sugar before serving for a simple finish.
- For an extra rich flavor, use high-quality dark chocolate.
- Prep Time: 15 min
- Cook Time: 35 min
- Category: Dessert
- Method: Baking
- Cuisine: American
Nutrition
- Serving Size: 1 slice
- Calories: 350
- Sugar: 25
- Sodium: 50
- Fat: 25
- Saturated Fat: 15
- Unsaturated Fat: 10
- Trans Fat: 0
- Carbohydrates: 30
- Fiber: 3
- Protein: 7
- Cholesterol: 150
Keywords: flourless chocolate cake, gluten free cake, dark chocolate dessert, rich chocolate cake