
Oh, there’s just nothing that beats the moment you pull a fruit pie out of the oven, and the kitchen instantly smells like warm sugar and summer berries, right? I’m telling you, this simple **Blackberry Pie** is my absolute go-to when I want true comfort food without all the fuss. Forget those complicated bakery versions; we’re going back to basics here.
The entire secret, honestly, lies entirely in the crust. I spent ages perfecting how to get that crust flaky—not tough, not soggy, but perfectly flaky—and I’ve hammered out the steps so you don’t have to guess. This straightforward recipe focuses on nailing that pastry foundation so the sweet, tart filling can truly shine. If you’ve ever been intimidated by pie making, trust me, this is the recipe that’s going to change your mind. You’ll be serving up these beautiful, bubbly pies all summer long!
Why This Blackberry Pie Recipe Stands Out
What makes this the only **Blackberry Pie** recipe you’ll ever need? Frankly, it’s the confidence you get when you bake it. We focus on making sure you succeed!
- The crust is super simple—no fancy pastry skills needed to get those amazing flakes.
- We boost the filling flavor so you get that intense, natural blackberry taste every single time.
- And beautifully golden brown edges? They just happen, every time, making it look like you spent hours!
If crust worries have kept you away from baking pies, you should totally check out some general tips on making you a better baker before you start. It really doesn’t take much to get amazing results!
Essential Ingredients for Your Blackberry Pie
Gathering your ingredients is the easy part of this recipe, but paying attention to how you prep them makes all the difference in your final **Blackberry Pie**. You absolutely must use cold butter and ice water for the pastry—I can’t stress that enough! If your butter melts even a little, you’re losing those precious layers.
- 2 1/2 cups all-purpose flour (This is the backbone for our pastry!)
- 1 teaspoon salt
- 1 cup (2 sticks) cold unsalted butter, cut into cubes (Seriously, keep this chiled!)
- 1/2 cup ice water (Ice water equals flaky!)
- 6 cups fresh or frozen blackberries (If you use frozen, don’t thaw them!)
- 1 1/2 cups granulated sugar
- 1/4 cup cornstarch (This thickens the filling beautifully.)
- 1 tablespoon lemon juice (Just a splash for brightness.)
- 1 large egg, beaten (We need this for that gorgeous, shiny egg wash on top.)
If you ever wondered about swapping out dairy ingredients, I have some great reading on buttermilk substitutions, although for this classic pie crust, stick to the butter!
Crafting the Perfect Flaky Crust for Your Blackberry Pie
Listen, the crust is where most people mess up their amazing **Blackberry Pie**, but not you! We’re going slow and focusing on keeping things cold. You mix the flour and salt, and then here’s the crucial part: you cut in that cold butter. I mean *cold*. You want chunks—pea-sized crumbs are great, but pea-sized *chunks* are better for real flakiness. Use your fingers, a pastry blender, or even two knives; just don’t let the butter melt!
When you add the ice water, be gentle. You’re just trying to bring the shaggy mess together into a dough. Stop mixing the second it holds its shape. Overworking this pastry is the fastest way to end up with a tough, biscuit-like bottom instead of flaky layers. Once it’s barely formed, split it in two, flatten those babies into disks, wrap them up tight, and get them into the fridge! That chilling step locks in the flakiness we’re working so hard for.
And here’s a little trick I learned the hard way for baking the final **Blackberry Pie**: keep an eye on those edges while it’s baking. If they start looking darker than you’d like when the filling is still cooking, just grab a little strip of aluminum foil and gently drape it over the rim. It protects the beautiful edge without stopping the bake!
Chilling Time: The Key to a Tender Blackberry Pie Crust
Seriously, do not skip setting those dough disks in the fridge for at least an hour. That hour lets the gluten relax after all that mixing we did. If you try to roll it out warm, it fights you, shrinks in the oven, and won’t flake nicely. A well-rested dough means a tender, flaky crust for your stellar **Blackberry Pie**!
Assembling and Baking the Ultimate Blackberry Pie
Okay, the dough is perfectly chilled—now for the fun part: filling it up! Take one disk out of the fridge and roll it gently on a floured surface until you have a nice big circle to fit your 9-inch pie plate. Slide that dough tenderly into the bottom of the plate. Remember, this **Blackberry Pie** needs a strong base!
Next, the berries! Mix your 6 cups of blackberries (fresh or frozen, it doesn’t matter—if they’re frozen, just toss them in still frozen with the sugar, cornstarch, and lemon juice) until everything is just coated. Pour that glorious, deep purple filling right over your bottom crust. Try to keep the filling relatively level in the middle.
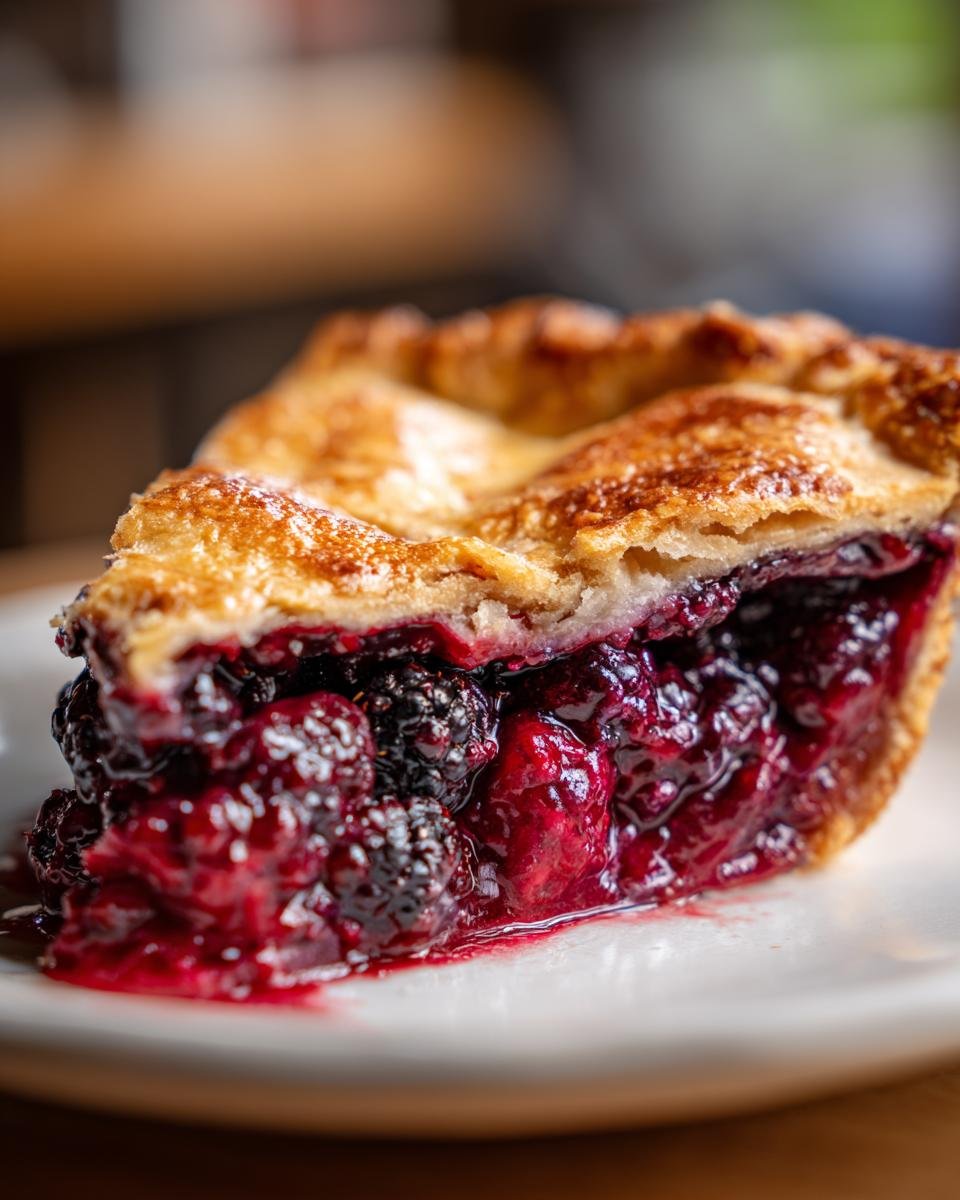
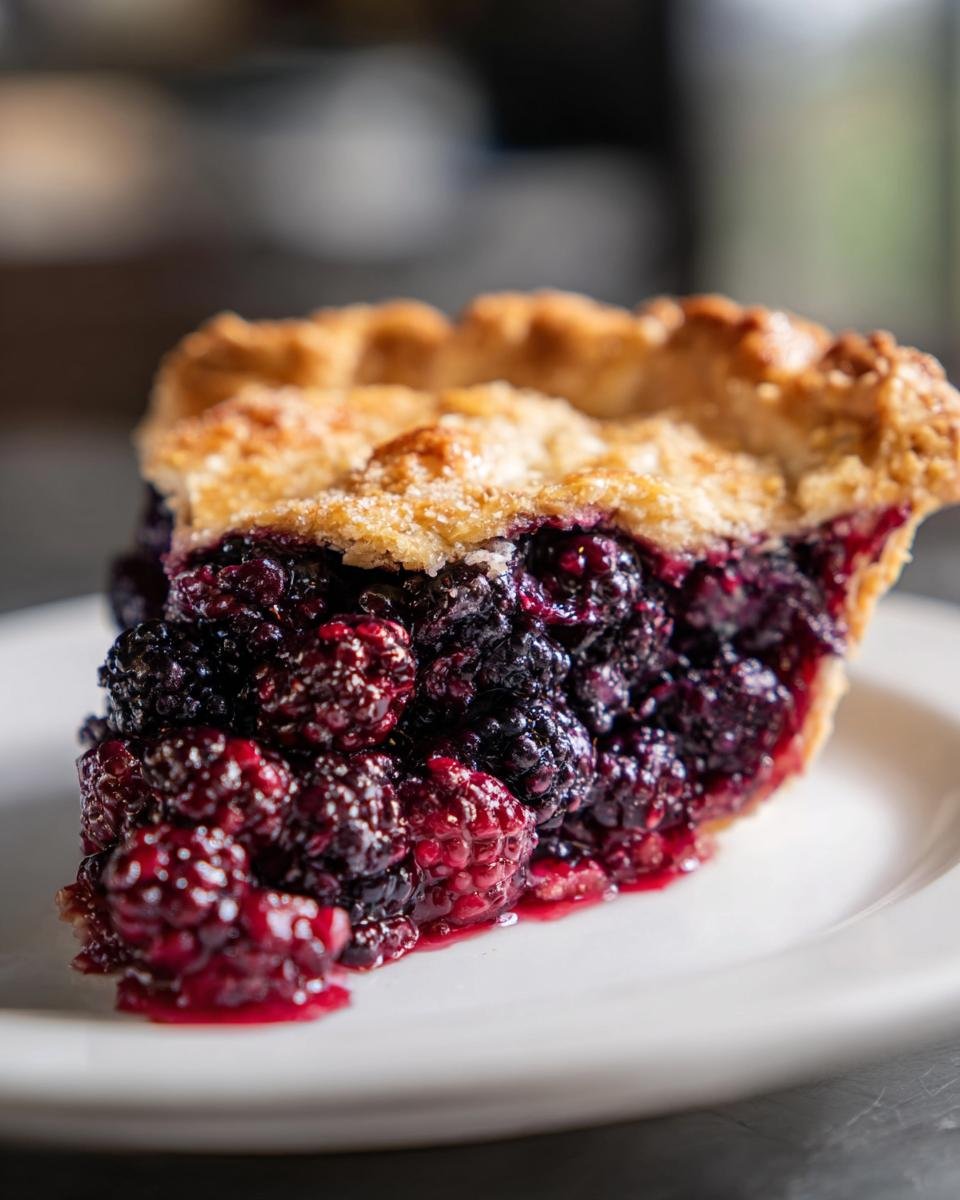
Now for the top! Roll out that second disk. You can lay it whole across the top, or if you’re feeling fancy, cut some nice big vents in it—those need to be big enough to let the steam escape so you don’t end up with a crust explosion! Trim the edges around the rim and use your fingers or a fork to crimp them shut nicely. Don’t forget the egg wash! Brush that beaten egg all over the top crust; it’s what gives your **Blackberry Pie** that amazing shiny, golden color. If you want a read on how fruit pies set up perfectly, check out this guide on flavorful fruit pie recipes.

Here’s the crucial baking dance: Get your oven hot to 425 degrees F. We start high for about 15 minutes to set that flaky crust fast. Once set, drop that temperature way down to 375 degrees F and let it bake for another 40 to 50 minutes. You’re looking for a crust that’s deep golden brown and filling that is bubbly thick. Trust me, that bubbling lets you know the cornstarch has done its job in this perfect **Blackberry Pie**!
Cooling and Serving Your Delicious Blackberry Pie
Okay, you’ve pulled that gorgeous, golden-brown **Blackberry Pie** out of the oven. Now, I know you’re ready to dive in, but you have to fight that urge! The most important, non-negotiable step is letting it cool. I mean it—at least three full hours on a wire rack.
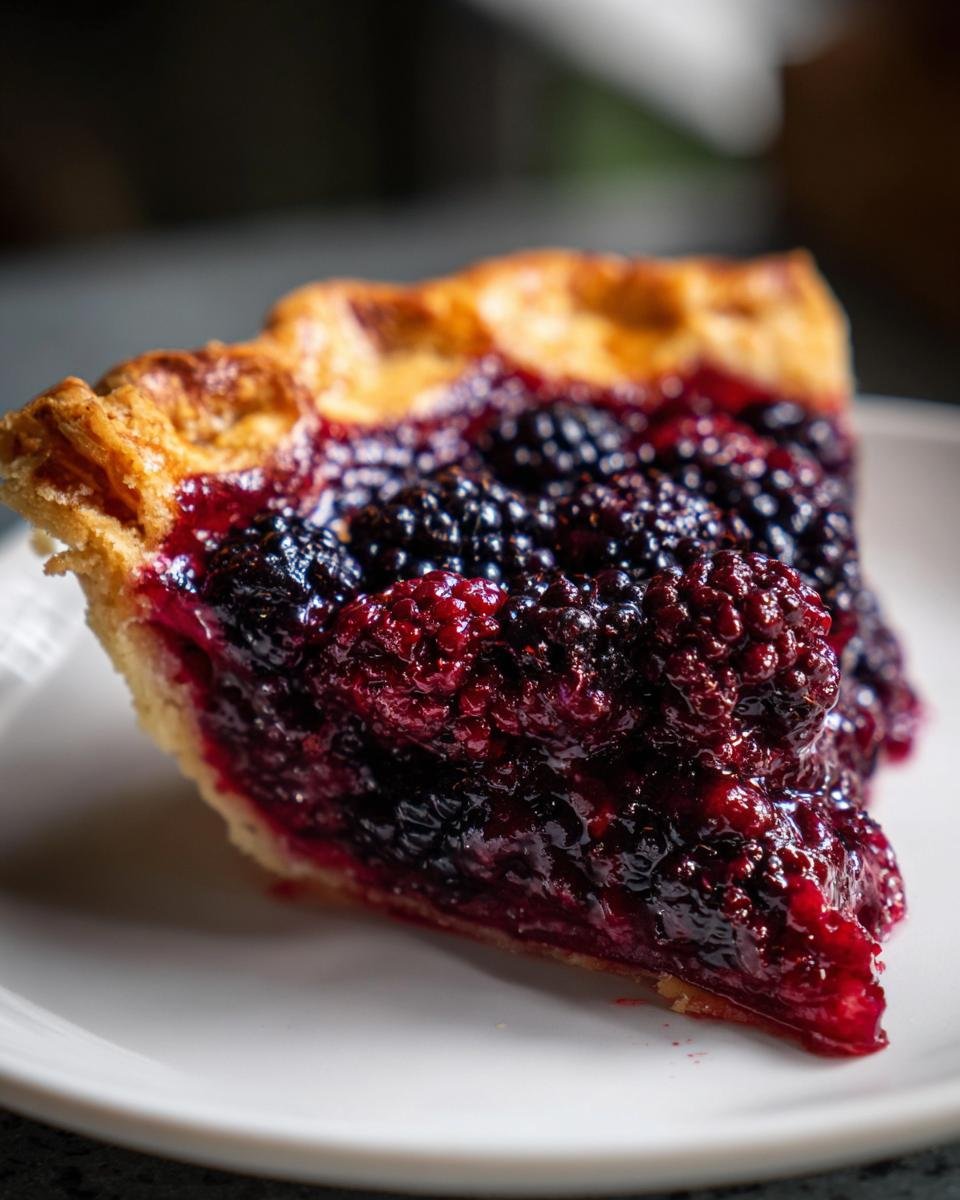
If you slice it too soon, that beautiful, thickened berry filling will just run out all over the place. Those three hours allow the cornstarch to fully set up and create that perfect, sliceable texture. Seriously, patience pays off here! When it’s finally cooled down enough, this **Blackberry Pie** is just heavenly with a scoop of good vanilla bean ice cream melting right over the warm fruit. Don’t skip the wait!
Tips for Success When Making Blackberry Pie
Even though this is a straightforward **Blackberry Pie** recipe, sometimes those little things make the difference between good and incredible. If you want to really show off your baking prowess, here are a few extra things I always do! First, preventing that soggy bottom: try brushing the bottom crust lightly with a whisked egg white right before you pour in the filling. It creates a tiny waterproof seal!
Also, when you’re mixing the filling, be gentle. You want the berries to stay mostly whole. If you mash them too much while mixing in the sugar and cornstarch, you end up with berry mush instead of distinct fruit pieces in your slice. Mix just until everything is coated. If you want even more insider info on general baking know-how, I always refer back to this great piece on baking tips to make you a better baker.
And if you’re using berries that are exceptionally juicy? Toss in an extra teaspoon of cornstarch—better safe than sorry when dealing with fruit juice in your beautiful **Blackberry Pie**!
Storing Leftovers of Your Blackberry Pie
Don’t panic if you have some **Blackberry Pie** left over! Since this is a fruit pie made with a sturdy crust, you have a couple of options. If you think you’ll eat it all within a day, covering it loosely and keeping it on the counter is fine. But I always recommend storing leftovers in the fridge just to be safe.
When you’re ready for a piece later, just let it sit out on the counter for about 30 minutes to take the chill off. Or, if you prefer it warm, give it a quick zap in a 300-degree oven for about 10 minutes. That warms the berries back up without ruining the flaky pastry on your leftover slices!
Frequently Asked Questions About This Blackberry Pie
When you’re baking your first or tenth **Blackberry Pie**, there are always a few little questions that pop up. It’s totally normal when working with fruit pastry! Here are some things folks ask me all the time about making sure this fruit pie turns out perfect every time.
Can I substitute the blackberries in this blackberry pie recipe?
Oh yes, you absolutely can! This recipe works beautifully with blueberries or mixed berries. If you use a mix, you might want to add an extra half tablespoon of cornstarch just because different fruits release different amounts of liquid. But yes, feel free to swap out the blackberries for another fruit!
What is the best way to prevent the bottom crust from getting soggy?
This is the bane of many bakers’ lives, isn’t it? The best defense for your bottom **Blackberry Pie** crust is ensuring it’s super cold when the filling goes in. I also recommend quickly brushing the inside of the bottom crust with a slightly beaten egg white right before adding the fruit. It seals the pastry wonderfully!
Another quick thought: make sure you let your pie cool completely—that’s crucial for setting the juices so they don’t steam the bottom crust while sitting on your counter!
Estimated Nutritional Snapshot for Blackberry Pie
Now, I’m not a nutritionist, so I always say take these numbers with a grain of salt, maybe even two! These figures are just a general idea for one slice of this delicious **Blackberry Pie** based on the ingredients we used. It’s definitely a treat, but oh boy, is it worth it!
- Calories: About 380
- Total Fat: Around 18 grams
- Carbohydrates: Roughly 55 grams
- Protein: Only about 4 grams per slice
- Sugar: High, around 35 grams, thanks to those lovely berries and added sugar!
Just remember, this breakdown assumes you get 8 even slices from your pie, so enjoy your slice of homemade goodness!
Print
Simple Blackberry Pie
- Total Time: 105 min
- Yield: 8 servings 1x
- Diet: Vegetarian
Description
A straightforward recipe for a classic blackberry pie with a flaky crust.
Ingredients
- 2 1/2 cups all-purpose flour
- 1 teaspoon salt
- 1 cup (2 sticks) cold unsalted butter, cut into cubes
- 1/2 cup ice water
- 6 cups fresh or frozen blackberries
- 1 1/2 cups granulated sugar
- 1/4 cup cornstarch
- 1 tablespoon lemon juice
- 1 large egg, beaten (for egg wash)
Instructions
- Prepare the crust: Mix flour and salt in a large bowl. Cut in the cold butter until the mixture resembles coarse crumbs. Gradually add ice water, mixing until the dough just comes together. Divide the dough in half, flatten into disks, wrap, and chill for at least 1 hour.
- Prepare the filling: In a separate bowl, gently mix blackberries, sugar, cornstarch, and lemon juice.
- Assemble the pie: On a lightly floured surface, roll out one dough disk to fit a 9-inch pie plate. Place the dough in the plate. Pour the blackberry filling over the bottom crust.
- Roll out the second dough disk for the top crust. Place it over the filling. Trim and crimp the edges to seal. Cut several slits in the top crust for venting.
- Brush the top crust with the beaten egg wash.
- Bake: Preheat your oven to 425 degrees F (220 degrees C). Place the pie on a baking sheet. Bake for 15 minutes at 425 degrees F. Reduce the oven temperature to 375 degrees F (190 degrees C) and continue baking for 40 to 50 minutes, or until the crust is golden brown and the filling is bubbly.
- Cool: Let the pie cool on a wire rack for at least 3 hours before slicing.
Notes
- If using frozen blackberries, do not thaw them before mixing with the sugar and cornstarch.
- If the edges of the crust start browning too quickly during baking, cover them loosely with aluminum foil.
- Prep Time: 30 min
- Cook Time: 65 min
- Category: Dessert
- Method: Baking
- Cuisine: American
Nutrition
- Serving Size: 1 slice
- Calories: 380
- Sugar: 35
- Sodium: 150
- Fat: 18
- Saturated Fat: 10
- Unsaturated Fat: 8
- Trans Fat: 0
- Carbohydrates: 55
- Fiber: 4
- Protein: 4
- Cholesterol: 45
Keywords: blackberry pie, fruit pie, dessert, pastry, summer pie