
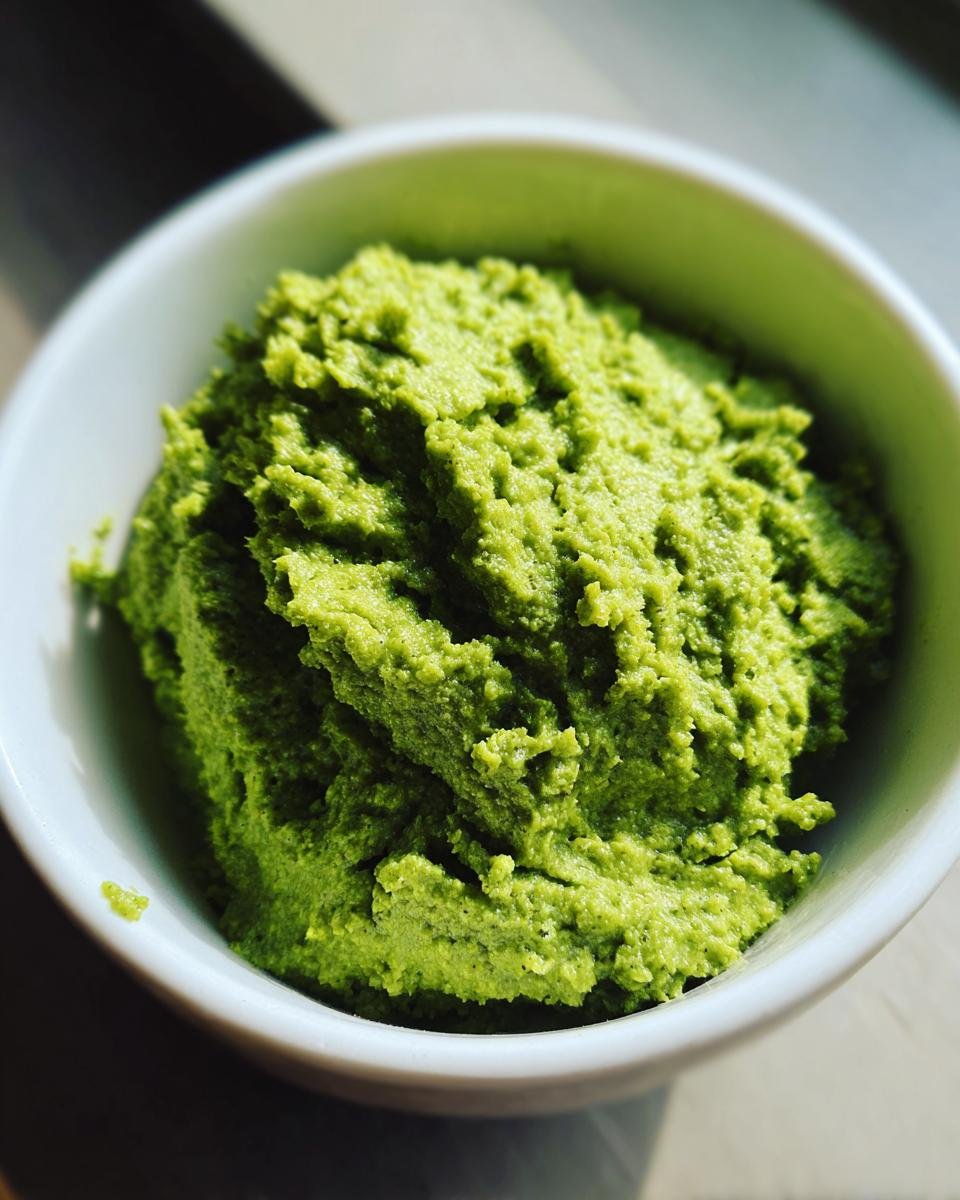
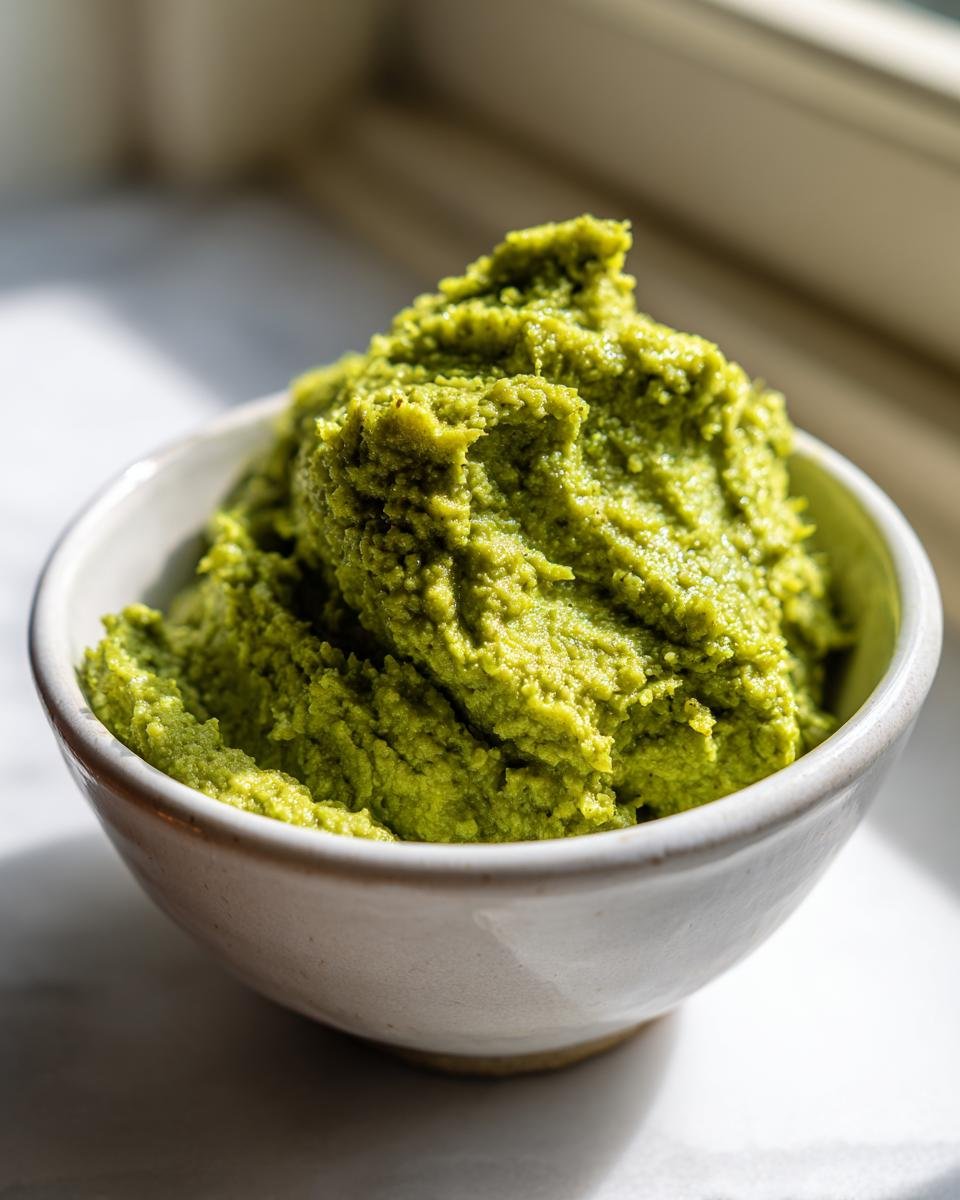
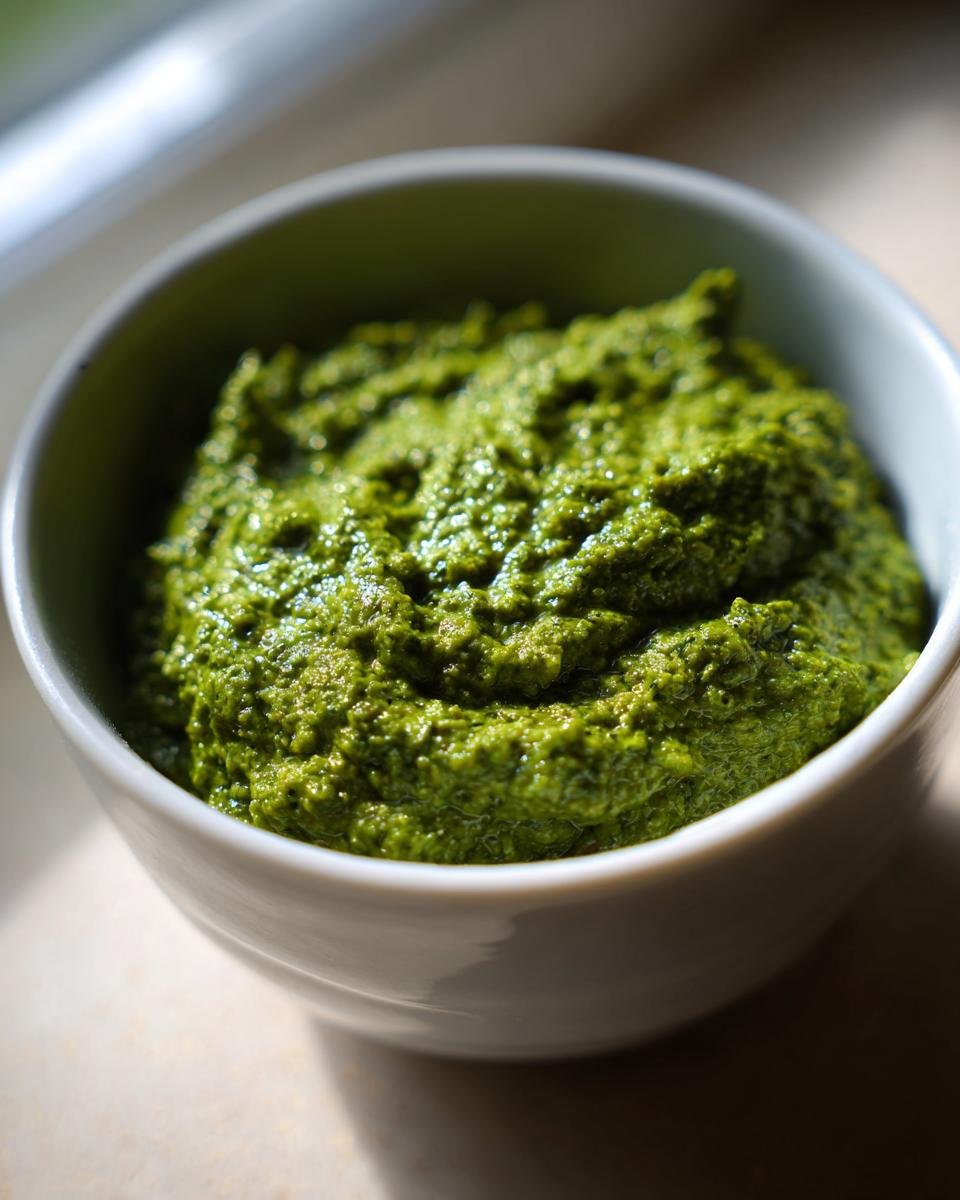
Oh, trust me, we’ve all been there. The doorbell rings, you weren’t expecting anyone, and suddenly you need a respectable appetizer on the table in under five minutes. Panic mode, right? Wrong! That’s when you pull out the powerhouse that is my **2 Minute Green Olive Dip**. I swear, this thing is pure kitchen magic. It’s salty, briny, totally packed with that bright Mediterranean punch, and honestly, it requires zero actual cooking. If you can pulse a button on a small appliance, you can nail this dip every single time. It’s my secret weapon for turning a frantic five minutes into a moment of relaxed entertaining!
Why You Need This 2 Minute Green Olive Dip Today
I keep telling everyone: you don’t need complex recipes to wow people. This dip proves it! When I whip this up, people always assume I spent way more time on it than I actually did. It’s all about having the right, powerful ingredients on hand.

-
Incredibly Fast Preparation Time
Seriously, two minutes. That’s it. You aren’t even preheating the oven—which, let’s be honest, is the best part of any quick recipe. It’s ready to go before your guests even find their coat hooks.
-
Flavor Profile of This Quick Dip
It tastes like sunshine on a cracker! You get that beautiful, bold saltiness from the olives, which is immediately brightened up by that little zip of lemon juice. Plus, that earthy hint of oregano pulls it all together. Think of it as a super-fast, intensely flavorful olive tapenade!
Essential Ingredients for Your 2 Minute Green Olive Dip
Okay, friend, the secret to keeping this under two minutes is preparation, but also quality! Since there are only five things going into the food processor, every single ingredient has to count. If you try to skimp here, you’ll taste it, trust me. I’ve tried a few things in the past, and I always come back to this core list. It’s classic Mediterranean simplicity at its best, and you probably already have most of these things.
We need one cup of green olives, and here’s the non-negotiable rule: they absolutely must be pitted. Nobody wants to be spitting pits onto the appetizer platter! Then we layer in the flavor with a generous clove of fresh garlic—don’t even think about using that jarred pre-chopped stuff, it tastes dull next to fresh.
-
Ingredient Specifications and Notes
When you shop for your olives, try to grab some that are packed in salt or a light brine if you can find them; those tend to have a brighter flavor than the ones swimming in super-heavy oil. That olive oil you choose is important too—don’t use your fancy, expensive finishing oil, but use one that tastes pleasant on its own. We need two tablespoons of that oil to get the right consistency. We finish the flavor profile with just a tiny splash of lemon juice—that’s key for balance—and a quarter teaspoon of dried oregano. That little bit of oregano sings alongside the olives, making this **2 Minute Green Olive Dip** taste complex, even though you just dumped it all in a machine! You might even find my post on making homemade cleaning sprays useful; sometimes you need to clean up the counter after all this intense dipping!
Step-by-Step Instructions for Making 2 Minute Green Olive Dip
Alright, time to make the magic happen! This is where we earn that two-minute badge, but you have to be swift and intuitive. I really hope you’ve got your trusty food processor ready to go because we are not messing around with hand chopping these olives. The whole process is about getting everything in there and just blending until it looks right, not perfectly smooth like hummus. We want texture here!
- First things first, get everything into the bowl of your food processor: those pitted green olives, the olive oil, that single clove of garlic, the lemon juice, and the quarter teaspoon of dried oregano. Easy, right? Measure twice, dump once!
- Now for the crucial part. Hit that pulse button! You only want to pulse it until you start seeing a coarse paste form. Stop. Look. Pulse again. If you let the machine run continuously, you’ll end up with olive soup, and nobody wants that mess. We need something rustic and chunky that holds onto your cracker.
- Once you think you’re close, stop the machine completely. Take the lid off and scrape down the sides—trust me, the bits stuck up high need to see the blades too. Give it a couple more quick pulses just to be sure everything is incorporated and has that perfect, slightly chunky paste texture.
- Taste it! This is my favorite part, and where you become the master of your dip. Olives are naturally salty, so you might not need any extra salt at all. Take a tiny spoonful and see what you think. If your olives were mild, go ahead and add a small pinch of salt.
- Scoop that beautiful creation out of the processor bowl and put it into a cute serving dish. If you’re not serving it immediately, just move it to the fridge, though I find it’s best served right away when the garlic is sharpest. For more ideas on quick culinary wins, you should definitely check out my process for making an easy BLT party dip when you’re feeling less salty and more creamy!
Processing the 2 Minute Green Olive Dip to Perfection
If you hear that machine humming too long, you’ve gone too far! Remember the goal is texture. That means pulsing is your friend. Think of it like tossing a salad with your hands—you stop when it’s mostly combined but still has defined pieces. If you see too much liquid pooling, add just one more olive or a tiny splash more oil to help things blend without turning soupy. Don’t be afraid to stop, look, and restart.
Final Seasoning Check for Your Green Olive Dip
Seriously, taste first. I’ve made this when using Italian olives and needed zero added salt. Then I made it last week with Spanish olives and needed a small pinch to bring out the oregano. The brine dictates the final sodium level, so your palate is the best tool here. Only add salt after you taste it—it’s the final, professional touch that makes this **2 Minute Green Olive Dip** taste perfectly seasoned.
Tips for Success with Your 2 Minute Green Olive Dip
Since this is such a simple recipe, the success really hinges on technique and ingredient quality, which I’ve learned from watching my messy cooking evolution over the years! Don’t rush the pulsing, even though it’s called the 2 Minute dip—that minute you take to check the texture is invaluable. Also, make sure your food processor blade is sitting just right; a wobbly blade means uneven chopping, and nobody wants chunks of garlic being missed.
Here’s my big personal secret for making this **2 Minute Green Olive Dip** really sing: I find using a high-quality olive oil really makes this shine. It adds a smooth, slightly fruity note that cuts through the brine beautifully. If you happen to be looking for general better baking tips, I have a whole post on that, but honestly, these same little tricks about using good fats apply here too!
Finally, if you’re planning on serving this on a big platter, make sure you let the finished dip sit at room temperature for about ten minutes before serving. Cold dulls flavor, and we want that garlic and oregano to hit you right away!
Creative Variations for Your Green Olive Dip
The beauty of keeping a base recipe this simple is how easily you can jazz it up depending on what you’re serving it with or what mood you’re in! While I obsessively stick to the five core ingredients when I’m truly in a 2-minute emergency, sometimes I have an extra minute—maybe 30 seconds—to add something special. It’s fun to personalize this **2 Minute Green Olive Dip**!
If you want to lean into that salty Mediterranean profile, throwing in a teaspoon of capers is a total game-changer. They add another layer of punchy, vinegary goodness. Just toss them in with the olives and blend away. Don’t worry about adding extra salt if you do this; the capers bring plenty!
For those of you who love a little color and sunshine, finely chopped sun-dried tomatoes are amazing. You only need about two tablespoons, and they add a chewy texture and a rich, sweet counterpoint to the briny olives. Chop those by hand first, though, so they don’t totally disappear in the food processor.
And let’s talk about boosting the depth of flavor. If you’re serving this to adults and want something truly savory, a tiny little smear—maybe half a teaspoon max—of anchovy paste tucked in there is incredible. It melts right into the oil and vinegar base, and nobody will ever guess what it is, they’ll just say, “Wow, this dip is amazing!”
Finally, when mixing in those additions, always finish with fresh herbs if you can. A tiny sprinkle of freshly chopped parsley right before serving elevates the look instantly. It adds that fresh, herbaceous aroma that makes any dip look like it took hours to prepare, not just a couple of minutes!
Serving Suggestions for the 2 Minute Green Olive Dip
Now that you have this punchy, quick **2 Minute Green Olive Dip**, you need the perfect vehicle to get it from the bowl to your mouth! Since this dip screams Mediterranean flavor, you want things that complement that savory, briny profile. Don’t reach for just any old chip; let’s make this snack feel intentional!
The number one winner, always, is warm pita bread. You can toast slices lightly in the oven or even quickly warm them in a dry pan until they puff up just a little. Next up are sturdy crackers—look for water crackers or anything with a mild flavor so you can really taste the olives. If you’re trying to keep things light, fresh veggie sticks are fantastic. Cucumbers are bright and cool, and carrot sticks hold up well to the dip’s texture. I even use this dip as a topper for grilled halloumi cheese sometimes! Honestly, if you want to build a full spread, check out my guide on five tricks for a show-stopping antipasto platter; this dip fits right in!
Storage and Reheating Instructions for 2 Minute Green Olive Dip
So, what happens if you actually manage to have leftovers of this speedy wonder? That’s a good problem to have, honestly! Since this **2 Minute Green Olive Dip** is made entirely of ingredients that are already preserved—olives, oil, lemon—it keeps surprisingly well. But you absolutely have to handle it correctly.
The golden rule here is airtight storage. Grab a small glass jar or a little Tupperware container with a lid that seals tightly. Don’t let it sit out on the counter after the party ends; olive oil dips can go off quickly once exposed to air for too long. Pop it right into the refrigerator as soon as you’re ready to put your feet up.
I’ve kept mine this way for about three days, and it’s almost as good as the first time around. The flavor actually deepens a bit, which I don’t mind at all! However, let me give you a real piece of advice: forget about reheating this dip. Really, don’t do it.
Reheating it won’t really improve the texture or the fresh flavor of the garlic and lemon. If anything, it’ll just separate the oil a bit and might make the garlic taste slightly cooked, and we want that sharp bite! If you pull it straight from the fridge, it will be super firm because the olive oil solidifies when it gets cold. That’s normal! All you need to do is take the container out onto the counter about 30 minutes before you plan to serve it again. That little bit of time warming up to room temperature lets the oil soften again, bringing that fantastic briny flavor right back to life without any actual heat required!
Frequently Asked Questions About 2 Minute Green Olive Dip
I know when you’re looking for lightning-fast appetizers, you have questions! It’s smart to ask before you dive in. I’ve collected the most common things folks wonder about when they first try out my super speedy, no-fuss **2 Minute Green Olive Dip**. Don’t worry, this recipe is forgiving, but knowing these little details will make your dip the star of whatever party you’re throwing.
-
Can I make this green olive dip ahead of time?
You absolutely can, but I’m going to give you the honest truth: it’s best fresh. Why? Because that fresh garlic bite is what makes it pop! If you make it the day before, that fresh taste mellows out a little bit. If you refrigerate it overnight, the dip gets super firm because of the oil. You just need to remember to take it out on the counter for a good 30 minutes before serving so it softens up nicely again. That little bit of waiting makes all the difference!
-
What if I don’t have a food processor for this 2 minute recipe?
Oh, the food processor drama! If you’re in a pinch and only have a knife, you can still pull this off beautifully, although it won’t be a true **2 minute recipe** anymore, I won’t lie! You’ll need to finely mince everything—the olives, the garlic—as finely as humanly possible, and then you can whisk in the oil, lemon, and oregano vigorously. It takes patience, but the resulting texture is more of a hand-chopped tapenade, which is fantastic too! You might find my guide on making easy homemade enchilada sauce helpful; sometimes you just have to use the tools you have handy!
-
Is this dip too salty for everyone?
That’s the main concern with any olive-based appetizer! It truly depends on how salty your brine is. That’s why tasting before you add any extra salt is the most important step in the balancing act. If you’re worried, you can even rinse your pitted olives quickly under cold water before processing them, though you might lose a tiny bit of that deep olive flavor doing that. I usually just taste first!
Nutritional Information Estimate for 2 Minute Green Olive Dip
Now, let’s talk real talk for a second. Because this **2 Minute Green Olive Dip** is loaded up with good fats from the olive oil and the olives themselves, it’s certainly tasty, but it’s also rich! I always like to show the numbers because I feel like keeping things transparent builds trust between home cooks. You know I’m not a nutritionist, so please remember these figures are just an estimate based on the standard ingredients I listed.
This estimation breaks down the entire batch yield (about 1 cup) into servings of two tablespoons. If you end up loading up your pita chips with huge dollops, you’ll be consuming more, so keep that in mind when you’re enjoying this appetizer!
Here’s the breakdown based on standard measurements. Enjoy, but maybe serve with some fresh garden veggies instead of just crackers if you’re watching your sodium level!
- Serving Size: 2 tablespoons
- Calories: 75
- Fat: 7g (This is where the healthy fats live!)
- Saturated Fat: 1g
- Carbohydrates: 2g
- Protein: 1g
- Sodium: 350mg (That’s the olive brine talking, see? Taste test is important!)
- Sugar: 0.5g
- Cholesterol: 0mg
See? Not bad for something that tastes this good when you only spent two minutes making it! It’s a high-fat, low-carb appetizer, which fits perfectly with a Mediterranean lifestyle.
Print
2 Minute Green Olive Dip
- Total Time: 2 min
- Yield: About 1 cup 1x
- Diet: Vegetarian
Description
A quick and simple dip made primarily from green olives.
Ingredients
- 1 cup green olives, pitted
- 2 tablespoons olive oil
- 1 clove garlic
- 1 teaspoon lemon juice
- 1/4 teaspoon dried oregano
Instructions
- Place the pitted green olives, olive oil, garlic, lemon juice, and dried oregano into a food processor.
- Pulse the ingredients until a coarse paste forms. Do not over-process; you want some texture.
- Taste the dip and add a small pinch of salt if needed, depending on the saltiness of your olives.
- Transfer the dip to a serving bowl.
Notes
- Serve immediately with pita bread, crackers, or vegetable sticks.
- Store leftovers in an airtight container in the refrigerator for up to 3 days.
- Prep Time: 2 min
- Cook Time: 0 min
- Category: Appetizer
- Method: Food Processing
- Cuisine: Mediterranean
Nutrition
- Serving Size: 2 tablespoons
- Calories: 75
- Sugar: 0.5
- Sodium: 350
- Fat: 7
- Saturated Fat: 1
- Unsaturated Fat: 6
- Trans Fat: 0
- Carbohydrates: 2
- Fiber: 0.5
- Protein: 1
- Cholesterol: 0
Keywords: green olive dip, olive tapenade, quick dip, 2 minute recipe, appetizer