
Oh my goodness, if you need a decadent, show-stopping treat that takes practically zero effort—like zero!—then you’ve landed on the right page. We’re talking about pure indulgence with minimal fuss. Forget turning on the oven; these **Chocolate Covered Cherry Dessert Balls** are my absolute go-to when I need something fancy fast.
I swear, they taste like the fancy boxed candies but somehow better because *you* made them! Seriously, these are the best no-bake dessert balls because you get that perfect pop of cherry flavor wrapped up in silky smooth chocolate. My secret weapon for saving the day when guests drop by unannounced? This recipe. It highlights the rich flavor combination that everyone adores.
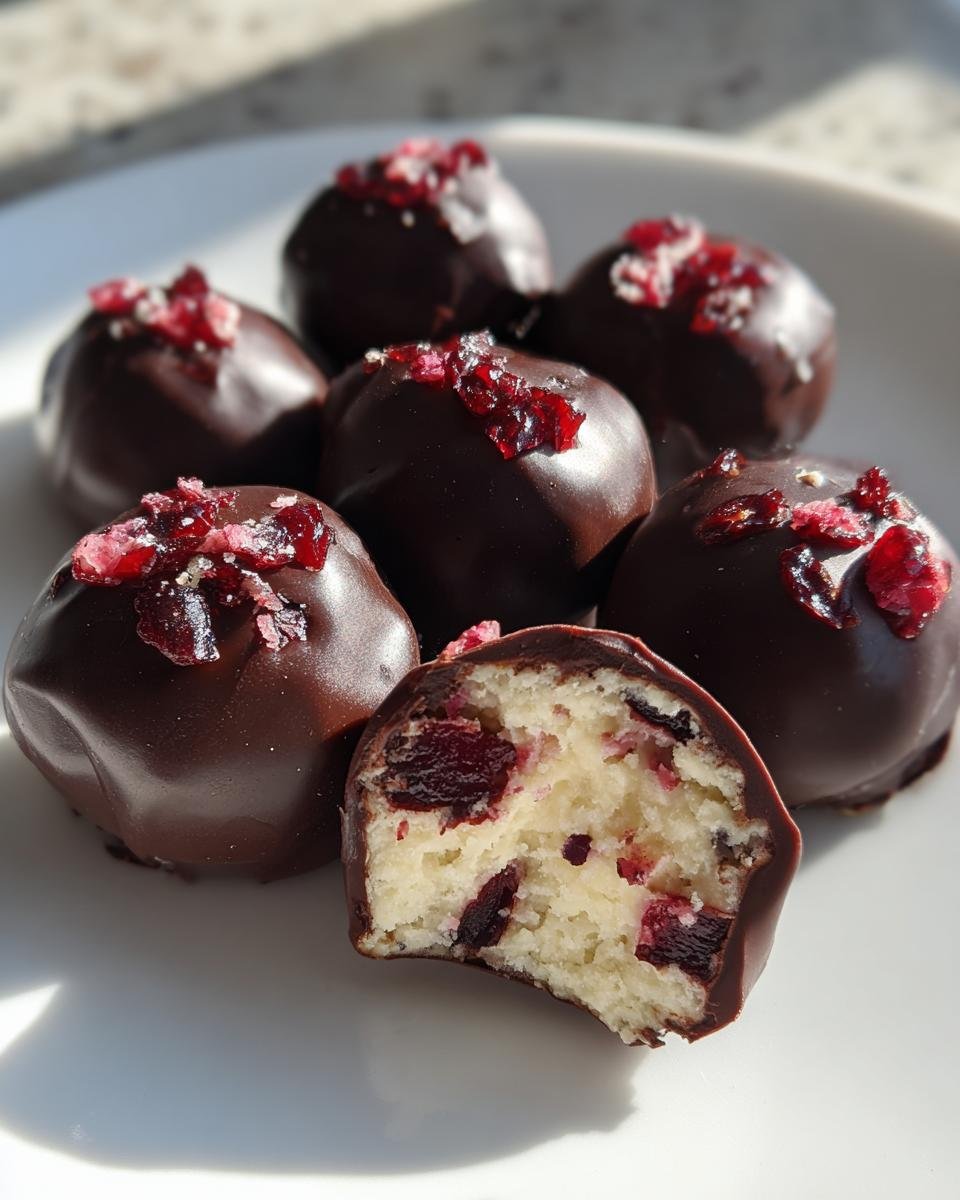
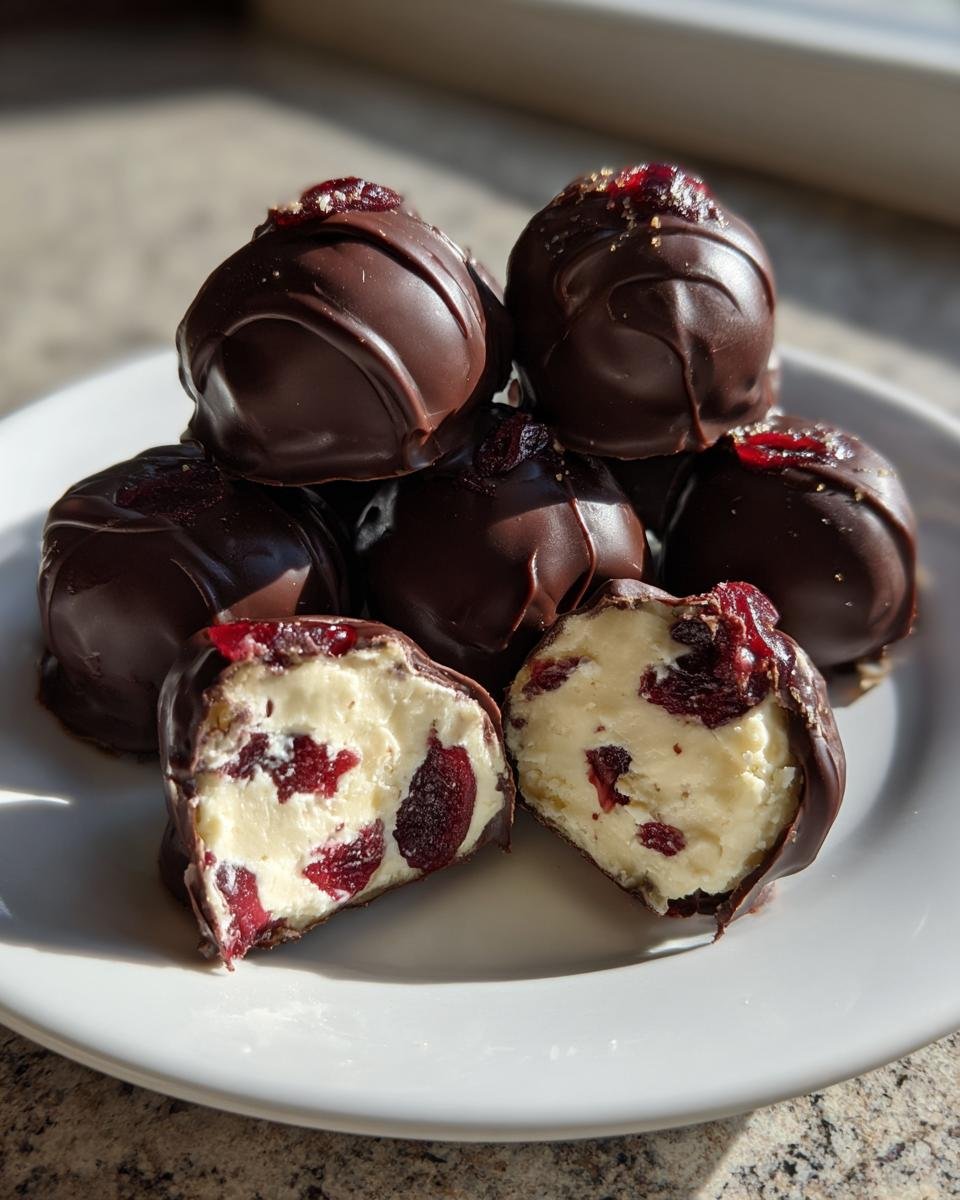
The best part? The cream cheese filling comes together in minutes. It’s creamy, tangy, sweet, and studded with those chewy little dried cherries. The chilling time is the hardest part, trust me. But it’s worth it to ensure you get that clean, beautiful chocolate shell when they set.

Gathering Ingredients for Your Chocolate Covered Cherry Dessert Balls
Listen, assembling these is half the fun—and it’s crucial that your ingredients are ready before you start the mixing frenzy! Since we aren’t baking, preparation is everything here. You toss these together in about twenty minutes, but you need everything prepped right. The texture of the final ball depends entirely on using the right stuff at the right time. For instance, if your cream cheese isn’t softened, you’ll end up with lumps instead of a silky base. If you’re looking for substitutions in other recipes, check out my thoughts on buttermilk substitutes, but for this one, stick to the plan!
Ingredients for the Cherry Filling Base
This is where that gorgeous cherry flavor comes from, so pay attention to the specifics!
- We need one full cup of dried cherries. But here’s the kicker: you absolutely *must* finely chop these before they go anywhere near the mixer. We want them spread out evenly, not big chunks tearing up the texture.
- Make sure you have 1/2 cup of cream cheese, and I mean softened. Pull it out early!
- Just 1/4 cup of powdered sugar is plenty to sweeten things up without being overwhelming.
- And for that little hint of depth, one teaspoon of pure vanilla extract seals the deal.
Coating Ingredients for Perfect Chocolate Covered Cherry Dessert Balls
The chocolate coating needs to flow like silk so you get those gorgeous, uninterrupted shells. That means we need a little helper in there.
- One cup of semi-sweet chocolate chips works perfectly. I like semi-sweet because it cuts through the sweetness of the filling.
- The secret sauce here is one tablespoon of coconut oil. Seriously, don’t skip this! It thins the melted chocolate just enough so when you dip your chilled balls, the coating is thin and smooth, not gloppy and thick.
Step-by-Step Instructions for No-Bake Chocolate Covered Cherry Dessert Balls
Okay, now that we have our ingredients happy and ready to go, it’s time to mix! Since this is a no-bake situation, we’re building layers of flavor and texture using cold and time. If you wanted a refresher on general kitchen skills before we dive in, I have some great tips over at my post about making you a better baker—even when you aren’t actually baking!
Preparing the Cherry Filling Mixture
First things first, remember those dried cherries we chopped super fine? Get those ready. Grab your mixing bowl and introduce the softened cream cheese, your powdered sugar, and the vanilla. Beat those three together until they look perfectly smooth and light. Seriously, mix it until you can’t see any streaks or bumps from the cream cheese.
Once the base is glorious, fold in those little bits of chopped dried cherry. You want them distributed everywhere, so mix gently but thoroughly until they’re evenly speckled throughout that creamy mixture. This filling is what gives our **Chocolate Covered Cherry Dessert Balls** their classic flavor profile!
Forming and Chilling the Chocolate Covered Cherry Dessert Balls
This next part is where you get to play with your food! Take about a tablespoon of the filling mixture and roll it gently between your palms until you have a nice, neat ball, about an inch wide. Try to keep them all the same size so they dip evenly later on. Line a baking sheet with parchment paper—this is non-negotiable, trust me—and set your formed balls onto it.
Now, here’s the crucial holding pattern: they have to chill! Pop that whole sheet into the refrigerator for at least 30 minutes. You need them nice and cold. If the filling is warm, the hot chocolate will melt it right off, and you’ll end up with messy puddles instead of beautiful, coated treats.
Melting Chocolate and Coating the Dessert Balls
While they chill, get your coating ready. Combine your chocolate chips and that tiny bit of coconut oil in a microwave-safe bowl. Microwave it in 30-second bursts. Stir well after every 30 seconds, even if it doesn’t look melted yet. Keep going until it’s completely smooth and glossy. That coconut oil makes dipping so much easier!
Take the chilled balls out of the fridge. Using a dipping tool or even just a fork, carefully plunge one ball straight into the melted chocolate. Make sure the whole thing is submerged. Lift it out and let any excess drip off before placing it back onto that parchment-lined sheet. Work quickly because the cold balls will start setting the chocolate fast!

Final Set Time for Firm Chocolate Covered Cherry Dessert Balls
We are almost there! Once all your luscious little orbs are coated and sitting pretty on the parchment paper, they need one final rest. Back they go into the refrigerator. This time, let them hang out for a full hour, maybe a little more if your kitchen is warm. You are waiting for that glorious snap—the chocolate needs to be completely firm before you try to move them or store them. This final chill ensures your **Chocolate Covered Cherry Dessert Balls** look professional and taste incredible!
Tips for Perfect Chocolate Covered Cherry Dessert Balls Every Time
When you’re dealing with something this simple, the little tweaks make all the difference between ‘pretty good’ and ‘Oh my gosh, you made these?!’ Since there’s no oven involved, we have to control the temperature and consistency perfectly ourselves. If you’re ever making something richer, like my caramel fudge, those small temperature checks become even more vital!
Adjusting Filling Consistency
Sometimes, especially if your cream cheese was a hair too cold or your cherries were a little drier than usual, the filling mix might feel crumbly or too soft to roll into a neat ball. If it’s too soft, don’t panic! Just pop it back in the fridge for another 15 minutes before you attempt rolling. That chill really firms up the cream cheese base.
On the flip side, if you accidentally left your cream cheese out too long and your mixture seems almost runny, you can try adding just a tiny splash—like half a teaspoon—of milk or a spoonful more powdered sugar to bring it back together. Just proceed slowly; we don’t want to dilute that gorgeous cherry flavor.
Achieving a Smooth Chocolate Coating
The chocolate dip is where the visual payoff happens. While semi-sweet chips are great for flavor balance, sometimes they seize or feel too thick for a perfect shell, even with the coconut oil. For the absolute smoothest, glossiest finish that gives you that satisfying *snap* when you bite in, try using good quality melting wafers or even adding a tiny bit more coconut oil than the recipe calls for.
Melt that chocolate slowly, like I mentioned, and make sure you stir out every single unmelted chip before you try dipping. A perfectly melted coating is the difference between professional-looking **Chocolate Covered Cherry Dessert Balls** and lumps of chocolate hiding your filling!
Storage and Make-Ahead Options for Chocolate Covered Cherry Dessert Balls
You know, sometimes I make a batch of these on a Sunday just because I know I’ll want one (or three!) waiting for me mid-week. Because these are no-bake and use cream cheese, they are actually fantastic for making ahead of time. The best place for them is an airtight container in the refrigerator. They stay perfectly fresh and firm in there, usually for up to a week. They’re sturdy little bites!
If you are making these for a big holiday party or just want to be super prepared, you can absolutely freeze them! I’ve done it plenty of times. Place your set **Chocolate Covered Cherry Dessert Balls** on a baking sheet lined with parchment paper, and pop that into the freezer until they are solid—this takes about an hour. Then, you can transfer them to a freezer-safe bag or container. They freeze beautifully, and you can pull them out whenever you need a decadent treat. They thaw quickly on the counter, maybe 15 minutes max. They are almost as good as the day they were made, just like when I store my caramel fudge for later!
Why You Should Make These Chocolate Covered Cherry Dessert Balls Today
Seriously, why wait? If you’re looking for a dessert that punches way above its weight class in flavor but stays happily under the radar in terms of work required, this is it. I keep these in my rotation specifically for days when I want something homemade and impressive without spending hours in the kitchen. They seriously deliver!
-
The Prep is Insanely Fast: You’re looking at maybe 20 minutes of active work. Everything mixes in one bowl, and there’s no complicated temperature monitoring like you get with baking. It’s foolproof!
-
No Oven Required, Ever: This is perfect for hot summer days when you don’t want to heat up the house, or for those times when your oven is already claimed by a roast or something else. Pure, simple, no-bake magic.
-
That Classic Flavor Combo: Chocolate and cherry—it’s a match made in heaven! The tartness of the dried cherry cuts through the richness of the cream cheese and that sweet chocolate shell. It’s addictively good.
-
They Look Like Fancy Chocolates: Once you dip them, they instantly look like something you bought from an expensive candy shop. They are absolutely perfect for gifting because they travel well and look so elegant on a platter.
If you love this level of quick, satisfying chocolate goodness, you absolutely have to try my no-bake chocolate peanut butter bars too—they follow a similar low-effort, high-reward philosophy!
Equipment Needed for Chocolate Covered Cherry Dessert Balls
Even though this is a no-bake recipe, you still need your trusty kitchen tools ready to go! Preparation really involves setting up your workspace so rolling and dipping is quick and clean. It prevents that frantic scrambling for a clean bowl when you need one fast.
I always get all this stuff out before I even pull the cream cheese from the fridge, just to make sure I don’t forget anything important. It sounds excessive, but trust me, when you’re dealing with chilled centers and hot chocolate, efficiency is your friend.
Here’s the short list of things you’ll want on hand before you start whipping up your **Chocolate Covered Cherry Dessert Balls**:
- A couple of mixing bowls—one medium one for the filling base and maybe a slightly larger one if you need space to mix around the cherries.
- Your trusty electric mixer or even just a sturdy wooden spoon if you like to get a good arm workout while creaming the cheese!
- A baking sheet. This is essential for chilling and setting the final products.
- Parchment paper. I cannot stress this enough—you need this to line the sheet so the chocolate doesn’t glue your beautiful cherry truffles to the metal.
- A microwave-safe bowl specifically for melting down your chocolate and coconut oil.
- A small fork or a dipping tool. This makes dipping less messy than trying to hold the ball with your fingers.
Frequently Asked Questions About Chocolate Covered Cherry Dessert Balls
I know you might have a few questions lingering! When you’re dealing with a fantastic no-bake dessert like this, questions about ingredients and storage are super common. I’ve tried to cover all the things customers asked me about when I first started making these for neighborhood parties.
Can I use fresh cherries instead of dried cherries in these dessert balls?
Oh, I wish you could, but please don’t! Fresh cherries are just too plump and full of water for this specific recipe. If you tried to chop fresh ones and mix them in, the filling would turn soupy almost instantly, and you wouldn’t be able to roll them properly. Remember, these are designed to be sturdy little **cherry truffles**, and that chewiness comes strictly from the dried kind. Stick to the dried cherries, finely chopped!
What is the best type of chocolate to use for dipping my cherry dessert balls?
This is a matter of preference, but I have a strong recommendation! I favor semi-sweet or dark chocolate chips because their slight bitterness balances out how sweet the cream cheese filling is. That contrast is what makes these so addictive. If you are in a huge hurry, you *could* use candy melts—they set up faster and look ultra-shiny—but you lose some of that genuine, rich chocolate flavor. For the best taste in your **Chocolate Covered Cherry Dessert Balls**, real chips (with the coconut oil helper!) are the way to go.
How long do these chocolate covered cherries stay fresh in the refrigerator?
Because we are using cream cheese in the center, these need to stay chilled for food safety, just like any good cream-based treat. Stored properly in an airtight container in the fridge, they usually last beautifully for a full week. They tend to taste best within the first three or four days, but I’ve definitely eaten them up to day seven, and they were still perfect! Just make sure the container is sealed tight so they don’t pick up any funny fridge smells.
Estimated Nutritional Snapshot for Chocolate Covered Cherry Dessert Balls
Now, I know we make these delicious **Chocolate Covered Cherry Dessert Balls** because they taste amazing, not because they are diet food! But since I always get asked about the numbers, I wanted to give you a rundown of what you can expect from a single one of these little gems. Remember, this is just a ballpark figure since the exact calories and fat content can change based on the brand of chocolate chips or cream cheese you use, but it should give you a good idea!
When I was testing out my version of chocolate chip cookies without brown sugar, I realized how much ingredients matter, and that’s true here too. These estimates are calculated based on the standard measurements in the recipe above and the yield listed.
Here is the general nutritional breakdown per serving (which we set at one ball):
- Serving Size: 1 ball
- Calories: Around 110
- Sugar: 12g (That’s mostly from the chocolate and cherries, naturally!)
- Sodium: 15mg
- Fat: 6g
- Saturated Fat: 4g
- Unsaturated Fat: 2g
- Trans Fat: 0g (No junk here!)
- Carbohydrates: 14g
- Fiber: 1g
- Protein: 1g
- Cholesterol: 8mg
So, you get a perfectly portioned, rich little bite for just over 100 calories. I think that sounds like a totally winning trade-off for such easy and decadent **cherry truffles**! Enjoy them responsibly (if you can stop at one!).
Share Your Chocolate Covered Cherry Dessert Balls Creations
Well, that’s it! You’ve made beautiful, decadent, no-bake **Chocolate Covered Cherry Dessert Balls**! Woohoo! Now, just like Grandma always told me in the kitchen, the best part of baking is sharing what you made. When I pull mine out, my family actually gathers around waiting for them to set—it’s tradition now!
I really, truly want to see what you come up with! Did you try a different kind of chocolate? Maybe you used dark chocolate instead of semi-sweet? Or perhaps you added a little sprinkle of flaky sea salt on top while the chocolate was still wet? Don’t keep those brilliant ideas to yourself!
Please come back here and leave a star rating for the recipe if you loved how easy and delicious these treats were. Five stars if they saved your party, right? And if you snapped a picture—and I bet you did, because they look gorgeous—tag me on social media so I can gush over your skills! It means the world to me when you try my favorite recipes.
If you have any super specific questions that the FAQ didn’t quite cover, or if you want to give me some feedback on how the coconut oil worked in your chocolate glaze, feel free to shoot me a message using my official contact form. Happy snacking, everyone!
Print
Chocolate Covered Cherry Dessert Balls
- Total Time: 95 min
- Yield: 18 servings 1x
- Diet: Vegetarian
Description
Simple, no-bake dessert balls featuring a cherry filling coated in chocolate.
Ingredients
- 1 cup dried cherries
- 1/2 cup cream cheese, softened
- 1/4 cup powdered sugar
- 1 teaspoon vanilla extract
- 1 cup semi-sweet chocolate chips
- 1 tablespoon coconut oil
Instructions
- Finely chop the dried cherries.
- In a medium bowl, beat the softened cream cheese, powdered sugar, and vanilla extract until smooth.
- Mix in the chopped dried cherries until evenly distributed.
- Roll the mixture into small balls, about 1 inch in diameter. Place them on a parchment-lined baking sheet.
- Chill the balls in the refrigerator for at least 30 minutes.
- In a microwave-safe bowl, combine the chocolate chips and coconut oil. Microwave in 30-second intervals, stirring between each, until smooth.
- Dip each chilled ball into the melted chocolate, ensuring full coverage.
- Return the coated balls to the parchment-lined sheet.
- Refrigerate until the chocolate is firm, about 1 hour.
Notes
- If the mixture is too soft to roll, chill it for an additional 15 minutes before forming the balls.
- Store leftovers in an airtight container in the refrigerator.
- Prep Time: 20 min
- Cook Time: 5 min
- Category: Dessert
- Method: No-Bake
- Cuisine: American
Nutrition
- Serving Size: 1 ball
- Calories: 110
- Sugar: 12
- Sodium: 15
- Fat: 6
- Saturated Fat: 4
- Unsaturated Fat: 2
- Trans Fat: 0
- Carbohydrates: 14
- Fiber: 1
- Protein: 1
- Cholesterol: 8
Keywords: chocolate covered cherries, cherry dessert balls, no-bake dessert, cherry truffles, chocolate candy