
Listen, finding a gluten free graham cracker crust that actually *holds together* is like finding a unicorn in your pantry sometimes, right? Everything either crumbles into sandy sadness the second you slice it, or it comes out tasting like cardboard. Ugh. That’s why I absolutely had to nail down this formula because my famous pumpkin chocolate cheesecake needs the perfect base.
Friends, this is it. This is the easiest, most reliable Gluten Free Graham Cracker Crust recipe you will ever use. It’s sturdy, it has that perfect buttery snap, and takes literally ten minutes of active work. You won’t even believe it’s gluten free. Trust me on this one—it’s my go-to every single time!
Why This Gluten Free Graham Cracker Crust Stands Out
When you’re skipping the gluten, you usually have to sacrifice texture, but not here! This crust is a total workhorse. It’s the secret weapon I use whenever I make my tart apple crisp cheesecake, and it never lets me down.

- It’s lightning fast—prep time is barely anything!
- The post-bake texture is firm enough to slice cleanly.
- It’s your blank canvas for virtually any creamy filling.
- It holds up beautifully, even under rich fillings.
Essential Ingredients for Your Gluten Free Graham Cracker Crust
Okay, let’s talk about what matters most: the stuff you put in the bowl. For this crust, simple is better, but the quality has to be right, especially since we’re dealing with gluten free ingredients. You’ll need three main players here to get that perfectly crisp base.
Grab your measuring cups for this quick setup. You need:
- 1 1/2 cups of your favorite gluten free graham cracker crumbs
- 1/4 cup regular white granulated sugar
- 6 tablespoons of good quality unsalted butter, and make sure it’s totally melted!
Don’t skip on melting that butter completely; if it’s just soft, your texture won’t be right when you mix everything up.
Ingredient Notes and Substitutions for the Gluten Free Graham Cracker Crust
Where do you find these GF graham crackers? Honestly, if you can only find whole crackers, just toss them into your food processor—I use mine all the time for grinding up nuts for toppings, too! Blitz them till they look like fine sand. That’s the secret to a smooth Gluten Free Graham Cracker Crust.
One more thing: if you’re bringing this to a party and you’re short on oven time, remember you can totally skip the bake step. Just press that mixture firmly into your pie plate and pop it in the fridge for about thirty minutes until it sets up nicely. Fantastic for a no-bake version!
Step-by-Step Instructions for the Perfect Gluten Free Graham Cracker Crust
Following these steps ensures you get that beautiful, compact shape every time. It’s so simple, you’ll be shocked this is the easy Gluten Free Graham Cracker Crust you’ve been looking for! Grab your 9-inch pie plate and let’s get this assembly line started.
- First things first, get that oven warmed up! We need it to hit 350 degrees F, so pop the broiler on now so it’s ready when you are.
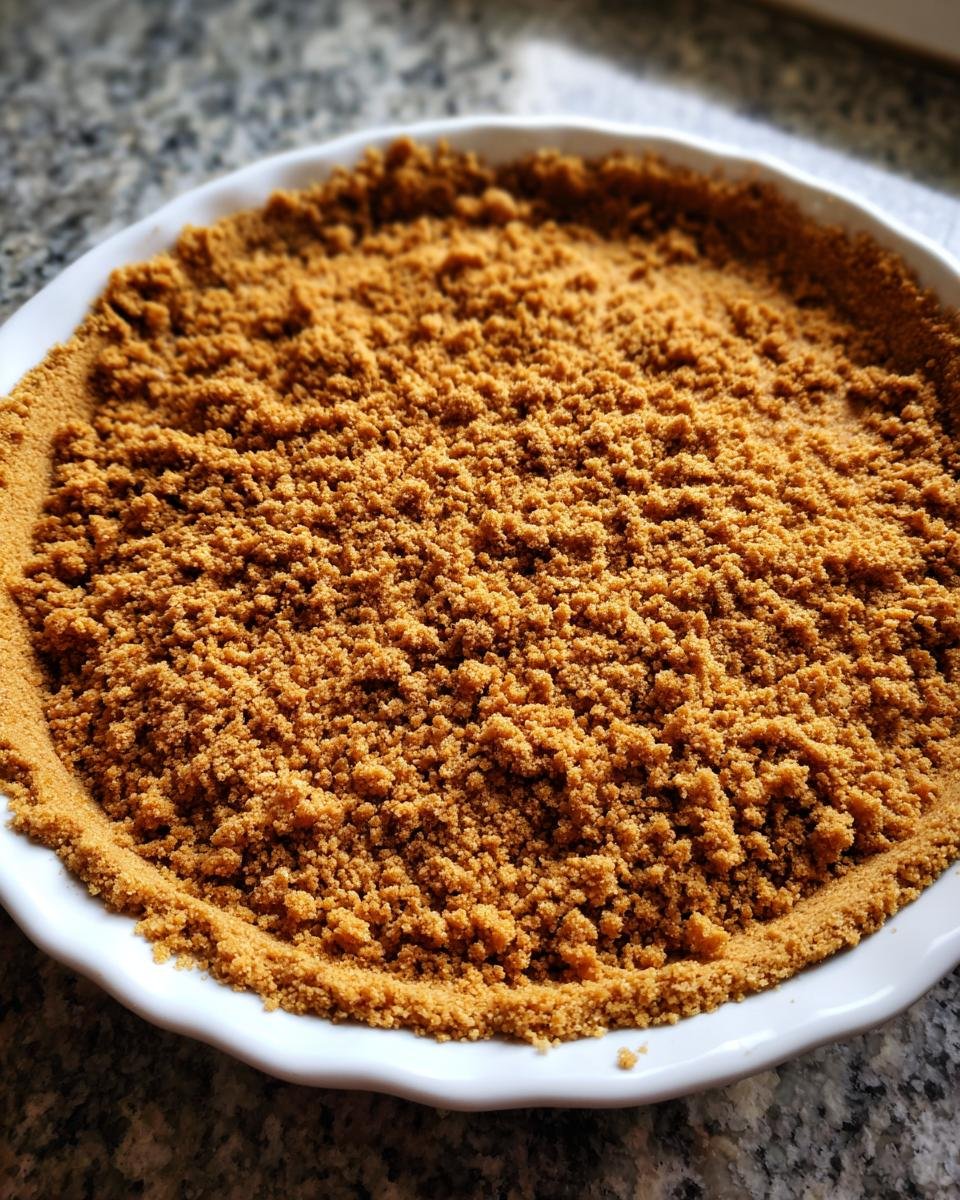
- In a medium bowl—nothing fancy required—toss together your 1 1/2 cups of gluten free graham cracker crumbs and the sugar. Give them a quick stir with a fork just to make sure they’re acquainted.
- Now, pour that melted butter right over the top. This is where you need to mix quickly! Use your fork or a rubber spatula to really work that butter into every bit of crumb until it looks uniformly damp.
- Time to press! Transfer the mixture into that pie plate. Here’s the pro tip I learned the hard way: Press SO firmly, especially up the sides against the rim. I use the bottom of a dry measuring cup—it gives you a really flat, even surface. Don’t be shy; you want it packed tight so it doesn’t crumble on you later! I learned so much about getting bases right from studying how to build a sturdy foundation.

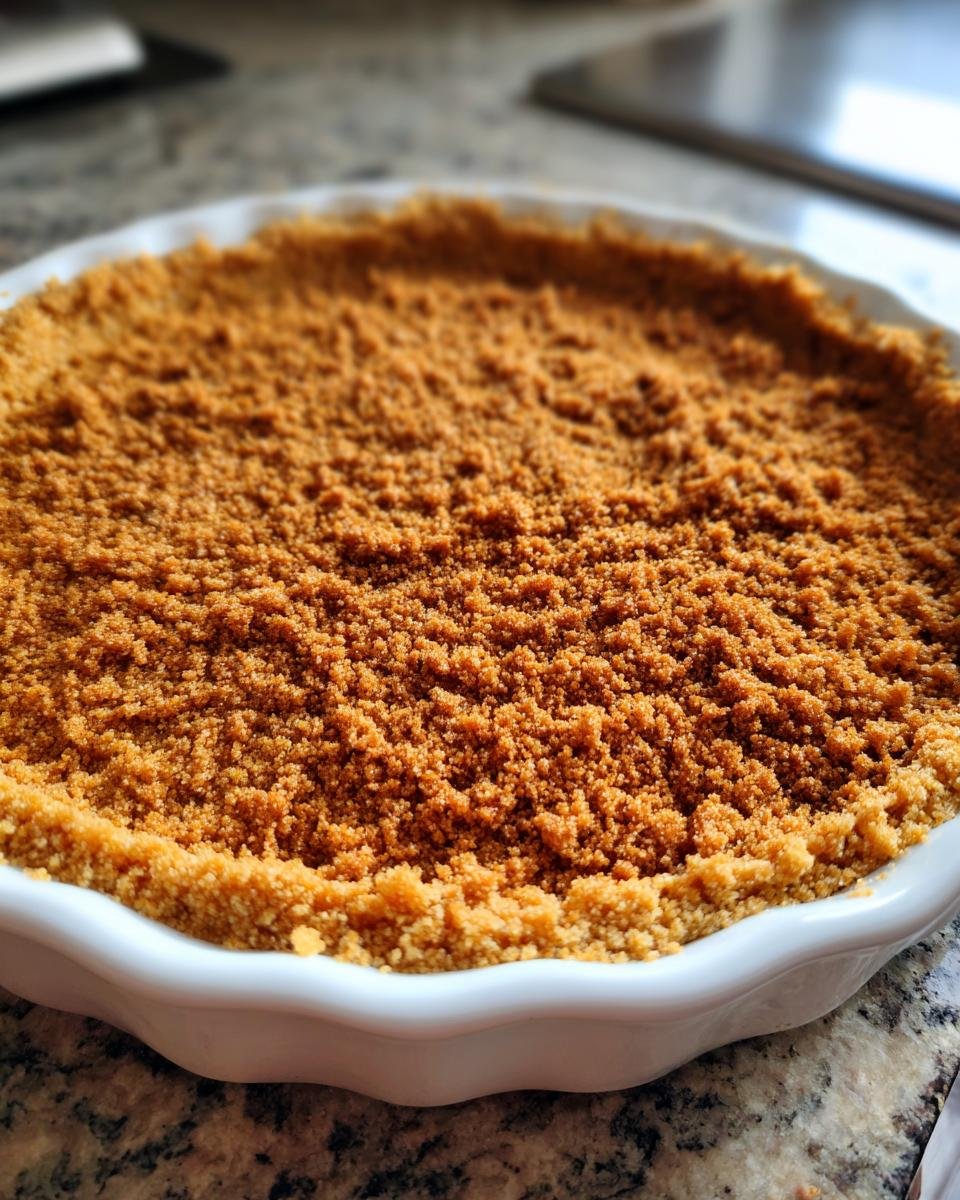
- Pop it into that waiting oven and bake for exactly 10 minutes.
- When the timer sings, pull it out very carefully. This crust needs to cool completely before you add any filling. Seriously, let it sit on the counter until it’s room temperature. That cooling time locks everything into place perfectly.
Baking the Gluten Free Graham Cracker Crust
When you pull it out at the ten-minute mark, it should look just slightly darker around the edges—a beautiful golden brown, not burnt! The heat sets the butter and the sugar, creating a solid structure so your filling doesn’t seep through or cause sogginess. Don’t rush that cooling step, though. If you want to slice into a perfect piece of pie or cheesecake later, that ten minutes of baking must be followed by plenty of downtime on the counter before going any further. Patience pays off!
Tips for Success When Making a Gluten Free Graham Cracker Crust
Even though this Gluten Free Graham Cracker Crust recipe is straightforward, a few little checks can save you a broken crust crisis later. We’re aiming for perfect, sturdy edges, not a pile of crumbs on your serving plate!
First, if you look at your crumbs and they seem dry—like dust bunnies—you under-mixed the butter. Go back to the bowl; you want the mixture to look like wet sand when you squeeze a handful. It should hold its shape without oozing butter. If it crumbles apart when you test it, drizzle in another teaspoon of melted butter and mix it well. This tiny bit of extra fat is what glues the gluten-free pieces together!
Another quick check is your pressing technique. I know I mentioned it before, but it bears repeating: use a flat, heavy object to pack it down. If you just use your fingers, you’ll probably get high spots and low spots, and those low spots burn faster in the oven. I swear by the measuring cup trick I told you about earlier—it’s my secret weapon for an even Gluten Free Graham Cracker Crust.
If you’re worried about the edges burning before the center is set, try this neat trick I picked up from reading more advanced baking articles: after about six minutes in the oven, you can loosely wrap a small strip of aluminum foil around the top edge of the crust. This shields those delicate corners from direct heat while the center finishes baking through. Remember, we want golden, not charcoal!
Storage and Reheating for Your Gluten Free Graham Cracker Crust
Now, this is an important part of the process, because sometimes you just can’t make your pie or cheesecake filling right away, right? Dealing with a Gluten Free Graham Cracker Crust means you need to store it correctly so it doesn’t get that stale or damp texture later on.
If you’ve already baked this crust, let it cool down completely—and I mean totally cool, not even warm to the touch—before you even think about covering it. If you trap steam in there, you’ll end up with a soggy bottom, and nobody wants that tragedy!
For short-term storage, I usually just cover the pie plate tightly with plastic wrap or foil once it’s truly chilled. You can keep an unbaked, pressed crust in the fridge for about 24 hours, but if you’ve baked it, it’s happy sitting on the counter at room temperature for a full day, covered, if your kitchen isn’t too humid. If you need longer, pop the cooled, baked Gluten Free Graham Cracker Crust into an airtight container and freeze it!
Freezing is fantastic! It lasts beautifully for up to two months this way. I often bake two crusts when I’m on a roll and send one to the freezer for a future emergency dessert. You don’t even need to thaw it completely before filling it; just take it out of the freezer, add your filling, and then add about 5 to 10 extra minutes onto your filling’s baking time. It keeps the crust firm and ready for action!
Serving Suggestions for This Gluten Free Graham Cracker Crust
The best part about making this rock-solid Gluten Free Graham Cracker Crust is knowing it will support almost anything you throw at it! Seriously, it’s versatile, which is what every good base recipe should be. It’s not just for plain old pie, although it’s certainly good enough for that!
My absolute favorite thing to use this crust for, besides that pumpkin recipe I mentioned earlier, is a bright, tangy lemon filling. The slight sweetness and warm spice notes from the crackers offer the perfect contrast to tart citrus. You have to try it with my tangy lemon filling recipe next time—it’s divine!
But if you’re more of a chocolate fanatic, you are in luck! This crust is the absolute perfect counterpoint for decadent, creamy chocolate fillings. Think rich, almost fudgy textures. It works like a charm under my heavenly Nutella Cheesecake, providing just enough crunch to cut through all that smoothness. It’s seriously dangerous how well they go together.
For a milder, yet equally impressive dessert, try filling it with something coffee-flavored. The slight saltiness in the crust cuts through the richness of coffee-infused cream. A few years ago, I made a big batch of these crusts just to have on hand, and I filled two of them with my amazing Mocha Cheesecake filling. They disappeared in an hour. So, go wild! Any cheesecake, any cream pie, or anything that needs a sweet, reliable base will sing when you use this Gluten Free Graham Cracker Crust.
Frequently Asked Questions About Gluten Free Graham Cracker Crust
I always get a ton of questions once I post this recipe online, proving that everyone is looking for that easy Gluten Free Graham Cracker Crust solution! Here are the few I hear most often from readers trying this for the first time. Hopefully, this clears up any last-minute construction concerns you have! My number one priority here is making sure your base is perfect, so you don’t have to worry about substitutions.
Can I use a sugar substitute instead of granulated sugar?
That’s a common one, especially when baking for dietary needs! You totally can substitute the sugar if you prefer, but you need to know that it might affect the binding slightly. White sugar helps the butter and crumbs stick together when heated. If you opt for a granular sweetener like stevia or monk fruit, you might need to add an extra teaspoon of melted butter to make sure your Gluten Free Graham Cracker Crust holds its shape during slicing. If you use a liquid sweetener, avoid it here—we need that low moisture content for a truly firm crust! If you want to know more about swapping other dairy ingredients, I have a great guide on making buttermilk substitutions.
Can I press this mixture into a springform pan instead of a pie plate?
Absolutely, yes! In fact, if you’re making a cheesecake, a springform pan is usually my preferred choice anyway, because getting that clean release is so satisfying. When using a springform pan for this Gluten Free Graham Cracker Crust, you absolutely must run a small sheet of parchment paper underneath the bottom plate before you latch the sides on. This prevents the crumbs from leaking out the bottom seam when you press them down. Press firmly, bake for ten minutes, cool, and then you can unlatch the sides once it’s totally cooled off.
What if I don’t have any gluten free graham crackers on hand?
Don’t panic! If your grocery store is sadly out or you just don’t want to buy a whole box for one crust, you can make your own crumbs from scratch. Most common gluten free biscuits or plain cookies work really well as a substitute base. Just make sure they aren’t overly flavored—vanilla or slightly spiced cookies work best. If you use a salty cracker, you might want to reduce the added sugar in the recipe by about one tablespoon. I often end up making my own base because it lets me control the spice level, which is super fun if you want to get creative!
Why does my crust seem too crumbly after baking?
This usually pops up when one of two things happened: either your butter wasn’t quite melted enough, or you didn’t press hard enough in step four. Remember I always talk about using that measuring cup base to really compact the crumbs? That step is crucial for a stable Gluten Free Graham Cracker Crust. If you see it crumbling after it cools, drizzle one or two extra teaspoons of freshly melted butter right over the top and gently rub it in with your finger tips, then pop it back into a 325-degree oven for another 3 minutes just to set that extra butter. It usually saves the day!
Can I substitute the butter with coconut oil?
You can definitely try it, especially if you don’t eat dairy! Coconut oil works fine as a melted fat replacement in this recipe, but just be aware that it often gives the final crust a slightly higher crunch rather than the soft, buttery snap you get from cow’s butter. Since coconut oil is often solid at cooler room temperatures, it helps the crust set up fast if you choose the no-bake method, which is a nice bonus. If you use it, make sure to melt it first, just like the butter.
Estimated Nutritional Data for a Serving of Crust
Okay, so while I spend most of my time thinking about how the crust tastes—which is delicious, by the way—I know some of you are keeping a closer eye on the numbers. I pulled together the breakdown for you based on standard measurements, but please remember this is just an estimate!
Since this recipe makes 8 slices of the Gluten Free Graham Cracker Crust, here is what a single serving looks like, based on the ingredients listed. This data is based on using standard sugar and butter, so if you swap things out, the totals will shift!
Here’s the quick look:
- Calories: About 180 per slice
- Total Fat: A reasonable 12 grams
- Protein: Around 2 grams
- Total Carbohydrates: 17 grams
- Sugar: Roughly 8 grams
I try not to stress too much about the exact numbers when I’m making the base for a holiday pie, but it’s good to know where you stand! If you’re worried about saturated fat, you can play around with swapping some of the butter for oil, but honestly, the butter is what gives the Gluten Free Graham Cracker Crust that unmistakable richness and snap when baked. Just enjoy that delicious slice!
Share Your Gluten Free Graham Cracker Crust Creations
Okay, now that you have this amazing, reliable Gluten Free Graham Cracker Crust holding down the fort for whatever incredible dessert you’ve whipped up, I absolutely MUST see what you made! Baking is so much more fun when we can share the final results, don’t you think? I spend hours perfecting these foundations so you don’t have to fuss with crumbs.
If you tried this recipe—whether you baked it or went the no-bake route—please hop down to the comments below and leave a rating! Five stars if it didn’t crumble on you, four stars if it needed an extra dash of butter, that kind of thing. Your feedback helps everyone else who is nervous about tackling gluten free baking for the first time!
And seriously, I need pictures! If you made my favorite chocolate cheesecake or even just a classic banana cream pie in this crust, snap a photo! Tag me over on social media! Seeing your beautiful finished pies makes my whole week. There is nothing better than helping someone succeed in the kitchen, especially when it comes to tricky bases like the perfect Gluten Free Graham Cracker Crust. Happy baking, and I can’t wait to see what you fill it with!
Print
Gluten Free Graham Cracker Crust
- Total Time: 20 min
- Yield: 1 (9-inch) crust 1x
- Diet: Gluten Free
Description
A simple recipe for a gluten free crust suitable for pies and cheesecakes.
Ingredients
- 1 1/2 cups gluten free graham cracker crumbs
- 1/4 cup granulated sugar
- 6 tablespoons unsalted butter, melted
Instructions
- Preheat your oven to 350 degrees Fahrenheit.
- Combine the gluten free graham cracker crumbs and sugar in a medium bowl.
- Pour the melted butter over the crumb mixture. Mix until the crumbs are evenly moistened.
- Press the mixture firmly into the bottom and up the sides of a 9-inch pie plate.
- Bake for 10 minutes.
- Remove from the oven and let it cool completely before filling.
Notes
- You can use a food processor to make your own gluten free graham cracker crumbs.
- For a no-bake crust, chill the pressed crust in the refrigerator for at least 30 minutes instead of baking.
- Prep Time: 10 min
- Cook Time: 10 min
- Category: Dessert Base
- Method: Baking
- Cuisine: American
Nutrition
- Serving Size: 1/8 of crust
- Calories: 180
- Sugar: 8
- Sodium: 120
- Fat: 12
- Saturated Fat: 7
- Unsaturated Fat: 5
- Trans Fat: 0
- Carbohydrates: 17
- Fiber: 1
- Protein: 2
- Cholesterol: 25
Keywords: gluten free, graham cracker crust, pie crust, cheesecake crust, gluten free baking