
Okay, let’s talk about dairy-free desserts for a minute. I used to think going vegan meant saying goodbye to fluffy, decadent toppings forever, but boy, was I wrong! Trust me when I say this recipe changed everything. I’m sharing my super simple, unbelievably rich Chocolate Coconut Whipped Cream, and you are going to be hooked.
The first time I tried this, I thought I’d messed up because I was still shaking the can of coconut milk like crazy. Oops! But once I figured out the trick—leaving it alone overnight—magic happened. It’s seriously the fastest way to get a decadent topping that tastes like a dream dessert. Forget complicated substitutes; this is the real deal!
Why This Chocolate Coconut Whipped Cream Recipe Works So Well
Honestly, this recipe beats any store-bought container, and it takes next to no time. I always felt like dairy-free substitutes were going to compromise on texture, but this Chocolate Coconut Whipped Cream proves that theory completely wrong. You get that beautiful, airy topping you crave without any dairy guilt.

Here’s why I always come back to this simple formula:
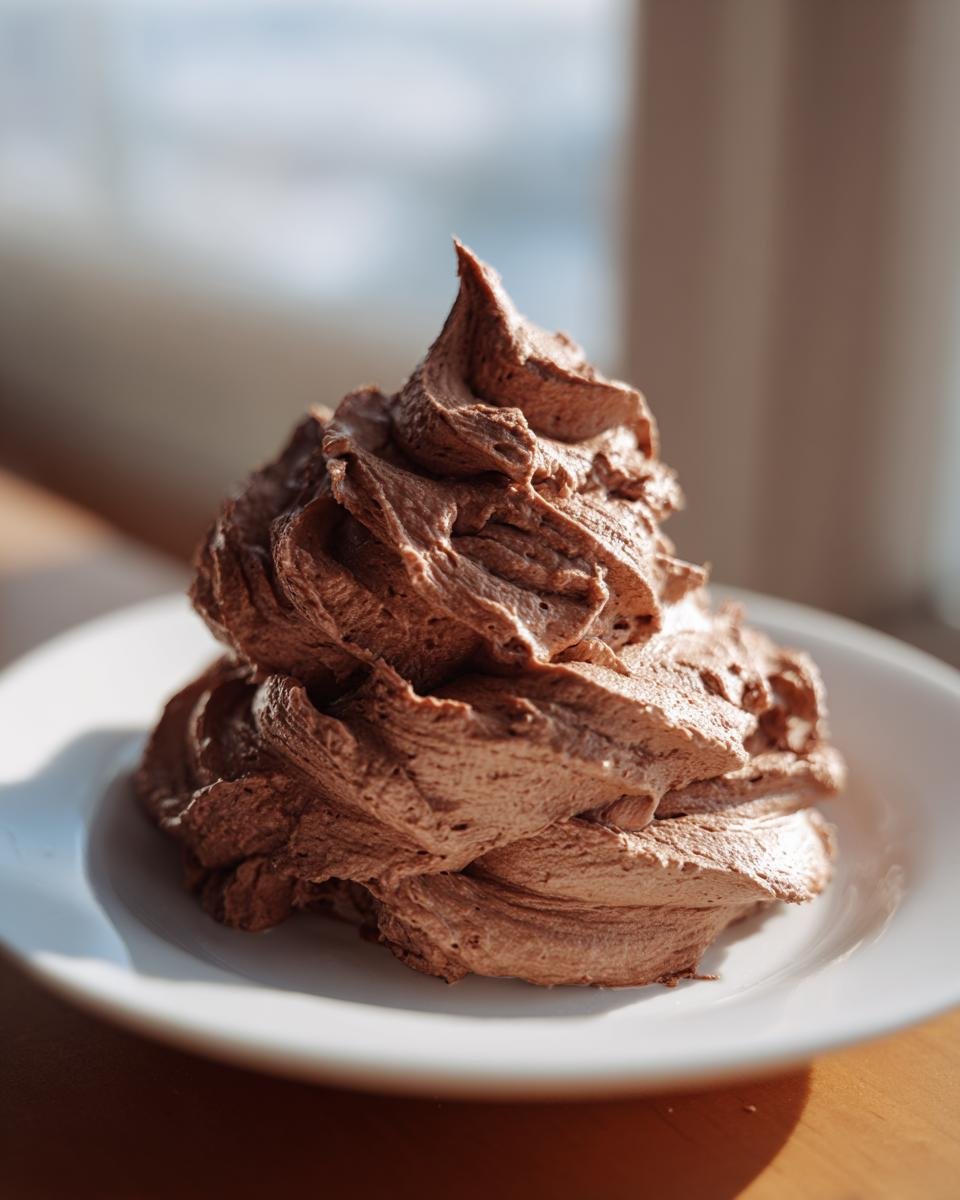
- It whips up into gorgeous, firm stiff peaks that hold their shape forever.
- The flavor is spot on—that earthy cocoa marries perfectly with the sweet coconut note.
- It’s ready faster than you can clean up the mixing bowl!
Quick Preparation for Perfect Chocolate Coconut Whipped Cream
You can’t beat five minutes of work for an amazing topping. Seriously, the prep time is only five minutes, and there’s zero cooking involved. If you get a sudden urge for something decadent on your brownies or pie, this is your instant solution. You just scoop, dump, and whip!
Dairy-Free and Vegan Friendly Chocolate Coconut Whipped Cream
The best part? This recipe is naturally vegan! It’s brilliant for when friends with allergies come over, or frankly, whenever I want a vegan dessert. You get about 1.5 cups of topping from just one can of milk, which is a really decent yield for something so rich.
Essential Ingredients for Rich Chocolate Coconut Whipped Cream
When you see how easy this is, you’ll wonder why you didn’t start making it years ago. The magic of this topping relies entirely on getting a few core ingredients exactly right. My biggest advice, which I learned the hard way after one sad, soupy batch, is chilling. You absolutely must chill that coconut milk overnight—preferably unopened in the coldest part of your fridge! We talk about substitutions a lot on this blog, but for this recipe, stick to the plan, unlike when you might need substitutions for buttermilk.
Gather these four things, and you are set for success. Don’t even think about swapping out a core component!
- 1 can (13.5 oz) full-fat coconut milk, chilled unopened overnight
- 1/4 cup powdered sugar
- 2 tablespoons unsweetened cocoa powder
- 1/2 teaspoon vanilla extract
Ingredient Clarity: Achieving the Right Consistency for Chocolate Coconut Whipped Cream
Let’s drill down on those ingredients because they matter big time, especially that coconut milk. You need one can (13.5 oz) of full-fat coconut milk, chilled unopened overnight. If you buy the light stuff, or if it’s been sitting upright in your fridge, you’ll just end up with chocolate coconut soup, and nobody wants that tragedy.
For sweetness, make sure you’re using powdered sugar—sometimes called confectioner’s sugar. Granulated sugar just won’t dissolve properly into this cold cream base. Also, use unsweetened cocoa powder for that deep chocolate punch. If you accidentally use sweetened cocoa, your Chocolate Coconut Whipped Cream will be way too sweet, trust me on this one!
Step-by-Step Instructions to Make Chocolate Coconut Whipped Cream
Alright, the moment of truth! This is where you get to see that overnight chilling pay off. Remember, organization is key, especially when you’re working with temperature-sensitive products. If you’re looking for general advice on leveling up your kitchen game, I’ve put together a few of my favorite baking tricks that just work.
My biggest tip before you even turn on the mixer? If you remembered to chill your coconut milk, you *must* also chill your mixing bowl and your beaters for about 15 minutes. Cold tools equal stable cream. Now we can dive into the steps!
Preparing the Coconut Cream Base for Chocolate Coconut Whipped Cream
First things first: You have to open that can of chilly coconut milk very carefully. Do NOT shake it! Tilt it gently and scoop out only the thick, hardened cream layer from the top. That solid stuff is what whips up beautifully. Leave all the thin, watery liquid underneath behind in the can—we don’t need that for this Chocolate Coconut Whipped Cream (save it for smoothies, though!).
Toss that glorious scoop of solid cream into your pre-chilled mixing bowl. Then, in go the powdered sugar, the unsweetened cocoa powder for that gorgeous color, and the vanilla extract. That’s all the mixing you do before the electric part!
Whipping the Chocolate Coconut Whipped Cream to Stiff Peaks
Now, grab your electric mixer. Start on medium speed just to incorporate everything smoothly—we don’t want a cocoa cloud explosion across the kitchen! Once it starts looking uniform, bump it up to medium-high speed. Keep watching it closely. It usually takes about 3 to 5 minutes to go from liquidy cream to stiff peaks.
How do you know when you’re done? Stiff peaks mean that when you lift the beaters out of the mixture, the peaks stand straight up without flopping over. If they droop a little, keep whipping for another 30 seconds. If you beat it too long, you might accidentally start making coconut butter, so stop when those peaks are proud and standing tall!
Tips for Success When Making Chocolate Coconut Whipped Cream
Even when you follow the chilling rules perfectly, sometimes the humidity or the subtle variations in canned coconut milk can leave you with a batter that’s just a little too soft. Don’t panic! This is where that expert knowledge comes in handy. We aren’t starting over; we are just giving the mixture a little time-out to firm up its resolve.
I always keep this two-step troubleshooting plan in my back pocket because I know how frustrating it is when you expect stiff peaks and get soft waves instead. This process is all about cooling things down quickly so the fat structure can solidify properly.
Troubleshooting Soft Chocolate Coconut Whipped Cream
If you’ve whipped your Chocolate Coconut Whipped Cream for the full five minutes and the peaks are still flopping sadly over the beaters, you need to try the freezer trick. This is one of my absolute go-to moves!
Take the entire bowl—the one with the soft mixture in it—and place it right into the freezer. You don’t want to leave it long; seriously, check it after 10 minutes. That brief blast of cold air usually firms up the coconut fat just enough to do the job. Pull it out, put the beaters back in, and whip it again on medium-high speed. It should whip right up to those glorious stiff peaks! If it’s still reluctant, pop it back in for another 5 minutes, but be careful not to let it freeze solid!
Also, remember what the notes said: if you’re worried about serving it immediately, just chill the bowl once you’ve reached your stiff peaks. Keeping it cold is the secret to maintaining that perfect fluffy texture until you’re ready to dollop it onto that pie!
Creative Ways to Serve Your Chocolate Coconut Whipped Cream
Now that you have this amazing, dairy-free cloud of Chocolate Coconut Whipped Cream, the fun really begins! You don’t have to wait for a special occasion to use it. I swear, even a boring Tuesday night feels fancy when you have this topping waiting in the fridge.
Because it’s so rich, it pairs wonderfully with things that need a little cooling sweetness. If you love coconut chocolate combos, you absolutely *have* to try a dollop on top of my coconut chocolate chip cookies—it’s next-level delicious.

Here are a few ways I love using this topping:
- In place of regular frosting on a vegan cake, especially if you’re making something like my double chocolate cookie cake!
- Piled high onto fresh strawberries or raspberries; the fruit cuts through the richness perfectly.
- As a topping for hot cocoa—it melts just beautifully and adds that yummy coconut flavor into the drink.
- Dolloped over a scoop of vegan vanilla ice cream or on simple fruit salad when you need a treat fast.
It’s just so versatile! You’ll find yourself looking for excuses to whip up a batch!
Storage Instructions for Leftover Chocolate Coconut Whipped Cream
This Chocolate Coconut Whipped Cream is best enjoyed right away, but that rarely happens in my house because we tend to devour it! If you do manage to have leftovers, you need to treat it nicely because coconut fat is a little stubborn once it’s been whipped.
The key is keeping it very cold. Scoop whatever you have left into an airtight container. You don’t want any fridge smells sneaking in there! You can store it in the refrigerator for about three or four days. After that, the texture starts to change, and it can get a bit grainy or watery, and nobody wants that sad texture.

If you pull it out and it looks a little soft or separated, don’t throw it out! Just pop the container into the freezer for about 10 minutes while you get your mixer ready. Then, give it a quick whip again on medium speed for just about 30 seconds. It usually smooths right back out, fluffy and perfect, ready for another round of topping duty!
Frequently Asked Questions About Chocolate Coconut Whipped Cream
I always get a ton of questions about this recipe because people are nervous about making dairy-free substitutes work. It’s totally normal to have doubts when you’re stepping away from heavy cream, but don’t worry! I’ve gathered up the questions I hear most often so you can feel confident heading into the kitchen.
Can I sweeten the Chocolate Coconut Whipped Cream with maple syrup instead of powdered sugar?
Oh, I love maple syrup as much as the next person, but for this specific recipe, I really advise against it! Powdered sugar is dry, and we need to keep the liquid content very low to ensure those stiff peaks form. Maple syrup is liquid, and if you add it, you’re basically just going straight back to runny coconut cream. It’ll cause the fat structure to break down immediately. If you absolutely must avoid sugar, you could try a liquid monk fruit sweetener, but I haven’t tested it enough to promise stiff peaks. Stick to powdered sugar for the best Chocolate Coconut Whipped Cream texture!
Why is my coconut milk not whipping into stiff peaks?
If your mixture is refusing to get fluffy, nine times out of ten, it’s a temperature issue or an ingredient mismatch. Did you chill that can of full-fat coconut milk long enough? I mean a full 12 to 24 hours, unopened, in the back of the fridge. If it’s not completely solid on top, it won’t whip! Also, check the label one more time: it must say full-fat. Light coconut milk just won’t cut it because it has too much water content, and water actively fights against whipping. A quick 10 minutes in the freezer can sometimes rescue a too-warm batch, remember that trick!
How long does homemade Chocolate Coconut Whipped Cream last in the fridge?
We usually eat ours within 24 hours, but if you store it properly, it should last decently well. Pop it in a sealed, airtight container. Because it’s so dependent on the cold temperature for its stability, I’d say you are safe keeping it for about three to four days in the back of the fridge. If you notice it looks a bit sad or separated when you take it out, don’t fret! Just give it a quick beat with your mixer for about 30 seconds, and it should fluff right back up. Don’t let it sit out on the counter for too long, or it will definitely turn back into liquid.
Estimated Nutritional Snapshot for Chocolate Coconut Whipped Cream
I always think it’s helpful to have a general idea of what’s in the amazing things we bake and eat! Now, remember, because this is a homemade topping made with natural coconut fat, these numbers are estimates based on dividing the total output into four servings of about 1/4 cup each. We’re looking at about 120 calories per serving thanks to that rich coconut base.
Here’s a quick breakdown of the main components:
- Serving Size: 1/4 cup
- Calories: 120
- Sugar: 8g
- Fat: 11g (Saturated Fat: 9g)
- Protein: 1g
It’s definitely a rich topping, but it’s free of cholesterol and dairy, which is a win in my book! Enjoy it guilt-free while it lasts!
Share Your Dairy-Free Whipped Cream Creations
Whew! You’ve made it to the best part—enjoying the Chocolate Coconut Whipped Cream! I sincerely hope this recipe becomes a staple in your kitchen, too. It just makes everything feel instantly more special, whether you’re topping a slice of vegan pie or just sampling it with a spoon (don’t judge, I do it all the time!).
I always love seeing how you all use my favorite recipes. Please, take a second and let’s chat in the comments below. How did you serve up your batch? Did you use it on strawberries, or maybe you finally made that dream layered dessert?
If you loved this super quick, dairy-free topping, please consider leaving a quick review—a five-star rating really helps other folks find this great recipe! And if you have any questions or just want to say hello, feel free to reach out through my contact page anytime. Happy whipping!
Print
Chocolate Coconut Whipped Cream
- Total Time: 5 min
- Yield: About 1.5 cups 1x
- Diet: Vegan
Description
A simple recipe for dairy-free whipped cream flavored with chocolate and coconut.
Ingredients
- 1 can (13.5 oz) full-fat coconut milk, chilled overnight
- 1/4 cup powdered sugar
- 2 tablespoons unsweetened cocoa powder
- 1/2 teaspoon vanilla extract
Instructions
- Open the chilled can of coconut milk without shaking it. Scoop out the thick cream from the top layer into a mixing bowl, leaving the watery liquid behind.
- Add the powdered sugar, cocoa powder, and vanilla extract to the coconut cream.
- Using an electric mixer, beat the mixture on medium-high speed until stiff peaks form, about 3 to 5 minutes.
- Serve immediately or chill for later use.
Notes
- For best results, chill your mixing bowl and beaters before starting.
- If the cream is too soft, place the bowl in the freezer for 10 minutes and whip again.
- Prep Time: 5 min
- Cook Time: 0 min
- Category: Dessert Topping
- Method: Mixing
- Cuisine: American
Nutrition
- Serving Size: 1/4 cup
- Calories: 120
- Sugar: 8
- Sodium: 10
- Fat: 11
- Saturated Fat: 9
- Unsaturated Fat: 2
- Trans Fat: 0
- Carbohydrates: 9
- Fiber: 1
- Protein: 1
- Cholesterol: 0
Keywords: chocolate, coconut, whipped cream, dairy-free, vegan topping