
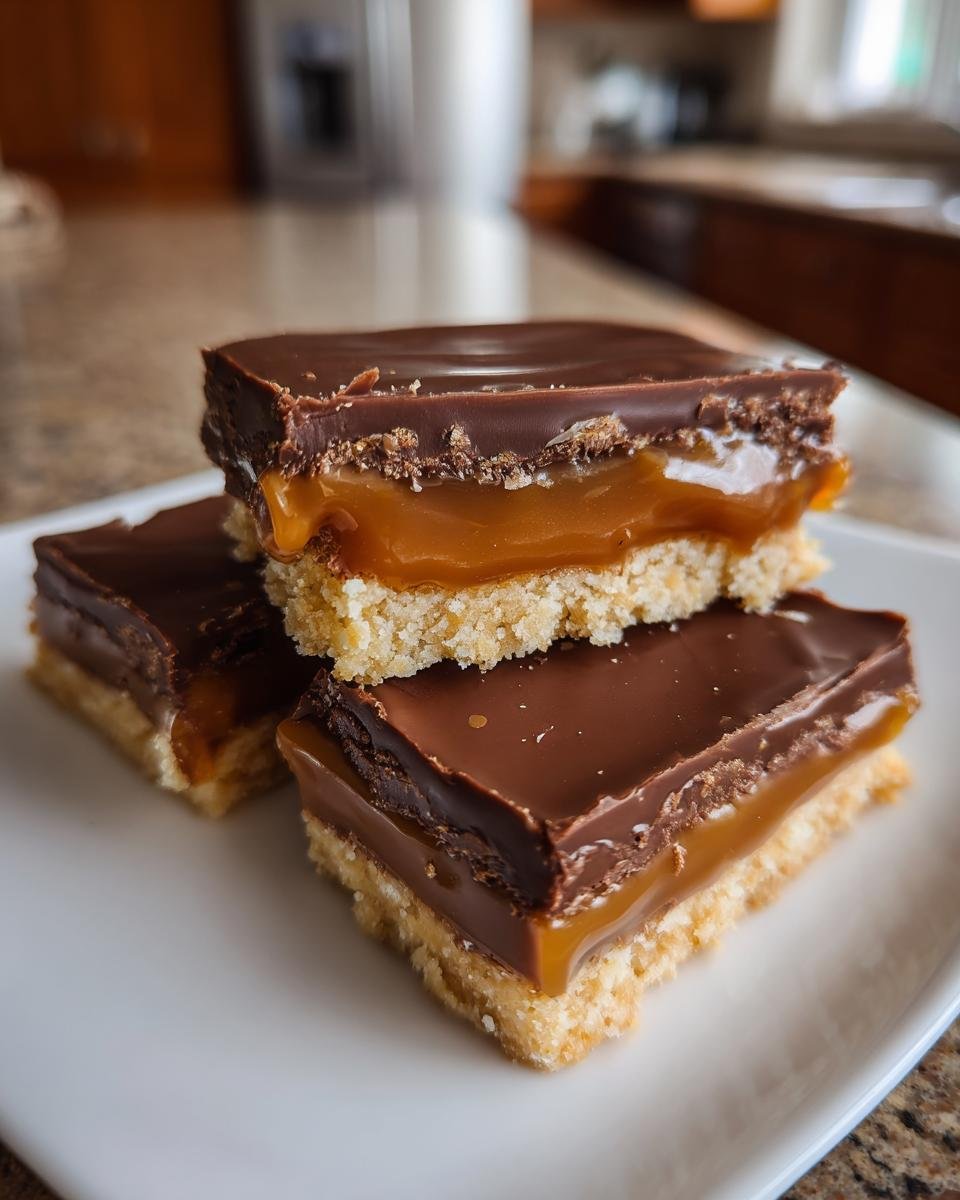
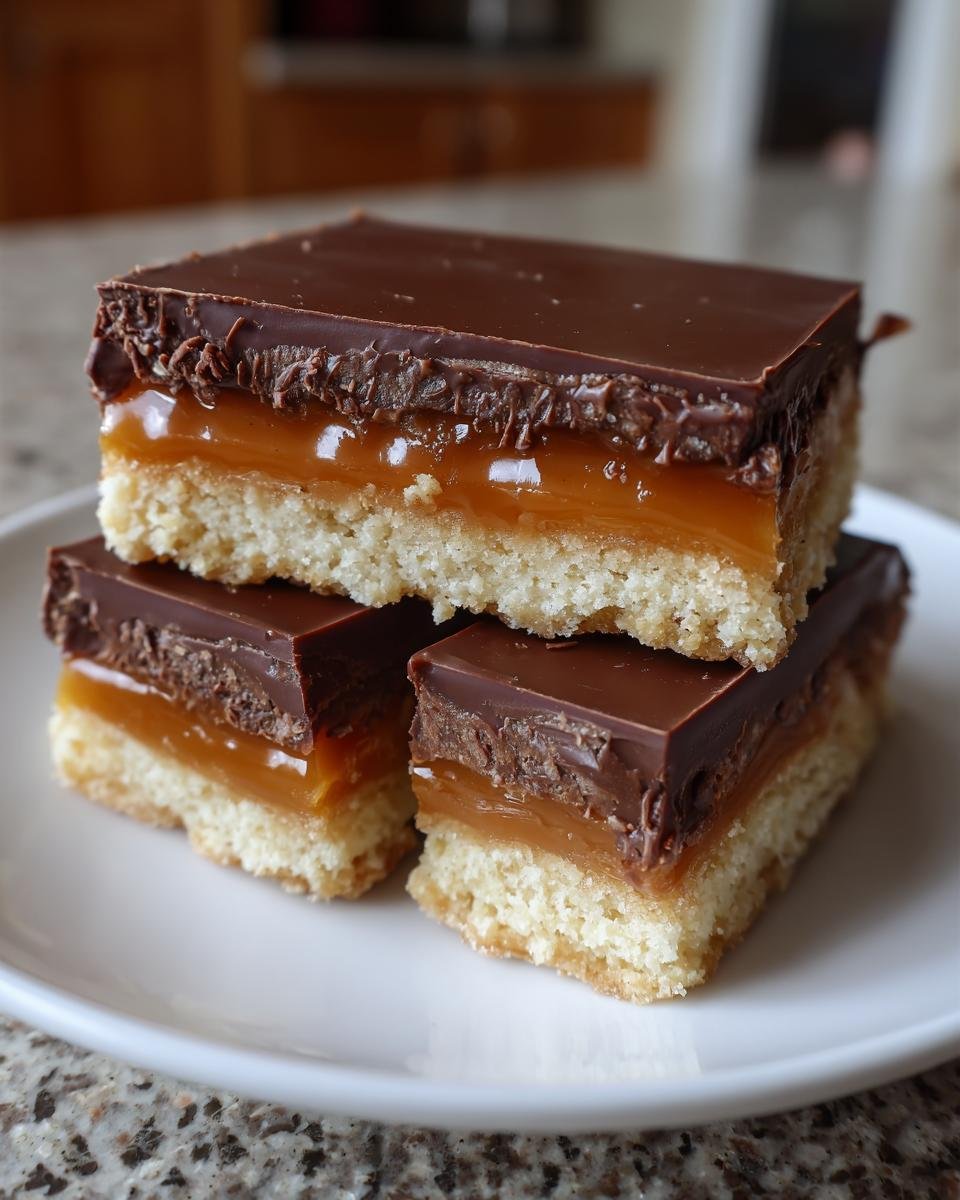
If you’re anything like me, sometimes only a chocolate-and-caramel skyscraper can satisfy that intense sweet craving. Forget those waxy, store-bought versions! We’re going straight to the source with my Irresistible Homemade Twix Bars Recipe For Sweet Lovers. You get that perfect, crumbly shortbread base, layers of gooey, chewy caramel, and then it’s all dipped in a thick coating of real chocolate goodness.
I’ve been obsessed with getting the caramel just right—you know, not too hard, not too soupy? After years of trying to nail that perfect chewy caramel, I finally cracked the code for this Irresistible Homemade Twix Bars Recipe For Sweet Lovers. Seriously, once you taste this shortbread crumble against that soft filling, you won’t go back to the candy aisle, trust me!

Why You Will Make This Irresistible Homemade Twix Bars Recipe For Sweet Lovers
Honestly, once you realize how easy it is to make these far superior to the ones wrapped in crinkly foil, you’ll wonder why you ever waited. This recipe really sings because it nails the textural contrast.
- The shortbread base is everything! It bakes up perfectly golden and provides that essential, slightly sandy crunch that breaks apart beautifully when you bite into it. It’s sturdy enough to handle the toppings, too.
- That gooey caramel layer? Oh my gosh. It’s soft, rich, and never turns into hard candy, even when it cools down. I finally figured out how to get that perfect homemade chew, and it only requires a little patience on the stove.
- It’s totally customizable! While this recipe is the official winner, you can easily swap in milk chocolate or even add a little sprinkle of sea salt right before the chocolate sets if you like that sweet-salty vibe.
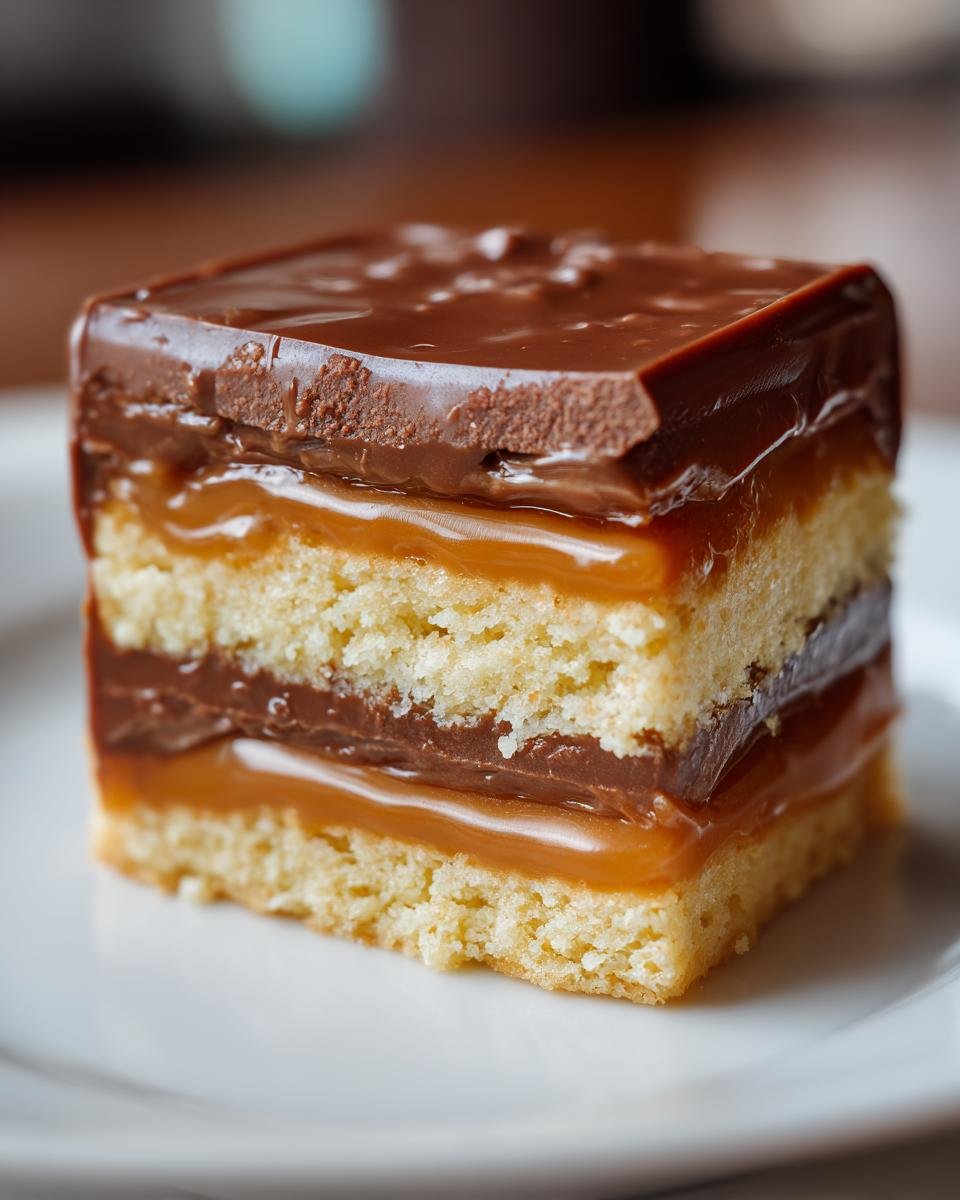
- The assembly isn’t messy at all—if you follow my tip about letting the caramel cool slightly! You get three distinct layers of amazing flavor without needing fancy equipment. If you want to check out some other handy hints for better baking overall, I highly recommend looking over these baking tips.
- Flavor payoff is huge. Seriously, the smell when the shortbread is baking? It takes me right back to childhood, except now I get to eat the whole pan!
Gathering Ingredients for Your Irresistible Homemade Twix Bars Recipe For Sweet Lovers
Okay, this is where we set ourselves up for success, right? You need the right stuff for each layer, or things get sticky fast! Don’t worry if you’re missing an ingredient; sometimes we have to get resourceful. For instance, if you ever need a quick substitute for things like milk or cream, check out this guide—though for this recipe, the listed items are honestly the key players.
Pull out your measuring cups and let’s get everything laid out before we even think about turning on the stove or the oven. Organization is half the battle when you’re dealing with three separate components!
For the Shortbread Base
This dough needs to be tender, not tough, so pay attention to your butter temp here!
- 1 cup (that’s two sticks!) of unsalted butter, sitting out on the counter so it’s nice and softened. Don’t even think about melting it.
- 1/2 cup of regular granulated sugar.
- 2 cups of good old all-purpose flour.
- Just a tiny pinch—1/4 teaspoon—of salt.
For the Gooey Caramel Layer
This is the magic section. The corn syrup is an absolute non-negotiable because it keeps that caramel soft and chewy, giving you that classic Twix texture we’re chasing.
- One whole 14-ounce can of sweetened condensed milk. Don’t drain it!
- 1/2 cup of light corn syrup. This is your secret weapon for chewiness.
- 1 cup of light brown sugar, and make sure you pack it down hard into the measuring cup.
- 1 teaspoon of vanilla extract—use the real stuff if you can smell the difference, which you totally can!
For the Chocolate Coating
We need this chocolate to be smooth and glossy so it coats beautifully without cracking when you bite into it. That little bit of shortening is essential for that shiny finish!
- 1 1/2 cups of semi-sweet chocolate chips. You can switch this to milk chocolate if you like it sweeter.
- 1 tablespoon of vegetable shortening. This helps thin the chocolate out perfectly for dipping.
Step-by-Step Instructions for the Irresistible Homemade Twix Bars Recipe For Sweet Lovers
Alright, this is where we get down to business! Making these bars is like getting three little baking projects done in one go, but don’t let that scare you. We’re taking it slow, layer by layer. Remember, just like when making my famous caramel fudge, constant stirring when the heat is on is your best friend so nothing burns!
First things first: get that oven warmed up. We need everything ready before we start mixing the base so nothing sits around getting weird.
Preparing and Baking the Shortbread Base
We want this shortbread to be buttery and crisp, so we aren’t going to overwork it at all. Overmixing flour will make these tough, and we definitely don’t want that!
- Get your oven set to 350 degrees F (that’s 175 degrees C) nice and early.
- Grab your 9×13 inch baking pan. I always line mine with parchment paper, leaving those lovely overhangs on the sides—this acts like built-in handles for lifting the whole thing out later. Seriously, thank goodness for parchment paper!
- In a good big bowl, beat that softened butter and the granulated sugar together until they look creamy. Like, light and fluffy creamy, not watery creamy.
- Now, gently add in your flour and that small bit of salt. Mix it until you just see the flour disappear and it forms a nice, cohesive dough. Pro Tip: Press that dough down super evenly into your prepared pan. I use the flat bottom of a drinking glass to get it perfectly level.
- Bake this base for about 15 to 18 minutes. You’re looking for the edges to just turn the slightest hint of golden brown.
- Once it’s out, let it cool down just a bit while we tackle the star of the show—the caramel!
Cooking the Perfect Caramel for Your Irresistible Homemade Twix Bars Recipe For Sweet Lovers
This is the most important part! If you rush the caramel, it gets too hard, and that’s a tragedy. We’re aiming for that stretchable, perfect chew.
- Into a medium saucepan, toss in your sweetened condensed milk, the light corn syrup, and all that packed brown sugar.
- Set the heat to medium. You need to stir this constantly—I mean *constantly*—as it heats up. Don’t let it sit unattended for even a second, or you’ll get sugary sediment bubbling up.
- Keep stirring and watching! Ideally, you want a candy thermometer in there to hit 240 degrees F (that’s 115 degrees C). If you don’t have a thermometer, look for it to get noticeably thick and it should coat the back of your spoon heavily. This usually takes about 8 to 10 minutes.
- When it hits that sweet spot, pull it right off the burner immediately!
- Stir in that teaspoon of vanilla extract quickly.
Assembling and Setting the Layers
Now we bring our two best components together and let them set up before we add the chocolate armor. Patience here pays off big time!
- Gently pour that gorgeous hot caramel right over your slightly cooled shortbread base. Spread it out so it covers every corner evenly.
- Now, you have to let it set. Leave it alone on the counter for about one full hour. If your kitchen is really warm, you can stick it in the fridge for about 30 minutes, but room temperature works best for the final consistency.
- Once the caramel is firm enough that it doesn’t squish when you gently tap it, take a sharp knife and slice the whole thing into bars of whatever size you like. If you chill them for 30 minutes right before cutting, you get the cleanest lines possible—seriously, try that!
Creating the Smooth Chocolate Coating and Finishing the Irresistible Homemade Twix Bars Recipe For Sweet Lovers
This is the final step! When the chocolate melts right, it’s so beautiful and easy to work with. I always talk about how useful coating techniques can be in recipes, especially if you want that professional finish, just like in my caramel fudge guide.
- Grab your microwave-safe bowl. Put in your chocolate chips and that tablespoon of shortening.
- Microwave in short bursts—30 seconds at a time—stirring vigorously in between each burst until everything is completely melted and creamy smooth. The shortening ensures it stays nice and fluid for dipping.
- Take your pre-cut bars and dip each one into the chocolate bath. Make sure they’re fully submerged. Seriously coat them!
- Use a fork or dipping tool to pull them out, letting any excess drip off back into the bowl.
- Place the dipped bars back onto that parchment-lined sheet or a wire rack. Let them sit there until that chocolate coating is totally firm. You can speed this up by popping them in the fridge for 15 minutes if you’re impatient (I usually am!).
Tips for Success with Your Irresistible Homemade Twix Bars Recipe For Sweet Lovers
Look, these bars take a little time because of the setting required between layers, but if you follow these quick tips, they are absolutely foolproof. Trust me, this is how I finally stopped fighting with my caramel and started just enjoying the baking process!
Here are the few things I’ve learned over the kitchen trial runs:
- Don’t Skimp on Cooling Time! This is the biggest mistake people make. If you try to pour hot caramel onto hot shortbread, you get a melted mess instead of distinct layers. Let the shortbread cool completely after baking, and then let the caramel cool for a full hour before cutting. If you need to speed up the cutting process, chilling the entire slab for 30 minutes before slicing is your ticket to those super clean edges.
- The Thermometer is Your Pal for Caramel. I know some bakers hate using thermometers, but for candy, they save your sanity. You MUST hit that 240°F mark for that classic chew. If you go much higher, it gets hard and brittle; if you go too low, it will start oozing out the second you pick up the bar. If you don’t have one, watch for the mixture to pull dramatically away from the sides of the pan when you stir it—that’s a good visual cue!
- For a Shiny, Chip-Free Chocolate Coat: That little bit of shortening (or vegetable oil if you are in a pinch) mixed with the chips is non-negotiable for dipping. It lowers the viscosity of the chocolate so it flows smoothly over the entire bar. If your chocolate seizes up or looks dull, it might mean a tiny drop of water got in there, which is the worst! Stick to dry bowls and clean spoons.
- Press Firmly, But Gently. When you press the shortbread dough into the pan, press it firmly so it binds together, but don’t smash it down so hard that you compress all the air out. That air is what gives the shortbread a lovely, light crumb rather than making it dense like a cracker. You want a sturdy foundation, not a brick! If you want to dive deeper into general baking confidence, I always point people toward this wonderful resource I keep bookmarked.
Ingredient Notes and Substitutions for Irresistible Homemade Twix Bars Recipe For Sweet Lovers
I get asked all the time about fiddling with the ingredients in this recipe, and while the core elements are rock-solid secrets to the bar’s success, sometimes you just gotta work with what you have on hand! Don’t panic if you’re missing one small thing; we can adapt, but know that some roles are harder to replace than others.
Let’s talk about the three main troublemakers: the corn syrup, the chocolate, and that vital shortening in the coating.
What If I Don’t Have Light Corn Syrup?
Okay, this one is tough. Corn syrup is what stops your caramel from crystallizing or turning into rock-hard toffee. It keeps that lovely, slightly tacky chewiness we need. If you absolutely, positively can’t find it, you can try using an equal amount of golden syrup or even honey, but you need to adjust the sugar down a little bit because honey is sweeter.
If you use honey, be warned: the flavor profile changes just a tiny bit, and you might need to cook the caramel for a minute or two longer. But honestly, for the classic texture in this Irresistible Homemade Twix Bars Recipe For Sweet Lovers, corn syrup is worth tracking down!
Swapping Out Chocolate Types
This is the easiest switch! I used semi-sweet because it balances the incredible sweetness of that homemade caramel. But if you’re a darker soul like me sometimes, you can totally go for bittersweet chocolate chips. It cuts the overall sweetness nicely.
If you have kids or just love things super sweet, using milk chocolate chips instead will also work beautifully! The texture remains the same, it just changes the depth of the chocolate flavor. Make sure whatever you choose, it melts smoothly!
The Role of Shortening in the Chocolate Dip
People always ask why I put that tablespoon of vegetable shortening in with the chocolate chips for melting. It’s not there for flavor, I promise! Shortening (or even coconut oil, if you don’t mind a tiny coconut hint) is added because it raises the melting point of the chocolate slightly.
What does that mean for you? It means when you dip your bars, the chocolate sets up faster, has a beautiful, high-gloss shine, and doesn’t melt all over your fingers the second you pick it up. It keeps the coating crisp, not soft. If you skip it, your chocolate coating might stay a little dull or take ages to set up properly at room temperature.
Butter Quality for the Shortbread
I preach using good quality, softened, unsalted butter for the shortbread base, and I stand by it! That butter carries so much of the flavor in the shortbread layer. Don’t even try to use margarine here; the flavor just isn’t the same, and you might lose some of the structure we talked about earlier.
If your recipe calls for milk or cream in a different step, remember you can look up quick hacks on things like making buttermilk substitutions if needed, but for this specific bar recipe, the ingredients listed are designed to be straightforward and reliable!
Storage and Make-Ahead Options for Your Irresistible Homemade Twix Bars Recipe For Sweet Lovers
One of the BEST things about homemade candy bars is that they are totally make-ahead friendly! This is such a lifesaver when you’re planning a big gathering or just need a sweet stash ready to go. Unlike a delicate layer cake, these Irresistible Homemade Twix Bars Recipe For Sweet Lovers actually taste better the next day after the caramel and shortbread have really settled into each other.
I often make a double batch of these and stash them away. It’s incredibly helpful because I can handle the messy dipping part on a cooler day, and then just keep them stored safely until I need them. If you’re curious about other make-ahead crumbly treats, you should check out how I handle my caramel crumb bars—the principles of stable layers are similar!
Room Temperature Storage is Key
Since these bars have that super stable, cooked caramel center and a thick chocolate coating, they are perfectly happy hanging out on the counter. You don’t need to refrigerate them unless your house is extremely hot, because chilling can sometimes make the shortbread go a little too firm or the chocolate look dull.
- Store the finished, fully coated bars in an airtight container. I like using a large, flat Tupperware so they don’t stack too high, but if you must stack them, put a layer of parchment or wax paper between each layer of bars.
- They will stay delicious for up to one week at room temperature. Honestly, they rarely last that long in my house, but the chocolate holds up really well!
Can You Freeze Homemade Twix Bars?
Yes, you absolutely can freeze these! Freezing is ideal if you made a massive batch or if you want to keep them for much longer than a week. The shortbread and the cooked caramel freeze beautifully without any texture loss.
- Make sure the chocolate coating is completely set firm before freezing.
- Wrap the bars tightly! I recommend wrapping individual bars first in plastic wrap, and then placing those wrapped bars into a heavy-duty freezer bag. This prevents freezer burn and keeps that chocolate hard and protected.
- They should be good in the freezer for up to two months.
Thawing and Serving After Freezing
Thawing is crucial for the best texture, so don’t just toss them on the counter while they’re wrapped!
- When you’re ready to eat them, move the frozen bars (still in their wrapping) to the refrigerator overnight. This slow thaw keeps the chocolate from sweating when it warms up.
- Once they are fully cold in the fridge (after about 8 hours), then you can take them out and let them sit on the counter for about 20 minutes before eating. That will soften the caramel just enough back to that perfect chewy texture we worked so hard for!
Serving Suggestions for Your Irresistible Homemade Twix Bars Recipe For Sweet Lovers
Oh boy, after all that hard work creating the perfect Irresistible Homemade Twix Bars Recipe For Sweet Lovers, you deserve to sit back and enjoy them properly! These bars are rich, they are decadent, and they are *sweet*—really, fantastically sweet. Because of that rich filling and heavy chocolate coat, they kind of demand a beverage companion to cut through all that glory.
Simple Pairings to Balance the Sweetness
I find that simple, slightly bitter drinks are the absolute best match for something this indulgent. You want something that grounds the sweetness without overwhelming that delicate shortbread flavor.
- A Perfect Cup of Coffee: Forget the flavored syrups! A hot, strong black coffee—espresso, a dark roast, or even a simple French press—is the best partner. The slight bitterness of the coffee pairs so well with the deep notes of the semi-sweet chocolate and the brown sugar in the caramel.
- A Tall Glass of Cold Milk: This is classic for a reason, isn’t it? Nothing beats dunking a freshly made Twix bar corner into ice-cold whole milk. It softens the chocolate just a touch and washes down all that sticky caramel perfectly. My kids swear by this method every single time.
- Unsweetened Tea if You’re Feeling Fancy: If you’re serving these after dinner, a highly brewed, chilled black tea is actually a wonderfully sophisticated pairing. It’s refreshing and cleanses the palate between bites.
Leveling up the Dessert Experience
Sometimes, a bar just needs to be part of a bigger bowl of yumminess, right? If you want to turn your homemade Twix creation into a full-fledged dessert experience, here are my favorite ways to dress them up.
- The Vanilla Anchor: A scoop of really good quality vanilla bean ice cream is the ultimate way to serve these warm. If you’ve set your bars and chilled them, you can warm them slightly in the microwave (just for 5-10 seconds!) and crumble them right over the top of the ice cream. The hot/cold contrast is divine.
- Caramel Sauce Drizzle (If You Dare!): If you made extra caramel for some reason, or if you’re just feeling completely wild, drizzle a little extra sauce over the chocolate coating right before serving. It looks absolutely gorgeous and makes a big statement! But only do this if you aren’t worried about sugar overload!
- A Little Crunch Contrast: If you want to mix up the texture outside the bar itself, try serving it alongside something crunchy that isn’t sweet. Think maybe a few toasted, unsalted pecans or walnuts sprinkled on the serving plate. They add necessary textural excitement.
I’ve had great success pairing these with simple chocolate desserts, too. If you happen to be making something less rich, like a plain chocolate chip cookie without any brown sugar additions, these bars make the perfect, intense companion alongside it for contrast. Check out my recipe for that if you want to keep one element of your dessert spread lighter!
Frequently Asked Questions About the Irresistible Homemade Twix Bars Recipe For Sweet Lovers
I know when you try a new homemade candy recipe, questions always pop up, especially when dealing with things like set caramel and melted chocolate. I’ve been through every possible hiccup making these, so let me tackle the most common ones I hear about this Irresistible Homemade Twix Bars Recipe For Sweet Lovers!
Can I make the caramel filling without using a candy thermometer?
Yes, you totally can, but you have to be super attentive because that’s the crucial step! If you don’t have a thermometer that hits 240°F (115°C), you have to look for the visual clues. When you stir the mixture, it will start to look thicker and you’ll see the surface almost ripple slowly instead of boiling rapidly. Also, when you pull your stirring spoon out, the caramel dripping off the back should look thick and fall in heavy ribbons that sit on top of the mixture for a few seconds before melting back in. If you’re unsure, it’s always safer to pull it off the heat a tiny bit early than too late. You can always firm it up later!
Why is my chocolate coating looking dull or seizing up?
Dull chocolate usually means one of two things for this recipe. First, did you remember to add that tablespoon of vegetable shortening? That’s what gives it the shine! If you skip it, the chocolate sets a little duller. Second, and this is the worst, is water contamination. Chocolate hates water. Even a single drop of steam or water on your stirring spoon can cause the whole batch to tighten up and look grainy—that’s seizing! Make sure your bowl and utensils are bone dry before you start melting those chips.
My shortbread base seems crumbly or breaks when I try to cut it. What went wrong?
That usually happens for two reasons. Either you didn’t press the dough down firmly enough into the pan before baking, or you used fat that wasn’t soft enough. If the butter was too cold when you mixed it, the dough won’t bind properly when you press it. Remember, we want it soft enough to be creamy, but not melted! If it’s still too crumbly after baking, try chilling the entire shortbread layer for about 15 minutes before pouring the caramel on top—that helps hold it together.
Can I make these bars ahead of time for a party?
Absolutely! In fact, I highly recommend it. These Irresistible Homemade Twix Bars Recipe For Sweet Lovers are so much better on Day Two when the caramel has fully mellowed around the shortbread. You can make the entire batch, coat them in chocolate, and store them in an airtight container at room temperature for almost a week. If you need to keep them longer, freezing works great too, but make sure you wrap them individually first for the best results.
Is there a way to make this recipe without corn syrup, or one that’s easier to find?
I know corn syrup isn’t in every pantry, but for the specific texture of that classic chew in this recipe, it’s really the gold standard. If you search around, you can usually find it in the baking aisle, often right near the honey and sugar. If you absolutely must substitute, honey or golden syrup will work, but they introduce their own distinct flavor profile. If you want more general baking wisdom on ingredients, definitely check out my favorite baking resource for general tips!
Estimated Nutritional Breakdown for Irresistible Homemade Twix Bars Recipe For Sweet Lovers
Okay, let’s talk real talk for a second. We are making homemade candy bars layered with butter, sugar, and chocolate—these are not diet food, and I wouldn’t dream of pretending they are! They are treats, meant for enjoying in moderation!
This nutritional breakdown is based on cutting the final product into 24 perfectly sized bars, just like the recipe suggests. But please remember, this is just an estimate based on the basic ingredients I used. If you use dark chocolate instead of semi-sweet, or perhaps use salted butter, those numbers will shift a little bit!
Here’s what you can expect roughly per bar in this Irresistible Homemade Twix Bars Recipe For Sweet Lovers:
- Serving Size: 1 bar
- Calories: 250 (Yep, worth every one!)
- Sugar: 25g (That gooey caramel really packs a punch!)
- Total Fat: 15g
- Saturated Fat: 9g
- Carbohydrates: 28g
- Protein: 3g
We’ve got a little bit of everything in here, as expected from a layered bar with a shortbread base and full chocolate coating. If you’re tracking things like cholesterol, it comes in around 35mg, and the fiber is low, just 1g. Enjoy these knowing you made them with love and quality ingredients!
Print
Irresistible Homemade Twix Bars
- Total Time: 1 hour 45 min
- Yield: 24 bars 1x
- Diet: Vegetarian
Description
Make rich, homemade candy bars with a shortbread base, soft caramel filling, and chocolate coating.
Ingredients
- 1 cup (2 sticks) unsalted butter, softened
- 1/2 cup granulated sugar
- 2 cups all-purpose flour
- 1/4 teaspoon salt
- 1 (14 ounce) can sweetened condensed milk
- 1/2 cup light corn syrup
- 1 cup packed light brown sugar
- 1 teaspoon vanilla extract
- 1 1/2 cups semi-sweet chocolate chips
- 1 tablespoon vegetable shortening
Instructions
- Preheat your oven to 350 degrees F (175 degrees C). Line a 9×13 inch baking pan with parchment paper, leaving an overhang on the sides.
- For the shortbread layer: Beat the softened butter and granulated sugar together until creamy. Gradually add the flour and salt. Mix until just combined into a dough.
- Press the dough evenly into the bottom of the prepared pan. Bake for 15 to 18 minutes, or until the edges are lightly golden. Let cool slightly.
- For the caramel layer: In a medium saucepan, combine the sweetened condensed milk, corn syrup, and brown sugar. Cook over medium heat, stirring constantly, until the mixture reaches 240 degrees F (115 degrees C) on a candy thermometer, or until it thickens significantly, about 8 to 10 minutes.
- Remove the caramel from the heat and stir in the vanilla extract. Pour the hot caramel evenly over the cooled shortbread base. Let the caramel set at room temperature for about 1 hour, or until firm enough to cut.
- Once the caramel is set, cut the shortbread and caramel into bars of your desired size.
- For the chocolate coating: Place the chocolate chips and shortening in a microwave-safe bowl. Microwave in 30-second intervals, stirring well after each interval, until smooth and fully melted.
- Dip each caramel and shortbread bar into the melted chocolate, ensuring it is fully coated. Place the coated bars back onto the parchment-lined pan or a wire rack to allow the chocolate to set completely.
Notes
- For cleaner cuts, chill the bars in the refrigerator for 30 minutes before slicing the caramel layer.
- You can use milk chocolate or dark chocolate instead of semi-sweet for the coating.
- Store finished bars in an airtight container at room temperature for up to one week.
- Prep Time: 25 min
- Cook Time: 20 min
- Category: Dessert
- Method: Baking and Stovetop
- Cuisine: American
Nutrition
- Serving Size: 1 bar
- Calories: 250
- Sugar: 25
- Sodium: 50
- Fat: 15
- Saturated Fat: 9
- Unsaturated Fat: 6
- Trans Fat: 0
- Carbohydrates: 28
- Fiber: 1
- Protein: 3
- Cholesterol: 35
Keywords: Twix bars, homemade candy, shortbread, caramel, chocolate coating, sweet treat, dessert bar