
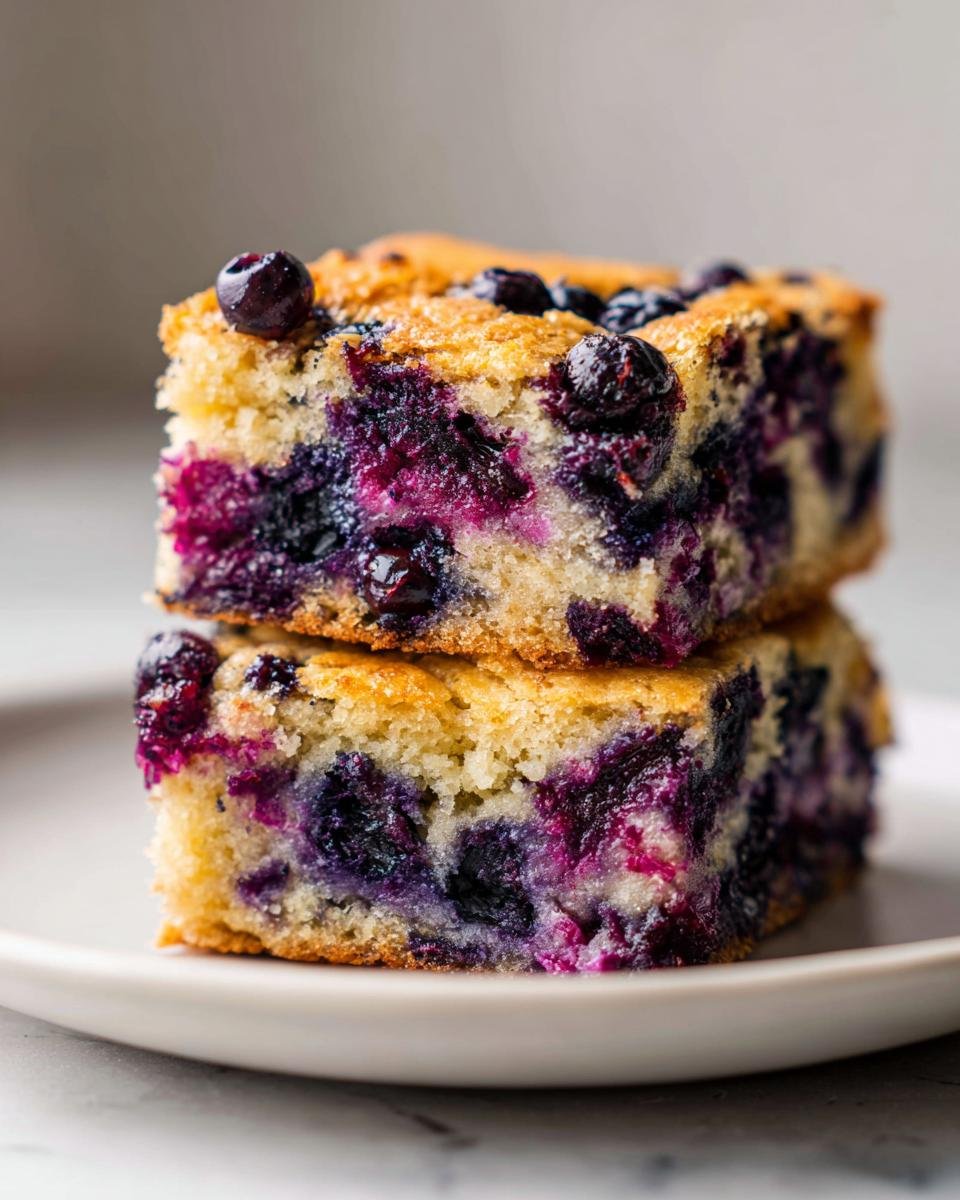
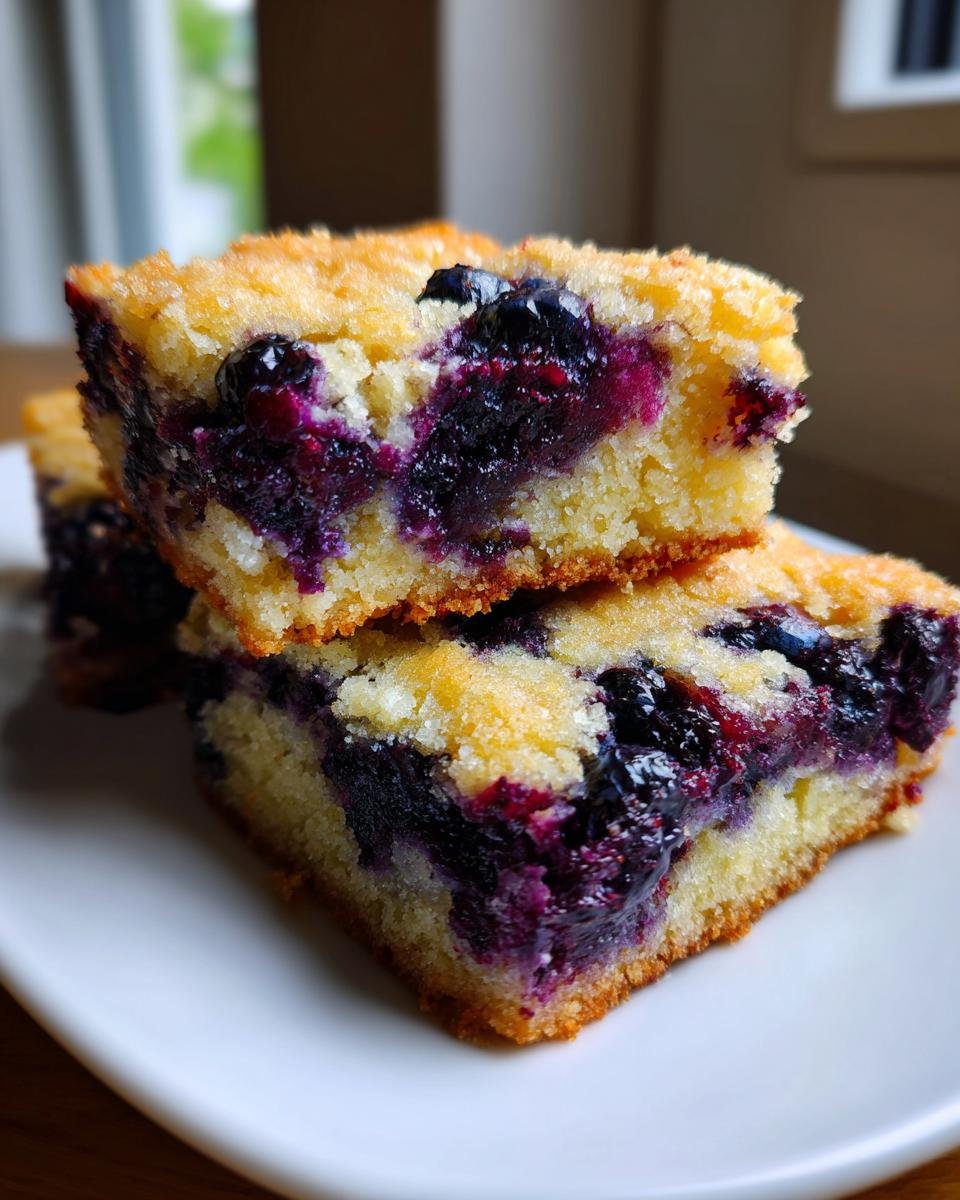
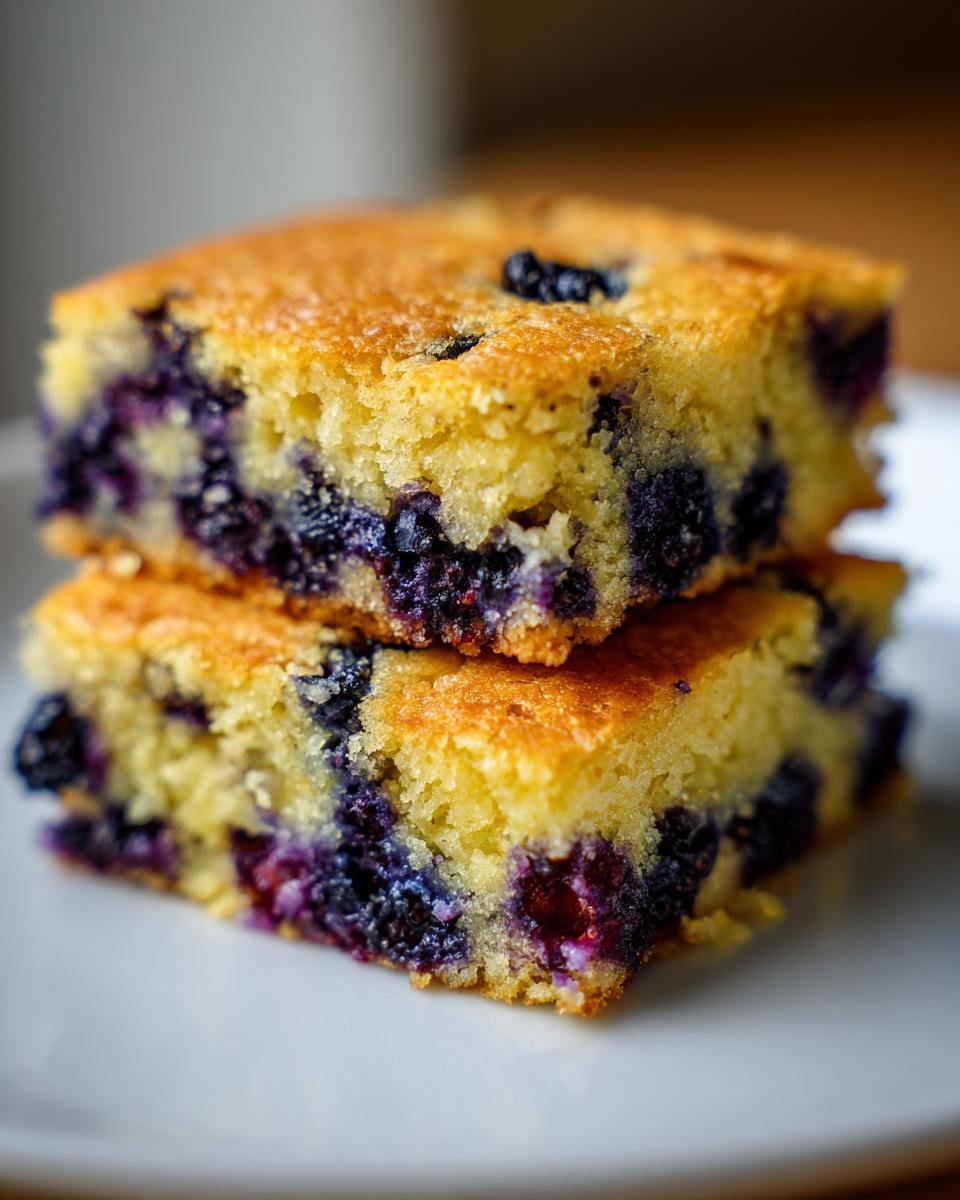
When I’m after a quick sweet fix but don’t want the fuss of shaping individual cookies, I always turn to something baked in a pan. Anything that comes out soft, chewy, and loaded with fruit just hits differently, you know? That’s why these absolutely perfect **Blueberry Cookie Bars** are my go-to obsession lately. Seriously, these aren’t just good; they are easily the softest and chewiest bars I’ve ever made, and when that warm, sweet blueberry filling bursts through the tender base, I honestly can’t stop eating them.

I’ve messed up enough baking projects to know that easy recipes are lifesavers, and this one is gold. It uses everyday pantry staples, comes together in what feels like minutes, and bakes up beautifully without needing fancy equipment. It’s the perfect, reliable treat when I need a dessert fast but want that comforting, homemade goodness. Trust me, once you try this method, these bars will be front and center in your rotation!
Why You Will Love These Blueberry Cookie Bars
I know what you’re thinking: are these just another average bar recipe? Absolutely not! I made sure to focus on the things that matter most—texture and speed. These bars are the reason I run to the kitchen when I need something comforting right away, and I think you’ll feel the same way.
- The texture is everything. We’re talking ultra-soft and gloriously chewy edges that just melt in your mouth. They never get hard or brittle, I promise.
- They are so fast! Seriously, you’ll be amazed that something this delicious only takes about 15 minutes of hands-on work before it heads into the oven.
- That pop of fresh blueberry flavor cuts through the richness of the butter so perfectly. It stops the whole cookie bar from being too heavy.
- No weird chilling times or complicated steps. Everything goes into the bowl, gets mixed, and spreads right into the pan. It’s pure baking therapy!
Keep reading, and I’ll walk you through exactly how we get that perfect soft center every single time.
Essential Ingredients for Perfect Blueberry Cookie Bars
Okay, let’s talk ingredients because that’s where the magic starts. You don’t need a ton of fancy stuff, but the quality of a few key items makes a massive difference in getting that perfect soft, chewy texture.
I always recommend making sure your butter is truly softened—you should be able to press your finger into it easily without it melting or looking greasy. If your butter is too warm, the whole creaming process goes sideways, and then we end up with sad, flat bars. And hey, if you ever run into a baking emergency and are missing buttermilk for another recipe, I found the best guide on making buttermilk substitutions!
For the Cookie Base
This is the hearty foundation that holds all that delicious fruit. Remember, we aren’t making cookies here; we are making a sturdy, yet tender vehicle for blueberries!
- 1 cup unsalted butter, softened – Remember, softened, not melted! This is crucial for creaming properly.
- 1 cup granulated sugar
- 1/2 cup packed brown sugar – Make sure you pack this into the measuring cup so you get the full molasses flavor in there.
- 2 large eggs – Room temperature eggs incorporate much better than cold ones, so try to pull these out early.
- 1 teaspoon vanilla extract – Don’t skip the vanilla; it brightens everything up.
- 2 1/2 cups all-purpose flour
- 1 teaspoon baking soda
- 1/2 teaspoon salt
- 1 cup fresh or frozen blueberries – Here’s the fun part: If you use frozen, just toss them in straight from the freezer! Do not thaw them, or they’ll bleed all over your lovely dough.
For the Optional Glaze
If you want that extra final touch of sweetness—and honestly, who doesn’t?—this glaze is so simple you almost don’t need a recipe. It adds a nice little visual appeal too!
- 1/2 cup powdered sugar for glaze (optional)
- 1 tablespoon milk for glaze (optional)
Expert Tips for Making the Best Blueberry Cookie Bars
I’ve learned a few things over the years that turn a regular tray of bars into something truly spectacular. Because these Blueberry Cookie Bars rely on a soft, cake-like texture, how you mix them is just as important as what you put in them!
If you are looking to level up all your baking experiments, I found an amazing post full of little secrets and tricks that I still refer back to all the time. You can check out all the little wisdom nuggets over at baking tips to make you a better baker; some of them directly apply here!
Here are my non-negotiable rules for foolproof success:
- The Golden Rule of Mixing: Stop Early! When you add those dry ingredients (flour, soda, salt), mix on low speed until they *just* disappear into the wet mixture, and then shut the mixer off immediately. I mean it! If you overmix after the flour goes in, you develop too much gluten, and goodbye, soft and chewy bar! You want a slightly shaggy dough stage before you fold in the fruit.
- Frozen Berries are Your Friend—Don’t Thaw Them! I put this in the notes, but I can’t stress it enough. If you use frozen blueberries, keep them frozen solid until the second you’re ready to fold them into the batter. Thawed berries have released too much juice already, and they will bleed purple streaks all through your beautiful, pale dough, making it look messy instead of nicely speckled.
- Butter Softness is Key, Not Heat. We talked about this before, but I have to repeat it because people always confuse warm butter with soft butter. Softened butter traps air when you cream it with sugar, which gives the bars their lift and tenderness. Warm or melted butter just makes the dough oily and heavy.
- Don’t Overbake Until You Test It Twice. Because this is a fairly dense bar, it can fool you. The edges might look golden brown, but the center could still be gooey. After the 25-minute mark, gently nudge the center of the pan—if it wiggles like Jell-O, give it 3 to 5 more minutes. You want moist crumbs clinging to a toothpick, not raw batter, but you definitely don’t want it bone dry either!
Step-by-Step Instructions for Blueberry Cookie Bars
Okay, here’s the straightforward path to those incredible bars. This recipe doesn’t mess around, and if you follow these steps exactly, you’ll end up with that perfect, soft slab of heaven. You can find my general tips for better baking, including how to make sure your fruit shines, over at this great easy blueberry cake recipe guide!
We’re going to break this process down into three parts: getting ready, mixing well, and then the final bake and finish. Don’t rush the cooling—that’s the hardest part, but it truly makes the difference!
Preparing the Pan and Oven
We always start here because we don’t want our beautiful dough waiting around for the oven to catch up. This is your very first step, time-saver!
- First thing, get that oven heated up! Preheat your oven to 350 degrees Fahrenheit.
- Next, grab your 9×13 inch baking pan. You need to grease it really well, and then dust it lightly with flour. This stops the rich cookie dough from bonding with the metal.
Mixing the Dough for Blueberry Cookie Bars
This is where the texture gets locked in, so pay close attention to how those ingredients combine. Remember what I said about not overmixing once the flour hits the scene!
- In your biggest mixing bowl, start with the base: cream together the softened butter, the granulated sugar, and that lovely brown sugar. Beat it until it looks fluffy and pale—this usually takes a good couple of minutes if your butter is spot-on soft.
- Now, work in those eggs one at a time. Make sure the first one is fully incorporated before adding the second. Then stir in your vanilla extract.
- In a separate, medium bowl, whisk up your dry stuff: the flour, baking soda, and salt. Whisking just ensures everything is evenly distributed before it hits the wet side.
- This is critical: Gradually add those dry ingredients to the wet mixture in stages. Mix on low just until you see the flour streaks disappear. I’m talking the slightest bit of mixing! If you keep going, these bars will become tough cookies, and we want soft bars!
- Finally, gently fold in those blueberries. You want to treat them delicately so they don’t burst prematurely. Spread the whole mixture evenly into that prepared pan. It might look a little thick, but that’s exactly what we want.
Baking and Finishing Your Blueberry Cookie Bars
The end is in sight! Timing is everything here to ensure you don’t dry these babies out.
- Bake the bars for about 25 to 30 minutes. Keep an eye on the edges; they should start looking lightly golden brown.
- When you think they are done, open the oven and give the pan a gentle wiggle—if the very center seems to jiggle too much, give it 3 more minutes and check again.
- This step is the hardest: Let those bars cool completely inside the pan before you even *think* about cutting them. If you cut them warm, they will crumble and fall apart because they haven’t had time to set up properly.
- If you decide you need that extra sweet zip, whisk together the powdered sugar and milk for the optional glaze until it’s smooth and drizzle it right over the cooled bars.
- Once cooled, cut them into neat squares and try not to eat the whole pan in one sitting!
Variations on Classic Blueberry Cookie Bars
Now, while I adore these Blueberry Cookie Bars exactly as the recipe states—pure, simple, and fruity—baking is all about making things your own, right? Once you master the base, you can really start experimenting. The structure of this dough is so sturdy and forgiving that it handles mix-ins like a dream. If you want to move beyond the classic blueberry experience, I have a few ideas that totally work without ruining that perfect chewy texture we worked so hard to achieve.
You know how sometimes you see a gorgeous cookie and wish you could turn it into a bar? Well, these swaps are inspired by some of my favorite cookie combinations! If you are interested in some complementary flavor profiles that really sing with berries, you should definitely check out the ideas on white chocolate raspberry cookies for inspiration.
Here are a couple of easy ways you can switch things up:
- Hello, Citrus Zing! The very best addition, in my humble opinion, is lemon zest. Take the zest of one full lemon and mix it right in with your butter and sugars during the creaming step. The bright, tart aroma of the lemon plays *so* well with the sweet blueberries. It makes them taste brighter and somehow even more summery!
- Switching the Fruit: You don’t have to stick just to blueberries, though they are my favorite. If you have raspberries, blackberries, or even chopped strawberries, use them! Just like with the fresh berries, try to avoid using thawed frozen fruit, as it can make the bottom layer a bit soggy.
- A Little Crunch Never Hurt Anyone: If you’re feeling like mixing in a nut, I suggest an ounce or two of finely chopped pecans or walnuts. Toss them in right with the blueberries. It adds a wonderful textural contrast to the soft bar. Make sure you chop them small, though, or you risk breaking your bars when you cut them later!
These variations mean you can keep making this basic dough recipe all year long, just swapping out the fillings to match the season!
Serving Suggestions for Blueberry Cookie Bars
Okay, so you pulled them out of the pan, they’re cooled down, and they look gorgeous, maybe even drizzled with that simple glaze we talked about. Now what? How do you best serve these soft little squares? Honestly, they’re amazing just standing alone on a plate, maybe still slightly warm!
They are rich enough to stand on their own as a perfect afternoon snack, especially with a hot cup of coffee or tea. The slight bitterness of the coffee is such a lovely counterbalance to the sweet, buttery dough and the tartness from the fruit.
But if you’re turning these into a proper dessert, you absolutely have to dollop something cold on top. I really find that a scoop of classic vanilla ice cream takes these Blueberry Cookie Bars right over the top. The way the ice cream starts to melt right into the soft crumb is just pure decadence. If you’re feeling ambitious, you could even whip up a quick, simple vanilla frosting—you can find my go-to recipe for a simple vanilla frosting that works incredibly well as an extra layer if you don’t want to use the powdered sugar drizzle.
Presentation-wise, if you’re serving these at a gathering, cut them neatly and arrange them on a platter with a few extra fresh blueberries scattered around the edge. It looks thoughtful without taking up much extra time! They really don’t need much fuss!
Storage and Make-Ahead Tips for Blueberry Cookie Bars
I love a recipe that lets me plan ahead, especially when I know company is coming over! The good news is that these Blueberry Cookie Bars are fantastic for making ahead of time. In fact, I sometimes think they taste even *better* on day two once all those flavors have really settled into the buttery base—isn’t that always the way with the best baked goods?
Unlike regular cookies that you keep in an airtight container, bars in a pan need a little different approach to stay soft. I always think about how best to store things like these, especially since they are so moist. If you are looking for storage tips for other sturdy baked goods, I once read a great piece about storing things like caramel crumb bars, and their advice on layering actually works perfectly here too.
Here’s my foolproof guide for keeping these bars in prime eating condition for days!
Keeping Them Fresh at Room Temperature:
- Once the bars are completely, totally cool—and I mean room temperature, not even slightly warm—you need to cover them tightly.
- If you used the glaze, make sure the glaze is fully hardened before covering, otherwise, you’ll end up with a sticky mess on the plastic wrap.
- I just place plastic wrap right over the top of the cake pan they were baked in, pressing it down gently. If you want them to last longer or are worried about flattening the tops, you can carefully transfer the cooled bars to an airtight container.
- They will stay perfectly soft and delicious sitting on the counter for about 3 to 4 days. I usually place them in a cool spot in the pantry or just on the counter, away from direct sunlight.
Freezing for Long-Term Storage:
Yes, you can absolutely freeze these! This is my secret weapon for school lunches or just having a treat ready when I need one. Freezing them before you glaze them is much easier, if you plan on glazing some now and saving others for later.
- Cut the cooled bars into individual squares first.
- Wrap each square very tightly in plastic wrap—I usually do a double wrap to prevent any freezer burn smell from getting in.
- Place the wrapped squares into a freezer-safe, airtight container or heavy-duty zip-top bag.
- They are good for up to about 3 months in the freezer! When you are ready to eat one, just pull it out of the freezer and let it thaw on the counter for about 30 minutes. It honestly tastes like it was just baked that morning.
The main thing to remember is just keep that moisture locked in, and these bars will be ready whenever you need a sweet fix!
Frequently Asked Questions About Blueberry Cookie Bars
I always seem to get more questions about these bars than any other recipe I share! People have strong opinions about their blueberries, and I get it. These bars are so straightforward, but a few small tweaks can make people nervous. I gathered up the most common queries I see popping up in the comments and figured I’d answer them right here. If you’re wondering if you can substitute ingredients or if you’re worried about those berries sinking to the bottom, I’ve got you covered!
If for some reason you end up with extra liquid or want to transform your leftover fruit situation, I found this amazing guide on making a secret 15-minute blueberry sauce that is fantastic drizzled over yogurt the next morning!
Can I use dried blueberries instead of fresh or frozen?
You certainly can, but it changes the texture quite a bit, so you have to treat them differently! Dried blueberries are very chewy and don’t release any moisture into the dough like the fresh or frozen ones do. If you use dried, I highly recommend soaking them for about 15 minutes in hot water or even a splash of orange juice before you fold them in. Drain them really well afterward! If you don’t soak them, they will actually suck moisture right out of your cookie bar dough, making the whole thing dry and a little tough. Also, since they shrink a bit when baked, you might want to use a tiny bit more—maybe a scant cup and a half.
How do I stop my blueberries from sinking to the bottom?
Ah, the classic sinking fruit problem! It happens when the fruit is heavier than the batter can support, or if the batter isn’t thick enough. Don’t worry; we have two easy ways to stop this phenomenon in our Blueberry Cookie Bars:
- The Flour Toss Method: This is my favorite, tried-and-true trick. Take your cup of blueberries (fresh or frozen) and toss them gently in about one tablespoon of the measured flour *before* you fold them into the finished dough. This light coating gives the fruit a little bit of grip against the batter so they stay suspended nicely while baking.
- Don’t Overmix the Final Fold: As I went over in the expert tips, mix the dough until *just* combined, and then fold the berries in very gently. If you beat the dough after the flour is added, you create too much liquid slackness, and the fruit just sinks right through to the bottom layer.
Can I make these Blueberry Cookie Bars gluten-free?
I haven’t personally tested a dedicated gluten-free version on this specific dough yet, but I have had excellent results swapping out the flour on many of my bar recipes! You should be able to substitute your favorite 1-to-1 all-purpose gluten-free flour blend right in place of the 2 1/2 cups of regular flour. Since GF blends vary, just be extra careful not to overmix the dough once you add the dry ingredients. Keep a close eye on the consistency; if the dough seems too dry or crumbly after adding the GF flour, add just another teaspoon of milk or vanilla to bring it back together before folding in those precious berries.
What if I don’t want to make the glaze?
You absolutely do not need the glaze! I offer it as an optional step because some people love that extra sugary layer, but honestly, these bars are perfectly delicious—and taste a bit more like an authentic, rustic cookie when they don’t have it. If you skip the glaze, just make sure that after the bars have cooled completely, you dust them lightly with a little bit of reserved powdered sugar right before cutting. It gives them a nice finish without adding that thick, harder layer of the full glaze.
Why must the bars cool completely before cutting?
As I mentioned earlier, this is probably the most important non-baking step! These bars are soft and rich because of the high fat content (hello, butter!) and the moisture from the fruit. When they come out of the oven, they are set on the outside but still incredibly tender and almost liquid-like in the center. If you try to slice them when they are warm, they will tear apart, squish out the sides, and look like a delicious, but very messy, fruit puddle. Give them at least two full hours at room temperature to cool and firm up. Patience pays off with clean squares!
Nutritional Snapshot of Blueberry Cookie Bars
Look, I bake for happiness and comfort, not for a science lecture, so please take these numbers with a giant grain of salt! We can whip up amazing Blueberry Cookie Bars without worrying too much about exact macros, but I know some of you like to peek at the basics. This is just a ballpark estimate based on the standard ingredients listed, so your actual numbers might be a smidge higher or lower depending on how much butter you *really* creamed in there or the exact size of your eggs!
If you’re counting calories or tracking macros, I always recommend plugging your exact ingredient weights into your favorite tracking app. But for the general idea, here’s what my quick calculations show for one generous square:
- Serving Size: 1 bar
- Calories: 220 (A satisfying treat, for sure!)
- Sugar: 18g (That’s where the deliciousness lives!)
- Fat: 11g
- Saturated Fat: 7g (That lovely butter content!)
- Trans Fat: 0g (Because we use real butter, not that fake stuff!)
- Carbohydrates: 30g
- Protein: 2g
- Sodium: 110mg
They aren’t exactly health food, but hey, they are homemade, made with love, and packed with actual fruit, which counts for something, right? Don’t forget, every time you add zest or swap out sugar, these numbers change slightly. Enjoy them!
Share Your Experience Making Blueberry Cookie Bars
Now that you have the secrets and the foolproof steps to make these unbelievably soft and chewy Blueberry Cookie Bars, the only thing left is to get baking! I truly hope they bring as much comfort and happiness to your kitchen as they do to mine.
But don’t just leave me hanging! Once you’ve baked a batch for your family or friends—maybe you tried the lemon zest trick, or perhaps you skipped the glaze—I really want to hear what you thought.
Head down to the comments section below and let me know:
- Did you use fresh or frozen berries? How did that work out for you?
- Did you stick to the original recipe, or did you add your own twist? I love seeing what you creative bakers come up with!
- How long did it take for your bars to cool enough so you could actually cut them? (Because I always cheat and cut mine too soon, oops!)
If you had a great experience or if you found one of my little tips particularly helpful, please consider leaving a star rating right there on the recipe card. A solid rating tells other readers that this recipe is dependable, and it just makes my whole day!
And if you have any questions at all about substitutions—maybe you’re substituting milk for buttermilk in the glaze, or swapping out the flour—don’t hesitate to reach out directly through my contact page. I try my very best to answer everyone!
Happy baking, friends! Can’t wait to read about your perfect, chewy squares!
Print
Blueberry Cookie Bars
- Total Time: 45 min
- Yield: 18 servings 1x
- Diet: Vegetarian
Description
Simple recipe for soft, chewy cookie bars with a blueberry filling.
Ingredients
- 1 cup unsalted butter, softened
- 1 cup granulated sugar
- 1/2 cup packed brown sugar
- 2 large eggs
- 1 teaspoon vanilla extract
- 2 1/2 cups all-purpose flour
- 1 teaspoon baking soda
- 1/2 teaspoon salt
- 1 cup fresh or frozen blueberries
- 1/2 cup powdered sugar for glaze (optional)
- 1 tablespoon milk for glaze (optional)
Instructions
- Preheat your oven to 350 degrees Fahrenheit. Grease and flour a 9×13 inch baking pan.
- In a large bowl, cream together the softened butter, granulated sugar, and brown sugar until light and fluffy.
- Beat in the eggs one at a time, then stir in the vanilla extract.
- In a separate bowl, whisk together the flour, baking soda, and salt.
- Gradually add the dry ingredients to the wet ingredients, mixing until just combined. Do not overmix.
- Gently fold in the blueberries.
- Spread the dough evenly into the prepared baking pan.
- Bake for 25 to 30 minutes, or until the edges are lightly golden brown.
- Let the bars cool completely in the pan before cutting.
- If using the glaze, whisk together the powdered sugar and milk until smooth. Drizzle over the cooled bars.
- Cut into squares and serve.
Notes
- If using frozen blueberries, do not thaw them before adding them to the batter.
- For a slightly firmer bar, bake for an extra 5 minutes.
- You can substitute other berries for the blueberries if you prefer.
- Prep Time: 15 min
- Cook Time: 30 min
- Category: Dessert
- Method: Baking
- Cuisine: American
Nutrition
- Serving Size: 1 bar
- Calories: 220
- Sugar: 18g
- Sodium: 110mg
- Fat: 11g
- Saturated Fat: 7g
- Unsaturated Fat: 4g
- Trans Fat: 0g
- Carbohydrates: 30g
- Fiber: 1g
- Protein: 2g
- Cholesterol: 40mg
Keywords: blueberry, cookie bars, dessert, baked goods, sweet treat