
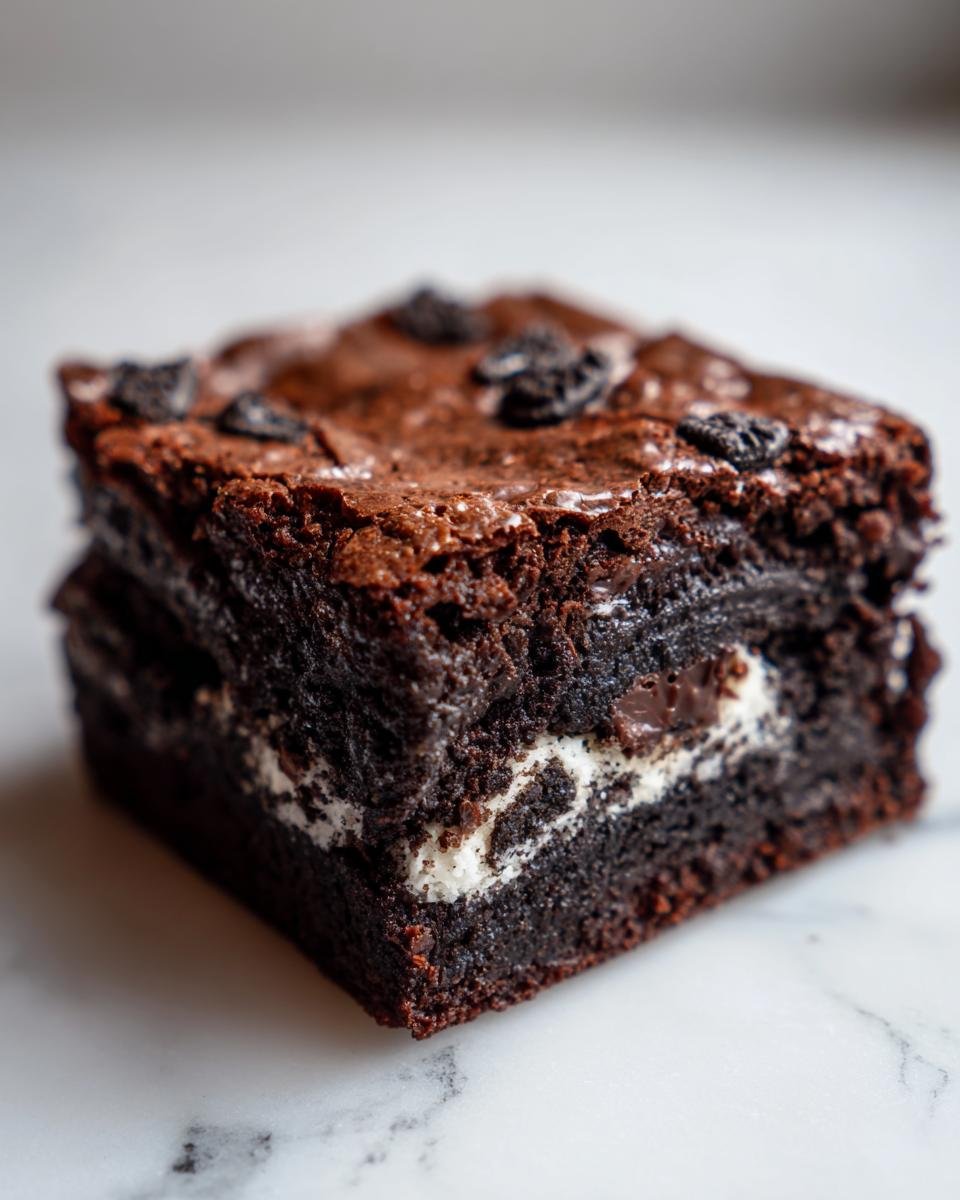
Listen, if you’re anything like me, you believe chocolate deserves its own food group. And when you add those crunchy, creamy cookies everyone loves? Forget about it! I spent way too many weekends trying to get that perfect balance between a dense, unbelievably fudgy center and those glorious, crackly tops.
I finally cracked the code after one disastrous batch that tasted suspiciously like hockey pucks. Now I have this foolproof method for making the absolute best **Oreo Brownies** you’ll ever taste. Seriously, they are so easy, you’ll wonder why you ever bothered with pre-made mixes. I made a batch last week, and my neighbor practically begged me for the recipe before they even cooled down. Trust me, these are magical!

Gathering Ingredients for Perfect Oreo Brownies
Okay, first things first: we need our building blocks! For these fudgy babies, you can’t substitute quality. You’ll need one cup of unsalted butter—don’t skip the unsalted part! Grab two cups of granulated sugar, which keeps things perfectly sweet. We need four large eggs, and don’t forget the vanilla extract for that background warmth.
For the chocolate structure, we’re using a generous three-quarters cup of unsweetened cocoa powder and a half cup of all-purpose flour. A pinch of salt balances it out. And, of course, the star: one full cup of roughly chopped Oreo cookies. If you’re out of buttermilk for another recipe, check out how to whip up a simple substitute right here!
Essential Equipment for Making Oreo Brownies
You don’t need a fancy stand mixer for this recipe, which is part of why I love it so much! Good tools make the job easier, though. First, you absolutely must have a sturdy 9×13 inch baking pan. Make sure you grease and flour it really well, or you’ll be crying when you try to get them out!
You’ll also need a small saucepan to gently melt that butter—low and slow is the key there. Grab a whisk for your eggs and vanilla, and a couple of mixing bowls: one for the dry stuff and one for everything else.
Finally, you need something to fold everything together with. I usually grab a silicone spatula for keeping everything mixed without getting too aggressive. If you want to level up your whole baking game, maybe check out some of my best general baking tips!
Step-by-Step Instructions for Fudgy Oreo Brownies
Alright, let’s get these beauties into the oven! Getting the step order right is the secret to that ultimate fudgy texture, especially when working with all those crushed cookies. If you want these to be extra, extra fudgy—like practically liquid chocolate in the middle—try knocking the flour down to just 1/3 cup. That’s my little trick!
Preparing the Pan and Oven for Your Oreo Brownies
First thing you do is crank that oven up to 350 degrees Fahrenheit. While it’s heating up, grab your 9×13 pan. You have to be diligent here: grease it up good and then dust it lightly with flour. This step prevents total disaster later when you try to cut them!
Mixing the Wet and Dry Components for the Oreo Brownies Batter
We start easy: gently melt your butter in a saucepan over low heat—don’t let it brown, just melt! Take it off the heat and stir in that big pile of sugar. Then, beat in your eggs one by one until they are smoothly incorporated, followed by the vanilla. Next, in a separate bowl, quickly whisk together your cocoa powder, flour, and salt. When you combine them, add the dry stuff slowly to the wet stuff. I mean it: stop mixing the **Oreo Brownies** batter as soon as you don’t see any more white streaks. Overmixing is what makes them tough!
Folding in Oreos and Baking Your Oreo Brownies
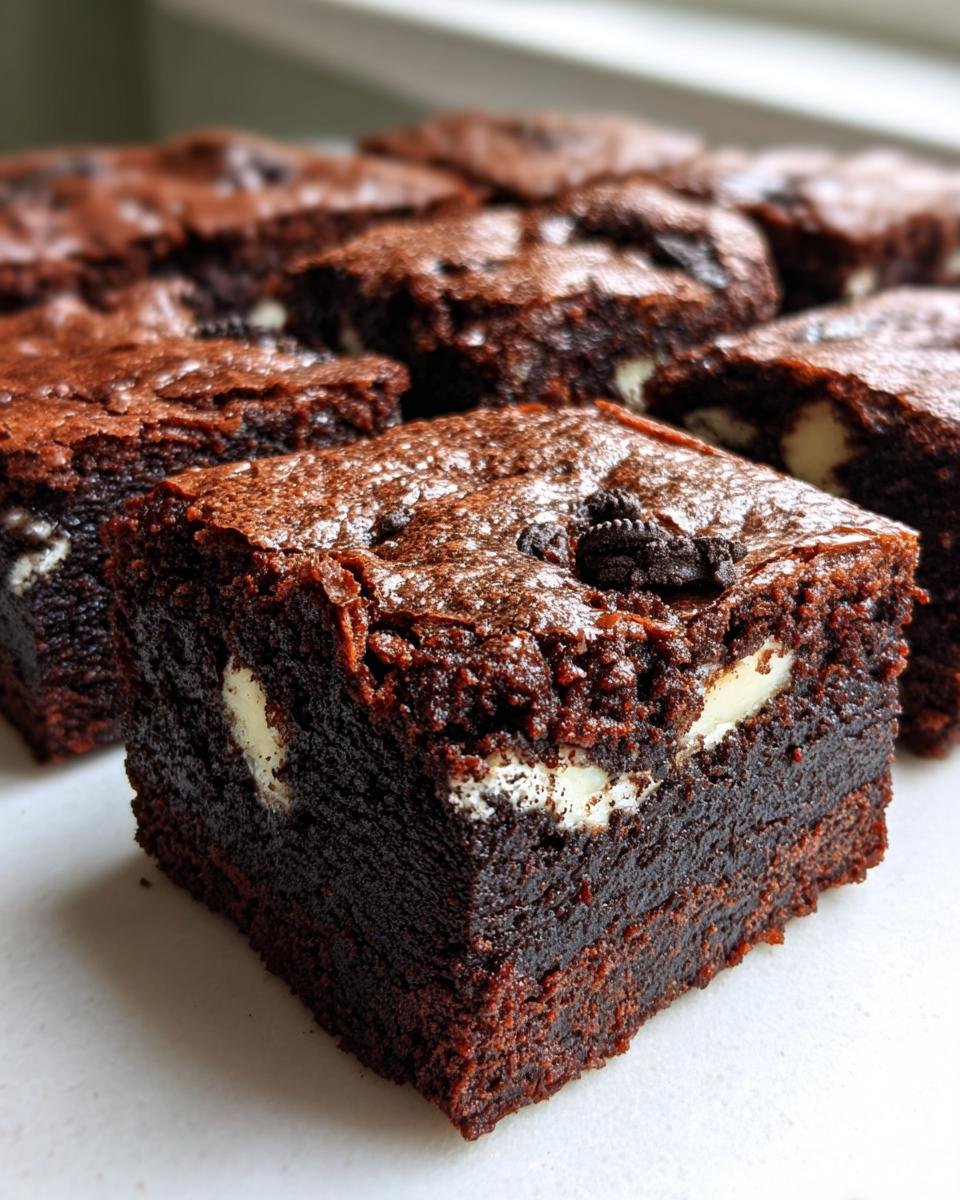
See those chopped Oreos? Gently fold them in. You want them distributed, not pulverized. Spread that gorgeous, chunky batter evenly in your prepared pan. Pop it into the oven for about 25 to 30 minutes. The crucial test? Stick a toothpick near the center. If it comes out with moist crumbs attached, perfect! If it’s wet batter, give it five more minutes. Let your **Oreo Brownies** cool completely before you dare slice them—patience earns you those clean, fudgy squares.
Tips for Achieving the Best Oreo Brownies Texture
The success of these **Oreo Brownies** really hinges on texture. We are aiming for that soul-satisfying fudgy center, not a dry cake! My biggest piece of advice is to pay attention to the flour measurement. Seriously, if you think three-quarters cup sounds like a lot, try reducing it, even by just a tablespoon or two. That little bit of reduction is what lets the chocolate shine and keeps the structure from getting too stiff.
Another thing I learned the hard way: baking time is non-negotiable! You are looking for moist crumbs on that toothpick, *not* clean. If the toothpick comes out totally clean, you’ve gone too far, and you’re sealing the fate of fudgy perfection. I always pull mine out when I still see a few tiny, damp specks on the stick. They keep cooking on residual heat!
Also, the cooling time is critical. I know, I know, waiting is the worst part when something smells this good, but if you try to cut into a warm brownie, it’s going to smear and look messy. Let them cool completely in the pan, maybe even chill them for 30 minutes. When they are firm, that’s when you get those perfect, neat squares. These recipes rock, and to explore some other decadent chocolate treats, you really should browse my other favorite recipes, like these four incredible brownie flavors!
Customizing Your Oreo Brownies: Variations and Substitutions
The beauty of a great base recipe, like our fantastic **Oreo Brownies**, is that you can absolutely play with it! While the classic combination is unbeatable, sometimes you just need a little something extra, right? Don’t hesitate to mix things up, but always handle those adjustments gently so you keep that fudgy texture we worked so hard to achieve.
Let’s talk cookies first. If you’re out of Oreos, or maybe you just want to try something different—go for it! Shortbread cookies are surprisingly good in here; they add a buttery crunch. Or maybe you love that peanut butter flavor; those peanut butter sandwich cookies work wonders too! Just chop them roughly, same as you would the Oreos. It’s all about adding that wonderful ‘surprise’ ingredient throughout the chocolate.
For those chocolate lovers who just can’t stop at one chocolate element, I always suggest tossing in about a half cup of semisweet chocolate chips along with your chopped cookies. That just amps up the decadence factor big time, making these **Oreo Brownies** almost too rich! You can even use milk chocolate if dark chocolate scares you a little.
Now, for the purely aesthetic touch! If you’re taking these to a party or just want them to look extra special, remember that tip about pressing whole cookies right on top before they go into the oven? It looks fantastic. Just gently press a few whole Oreos onto the batter about 10 minutes before they’re done baking. They sink in just enough, so when you cut them later, you have that perfect little cookie halo announcing that these are indeed special **Oreo Brownies**.
If you’re looking for more layered cookie inspiration that involves Oreos, you absolutely must take a peek at this wonderful Oreo Delight recipe—it’s a total showstopper!
Storage and Reheating Instructions for Leftover Oreo Brownies
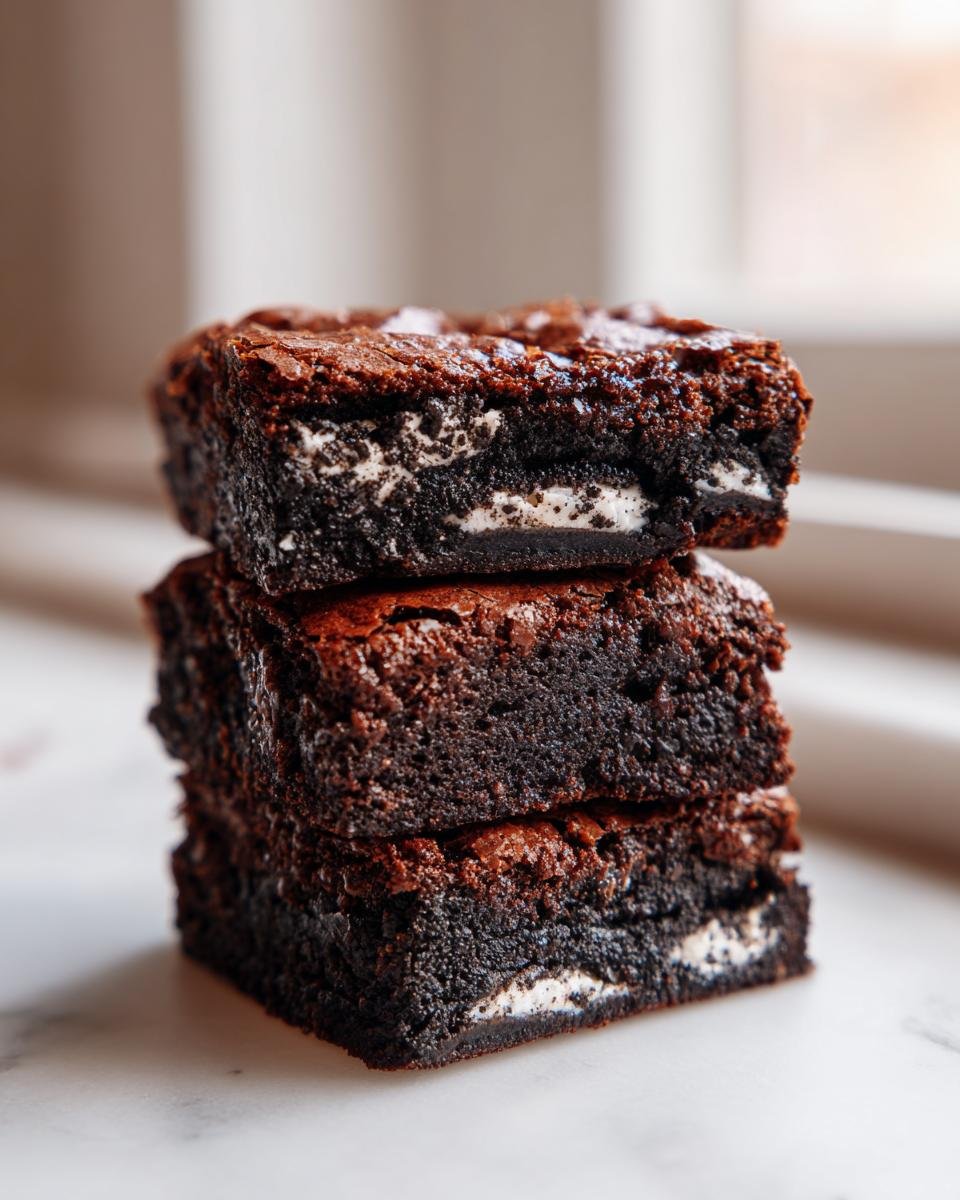
This is the hardest part, isn’t it? Having to save any of these fudgy treats for later! But I promise, these **Oreo Brownies** actually taste even better the next day once everything has settled in and fully cooled down. You want to keep that amazing texture we worked so hard for, so storage is key.
Do not, under any circumstances, put them in the fridge unless you absolutely have to. Cold temperatures are evil to brownies; they harden up instantly and we lose that glorious fudgy quality. Keep them right on the counter at room temperature.
The secret weapon here is an airtight container. Layer them between pieces of wax paper or parchment paper so they don’t stick together. I usually use a simple plastic container with a tightly fitting lid. Stored this way, they stay perfectly moist and delicious for three, maybe even four days. If you have a massive batch, this method is a lifesaver!
Now, if you really, truly need to warm one up—maybe you were feeling sentimental and want that gooey center back—you have a couple of options. The microwave is the quickest way. Just take a single square and zap it for about 10 to 15 seconds on medium power. Any longer and you risk making it too soft, especially with those creamy Oreo bits inside.
If you have slightly more patience, popping it in a low toaster oven for just a few minutes can restore a little bit of that crisp edge we loved before they fully cooled. But honestly, I always tell people, just let them sit on the counter for thirty minutes first. They soften up beautifully just coming back to room temperature!
Serving Suggestions for Your Homemade Oreo Brownies
Okay, you’ve waited. They are cool. They are cut. Now, how do you make these incredible **Oreo Brownies** an *event* rather than just a snack? That’s my favorite part of baking—the presentation!
First off, they are robust enough to stand on their own. A tall glass of ice-cold milk is mandatory in my house; the creamy milk cuts right through the richness of the dark chocolate and the sweet crunch of the cookies. It’s the ultimate comforting pairing.
But if you want to go full-on dessert mode, you have to top them. A single scoop of good vanilla bean ice cream is classic, but if you want to really lean into the chocolate celebration, try a scoop of coffee ice cream. The slight bitterness of the coffee highlights the cocoa powder beautifully.
If you’re serving these after dinner instead of as an afternoon treat, grab your favorite mug. A hot cup of strong black coffee is the perfect foil for the intense sweetness. If you want to get truly decadent—and trust me, you should—go check out my recipe for that amazing chocolate ice cream cake; it gives you inspiration for rich, layered desserts!
Honestly, though, my favorite way to serve them is simple: warm them up carefully, dust them with just a tiny bit of powdered sugar to make them look professional, and eat them while standing over the sink so no crumbs fall on the floor!
Frequently Asked Questions About Oreo Brownies
I get so many messages about this recipe, and honestly, I love hearing how everyone is baking them up! If you have a quick question, chances are someone else has wondered the same thing. Here are a few of the things I get asked most often about getting these right.
Can I use different types of cookies instead of Oreos in these brownies?
Yes, you absolutely can! The beauty of the base batter is that it’s so rich it basically makes friends with anything crunchy you toss in there. If you don’t have Oreos, try using something similar in texture like chocolate wafer cookies or even those crispy peanut butter sandwich cookies. Just make sure whatever you use is chopped roughly so you get nice pockets of texture throughout, just like the original recipe calls for.
Why are my Oreo Brownies cakey instead of fudgy?
Ah, the dreaded cakey brownie problem! This almost always comes down to two things, and I’ve fought this battle myself. First, check your flour. If you accidentally added too much flour, or if you spooned it into your measuring cup instead of fluffing and leveling it, you’re going to get a cake texture. Second, overmixing the batter after the flour goes in is a huge culprit!
Remember what I said back in the instructions? You stop mixing the second those dry streaks disappear. You want that dense, slightly under-mixed look before you fold in the cookies. For guaranteed fudgy results, always air on the side of pulling them out five minutes too early rather than leaving them in a minute too long. If you’re looking for other great brownie depth, check out my copycat recipe for that amazing Starbucks double chocolate brownie!
Nutritional Snapshot of These Rich Oreo Brownies
Now, I know what you’re thinking. After all that chocolate, butter, and those glorious cookie centers, these **Oreo Brownies** probably aren’t exactly ‘light fare.’ And you’d be right! These are a true indulgence, meant for celebrating, not counting every little calorie.
But since I promised you every detail, here is a rough breakdown of what one generous square might contain, based on the recipe amounts above. Keep in mind these are just estimates; your exact numbers will shift depending on the brand of cocoa powder or the specific type of Oreo you use in your batch!
Here’s what we’re generally looking at per serving:
- Calories: Around 250
- Fat: I calculate about 14 grams (with around 8 of those being saturated fat, thanks to that lovely butter!).
- Carbohydrates: Roughly 31 grams, most of that being sugar, which is expected in a dessert this good.
- Protein: A small boost, around 3 grams.
You’ll also find a tiny bit of fiber in there, which I credit entirely to those sweet, crunchy cookie pieces we chopped up! I always say, if you’re going to have a treat, make it count, and these rich, fudgy **Oreo Brownies** certainly do. Enjoy them with a big glass of water, or better yet, that cold milk we talked about earlier!
Print
Oreo Brownies
- Total Time: 45 min
- Yield: 16 servings 1x
- Diet: Vegetarian
Description
Simple recipe for rich, fudgy brownies studded with Oreo cookies.
Ingredients
- 1 cup unsalted butter
- 2 cups granulated sugar
- 4 large eggs
- 1 teaspoon vanilla extract
- 3/4 cup unsweetened cocoa powder
- 1/2 cup all-purpose flour
- 1/2 teaspoon salt
- 1 cup chopped Oreo cookies
Instructions
- Preheat your oven to 350 degrees Fahrenheit. Grease and flour a 9×13 inch baking pan.
- Melt the butter in a saucepan over low heat. Remove from heat.
- Stir the sugar into the melted butter.
- Beat in the eggs one at a time, then mix in the vanilla extract.
- In a separate bowl, whisk together the cocoa powder, flour, and salt.
- Gradually add the dry ingredients to the wet ingredients, mixing until just combined. Do not overmix.
- Fold in the chopped Oreo cookies.
- Spread the batter evenly into the prepared baking pan.
- Bake for 25 to 30 minutes. A toothpick inserted near the center should come out with moist crumbs attached, not wet batter.
- Let the brownies cool completely before cutting into squares.
Notes
- For fudgier brownies, reduce the flour to 1/3 cup.
- You can press a few whole Oreos onto the top of the batter before baking for decoration.
- Store cooled brownies in an airtight container at room temperature.
- Prep Time: 15 min
- Cook Time: 30 min
- Category: Dessert
- Method: Baking
- Cuisine: American
Nutrition
- Serving Size: 1 square
- Calories: 250
- Sugar: 28
- Sodium: 150
- Fat: 14
- Saturated Fat: 8
- Unsaturated Fat: 6
- Trans Fat: 0
- Carbohydrates: 31
- Fiber: 1
- Protein: 3
- Cholesterol: 50
Keywords: Oreo brownies, chocolate, cookies, fudgy, dessert, baked goods