
Oh my gosh, you know those moments when only deep, dark, ridiculously fudgy chocolate will do? When you need that perfect square of dessert that snaps just a little on top but melts like butter the second it hits your tongue? I spent *years* chasing that texture. I tried dumping in melted chocolate, using fancy gourmet cocoa—you name it! But I finally landed on this simple chocolate brownies recipe that just works every single time. It’s the one I whip up when company shows up unexpectedly because honestly, the batter comes together in about fifteen minutes flat. Trust me, this is the foolproof fudgy chocolate brownie you’ve been dreaming about!
Why You Will Make These Simple Chocolate Brownies Again and Again
This recipe isn’t about fancy techniques; it’s about maximum payoff with minimum effort. I’m so excited for you to try this out!
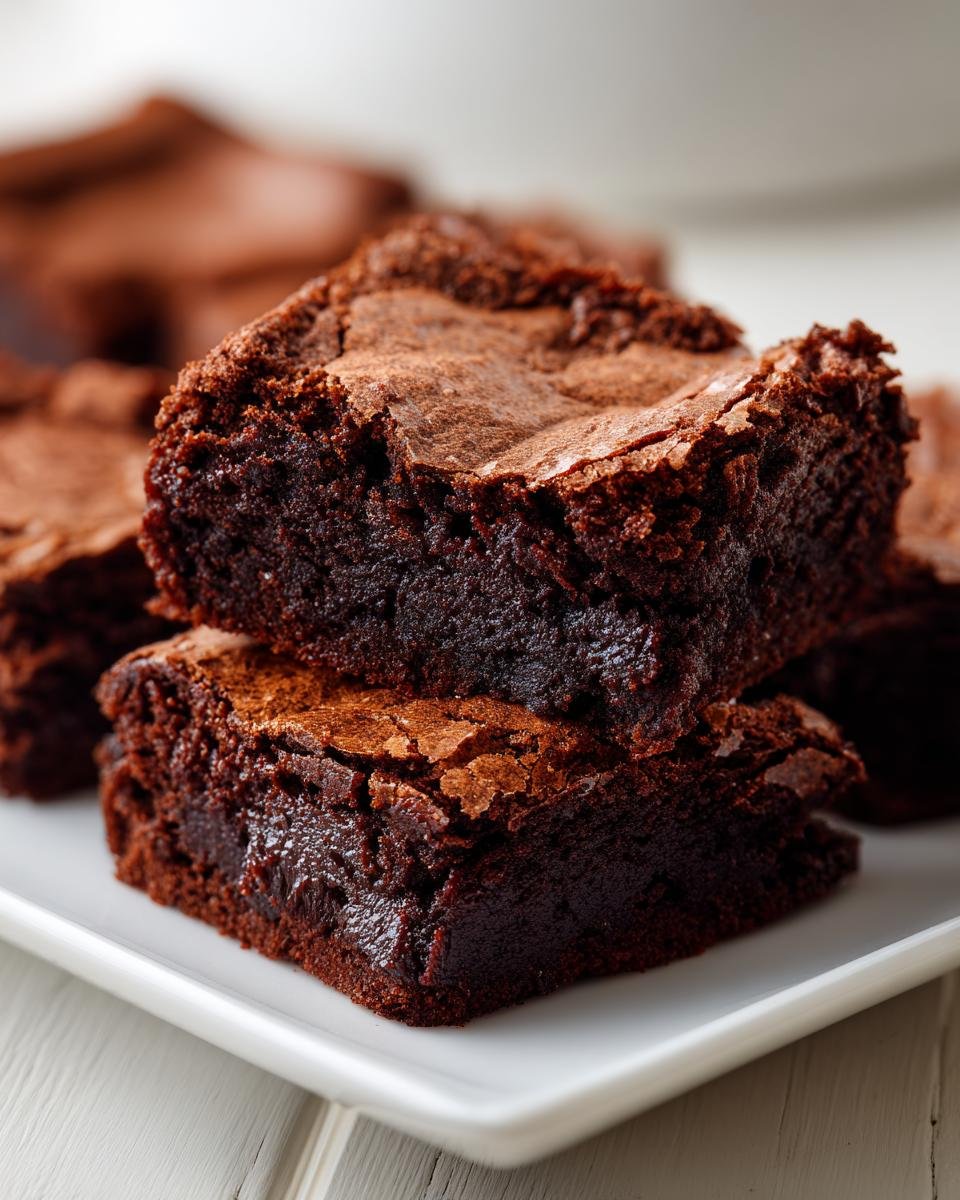
- They are unbelievably fudgy inside—truly the perfect texture contrast.
- Super fast, relying mainly on melted butter, which cuts down on mixing time.
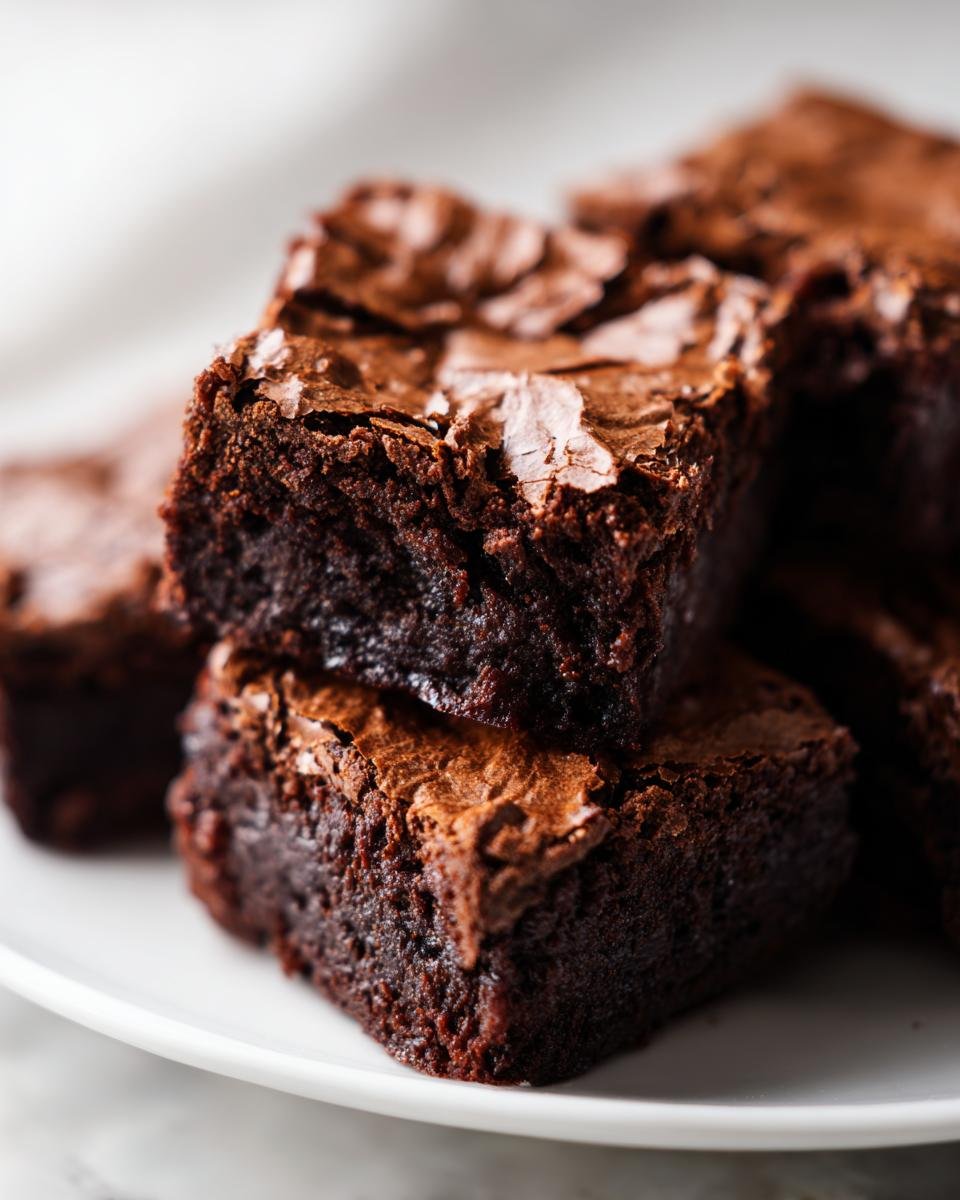
- You get that signature crackly top that everyone fights over. Who doesn’t love that?
- This straightforward method guarantees consistent, delicious **chocolate brownies** every single time you bake them.
Because they are so easy, I’ve even managed to sneak in some great vegetable surprises without my kids noticing (and you can check out my secret veggie trick here for extra fudginess: fudgy zucchini brownies if you’re feeling sneaky!).

Essential Ingredients for Perfect Chocolate Brownies
When you have a simple dessert, the ingredients really have to shine, and these aren’t complicated, I promise! We aren’t buying anything fancy here, just stuff you probably already have in your pantry. Remember, I always say that great baking is about respecting your ingredients, so make sure you measure everything out carefully before you start heating things up. I keep my main baking tips handy, like checking how to get your butter just right.
Here is the exact list I use for a 9×13 pan:
- One cup of unsalted butter—I always stick to unsalted so I can control the salt, you know?
- One cup of plain white granulated sugar.
- One full cup of tightly packed brown sugar. That brown sugar is key for that deep, almost molasses flavor.
- Four large eggs, beaten in one at a time.
- Just one little teaspoon of vanilla extract.
- One cup of all-purpose flour.
- A full cup of unsweetened cocoa powder—don’t skimp here!
- Half a teaspoon of good salt.
- And my personal favorite: one cup of chocolate chips if you want that extra gooey factor!
Equipment Needed for Your Chocolate Brownies
You don’t need a fancy stand mixer for these, which is the best news! I like to keep things easy, but having the right few tools makes all the difference between a messy kitchen and perfectly fudgy results. Grab these things before you start heating up that butter!
- Your trusty 9×13 inch baking pan. This is the standard size for the perfect thickness.
- A small saucepan for gently melting the butter—low and slow is the way to go here.
- A couple of mixing bowls, one medium for the dry stuff and one larger one for everything else.
- A good sturdy whisk for beating in the eggs.
- A silicone spatula is essential for folding everything together gently at the end. We don’t want to overwork that batter!
- Measuring cups and spoons, of course. Precision matters, even in simple baking!
That’s really it! No specialized gadgets needed for these delicious treats.
Step-by-Step Instructions to Bake Fudgy Chocolate Brownies
Okay, this is where the magic happens! Follow these steps exactly, and you’ll have unbelievably rich **chocolate brownies** ready for baking success. Just promise me you won’t peek too much while they bake!
Preparing the Oven and Pan
First things first: we need to get things ready. Preheat your oven right up to 350 degrees F (that’s 175 degrees C, for my international friends). While it’s warming up, take your 9×13 inch baking pan and grease it really well. Then, dust it lightly with flour. You want to make sure nothing sticks once these babies are done baking, or I’ll never forgive you!
Combining Wet Ingredients for the Best Chocolate Brownies
Grab your saucepan and melt the butter over low heat. Don’t let it brown, just let it get completely liquid, then take it off the burner immediately. Now stir in both the granulated sugar and that important packed brown sugar until everything looks creamy and combined in that melted butter. Next, we beat in the four eggs, one by one, mixing well after each addition, and finish this wet mix with a swirl of vanilla extract.
Mixing Dry Ingredients and Final Batter Assembly
In a separate bowl, spend just a few seconds whisking together the flour, all that glorious cocoa powder, and the salt. Now, add these dry ingredients slowly into your wet mixture. You only want to mix until you stop seeing streaks of flour—and I mean it! Overmixing develops gluten, and that gives you cakey brownies, which we absolutely do not want. Once it’s *just* combined, gently—and I mean *gently*—fold in those optional chocolate chips. I got the inspiration for mixing chip details from my favorite double chocolate recipe for reference!
Baking and Cooling Your Chocolate Brownies
Pour that thick, dark batter into the prepared pan and spread it out evenly. Pop it into your hot oven for about 25 to 30 minutes. The test here is everything: insert a toothpick near the center. If it comes out with moist, shiny crumbs clinging to it—not wet batter goo—they are done! Resist the urge to cut them right away. You *must* let these cool completely in the pan. This cooling magic forces them to firm up so you get those clean, perfect edges!
Expert Tips for the Ultimate Chocolate Brownies Texture
I know everyone chases that mythical fudgy center, and truthfully, it all comes down to temperature and timing. If you’re reading this, you’ve nailed the ingredients; now let’s nail the technique. Trust me, these little tweaks are what separates a good brownie from the *holy grail* brownie.
The absolute biggest trick for fudginess is slight under-baking. I mean, be brave! If the recipe says 30 minutes, pull them out at 27 or 28 minutes. That toothpick test is crucial: you want moist crumbs clinging to it, not actual wet batter, but you don’t want it coming out completely clean either. If it’s clean, you’re headed toward cake territory, and we want dense, rich brownies here!
Another huge factor is waiting for the cooling, which feels impossible when they smell this good. If you try to cut them warm, they just smear all over the knife. It’s a mess, and you lose those beautiful, defined edges. My sister loves adding a swirl of caramel sauce sometimes—you can check out how she does that here for inspiration: salted caramel brownies—but even that needs a cool base to sit on properly!
And speaking of patience, make sure your pan is totally cool before you even think about slicing them. Once they’ve cooled down, pop the whole pan into the fridge for about an hour. Seriously, it firms up the structure so much, and when you pull them out to cut, you get those gorgeous, clean squares that stack perfectly on a plate.
Simple Variations for Your Chocolate Brownies Recipe
Now that you’ve mastered the base recipe, you might want to play around a little. These **chocolate brownies** are so solid that they can handle a little extra flair without falling apart on you. I love experimenting once I know the core fudgy texture is locked in!
One of the easiest things to swap out is those optional chocolate chips. If you aren’t a huge chip fan, try swapping them for a cup of chopped toasted walnuts or maybe some pecans. The crunch against that dense, chocolatey center is just divine. I also tried adding raspberries once for a totally different but delicious take—though that’s only for when I’m feeling adventurous!
For deep, dark chocolate lovers like me, here’s a game-changer: add a teaspoon of instant espresso powder when you mix your dry ingredients. Don’t worry, you won’t taste coffee; it just deeply enhances the chocolate flavor making it richer. It truly transforms the whole experience.
If you’re looking for more unique baked hits besides brownies, you should look at my amazing chocolate shortbread recipe sometime, which is totally different but wonderfully rich. But for brownies, keep it simple; a little salt on top after baking or adding some chopped candies is usually enough excitement for me!
Storing and Serving Your Delicious Chocolate Brownies
I know you probably want to eat the entire pan of **chocolate brownies** right now, but if you manage to save a few squares (maybe your willpower is stronger than mine!), you need to know how to store them properly. The goal is keeping that fudge factor locked in, not letting them go dry!
The best way to keep them fresh is at room temperature. Just arrange them in a single layer in an airtight container. I usually line the bottom with parchment paper first, just in case they are still a tiny bit soft even after cooling. They hold up beautifully for about three or four days this way. Honestly, they taste just as good on day three as they did fresh out of the oven!
If, by some miracle, you make it to day five, or if your kitchen is super warm, you can definitely freeze them. Wrap individual squares tightly in plastic wrap, then pop them into a freezer bag. They keep perfectly for up to three months. When you want one, just pull it out and let it thaw on the counter for about thirty minutes.
Now, for serving—this is my favorite part! While they are amazing completely plain, I usually serve them warm with a scoop of vanilla bean ice cream. The contrast between the warm, dense brownie and the cold, creamy ice cream is just perfection. If you want a little salty kick, sprinkle a tiny pinch of flaky sea salt on top right before serving. It brightens up the chocolate flavor so much. By the way, if you’ve ever wondered how to make cookies without brown sugar (which changes the fudgy texture!), you can look at my notes here: chocolate chip cookies without brown sugar.
Frequently Asked Questions About Making Chocolate Brownies
Whenever I share this recipe, I always get a flood of questions—which is great, because it means people are excited to bake them! It shows that even when a recipe seems simple, details matter. Don’t hesitate to drop your own questions in the comments if you can’t find your answer here!
Can I use melted butter vs. softened butter for these brownies?
Oh, this is a big one! Look, for some cakes, softened butter creamed with sugar is the goal, but for these **fudgy brownies**, you absolutely need to use melted butter, as instructed. When you melt the butter and then stir in the sugars, it creates a much denser, richer texture once baked. Using softened butter forces you to cream it for air, and that air creates lift, leading straight to a cakey result. We want dense, heavy fudge here, so stick to the melted butter method!
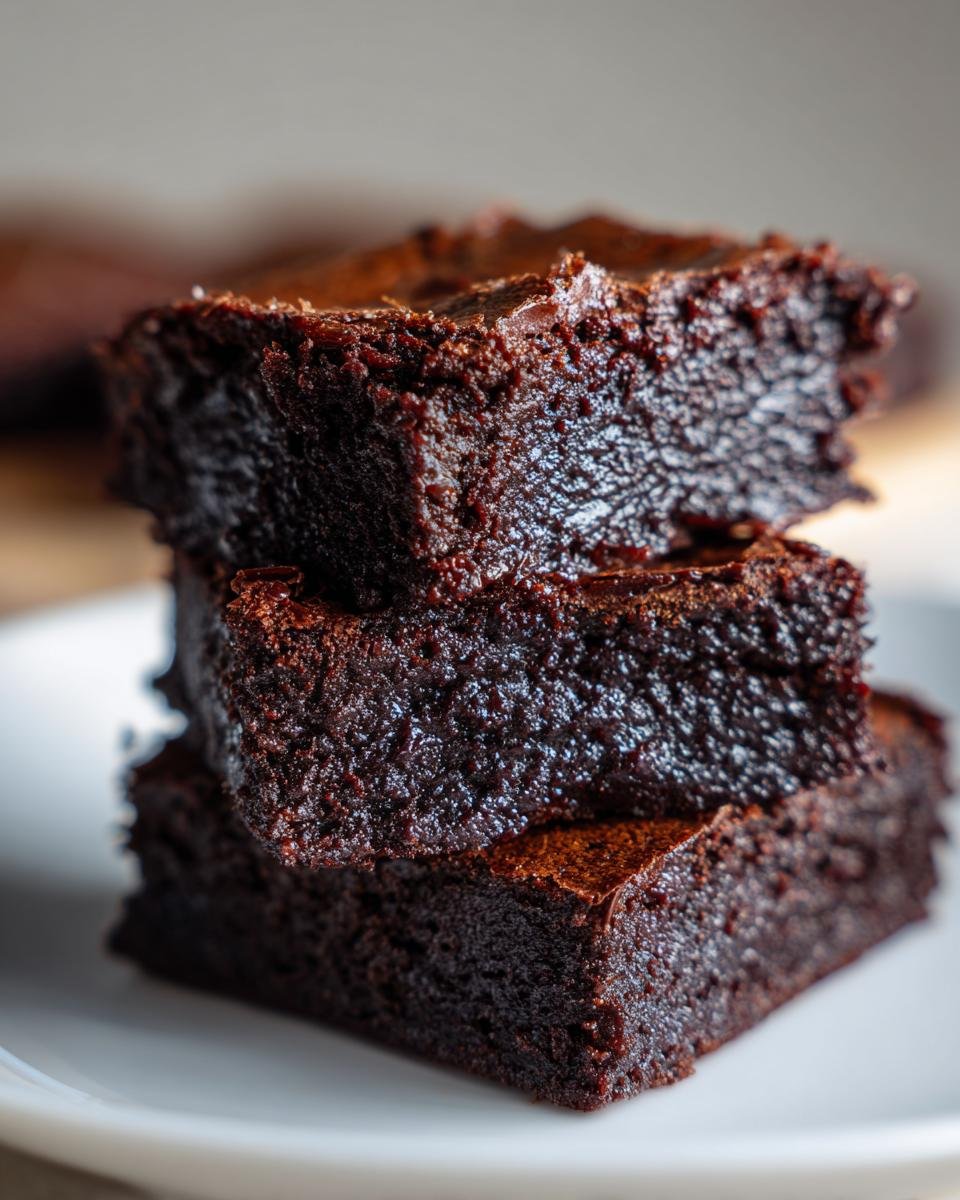
How do I make my Chocolate Brownies extra fudgy?
If you secretly want them to be even *more* fudgy than they already are, you have to cheat the baking time just a hair. When you test them, if the toothpick comes out with wet batter, you’re not ready. But if it comes out totally clean, they are already overdone for maximum fudge potential. Aim for that sweet spot where the toothpick has shiny, moist crumbs attached but no wet goo. That slight under-baking allows the center to set up beautifully as they cool on the counter. It takes guts to pull them early, but it’s worth it!
What is the best way to get clean cuts when slicing?
I preached about this earlier, but it bears repeating because nobody likes a smashed, crumbly mess on their serving plate! The cooling time is non-negotiable—let them cool completely, preferably in the fridge for an hour like I mentioned for the ultimate set. Once they are totally firm, grab a long, sharp knife. A thin blade works best. Dip the knife in hot water, wipe it completely dry with a clean kitchen towel between *every single cut*. That hot, clean blade glides right through the dense chocolate without dragging the texture upwards. If you’re swapping buttermilk in other recipes, remember to check my guide on buttermilk substitutions for reference!
Estimated Nutritional Snapshot for Chocolate Brownies
Okay, let’s talk turkey for a second. I know most of us aren’t reaching for brownies because we think they are “health food,” but I like knowing what I’m putting into my body, even when I’m treating myself! Knowing the general facts helps balance out the rest of the day, right?
Here is a quick glance at what a standard single serving square of these glorious **Simple Chocolate Brownies** might look like, based on my recipe estimates. Remember, this is just a rough guide, because how much cocoa you pack in, or whether you go hog wild with extra chocolate chips, makes a difference!
- Serving Size: Just one square (because they are rich!)
- Calories: Around 250
- Sugar: About 25 grams
- Total Fat: Roughly 14 grams
- Saturated Fat: Closer to 8 grams
- Carbohydrates: Coming in around 30 grams
- Protein: About 4 grams
Please take these numbers with a grain of salt—literally, the salt in the recipe counts! This snapshot just gives you a starting point. If you use different toppings or swap any of our main ingredients, these numbers will definitely change. But for a totally decadent, homemade treat, I think that 250 calorie mark is pretty respectable!
Print
Simple Chocolate Brownies
- Total Time: 45 min
- Yield: 16 squares 1x
- Diet: Vegetarian
Description
A straightforward recipe for rich, fudgy chocolate brownies.
Ingredients
- 1 cup unsalted butter
- 1 cup granulated sugar
- 1 cup packed brown sugar
- 4 large eggs
- 1 teaspoon vanilla extract
- 1 cup all-purpose flour
- 1 cup unsweetened cocoa powder
- 1/2 teaspoon salt
- 1 cup chocolate chips (optional)
Instructions
- Preheat your oven to 350 degrees F (175 degrees C). Grease and flour a 9×13 inch baking pan.
- Melt the butter in a saucepan over low heat. Remove from heat.
- Stir the granulated sugar and brown sugar into the melted butter until combined.
- Beat in the eggs one at a time, then stir in the vanilla extract.
- In a separate bowl, whisk together the flour, cocoa powder, and salt.
- Gradually add the dry ingredients to the wet ingredients, mixing until just combined. Do not overmix.
- Fold in the chocolate chips, if using.
- Spread the batter evenly into the prepared baking pan.
- Bake for 25 to 30 minutes. A toothpick inserted near the center should come out with moist crumbs attached, not wet batter.
- Let the brownies cool completely in the pan before cutting into squares.
Notes
- For extra fudginess, slightly underbake them by a few minutes.
- Cooling completely before cutting results in cleaner edges.
- You can substitute walnuts or pecans for the chocolate chips.
- Prep Time: 15 min
- Cook Time: 30 min
- Category: Dessert
- Method: Baking
- Cuisine: American
Nutrition
- Serving Size: 1 square
- Calories: 250
- Sugar: 25
- Sodium: 100
- Fat: 14
- Saturated Fat: 8
- Unsaturated Fat: 6
- Trans Fat: 0
- Carbohydrates: 30
- Fiber: 2
- Protein: 4
- Cholesterol: 60
Keywords: chocolate brownies, fudgy brownies, cocoa dessert, baked sweets, simple brownies