
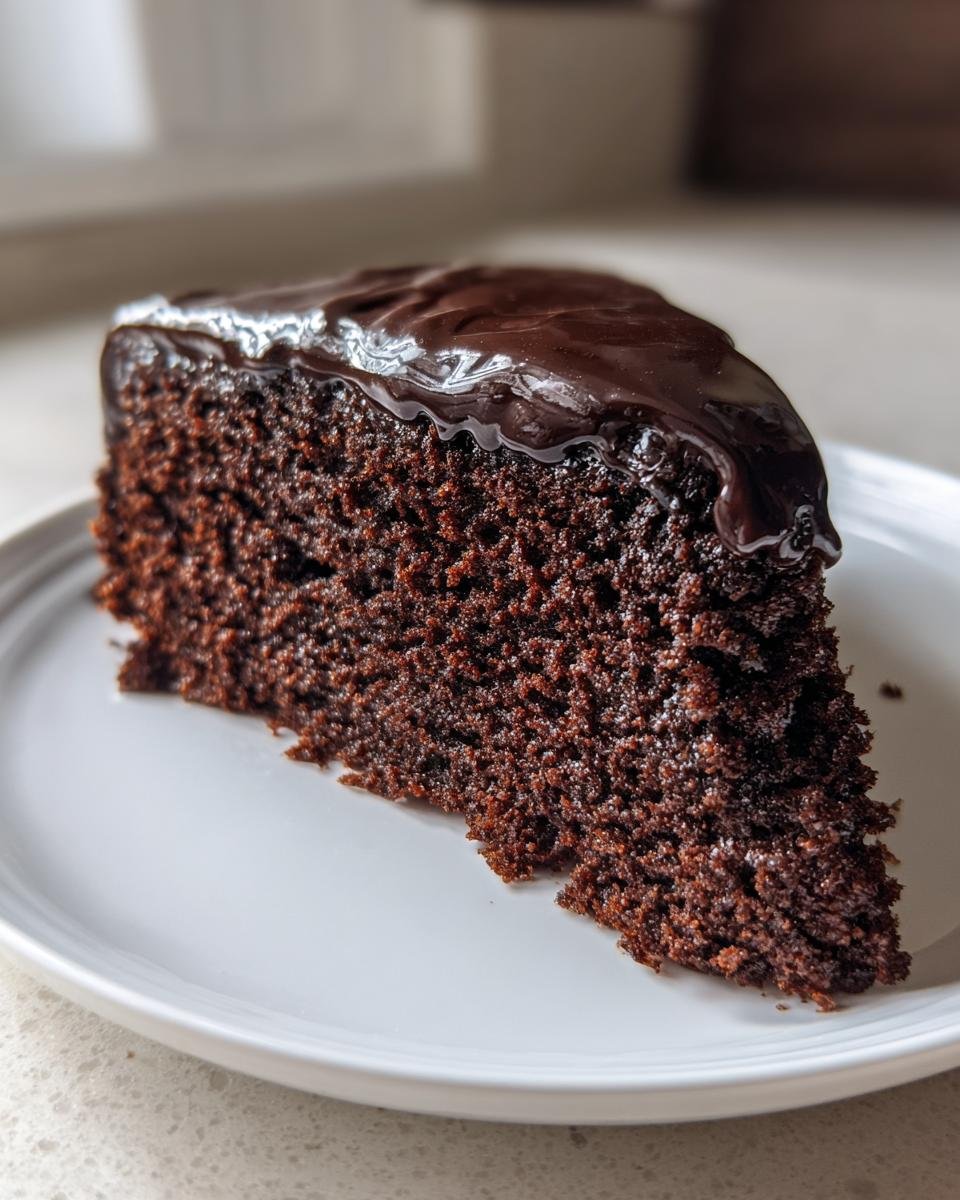
Oh, friends, when I talk about happiness in a pan, I mean this incredible, straightforward Chocolate Cake. Seriously, forget those fussy, complicated recipes that need a dozen bowls and specialty ingredients. This is the one! I remember the first time I made this—it was for my brother’s birthday, and I was sure I’d messed up because the batter looked so thin. But wow, did it deliver! We’re talking about the moistest, deepest chocolate flavor you can imagine without all the fuss. If you want a truly reliable, simple Chocolate Cake recipe that never fails, you are in the right spot. This one is pure comfort food, I promise! For more intense chocolate experiences, you really must check out my guide on flourless chocolate cake sometime.
Why This Chocolate Cake Recipe Stands Out
There are a million chocolate cakes out there, but this one is my go-to for a reason. It’s just foolproof! I’ve spent way too many years trying to get that perfect texture, and this simple Chocolate Cake nails it every single time. Check out why I keep coming back to this one.
- It delivers incredible moisture that lasts for days.
- It’s genuinely fast—I can have this mixed up before my coffee even cools down!
- The chocolate taste is rich and satisfying without being overly sweet.
Unbeatable Moisture Level in Every Chocolate Cake Slice
The secret sauce here is that combo of buttermilk, oil, AND that final cup of hot liquid. That’s where the magic happens! Trust me, oil just keeps cakes softer than butter does when you’re aiming for this much moisture. I even have a whole rundown on general baking tips if you want to see how temperature layering works wonders.

Quick Preparation for Your Simple Chocolate Cake
You only need about 15 minutes to prep this whole thing, which is insane for a cake this good. We aren’t creaming butter for ages or sifting flour five times. Just whisk, mix, pour, done. It’s perfect for those nights when you desperately need chocolate but don’t want to commit all day to baking.
Essential Ingredients for the Perfect Chocolate Cake
You don’t need a stocked pantry of weird items for this Chocolate Cake; that’s the beauty of it! But you do need to respect the measurements here, especially when it comes to the liquids. Because we skip the step where we melt the cocoa powder, we use hot water or coffee right at the end, and that’s what brings out that intense dark chocolate punch.
Here is exactly what you need to grab before you start anything else. Trust me, keeping these proportions right is how we get that super moist crumb we talked about!
- 2 cups all-purpose flour
- 2 cups granulated sugar
- 3/4 cup unsweetened cocoa powder
- 2 teaspoons baking soda
- 1 teaspoon baking powder
- 1 teaspoon salt
- 1 cup buttermilk
- 1/2 cup vegetable oil
- 2 large eggs
- 1 teaspoon vanilla extract
- 1 cup hot water or coffee
Ingredient Notes and Substitutions for Your Chocolate Cake
Listen, I *always* use hot coffee instead of hot water. It doesn’t make the cake taste like a mocha, I promise! It just completely deepens the chocolate flavor, making it taste richer, almost darker, than it already is. It’s my non-negotiable upgrade for any chocolate bake.
Now, if you opened your fridge and realized you were out of buttermilk—oops!—don’t panic. I write about this all the time because it happens so much. You can totally make your own! Just take regular milk, add one tablespoon of white vinegar or lemon juice to it, stir it gently, and let it sit for about five minutes. It curdles slightly, and boom—you have homemade buttermilk ready to go. It works like a charm every time, just check out my full guide on buttermilk substitutions if you need more detail on timing!
Equipment Needed for This Chocolate Cake Recipe
Okay, grab your gear! Like I said, this isn’t a recipe that needs fancy gadgets, which is another win in my book. You just need standard stuff that I bet is already hiding in your kitchen cabinets somewhere. Don’t feel like you need a new stand mixer for this; I often whip mine up by hand!
Here’s the must-have list you’ll want to have ready before you preheat the oven:
- Two 9-inch round cake pans. Make sure these are clean and ready to go!
- A big mixing bowl—you need space for all that batter to move around when you mix it up.
- A whisk for combining the dry stuff before the mixer comes in.
- An electric mixer (handheld or stand mixer) to get that two minutes of required beating time.
- A wooden pick or a thin knife for testing doneness—the toothpick test is classic for a reason!
- A wire cooling rack. We *must* get these cakes out of those hot pans quickly, so this is non-negotiable for even cooling.
That’s it! No specialized scrapers or ring molds needed. This simple Chocolate Cake keeps things easy from start to finish.
Step-by-Step Instructions to Bake Your Chocolate Cake
Okay, let’s get those ovens hot and those mixing bowls ready! Baking this Chocolate Cake is a quick process, but paying attention to the timing in the mixing stages is truly everything here. We are aiming for airiness mixed in with deep moisture, and these steps guide you right there. Don’t rush the beating time, but DEFINITELY don’t overdo it once that last liquid goes in! If you want to read more about general baking perfection, you can check out my guide on baking tips to make you a better baker.
Preparing Pans and Combining Dry Ingredients for the Chocolate Cake
First things first: get your oven set to 350 degrees F (175 degrees C). While that’s warming up, grab those two 9-inch pans and make sure they are well greased and floured. I always use a tiny bit of oil and then dust them heavily with cocoa powder instead of flour, just to make sure there are no white spots on my dark cake layers!
Now, in your biggest bowl, bring all your dry ingredients together. Flour, sugar, cocoa powder—get them all in there! Give them a really good whisking until everything looks totally uniform. No one wants a surprise pocket of baking soda in their slice, right?
Mixing the Batter and Baking the Chocolate Cake
Next up, the wet stuff goes into the dry. Add in your buttermilk, oil, eggs, and vanilla extract right on top of the dry mix. Turn your mixer on medium speed and beat that mixture for exactly two full minutes. You’ll hear the mixer change tempo as it incorporates everything. This helps build structure!
Once those two minutes are up, it’s time for the hot liquid—your hot water or coffee. Stir this in carefully by hand until the batter is perfectly smooth. I have to warn you, the batter will look shockingly thin, almost like soup! That’s exactly what you want. Pour it evenly into your prepared pans and pop them into the preheated oven for 30 to 35 minutes. Test with a wooden pick to make sure it comes out clean.
Cooling the Chocolate Cake Layers Correctly
This part takes patience, but it’s crucial! Once they are out of the oven, let those beautiful layers rest right there in the hot pans for 10 minutes. If you try to remove them immediately, the hot layers are too fragile and might tear pulling away from the edges. After those 10 minutes, gently flip them out onto a wire cooling rack. They need to cool completely before you dare even think about frosting them, or your frosting will melt right off. I usually let mine hang out until they are totally room temperature, sometimes even an hour, before I even touch them again!

Tips for the Most Beautiful Chocolate Cake Presentation
So, you’ve got these two perfectly flat, dark, rich layers—that’s the hard part done! Now, how do we make this simple Chocolate Cake look show-stopping for a birthday or just because? Since this recipe is a plain canvas, styling it up is where you get to play!
My favorite thing to pair with this depth of chocolate is a good, rich buttercream frosting, but honestly, a simple sour cream ganache is unbeatable if you want something quick but luxurious. If you’re new to making frosting from scratch, I have a fantastic, easy recipe for bright white frosting that contrasts beautifully with the dark cake (or you can tint it chocolate if you’re feeling extra).
Here’s one tip I learned the hard way—when layering cakes, you MUST level them first, even though this recipe bakes up pretty flat. Take a long serrated knife (like a bread knife) and gently saw off that tiny dome from the top of each layer. This keeps your cake from leaning like the Tower of Pisa once you stack them! Just shave off a little bit until the top is completely flat. Slice off the dome, and then you can use those little scraps for quality control tasting—shh, don’t tell anyone!
If you want a really professional look without much work, skip the thick frosting job. Just let the cakes cool completely, dust the top layer heavily with powdered sugar using a fine-mesh sieve, and then maybe sprinkle some extra cocoa powder on top for contrast. It looks elegant and classic, especially when served on a nice pedestal!
Storing Your Delicious Chocolate Cake
One of the wonderful things about this Chocolate Cake is how long it stays delicious—even after you’ve frosted it! Because we used oil instead of butter, this cake retains moisture better than those stiff, buttery recipes. You don’t need to rush to eat it all in one day, which is good news for my household!
If you made this Chocolate Cake and you know you won’t devour the whole thing within two days, you have a couple of storage options. Generally, if you’ve frosted it with a simple buttercream or a ganache that contains a lot of sugar, room temperature is perfectly safe and, frankly, tastes best.
- Room Temperature Storage: Keep the cake (frosted or unfrosted) tightly covered in an airtight container on the counter. It should stay wonderfully moist and flavorful for about 2 to 3 days. I find the texture is best when it hasn’t been chilled!
- Refrigeration (If Needed): If your frosting is cream cheese-based or you live somewhere super humid, you might need to refrigerate it. Just make absolutely sure you cover it *really* well, maybe even using plastic wrap directly against the surface of the frosting. Otherwise, the fridge will suck the moisture right out, and your beautiful cake will get sad and crumbly.
If you do pull it out of the fridge, don’t try slicing it cold! That’s a recipe for disaster. Take the Chocolate Cake out about an hour before you plan to serve it. Letting it come back up to room temperature lets that oil soften again, and it returns to that dreamy, melt-in-your-mouth texture we worked so hard to bake in. Honestly, reheating isn’t really necessary here—this cake shines at room temperature!

Frequently Asked Questions About This Chocolate Cake Recipe
Oh, I get so many wonderful messages after people try this Chocolate Cake, and usually, a few common questions pop up right away. Don’t feel silly if you have one of these same thoughts—this recipe has a few unique characteristics that make people pause! It’s always better to ask than to guess when you’re baking something special.
Can I turn this Chocolate Cake recipe into cupcakes?
Yes, absolutely you can! Cupcakes are such a fun way to serve up this simple dessert, and they bake up super fast. You’ll want to line a standard muffin tin with paper liners first. Fill those liners about two-thirds full with the batter—don’t overfill, or you’ll end up with chocolate mushroom caps!
Since cupcakes are much smaller and bake faster, you need to watch them closely. They usually take between 18 and 22 minutes in that 350-degree oven. Make sure you test one in the center by poking it with a small wooden pick; if it comes out clean, they are done! If you are curious about other fun little bakes, I have a wonderful chocolate zucchini cupcake recipe you might enjoy too!
Why is the batter for this Chocolate Cake so thin?
If you look down at your bowl and think, “Wait, this looks more like melted chocolate sauce than cake batter,” take a deep breath and relax! This is completely, totally normal for this specific simple Chocolate Cake recipe. That thin consistency is exactly what we are aiming for!
Remember, we use oil instead of dense, creamed butter, and then we stir in a whole cup of hot water or coffee right at the end. That hot liquid blooms the cocoa powder and thins everything out beautifully. If your batter was thick, your cake would end up dense and dry. Trust the process here; thin batter equals super moist layers!
Can I use regular milk if I don’t have buttermilk on hand?
While I listed that buttermilk substitute earlier, people often ask if regular milk will just work in a pinch without adding vinegar. The short answer is: you *can*, but I really advise against it if you want that perfect rise and crumb! Buttermilk’s acidity is what reacts with the baking soda and powder to give the Chocolate Cake its lift. Without that acid, the cake comes out heavier.
If you don’t have vinegar or lemon juice handy to make the homemade version, it’s worth running to the store for a small carton of buttermilk. But if you absolutely must use regular milk, make sure you add the acid. Otherwise, you’re sacrificing flavor and texture for convenience, and we absolutely won’t do that to this perfect Chocolate Cake!
Estimated Nutritional Data for One Serving of Chocolate Cake
Now, I want to be super clear about this part. When you’re baking for joy and comfort, you usually don’t worry too much about the numbers, right? But since I keep getting asked, here is the breakdown for one slice of this delicious Chocolate Cake, based on standard serving sizes. Because this recipe is so reliable, the numbers are fairly consistent, but remember, these are just estimates!
If you’re using your own frosting recipe, that will obviously change things, so keep that in mind when you look at the final tally. This data reflects the cake itself before any heavy layer of buttercream or ganache goes on top. For the most accurate information, you’d need to calculate your specific brand choices, but this gives you a good ballpark idea!
- Serving Size: 1 slice
- Calories: 350
- Fat: 15g (3g Saturated Fat)
- Carbohydrates: 55g
- Protein: 4g
- Sugar: 45g
- Sodium: 300mg
See? Lots of sugar, as expected in a celebratory dessert, but look at that 4g of protein! Every bite counts, I always say! Enjoy your slice of homemade goodness!
Share Your Homemade Chocolate Cake Experience
Now that you’ve whipped up this amazingly simple Chocolate Cake, I really, truly want to hear about it! Baking is always better when you can share the success, and I love seeing how my recipes turn out in your kitchens all over the place. Did you stack it high? Did you go for a simple dusting of sugar or a rich layer of frosting?
Don’t be shy! Head down to the comments section and leave me a rating. Even just five stars lets me know that this recipe is officially a success in your book too. Seeing that you mastered that thin batter and ended up with a moist, fudgy layer cake makes my day!
If you snapped a picture of your finished Chocolate Cake—maybe it’s already been cut into for a celebration—I would absolutely love to see it! You can always reach out to me directly through my contact page if you have photos you want to send my way, or if you have any little tweaks you discovered while making it. Your feedback helps me make sure this recipe stays perfect for everyone who stumbles upon it.
Thanks so much for baking along with me today. I hope this simple Chocolate Cake becomes your new reliable favorite, just like it is mine!
Print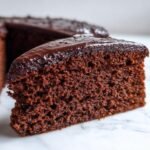
Simple Chocolate Cake
- Total Time: 50 min
- Yield: 12 servings 1x
- Diet: Vegetarian
Description
A straightforward recipe for a moist chocolate cake.
Ingredients
- 2 cups all-purpose flour
- 2 cups granulated sugar
- 3/4 cup unsweetened cocoa powder
- 2 teaspoons baking soda
- 1 teaspoon baking powder
- 1 teaspoon salt
- 1 cup buttermilk
- 1/2 cup vegetable oil
- 2 large eggs
- 1 teaspoon vanilla extract
- 1 cup hot water or coffee
Instructions
- Preheat your oven to 350 degrees F (175 degrees C). Grease and flour two 9-inch round cake pans.
- In a large bowl, whisk together the flour, sugar, cocoa powder, baking soda, baking powder, and salt.
- Add the buttermilk, oil, eggs, and vanilla extract to the dry ingredients. Beat with an electric mixer on medium speed for two minutes.
- Carefully stir in the hot water or coffee until the batter is smooth. The batter will be thin.
- Pour the batter evenly into the prepared pans.
- Bake for 30 to 35 minutes, or until a wooden pick inserted into the center comes out clean.
- Let the cakes cool in the pans for 10 minutes before inverting them onto a wire rack to cool completely.
Notes
- Using hot coffee instead of hot water deepens the chocolate flavor.
- Buttermilk can be substituted with regular milk mixed with 1 tablespoon of white vinegar or lemon juice, left to sit for 5 minutes.
- Prep Time: 15 min
- Cook Time: 35 min
- Category: Dessert
- Method: Baking
- Cuisine: American
Nutrition
- Serving Size: 1 slice
- Calories: 350
- Sugar: 45g
- Sodium: 300mg
- Fat: 15g
- Saturated Fat: 3g
- Unsaturated Fat: 12g
- Trans Fat: 0g
- Carbohydrates: 55g
- Fiber: 2g
- Protein: 4g
- Cholesterol: 40mg
Keywords: chocolate cake, cocoa, layer cake, simple dessert, birthday cake